
*This post contains affiliate links. I receive small commissions for purchases made through these links at no extra cost to you. These commissions help me keep this site up and running, in order for me to keep providing helpful and inspiring art content. :) What's the actual reason behind swatching watercolor paint (aside from the satisfaction of laying pretty colors down on paper)? What specific things should we be looking for when testing out a new watercolor paint set, besides differences in color? What are the different variables that may affect watercolors' behavior and their final appearance? In this blog post, I'm going to explain the most important characteristics that you should start taking note of when it comes to watercolor paint. By understanding these different aspects and how they vary from pigment to pigment, you'll be able to make more informed choices when it comes to picking your color palettes/schemes for your paintings, which will make everything go a lot smoother. I'll also walk you through my own personal method for swatching out a new paint set and share why I like testing my paints on two different types of paper. It's very useful to explore a new paint set before actually attempting to create a painting with it. This is especially the case when it comes to watercolors, as this painting medium's inherent characteristics make it tricky to use. For one, watercolors are translucent, which means we can't simply cover up our mistakes like we can when working with acrylics or oils. Secondly, due to their water-soluble properties, they tend to have a mind of their own. Finally (and something that was very hard for me to wrap my head around in the beginning), behaviors and effects can vary greatly from pigment to pigment, even within a set manufactured by the same company. There are also many external factors that can affect our watercolor painting process and the final outcome of a piece, such as how clean our water is, what kind of paper is used, and even the temperature of the room we're working in! Always remember that, as artists, we have to learn to embrace the exploration process. It may seem like a waste of time and resources when we're just starting out, but these smaller studies give us confidence and allow us to find ourselves as artists, so that we're then able to create more effective finalized works. If you're a beginner just starting out with watercolors, I highly recommend checking out my two-parter series on YouTube titled 10 Common Watercolor Mistakes. You'll find part 1 here and part 2 here. By avoiding these common beginner mistakes, you'll be able to make faster progress. Let's get to the swatching!
If you enjoyed this video and found it helpful, make sure to subscribe to my YouTube channel. I share a brand new video every week with art tips, drawing and painting tutorials and mindset/productivity tips for artists. *Subscribe HERE*
There is no right or wrong way to test out a new watercolor paint set. The whole point of swatching and testing out colors is for you, the artist, to have a better understanding of different color behaviors. This way, you'll be able to select the colors you like best depending on the particular subject you paint, your personal techniques and the overall effects you're going for. If you're just starting out and haven't found your style, no problem! As your artistic journey progresses, you'll discover your own way of working and the specific paint qualities that are important for you. Later on, you'll be able to modify your swatching process to whatever fits you best and perhaps leave out aspects that aren't as important. 
|
|

Find a list of my favorite art supplies and books here.
I hope you enjoyed this post and learned something new, or got inspired to go and create something for yourself.
I wish you tons of progress and enjoyment in your artistic journey!
Find a list of my favorite art supplies and books here.
I hope you enjoyed this post and learned something new, or got inspired to go and create something for yourself.
I wish you tons of progress and enjoyment in your artistic journey!

4 Comments
*This post contains affiliate links. I receive small commissions for purchases made through these links at no extra cost to you. These commissions help me keep this site up and running, in order for me to keep providing helpful and inspiring art content. :)
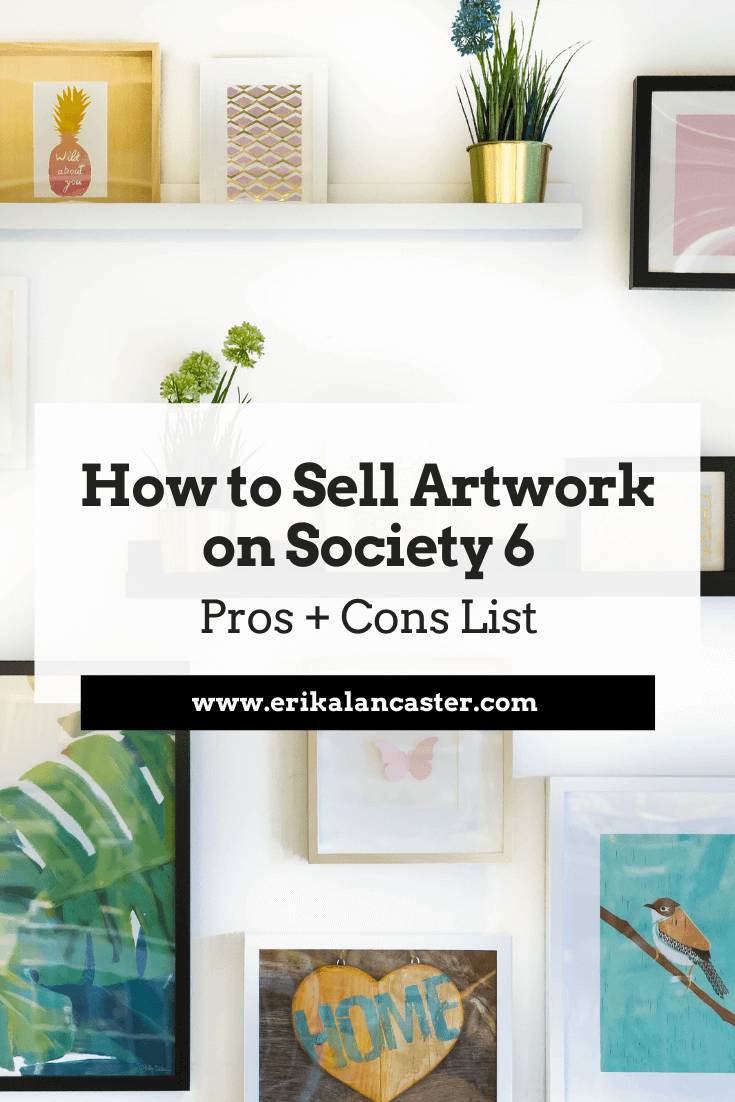
Are you eager to start selling your artwork online but perhaps feel overwhelmed with all the options out there? Wondering if print-on-demand platforms like Society6 and Redbubble are right for you? Do the technical aspects involved in creating on online shop and uploading your artwork effectively keep you from moving forward?
In today's blog post I'll be sharing my entire process for creating products to sell on Society6, as well as essential information you should definitely know if you're thinking of opening a shop of your own on this platform.
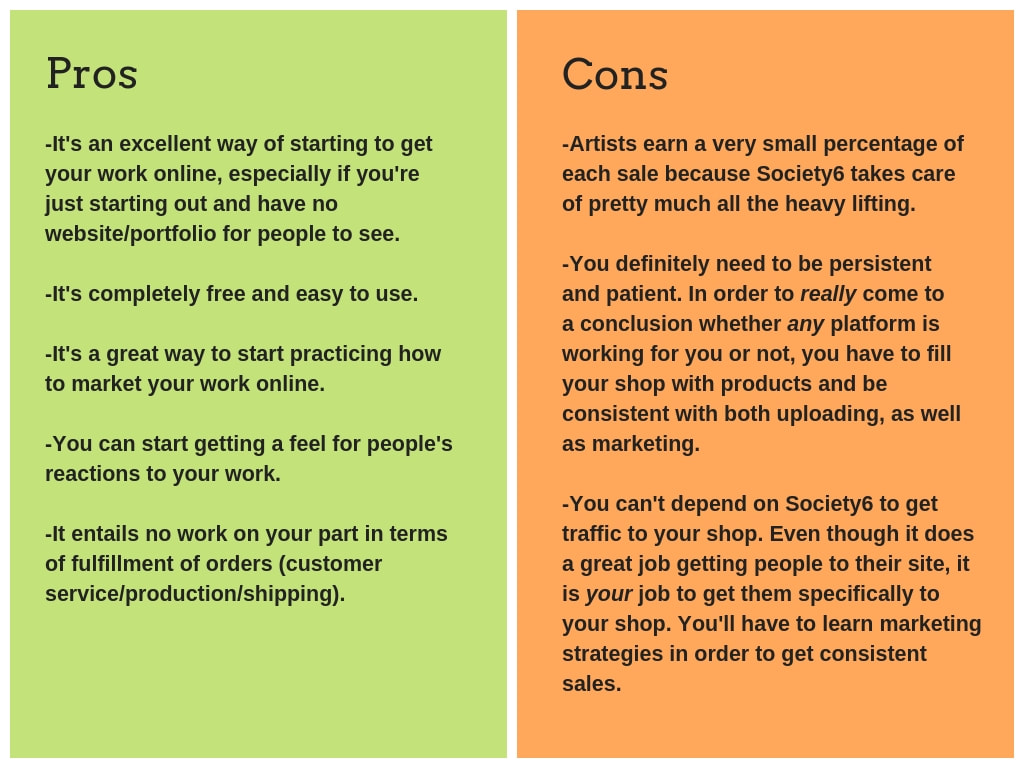
I'll also be providing a list of pros and cons about Society6 to help you make an informed decision on whether opening this type of shop is right or you.
Society6 is an online marketplace that allows artists and designers to easily create their own shops and sell their work not only on prints, posters, canvases, and other kinds of wall art, but on a large variety of accessories like phone cases, tote bags, apparel and even furniture!
One of the reasons why I decided on Society6 over other platforms is because, in my research phase, I heard great things about the quality of their products from other artists.
About a year and a half ago, when I first started learning about different options for selling my work online, I was taken aback by the amount of platforms available and the differences between each.
Some of them require artists to go through application processes, others ask for fee payments for each artwork uploaded, others keep a huge percentage of the artist's earnings, etc.
Of course, there are marketplaces like Etsy through which the artist assumes all responsibility for customer service, packaging and shipping orders, which you can go for right-off-the bat if you want more control and direct contact with your customers.
I decided to create shops on both Society6 and Redbubble, as they are fast to open, easy to use and require no monetary investment. However, since before starting with my online art business journey, I knew that my end goal was to eventually sell my original artwork through Etsy.
The way I saw it, these smaller shops would be a great way to start developing a habit for creating new pieces and uploading them on a semi-regular basis.
They would also enable me to test out what people liked most and to start marketing my different products through social media.
I saw these shops as a stepping stone, as I knew I still had a ton to learn about before opening my shop on Etsy. Also, I'm all for creating a variety of income streams and plan to keep these smaller shops running even after my Etsy shop has gained some traction.
Setting up multiple income streams is a total must for artists of all kinds, in my opinion.


There are three things that you should do before deciding whether a platform/marketplace is right for you or not:
a) Research, research, research (but don't get stuck there)
This entails visiting the site yourself and reading the information the company provides. You must know what their terms are, the support they provide, how/when you're getting paid, the quality level of their products, etc. I also recommend listening to reviews from at least three different artists or designers that have been on the platform for a decent amount of time.
Also, think about whether the company's overall vibe (the mood and attitudes they transmit through their site, social media channels, advertisements, etc.) meshes with yours.
b) Give thought to what goals you have for your artwork
There are so many paths that an artist could go down.
Is your dream to sell paintings for large amounts of money and getting into galleries? Are you primarily a commercial illustrator working with clients? Would you like to venture into surface pattern designing? Would you like to have your own larger shop on Etsy (or on your own website) through which you'll take care of all production and shipping to your customers in the future?
You have to know what it is you want to do before investing too much time and energy into something that may or may not be right for you.
What does your gut tell you?
Listen to your intuition and what feels right for you. Then take serious action and stay consistent. As you continue learning, don't be afraid to veer off the path you initially chose if you discover its not right for you. This is normal!
Check out my free masterclass on Goal-Setting and Time Management for Artists here.
c) Actually do it and give it a decent amount of time
Once you've come to a decision (be careful not to spend such a long time in the research phase that you never actually get to anything), it's essential to put in consistent effort and be patient. You might be doing everything right and still see nothing happening for months.
Remember it takes time to see results on any platform and it's essential to stay consistent for a while before arriving at any conclusions. Always continue learning what aspects you can improve about your shop and how you can get your work out there effectively.
If you enjoyed this video and found it helpful, make sure to subscribe to my YouTube channel. I share a brand new video every week with art tips, drawing and painting tutorials and mindset/productivity tips for artists. *Subscribe HERE*
How to Scan, Edit and Upload Artwork Onto Society6
1. Creating Your Artwork
You can upload any kind of artwork onto Society6 and choose any (or all) of the items available to place it on if you so desire. However, it's important to take into account that not all kinds of artwork will look good on all types of products.
And, of course, the less amount of items you make available, the less options you will offer to your visitors, which translates into less sales.
With my limited amount of time, I decided to create patterns using the watercolor illustrations I was already creating for the calendars I send out to my art email insiders every month! With one same pattern, I would be covering most of the items offered by Society6 at once and they would look awesome.
I know creating patterns might not fit your own artwork but, if you wish to create patterns with your illustrations as I do, I highly recommend creating your artwork with little to no background so that it's easy to "clip out" in Photoshop (or the photo editing software of your choosing).
As you upload your first drawings or paintings and start placing them on products, you'll find what types of items suit your work best. As much as it's great to have more products to offer, don't feel obligated to create products that don't make your artwork shine.
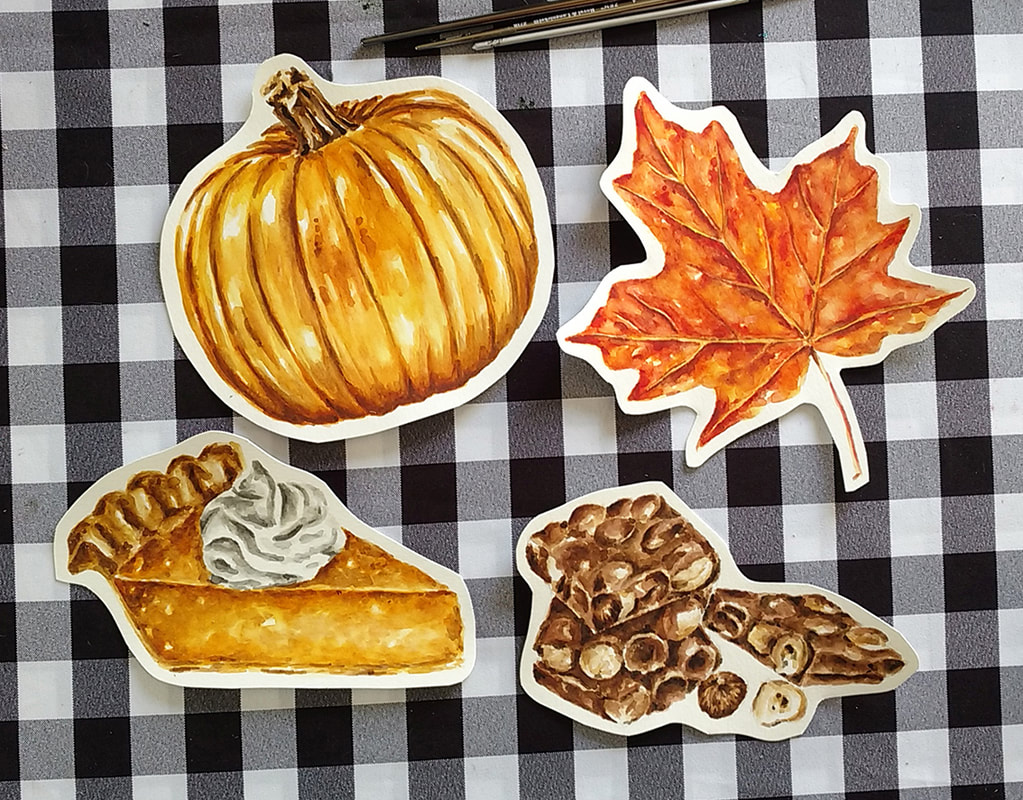
Watercolor food and botanical illustrations by Erika Lancaster. Winsor and Newton watercolors on Canson 140 lb. watercolor paper.
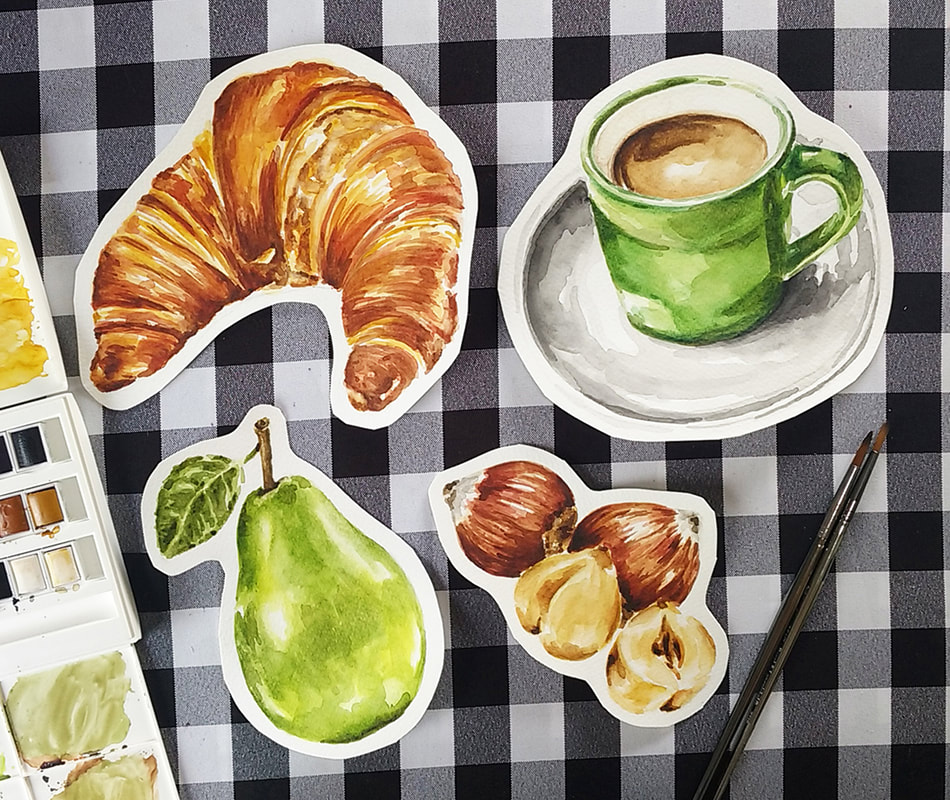
Watercolor food and botanical illustrations by Erika Lancaster. Winsor and Newton watercolors on Canson 140 lb. watercolor paper.

2. Scanning Your Artwork
In terms of the scanning process, there are a couple of things that you should have in mind. Firstly, the products you're intending to place your design on will be printed, which means that the resolution and quality of your scanned artwork matters a lot. Thus, you should make sure your scanner's settings are at at least 300 dpi (dots per inch).
There are artists that scan their work at higher resolutions, but this is the minimum. If you decide to scan at an even higher resolution, your scanning process will most likely take longer and your files are going to take up much more space on your computer.
Below are a couple of scanners that have been recommended by other artists who've bought these specifically with the intention of scanning their work and creating their own prints. After having read so many great reviews, I'm definitely going to be investing in one of these in the near future as I expand my business.
Great scanners for artists:
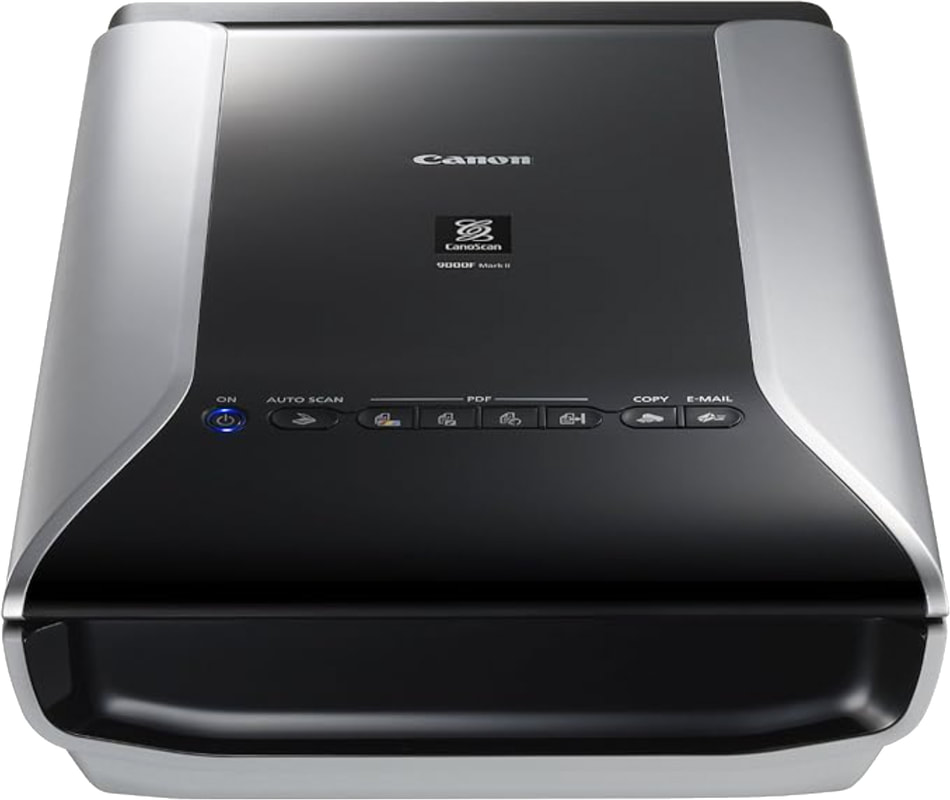
Canon CanoScan CS9000F Mark II, 6218B009
|
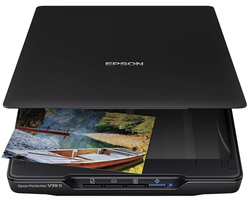
Epson Perfection V39 II Color Photo and Document Flatbed Scanner with 4800 dpi
|
3. Editing Your Artwork & Creating Your Designs

Epson DS-50000 Large-Format Document Scanner: 11.7” x 17” Flatbed
|
|
Once I have a high quality scan of my illustration on my computer, it's time to open Photoshop and move onto the cleaning/editing process, as well as creating any sort of pattern I'd like with it. If you don't currently have Photoshop, and don't want to pay for the software, don't worry!
You can download Gimp for free, which is a very popular photo-editing software you can get online for both Mac and PC. This popular alternative is even used by professional illustrators and contains pretty much all the tools that could come in handy for you as an artist.
In Photoshop, I mainly remove the background from my illustration, do any cleaning necessary (to remove hairs, etc.) and perhaps increase the contrast a tiny bit at times. To "clip" the illustration from the background I like using the Pen Tool, which provides me much more control than the Magic Wand selector.
You want to be careful when cutting your illustrations out, because any white spots you leave outside of your illustrations will get printed on the products! I always make sure to re-check my work when I'm done.
Every now and then, I also use Photoshop to manipulate colors so that I'm able to create colorful patterns using only one "base" illustration.
Once I've successfully separated my illustration from its background, it's time to create an appealing pattern with it! I visit Society6's Pixel Dimension Requirement page to make sure I'm creating my file in the right size before working on my pattern.
In this page, Society6 lists out the document sizes (in pixels) needed for each of their products. But don't worry, you don't need to create a separate file for each!
What I do is create a new document in Photoshop with their minimum recommended size of 6500 x 6500 pixels and create my pattern there. This size is covers most of the products on the list and the platform will automatically place it on all the products that require this size or smaller, which saves a lot of time.
There are currently only 2-3 products that require a larger size than this and you can create separate files for those if you wish. There are also a couple of products like stickers and t-shirts which you'll probably find need a separate design or layout.
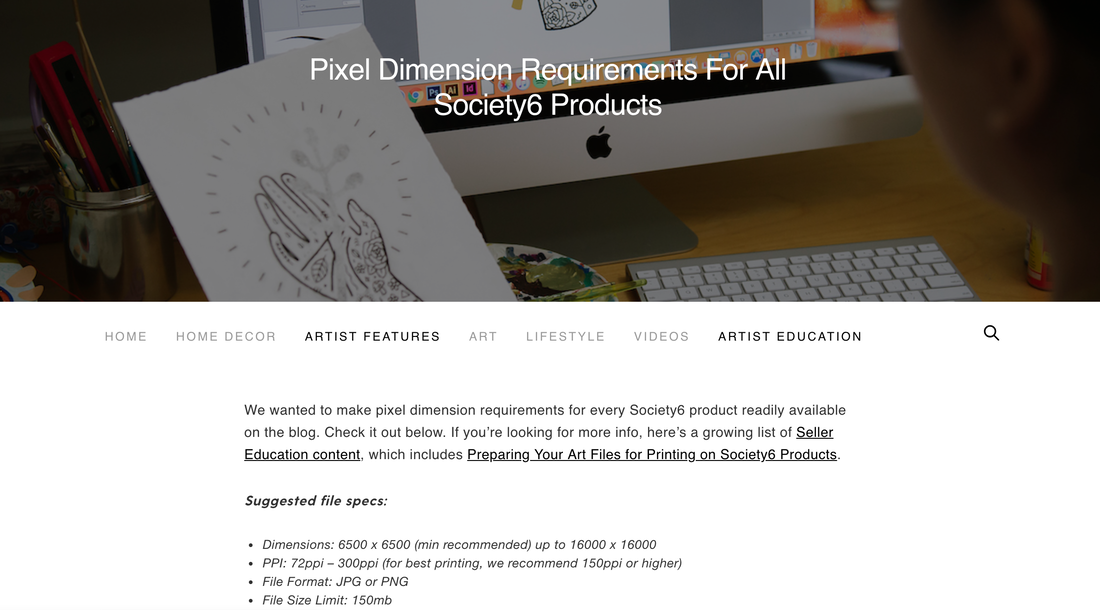
Pixel Dimension Requirements for Society6 Products. Click on image to visit site.
Once I'm happy with my pattern, I deactivate the background layer in Photoshop and save the document as a .png, which allows the background to remain transparent. This is the file you'll upload onto Society6.
Because I know I'm most likely going to have to come back to Photoshop to create separate .pngs for stickers and t-shirts, I leave it open.
Click to visit Gimp's website and download the software.
3. Uploading onto Society6
Opening your shop on Society6 is very fast and easy. All you need is a PayPal account. I recommend giving thought to your Username/URL because you won't be able to change it later and filling out your Artist Bio as soon as your able. Upload a banner and an avatar image to make your shop your own.
Once that's done, all you have to do is click on the button at the top that says "Sell" and you're going to be taken through a very straightforward 3-step process. The platform take a minute to process your artwork when you upload, as it's placing it on all available products that it fits on.
Next, you'll have to fill in a title for your work, as well as tags and a description. A tip here is to put yourself in the buyer's shoes. Instead of typing in a subjective title for your artwork, think about what words visitors actually type into Society6's search bar when looking for products. Be descriptive, create a five word title, use up all the available tags, and create a good little paragraph.
Finally, the fun part! You'll be taken to the last section, in which you'll see your design on all sorts of awesome items. You get to decide which to deactivate if you wish. I highly recommend taking time to look over every single product to ensure that your design is at an optimum size in each.
All you have to do is click on each item and shift your design's size/location.
As you scroll down the Create Products page, you will see what products require a separate .png file. I usually need to create a separate file for stickers, as a sticker page has to have fewer elements and they have to have a good distance between them (stickers have a white outline around them that shouldn't overlap).
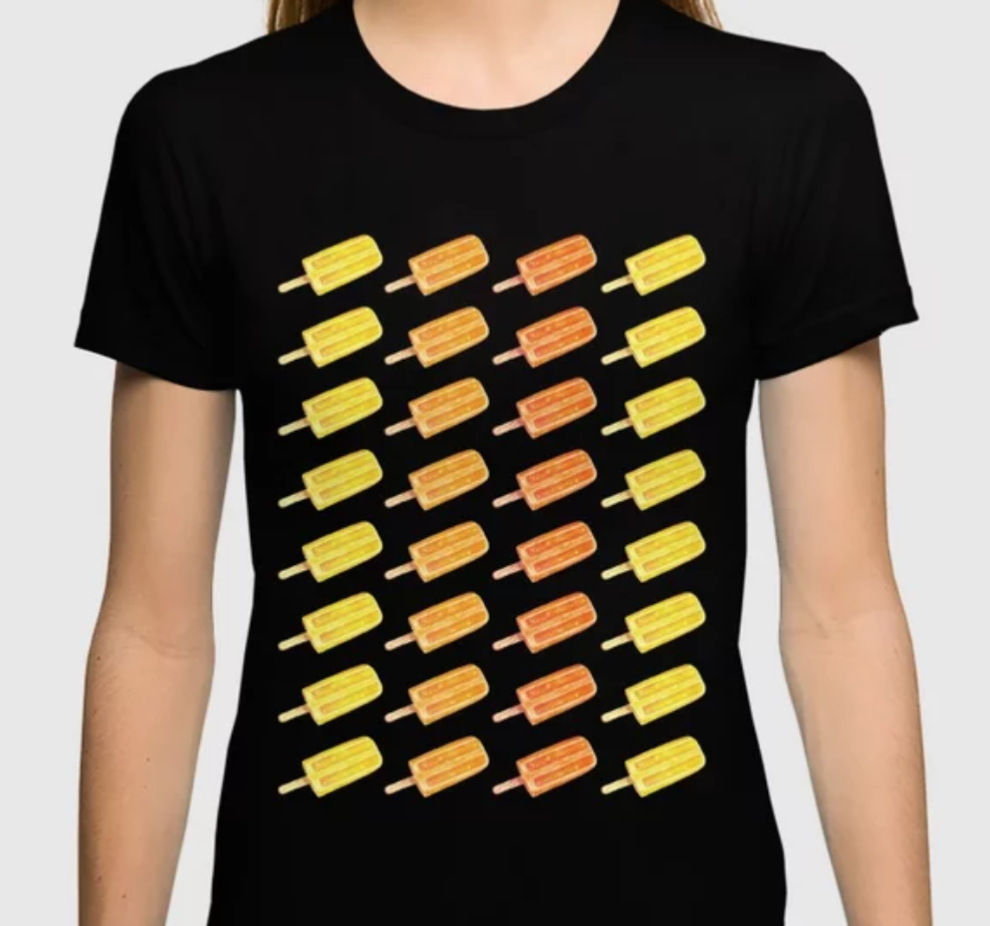
also create separate patterns for t-shirts that are usually more vertical and contain less elements than my initial pattern.
Create whatever .png files you need and upload them separately onto individual products by clicking on those items.
Finally, hit Publish and, in around 15 minutes, your products will be up on your shop!
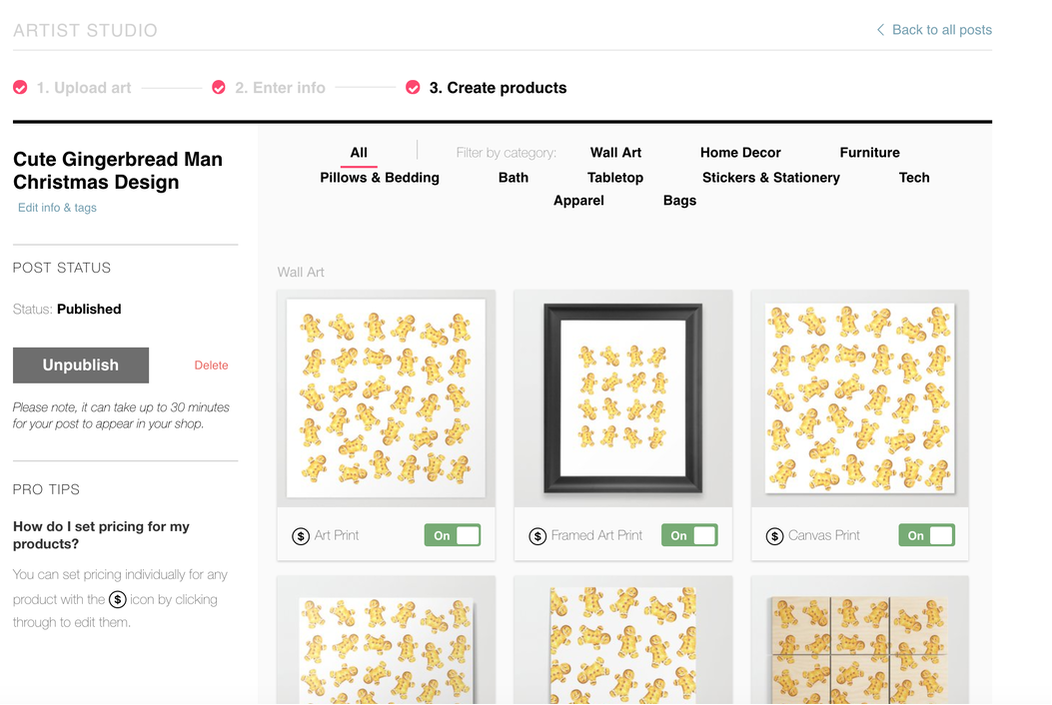
Back-end of Society6 store. Placing artwork on products.
*Next step! Market your artwork!
No matter how amazing your artwork is, if nobody knows about it, you're going to have a hard time making sales. Don't be afraid of putting your work out there!
While Society6 does a great job attracting shoppers to their site, their marketplace is saturated with incredible artists that have been on the platform a very long time and have formed a history/reputation for themselves. All of us need to go through that and have to accept and learn to enjoy the phase we're in.
If you're serious about selling your work online, I suggest optimizing your social media accounts so that you give your audience a clear idea of what you do and offer. Pick one or two and keep them professional.
Refrain from sharing personal things and stick to uploading pictures of your creative process, your favorite tools, what you find inspiring, links to useful articles that your target audience would find helpful, and share your new products!
Visit Society6's blog to find great tips for getting your work out there.
Pros and Cons of Society6 (and other similar online shops)
I hope you enjoyed this post and learned something new, or got inspired to go and create something for yourself.
I wish you tons of progress in your art journey and tons of luck with your sales!
Ever given thought to how you could enhance the way a spectator experiences your artwork, whether it's by simply incorporating a specific type of background music or lighting, or really pushing the envelope by making use of the latest technological advances? As visual artists, in what ways can we appeal to our publics' other senses so that we can get our message across more effectively and even create life-altering experiences?
In today's guest blog post, CODAworx shares a compilation of three groundbreaking contemporary artists that are using the latest technology to create works of art in which the viewer isn't only a spectator, but very much a participant. These artists have succeeded at creating experiences that their public can truly submerge in and take part of, coming out the other end changed.
In past blog posts , I've shared how I believe that the purpose of art is to set forth ideas and awaken people. The artists presented below have proven capable of doing precisely that through the creation of projects that challenge their public in a variety of ways. Through their work, these artists have managed to plant seeds in their spectators' minds and make them think about their world differently.
CODAworx (Collaboration of Design and Art) is a global online community that facilitates the connection between artists and creative companies that make those ideas come to life. They are true advocates for all types of arts and are taking massive action to make the world a better place through them.
Let's get to their article!
3 Artists That Are Embracing The Sensory Perception Of Art
by CODAworx
Sensory perception of art relies on understanding through the body. Rather than simply viewing a piece, we experience it. Artists from a variety of disciplines are using sensory art to force us to perceive it in bold new ways. Below are three such artists whose work envelopes you, rather than being separate from you.
Sensory perception of art relies on understanding through the body. Rather than simply viewing a piece, we experience it. Artists from a variety of disciplines are using sensory art to force us to perceive it in bold new ways. Below are three such artists whose work envelopes you, rather than being separate from you.
Titia Ex
Hailing from Amsterdam, Titia Ex is a multimedia conceptual artist known for her daring light play. Her work explores the relationship between light and place, examining how one manipulates and acts upon the other.
This relationship is exemplified beautifully in her 2008 installation, The Waiting. Ex floated 40 red LED lights in the tranquil waters of the Dutch island of Vlieland. The effect was akin to a the will-o'-the-wisps of European folklore, the lights silently blinking at random on the still pond.
The waters were imbued with the deep red light, the patternless blinks evoking a timelessness, an inability to see a tangible order to the light. As night fell, the lights became suspended in the darkness, not tethered to any place or object. Light and place, once joined, parted ways again.
Ex recently spoke at CODAsummit, an innovative conference exploring the intersection between art, place, and technology. The first annual CODAsummit was held at Santa Fe’s Center for Contemporary Arts by CODAworx, the beating heart of the commissioned art economy.
And while The Waiting helped secure Ex’s place on the bill, it was her 2014 piece, Dolmen Light that really stunned CODAsummit’s attendees. This time taking place in the Hondsrung Tunnel in the Dutch city of Emmen, this urban setting played host to a series of intricate dolmens made out of light.
Dolmen Light by Titia Ex from CODAworx on Vimeo.
Dolmens are megalithic structures laid by the prehistoric predecessors of Emmen’s current residents, forming part of the city’s rich cultural heritage. Ex transformed these megaliths into towering light structures, melding ancient history with utilitarian urban structures to create a literal tunnel of light.
Ex uses light to engage the viewer’s senses, toying with perception through the manipulation of light. It’s daring, striking and, as with all her work, utterly immersive.
Matthew Mohr
Also at CODAsummit this year was Matthew Mohr, an Ohio-based artist and Associate Professor of Design at Columbus College. With a background spanning graphic design, silk screen printing, and even web design, Mohr is renowned for his bold pursuit of beauty through technology.
His thesis project, Spatial Narrative, comprised a series of moveable screens to explore a frozen, intangible moment in time. Viewers were encouraged to reach out and adjust the screens to explore a pre-recorded scene, all the while unable to interact with the subjects.
Spatial Narrative’s success relied on its viewers becoming participants in the piece, physically touching and moving the screens to experience it wholly. Just as our smartphones have become our conduit through which we connect with the world at large, so too did Mohr’s screens become a channel to experience his art.
The project was eventually picked up by Samsung for their flagship store in Manhattan’s Time Warner Building, displaying products and advice to customers. But it was his vast permanent installation As We Are that garnered him the most attention at this year’s CODAsummit.
"As We Are" by Matthew Mohr from CODAworx on Vimeo.
As We Are consists of a 14-foot high human head made 24 layers of intense LED screens. In its powered-down state, it looks more like a golem than a person. But hidden within its depths is a 3D photo booth in which visitors can have their photo taken. The image is then projected onto the head outside, a Moai monolith for the digital age.
With As We Are, traverses the relationship between the self and the representation of self through an immersive sensory experience. As with Spatial Narrative, Mohr forces the viewer to become a participant, engaging with the work to become part of it, ultimately creating a new piece of art in the process.
Nick Ryan
Where Ex and Mohr lend their talents to exploring light and the visual, Nick Ryan turns to the auditory for his art. Buoyed by his fascination with synaesthesia, Ryan creates multisensory work that blends both sound and vision.
A fine example of this is his piece Synaesthesia, commissioned by the musician Imogen Heap. Ryan worked with the London Contemporary Orchestra and the visual artist Davide Quayola to transform imagery into audio that is simultaneously seen and heard.
Synaesthesia is a dramatic crescendo of visual and auditory texture, wholly enveloping the viewer (and listener) in a sensory experience for the eyes and ears. Music is, of course, art, and blending it with dynamic moving visuals makes for an exquisite piece of art that reaches beyond simple passive vision.
The three artists mentioned here all embrace sensory perception in their art. Light, sound, vision, touch — they all intersect in the artists’ works, with breathtaking results.
As a result, their art becomes more than just a passive piece to simply be observed. Each artist’s work immerses the viewer, transforming them from an observer into a participant. It’s bold and innovative and opens up brave new avenues for artists and art lovers alike.
|
|
CODAworx is on a mission to transform every space in the world by making great commissions happen. Its network connects artists and creative teams to architects, design and art professionals, and the universe of companies that provide services and products for commission projects.
|
I'd like to send out a huge thanks to CODAworx not only for reaching out and sharing this amazing article with us, but for being true advocates for the arts.
I highly recommend you check out the amazing work they're doing to make the world a more imaginative and inspiring place!

*This post contains affiliate links. I receive small commissions for purchases made through these links at no extra cost to you. These commissions help me keep this site up and running, in order for me to keep providing helpful and inspiring art content. :)
Welcome back, fellow artists!
I'm very excited to share that I made it through my first time participating in the Inktober drawing challenge.
In today's blog post, I'll be sharing my last time lapse compilation of Inktober sketches, as well as things I learned by having pushed myself through it. Though the drawings I'll be sharing were created specifically for Inktober, most of the information I'll be including throughout the post (and video) can relate to any type of daily art challenge.
There's no question that being able to produce a new piece every-single-day for an entire month (no matter how small), is extremely difficult. However, there's a ton to learn from participating in art challenges like this one, as they allow us to improve not only our cold-technical skills (drawing, shading techniques, etc.) and our time-management abilities, but also test us mentally in many ways.
This is why I made the decision to finally take on Inktober this year!
If you visited my blog or YouTube channel at any point throughout October, you're probably aware that I've been sharing time lapses for every-single-one of my Inktober sketches! I've also talked about a variety of topics pertaining to it.
Make sure to check out my past Inktober blog posts and find the rest of my time lapses over at my YouTube channel:
5 Tips to Make it Through Inktober and How I'm Going About It
My Inktober Supplies and Time-lapses for Sketches 6-11
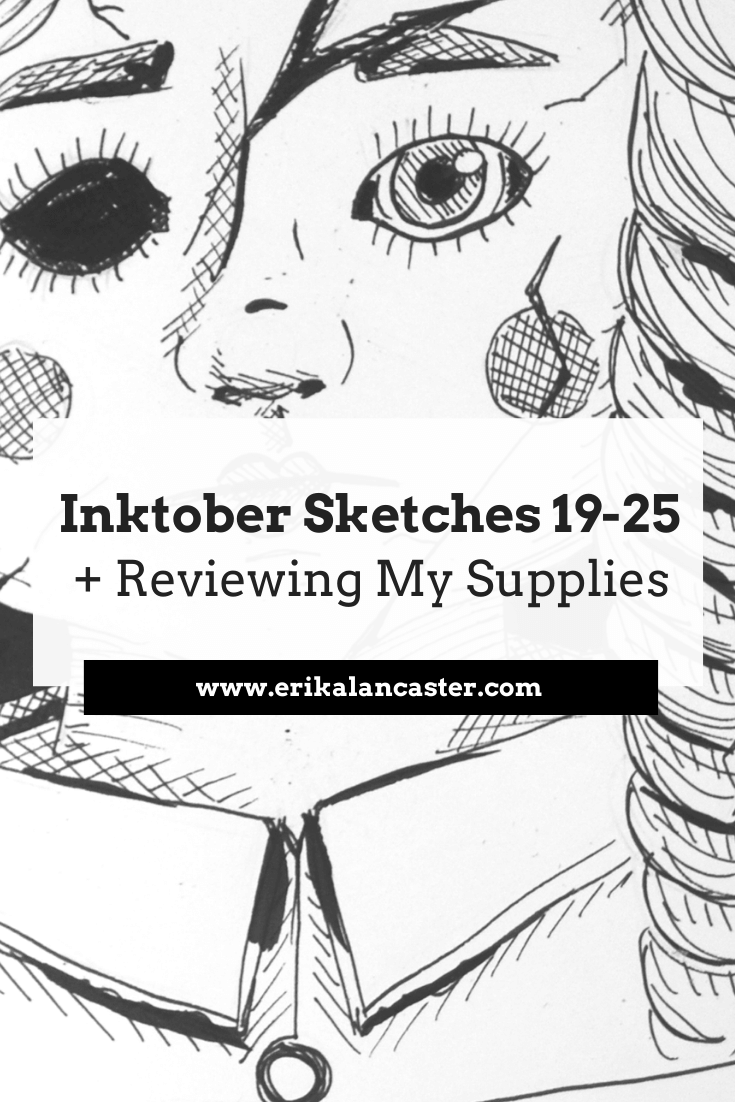
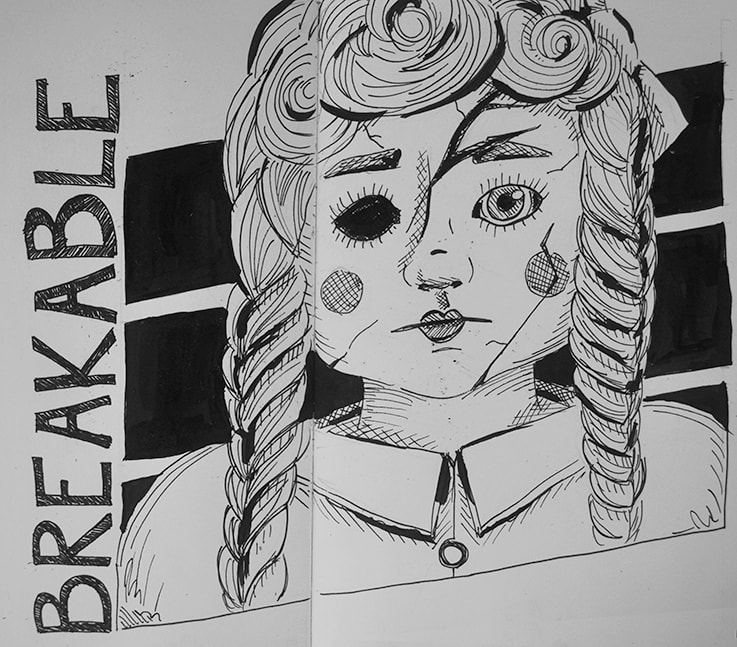
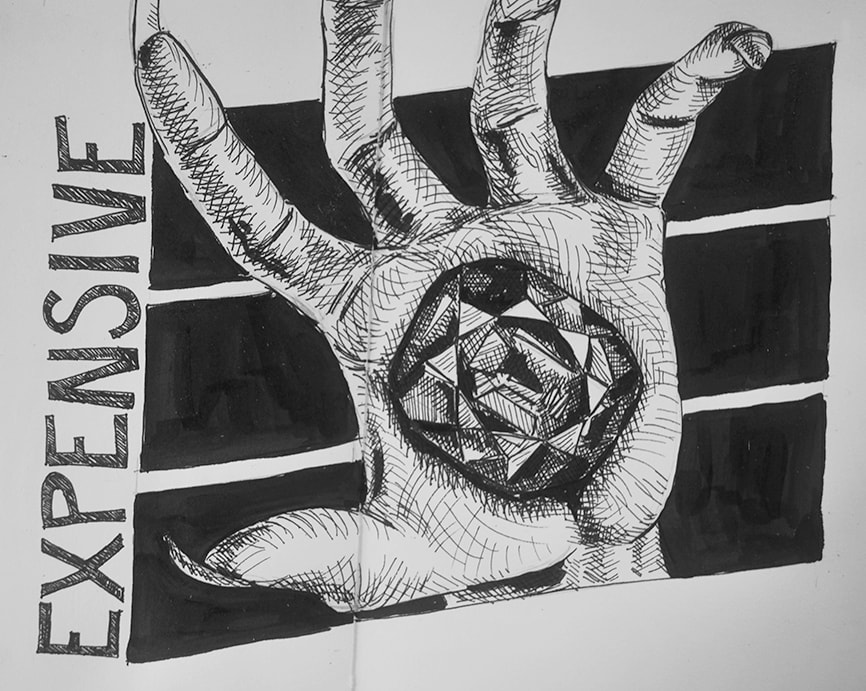
Inktober Sketches 19-25 + Reviewing My Supplies
If you enjoyed this video and found it helpful, make sure to subscribe to my YouTube channel. I share a brand new video every week with art tips, drawing and painting tutorials and mindset/productivity tips for artists. *Subscribe HERE*
You can find a list of my current favorite art supplies, as well as helpful art books here.
You can find a list of my current favorite art supplies, as well as helpful art books here.
What I Learned from Inktober
Technical Aspects
1. Stay present/mindful while you're creating art
I noticed pretty quickly as I was starting with Inktober, that when I was tired and/or my mind was just not in the art-making process, my drawings turned out much sloppier. I either went overboard with my mark-making, which led to certain areas appearing very flat or I created too much of a texture where I wasn't intending to.
Now I know that, no matter how small a sketch or study I'm working on, I have to do my best to stay present (whether it be 5 minutes or an hour). If I'm too tired or unable to concentrate, I'll consider resting and getting back to work the following day, or take a break to do something else that will allow me to de-stress before getting back into it.
Now I know that, no matter how small a sketch or study I'm working on, I have to do my best to stay present (whether it be 5 minutes or an hour). If I'm too tired or unable to concentrate, I'll consider resting and getting back to work the following day, or take a break to do something else that will allow me to de-stress before getting back into it.
2. Take it slow and honor the process
With this, I don't necessarily mean to force yourself to lay down each line or brush stroke super slowly if this isn't your thing. Personally, I love working at a faster pace and leaving some sort of expression, rawness and imperfection in most of my work.
What I mean with taking it slow is learning to enjoy the different phases of creation (brainstorming, preparation, preliminary sketch, developing marks/colors/values, etc.) and acknowledging each as an essential part of the process.
I realized this halfway through the challenge. Whenever I skipped a phase, my piece didn't turn out as well as it could have.
With a daily challenge like this one in which I had limited time, many of these phases were done simultaneously with other tasks, but I made a point to go through them, nonetheless.
Mental Aspects
1. Practice increases confidence (and speed)
The only way to really improve your self-confidence with any particular activity is practicing it and experiencing it first-handedly on a continuous basis. The more you do something, the more skilled you become, which makes you more comfortable doing it, which translates into doing things better and faster.
I had previous experience drawing with pen and ink, and have even shared different tutorials on mark-making and shading techniques both here at my blog, as well as over at my YouTube channel, which I highly recommend you check out:
Guide to Shading Techniques: Hatching, Cross-Hatching, Scribbling and Others
Pen and Ink Sketching: 6 Shading Techniques
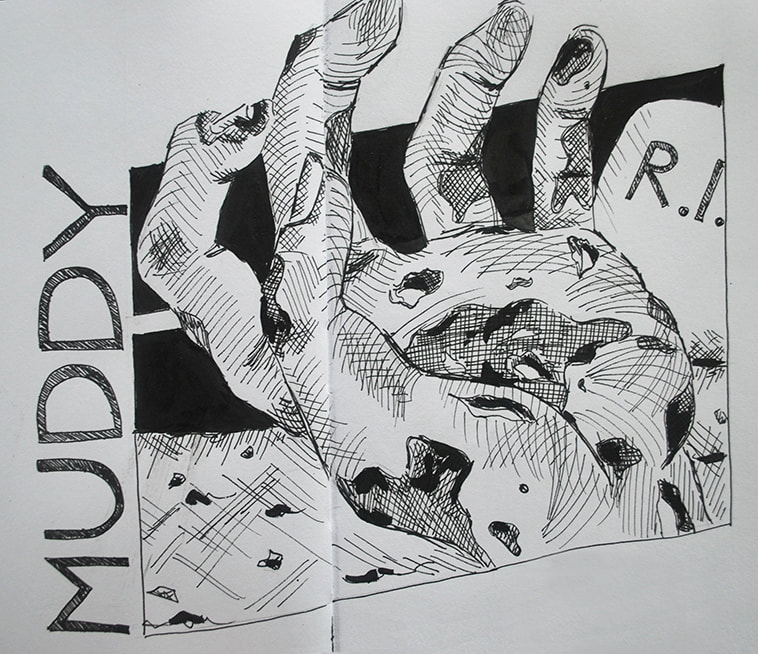
Shading a Hand Using Pen and Ink
However, I had never drawn with pen and ink as continuously as this drawing challenge pushed me to. By the end of the month, I was creating my sketches a lot faster than in the beginning. I was also able to tell when I was making a mistake quicker, which enabled me to stop in my tracks and succeed at making them less noticeable.
I had previous experience drawing with pen and ink, and have even shared different tutorials on mark-making and shading techniques both here at my blog, as well as over at my YouTube channel, which I highly recommend you check out:
Guide to Shading Techniques: Hatching, Cross-Hatching, Scribbling and Others
Pen and Ink Sketching: 6 Shading Techniques
Shading a Hand Using Pen and Ink
However, I had never drawn with pen and ink as continuously as this drawing challenge pushed me to. By the end of the month, I was creating my sketches a lot faster than in the beginning. I was also able to tell when I was making a mistake quicker, which enabled me to stop in my tracks and succeed at making them less noticeable.
2. Creativity is a muscle that gets stronger with consistent use
I'm sure you've heard this saying about creativity being a muscle before, but there's really nothing like participating in a daily challenge to really understand what pushing our creative limits every-single-day for a long(ish) period of time can do for us.
At the beginning, I really struggled to come up with the ideas behind my drawings. I was also really unsure about what arrangement/composition would look best and took a long time to decide these things.
By the end of the month my ideas came to me a lot faster and I was able to visualize more visually-pleasing compositions quicker. I knew whether an idea would work or not right off the bat and, if I thought it wouldn't, I moved on to thinking of a new one.
3. Persistence and determination are essential in order to reach any meaningful goal
In my blog post titled Time Management for Artists: My Secrets for Staying Consistently Productive, I explain how important it is to get to know ourselves so that we can truly come to a conclusion about what we want in life. This is the only way, really, that we can set meaningful goals so that we can then work towards them consistently.
Many of us are able to set those goals initially, but we fail at sticking to what we have to do because we lack motivation or life simply gets in the way.
It has been through gaining clarity on what I want in life and sheer persistence, that I've been able to get to where I am today. I think I owe my completion of Inktober to this basic understanding.
I knew that participating in this challenge would be difficult, but that it would help me progress my skills further, faster. This is important for me at this point in my life, and I honored my decision by sticking with it.

4. Chasing perfection is counterproductive
Perfection is probably the biggest enemy of creativity. It cripples us as artists and stops us from producing the work we need to create in order to keep moving forward. Getting something done, no matter how small (or flawed) is better than not doing it at all.
In art, exploration and learning to embrace the process is incredibly important. Even more important, I would say, than creating a finalized masterpiece. Once I learned this, my skills progressed a lot faster. Perfection is overrated.
Something I've come to realize is that constantly chasing perfection has a lot to do with an innate fear of not being enough and having to prove to the world, in some way, that we are. You don't have anything to prove to anyone but yourself, and what matters is to strive for progress, not perfection.
Life is way to short to let our fears stop us from doing the things we want to do in life. It is usually the people who are able to acknowledge their fears and move on despite them that succeed in achieving their goals.
5. Staying flexible is a must
Life is unpredictable. We can plan as much as we want to, but things will always come up and we have to be okay with shifting things around. As someone that thrives on routine, I'm still learning to be okay with modifying my schedules and specific things I had planned.
It's perfectly okay to take a break if you feel you need to (I did this a couple of times myself throughout the month). However, keep your priorities in check and get back to it as soon as you're able to.
There are two main ways that I stayed flexible throughout Inktober. For one, I had to accept that I would have to move my sketching to a different time of the day because things came up that I had to prioritize, or certain tasks simply took longer than expected. Sometimes I had to accept the fact that I would have to work on my Inktober sketch at the end of a long day of work.
Another way that I stayed flexible was with my supplies. The pages of the original Leuchtturm1917 sketchbook I planned on using ran out about 3/4's of my way through Inktober (I talk more about the specificities of my Inktober suppliesin this blog post).
Initially, I thought it would hold all of my sketches, but my heavy application of ink made it necessary for me to skip pages in between each piece. I had to make due with what I had on hand and be okay with using another sketchbook that didn't exactly match the characteristics I was looking for with this project. I accepted it and moved on.
6. Always focus on the good
There are two ways in which I applied this throughout Inktober: throughout the creation process and whilst analyzing my finished pieces.
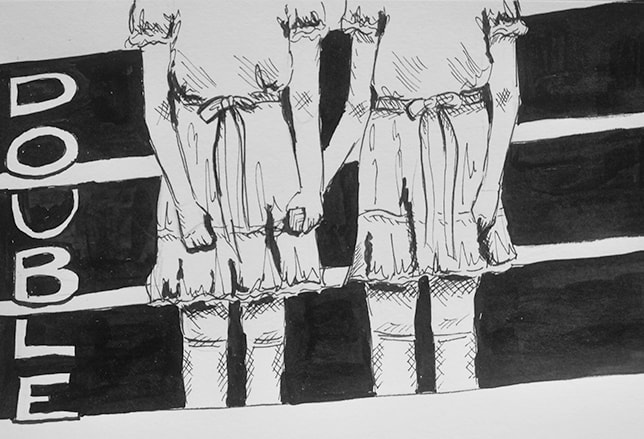
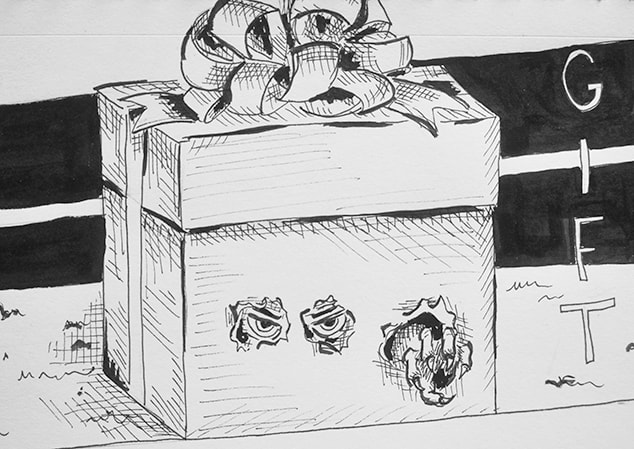
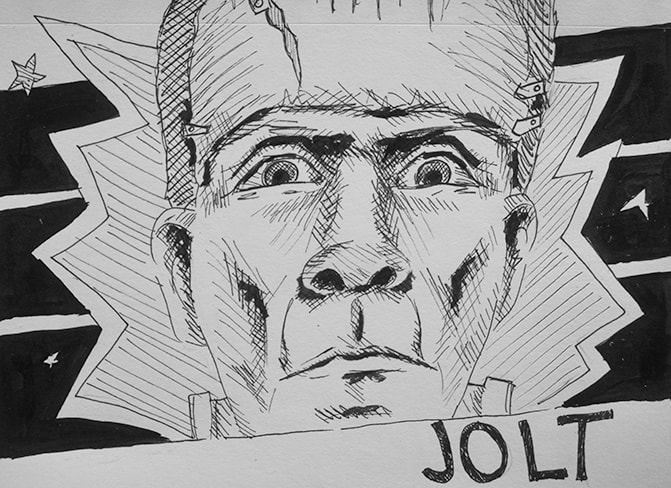
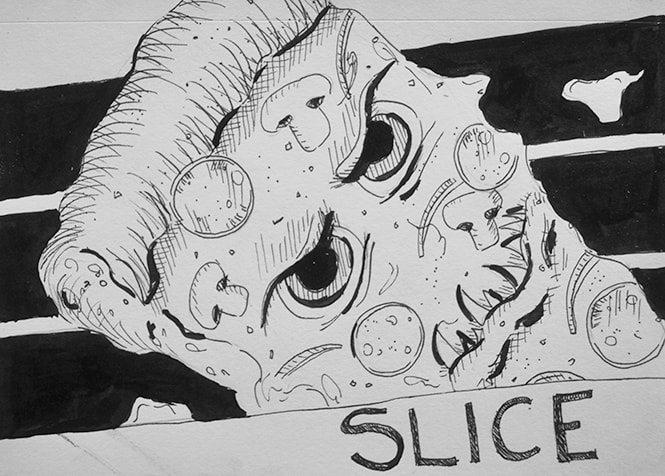
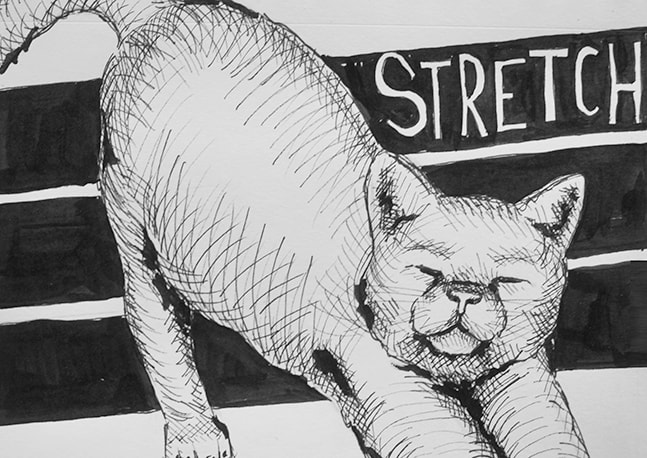
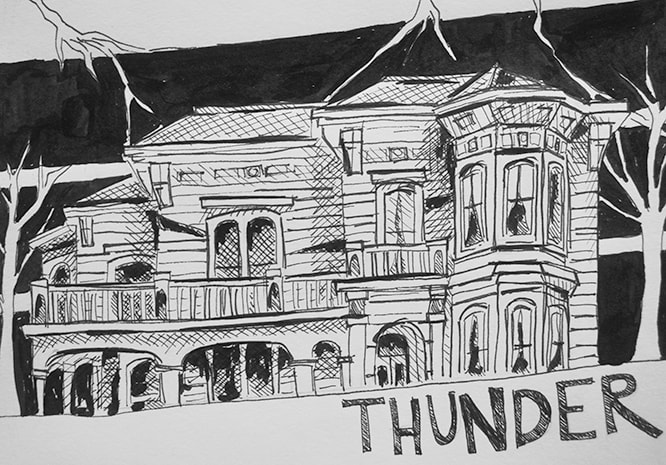
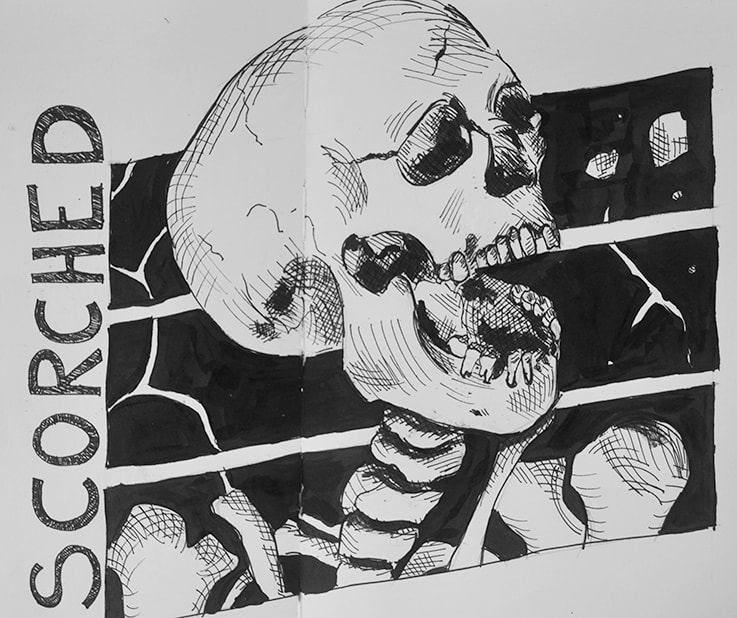
If you've been following my Inktober work, you're probably already aware that I decided to go with following the official prompts this year. There were honestly some prompts that weren't inspiring for me at all and I struggled to think of a good idea for my piece.
However, in these situations, I decided to focus on what I could enjoy and what could go well. Even if I wasn't smitten with my idea, I set out to use the opportunity to improve my cross hatching/line work, etc.
To be perfectly honest there were several sketches that I didn't like very much, either because the idea just wasn't that great, or because I feel the execution was sloppy. Nonetheless, I decided to take it easy, pat myself on the back for getting the work done for the day, and always focused on the good.
There are always things that go well, no matter how much more our mistakes stick out to us. Being able to recognize both possible areas of improvement as well as our strengths is essential for us to improve our skills and find our artistic style.
You can find a full list of my current favorite art supplies, as well as helpful art books here.
My Inktober Supplies:
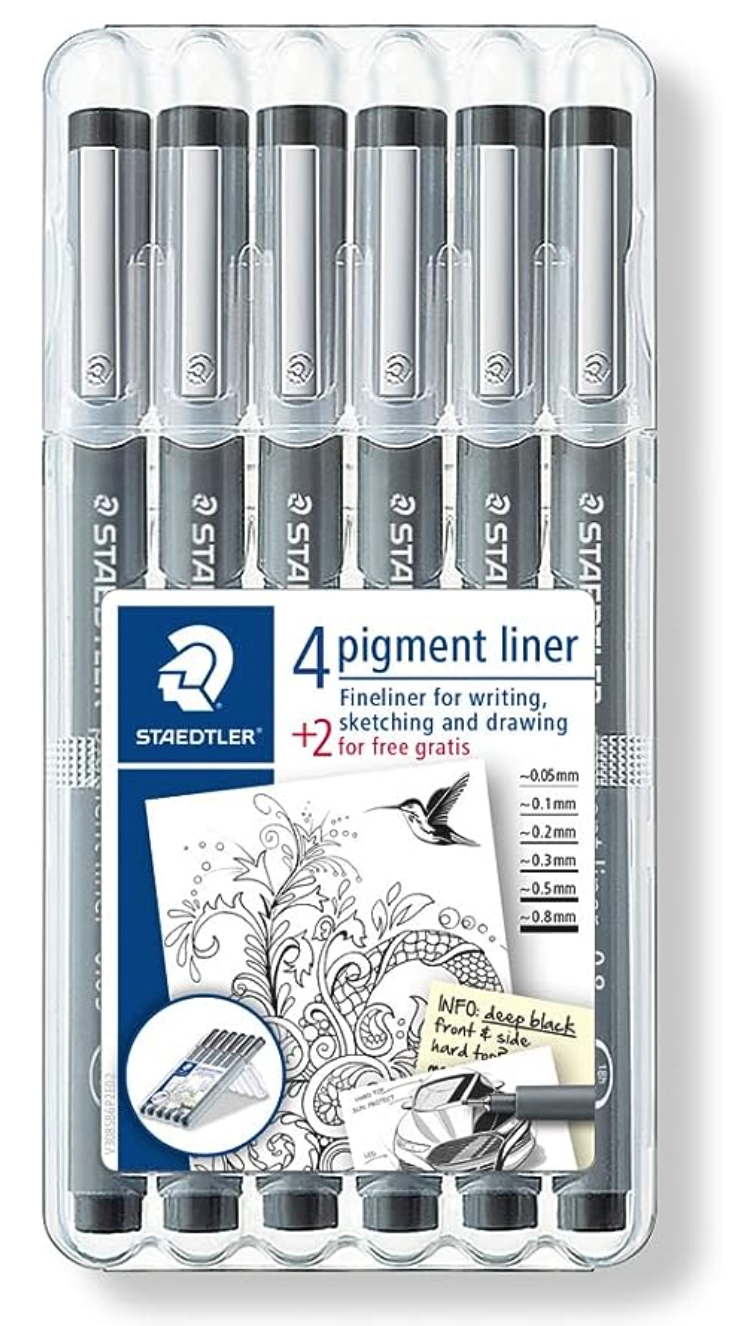
STAEDTLER Pigment Liner Bonus Sketch Set of 6
|
Canson Artist Series Field Drawing Book for Pencil, Pen and Felt Tip Pens, Side Wire Bound
|

I hope you enjoyed this post and learned something new, or got inspired to go and create a sketch for yourself.
I wish you tons of progress and enjoyment in your artistic journey. :)
*This post contains affiliate links. I receive small commissions for purchases made through these links at no extra cost to you. These commissions help me keep this site up and running, in order for me to keep providing helpful and inspiring art content. :)
In today's blog post/YouTube video, I'll be sharing Inktober sketches 19-25, as well as a review of the supplies I've been using throughout this challenge.
I wanted to really put these products to the test and have a good amount of experience with them before I actually expressed any opinions.
I have released several blog posts sharing tips and tutorials about pen and ink drawing that I highly recommend you check out if you haven't already (two very popular ones are this one and this one).
In past YouTube videos, I've shared how much I enjoy using this drawing medium and why I think it's so effective at helping us progress our artistic skills.
All this said, I had never used pen and ink as consistently as I have with this drawing challenge. I committed to participating in Inktober this year because I knew that creating a new piece every-single-day for an entire month would lead to amazing growth in a short period of time.
The challenge would help me not only exercise my creativity continuously and gain confidence in my pen and ink technique, but would also test my time-management skills and even more mental/personal aspects.
Over at my YouTube channel, I've shared all of my Inktober sketch time lapses so far:
1. Timelapses 1-5 + A Bit About My Thoughts and Process
2. Timelapses 6-11 + How I Come Up With the Ideas Behind My Sketches
3. Timelapses 12-18 + My Struggles So Far
*The video included in this post is my fourth compilation of sketch time lapses and I'm closing this Inktober series with a last video including my final drawings, as well as a bit about what I've learned.


If you enjoyed this video and found it helpful, make sure to subscribe to my YouTube channel. I share a brand new video every week with art tips, drawing and painting tutorials and mindset/productivity tips for artists. *Subscribe HERE*
My Inktober Supplies
I knew I wanted to make a careful selection of supplies and stick with them throughout the entire month. This way, I would be able to come up with solid opinions about them.
I bought all my supplies through Amazon and Blick Art Supplies this year.
If you'd like to see a full list of my current favorite art supplies, go here.
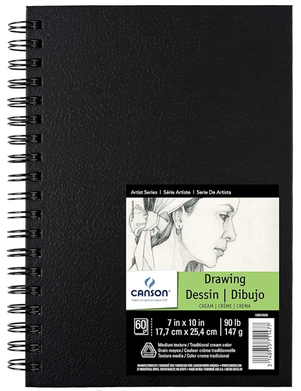
1. Leuchtturm1917 Sketchbook
This was my first time using a Leuchtturm sketchbook and I really enjoyed it, especially in combination with drawing pens and ink. These sketchbooks are definitely on the more expensive side, but I'm really glad I invested in one and decided to use it for this drawing challenge!
The sketchbook is 15 x 21 cms. in size and is made up of 96 pure white 180 g/m drawing paper that is quite smooth. I love that the sketchbook includes two bookmarks and an elastic to keep it safely closed. These characteristics make the sketchbook perfect to take out for drawing in plein air or coffeeshops.
I had a couple of different sketchbooks to pick from laying around that I could go for, but I went for this one for two main reasons:
a) I knew that I wanted some areas of my Inktober sketches to have thick applications of ink and the thickness of its pages would allow for this.
b) The pure/brilliant white of its pages would really allow my black ink lines/shapes to contrast and pop out!
Though I find this sketchbook amazing for drawing purposes, I wouldn't recommend it for sketching with watercolors, as its paper is too smooth and I don't think it would hold/absorb water very well. I think it would, however, work pretty well for gouache and even acrylics.
It's always a smart idea to give thought to what kinds of mediums you're planning on using in your sketchbooks before making a decision about which one to buy.
*This sketchbook is no longer available on Amazon, but you can find it on the brand's website here.

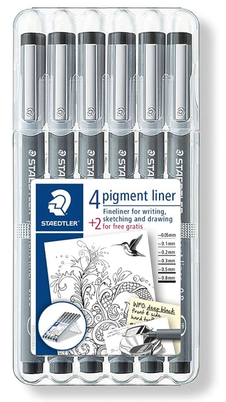
2. Pigment Liners from Staedtler
I've had this set of drawing pens for a while and I've always used them interchangeably with my Micron pens. I think these two brands/products are pretty close in terms of quality and price, and produce almost the same results.
I will continue buying Staedtler drawing pens for the time being, as I found throughout this challenge that I really enjoy them.
The four-pack of drawing pens that I have includes .1, .3, .5, and .7 millimeter points. The majority of my Inktober sketches were created using only the .3 and .5 points. I find the four pack includes a perfect variety of point thicknesses and don't think I would personally need anything smaller or larger.
The ink in the Staedtler Pigment Liners is waterproof, bleed-proof, smudge-proof and fade resistant, which leads me to think they would be perfect for use in combination with watercolors. The lines created by these drawing pens are also very crisp and dark.
Lastly, the ink in these pens also lasts a very long time. Even though I used them every-single-day for 31 days (and pretty roughly-I might add), they never started drying out.
Staedtler Pigment Liners 6 Pack
|
|
3. Speedball Drawing & Calligraphy India Ink
I acquired this little 2 ounce tub of black ink a while back for exploratory purposes and I'm very glad I had it on hand for this Inktober! It allowed me to create the flat black geometric background shapes that I decided would be the unifying aspect of my drawings prior to starting.
This Speedball drawing/calligraphy ink is a rich black and a bit on the thick side. However, it can be diluted to create a variety of values and a runnier texture. I used a small, angled, soft-bristled brush to apply it onto my paper and the wash always came out quite even. I never noticed any granulation, even in areas where I applied the ink thickly.
I also loved the fact that it washes off from skin pretty easily and that it has no overpowering odor to it. Lastly, the shape of its bottle is genius, as the bottom of it is wider than the top and makes it more stable. This avoids it from tipping over and creating a huge mess!
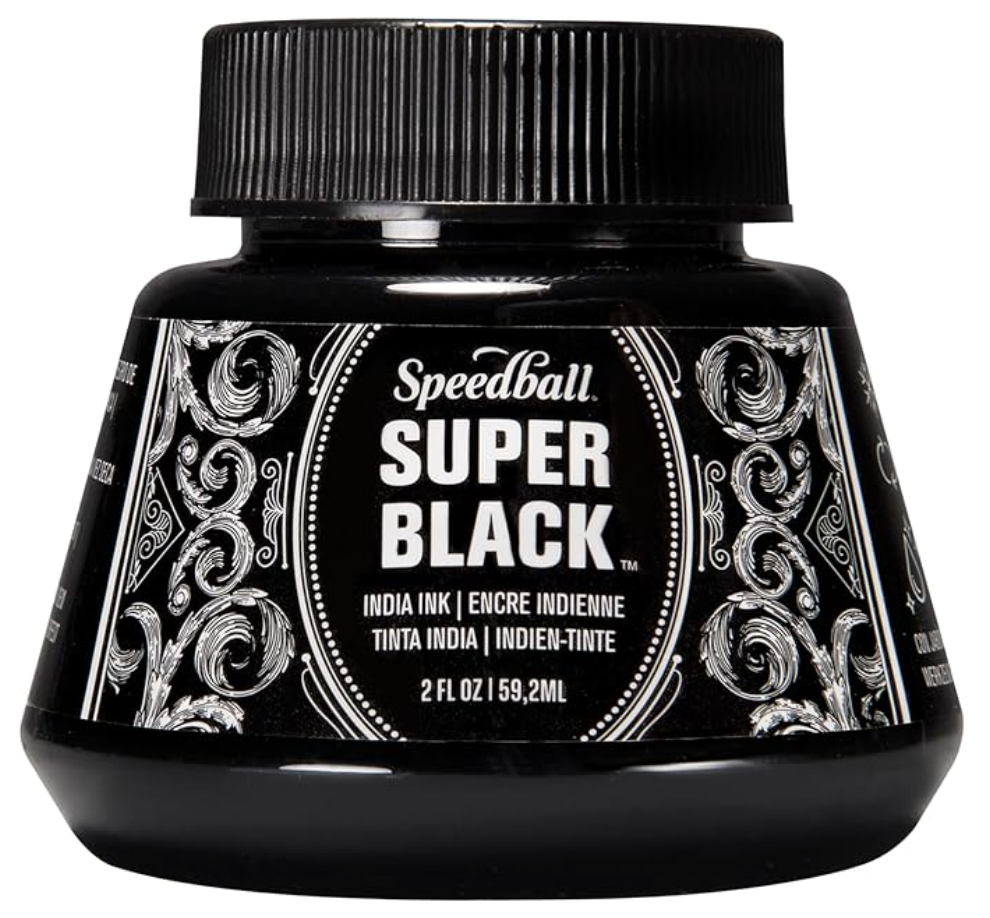
Speedball Super Black India Ink Tub
|
|
|
|
That's it in terms of my Inktober supplies for 2018!
I hope you enjoyed this post and learned something new, or got inspired to go and create a sketch for yourself. I wish you tons of progress and enjoyment in your artistic journey. :)
I hope you enjoyed this post and learned something new, or got inspired to go and create a sketch for yourself. I wish you tons of progress and enjoyment in your artistic journey. :)


www.erikalancaster.com
is a participant in the Amazon Services LLC Associates Program, an affiliate advertising program designed to provide a means for sites
to earn advertising fees by advertising and linking to amazon.com.
www.erikalancaster.com
is a participant in the Shareasale.com Affiliate Program, an affiliate advertising program designed to provide a means for sites to earn advertising fees by advertising and linking to Shareasale.com partner companies.
 RSS Feed
