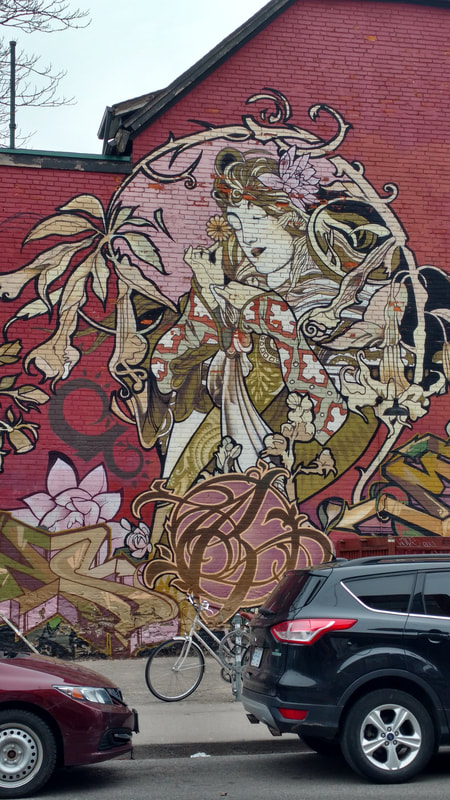
*This post contains affiliate links. I receive small commissions for purchases made through these links at no extra cost to you. These commissions help me keep this site up and running, in order for me to keep providing helpful and inspiring art content. :) Do you want to go off on vacation, but fear you'll lose your creative streak or even fall behind artistically if you take a few days off? Ever wondered how you can ensure creative progress while away from the studio and regular work routines? Curious to see what happens when you take your art-making on the road but are, perhaps, a bit nervous about working in unusual/public settings? As artists, traveling is a great way of gaining new inspiration and facing challenges that can lead to substantial growth. It may sound counterintuitive, especially for us workaholics, but putting miles between us and our studios may be just what we need to kick our creative progress into gear. In today's blog post, I'll be sharing the three things I personally did to prepare for my last trip, which allowed me to enjoy it immensely WHILE moving forward artistically. By preparing ourselves mentally and doing a bit of research beforehand, we can take full advantage of our travels and come back home refreshed, motivated and full of ideas! To clarify, I consider the incubation of ideas just as important as the act of creating finalized artworks. It's through first-hand experiences that we get to know ourselves as artists and come to conclusions about what messages we want to bring to the world. This, for me, is just as essential as working on our cold artistic skills. I absolutely loved Toronto! In my last blog post/YouTube video, I shared how there was just SO much to get inspired by! Check that post out HERE. The huge variety in cultures present in the city, as well as the beautiful architecture, music, coffee, shops, galleries and art studios triggered a lot of emotions in me that made me want to create. 
Me at Distillery District in Toronto
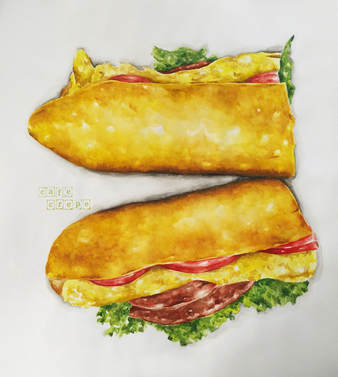
Visit THIS blog post to find more pictures of the painting process for this watercolor sandwich!
If you enjoyed this video and found it helpful, make sure to subscribe to my YouTube channel. I share a brand new video every week with art tips, drawing and painting tutorials and mindset/productivity tips for artists. *Subscribe HERE*
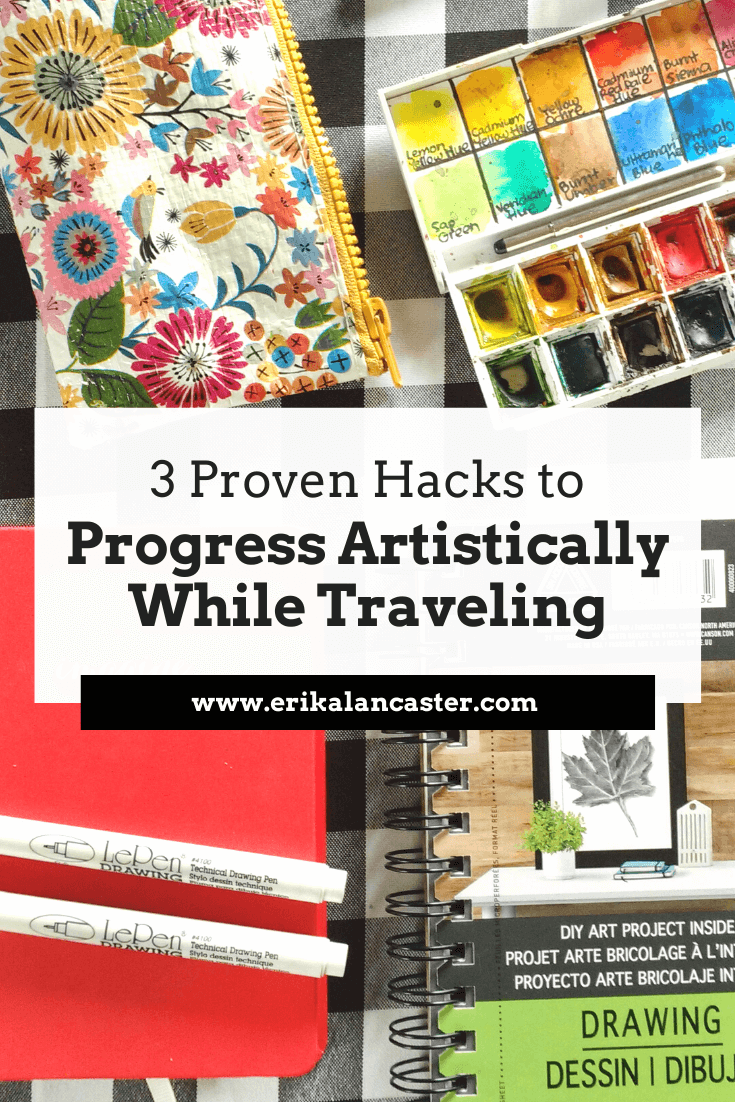
3 Hacks to Apply Before and During Your Next Trip1. Give some thought to what supplies and promotional items you'll be taking with you The supplies that you choose to take with you will vary depending on your artistic medium(s) of choice, as well as how comfortable you are drawing or painting in public (or rushed) situations. I love watercolors and immediately reached for my smallest/most portable set to pack up. However, I knew that I would probably have limited time and space to create, so I also made sure to take a few pencils and drawing pens with me. I recommend sticking to the basics and taking only what's truly necessary when selecting your art supplies (unless you're deliberately traveling to a drawing/painting event). Take your most portable sets and supplies that allow for easy cleaning, making sure they aren't the most expensive or even your favorite. Things get lost and damaged during trips, and you want to avoid sad situations. Also, consider what bag you'll use to carry your stuff in while walking around. I knew since before my husband and I started preparing for our trip, that I didn't want to pressure myself or take away from fully enjoying the experiences Toronto had to offer. I wanted to focus more on taking note of moments, feelings and thoughts that popped up. The few sketches I created were quick, but I made sure to take lots of reference pictures that I could work with when I got home. If you're up for the challenge, however, traveling is a great opportunity to practice plein air painting, drawing settings, objects and people! You can also set timers for yourself to practice creating faster drawings and/or paintings, which will help you become more expressive and efficient! 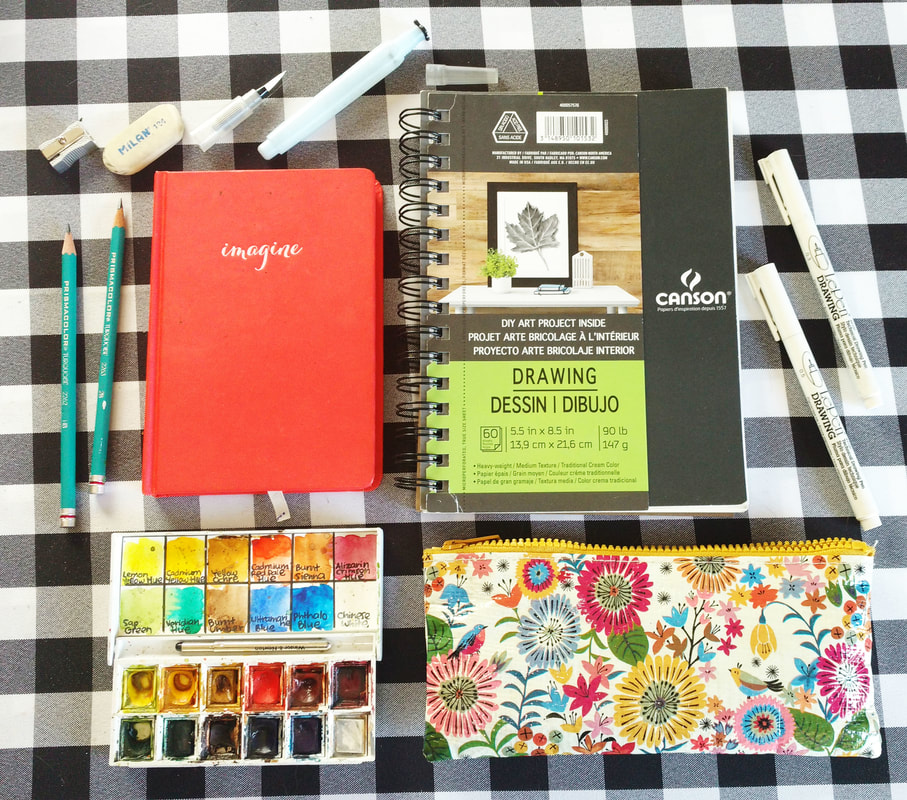
Art supplies I took on my trip.
|


|
|
|
|
|
|
|
|
Are you a professional artist? I highly recommend taking time to create unique promotional items that you can give to awesome people you meet while you're traveling!
Instead of giving out a regular business card, think of items that people will actually want to have around and/or use. Be practical about it, of course, as you'll have to make space for them in your suitcase and there's always a risk of things getting damaged throughout the journey.
I had some notebooks made with my artwork on the cover and contact information on the back and people loved them!
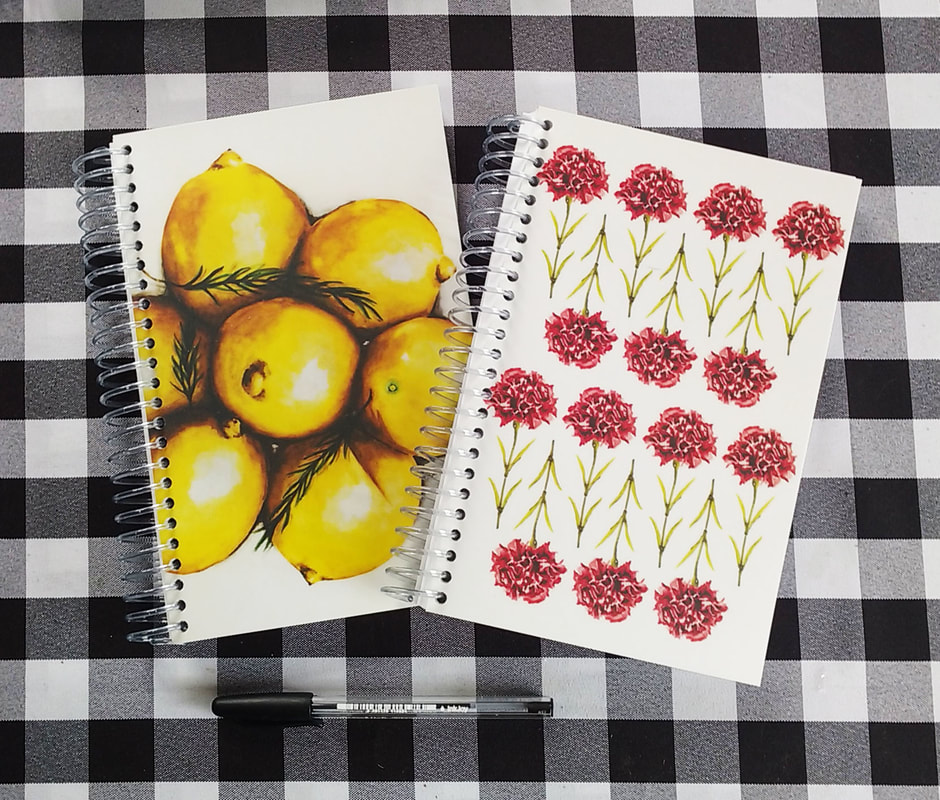
White paper spiral notebooks I had made with my artwork on the cover.
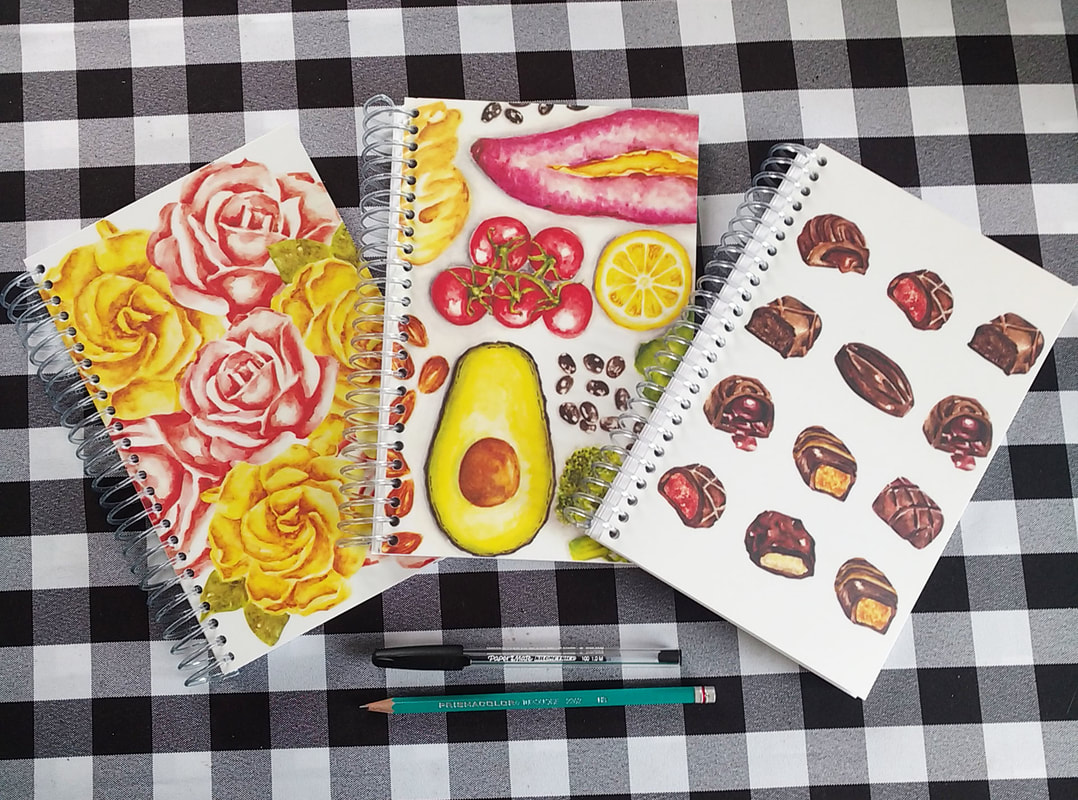 White paper spiral notebooks I had made with my artwork on the cover.

Check out my FREE Patreon-exclusive tutorial and class samples here.
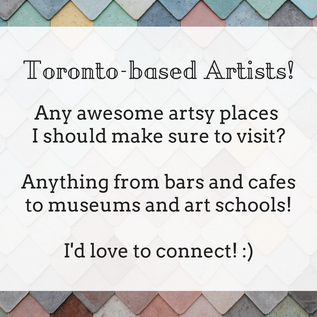
2. Use social media to reach out to locals working in areas related to your niche
A couple of weeks before my trip I got the idea of using social media channels to send out a message to artists actually living in Toronto. It's one thing to get recommendations from friends or family who've visited the city/town before, and quite another to get insights from actual local artists.
I created a nice-looking image using Canva calling out for Toronto-based artists and posted it on Instagram and Twitter (a few appropriate hashtags included). I honestly didn't know if I would get any responses, and should have posted it at least a couple of more times.
Fortunately, two very helpful locals got back to me with their recommendations. I even got to meet one of them during my trip, which was awesome.
Using your own research, as well as suggestions from local artists, create a list of places that you want to make sure to visit during your trip, always taking into account their distance from the hotel you'll be staying in.
Think of experiences that you find particularly enjoyable, instead of spending your whole trip running around from place to place visiting the usual tourist-y locations just because that's what everyone tells you you should do (unless you actually want to).
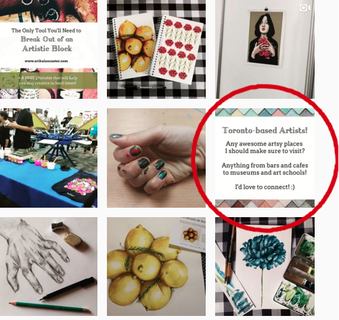
Quick design I made calling out to local Toronto artists.
|
My Instagram feed! Click to follow me there. :)
|
3. Stay open to inspiration coming from EVERYWHERE (not only the visual arts)
Think about things and experiences that usually trigger your inspiration/motivation. If you're an artist, of course you're going to find museums and galleries enjoyable.
However, what other things do you find inspiring? Is it history? Architecture? Fashion? Food? Nature? Music? Clubs? What is it for you and how can your personal interests translate into activities that you can experience in that particular city?
I understand how for some people it may be important to check off every-single tourist attraction in a specific city, especially because you never know when you'll be able to go back to that particular place. However, try to also incorporate your personal interests into your trip.
I often find quaint, lesser known establishments/areas just as enjoyable as the bigger attractions, and I also love getting to know what life is like for locals. Having the opportunity to chat with locals is very inspiring because you get to know perspectives of people living in cities different from your own.
In my blog post titled How I Find Inspiration as an Artist and Some Ideas to Keep You Going, I talk about the mentality I've adopted as an artist that allows me to be constantly inspired to create. I also give some useful tips that you can apply to keep your creativity flowing steadily.

Art supplies and inspirational items I bought at Toronto.
Supplies and inspirational items I bought during my trip:
1. Black back-pack and pins: Sonic Boom Records
2. The Starving Artist Cookbook, written and illustrated by Sara Zin: Sonic Boom Records
3. Leuchtturm1917 sketchbook: Art Gallery of Ontario Museum (Gift shop)
4. Emily Carr and Lawren Harris Art Magnets: Art Gallery of Ontario Museum (Gift shop)
5. AGO Museum Tote Bag: Art Gallery of Ontario Museum (Gift shop)
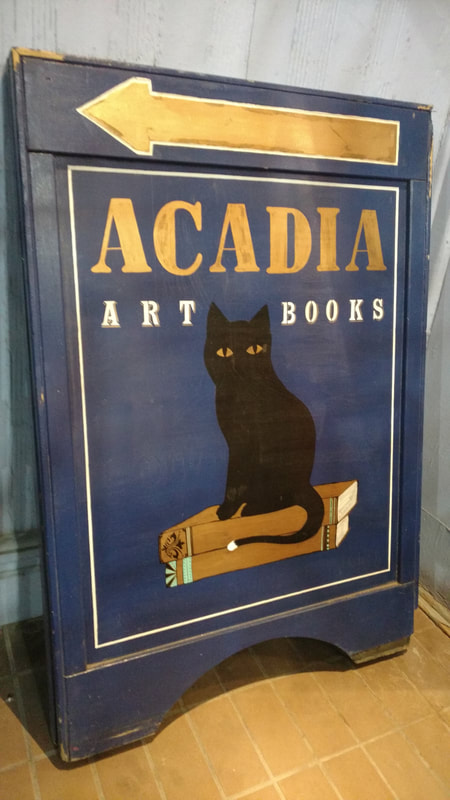
6. Emily Carr- An Introduction to Her Life and Art: Acadia Art and Rare Books
*Book can be acquired through Amazon HERE.
7. Wanderlust and Wildflowers Colored Pencils: Kid Icarus Gift and Screen Print Shop
8. Green Ink Pad: Kid Icarus Gift and Screen Print Shop
9. Schoolbook Lowercase Alphabet Stamps: Kid Icarus Gift and Screen Print Shop
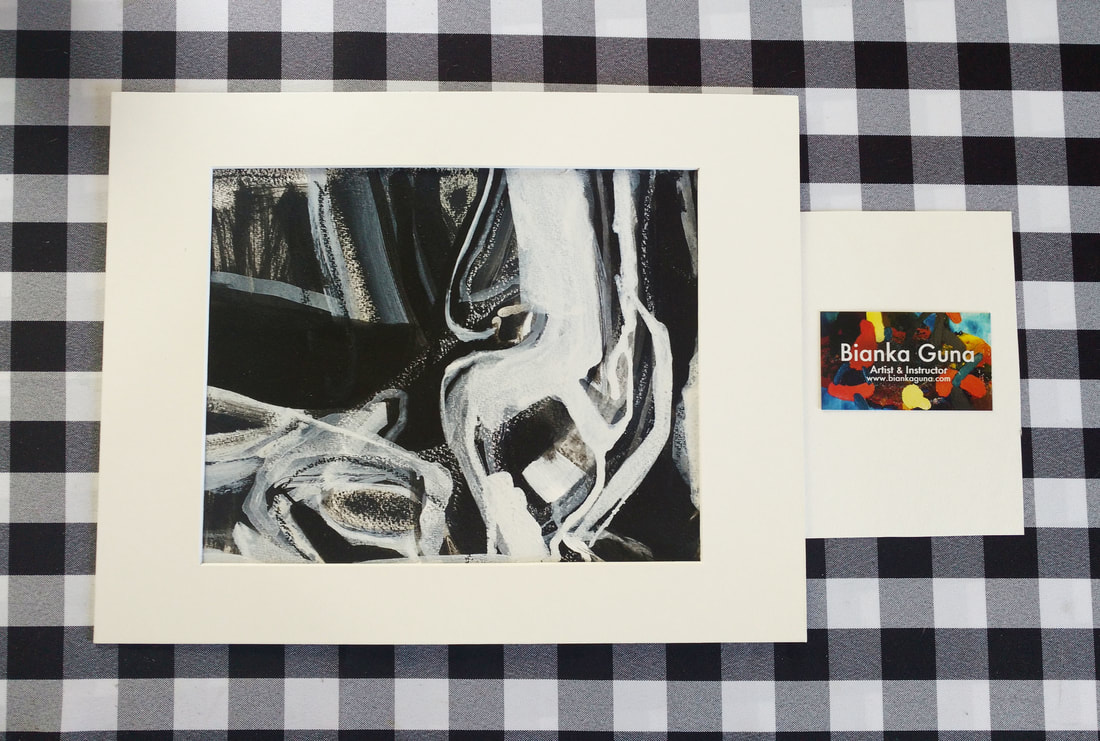
Abstract artwork by Bianka Guna. Click on the image to visit her website!
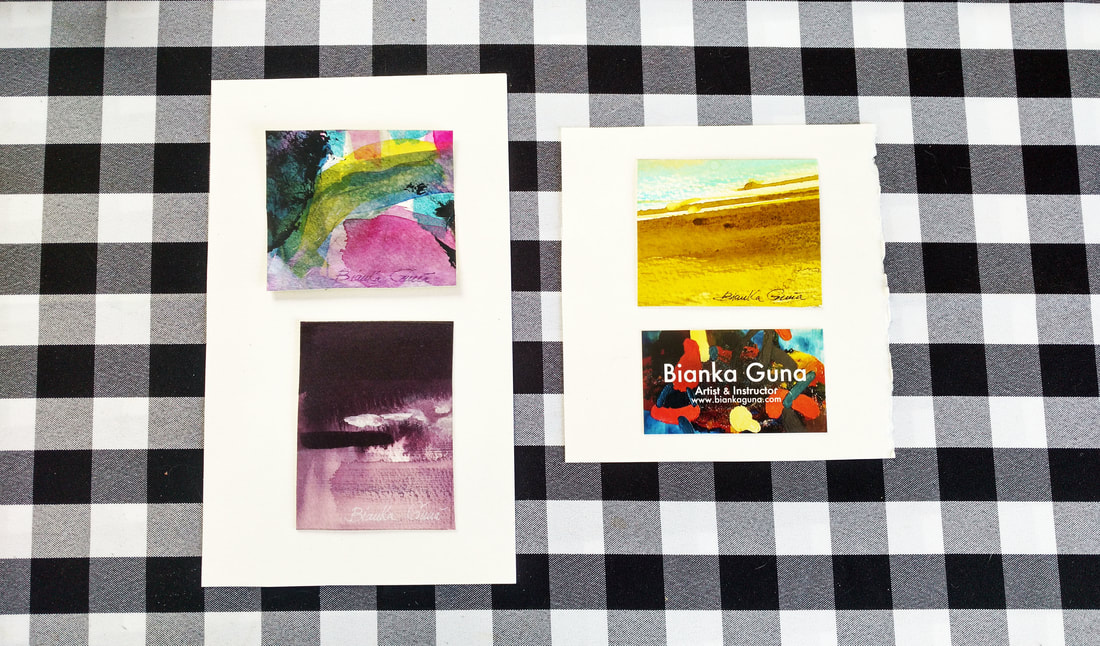
Abstract artwork by Bianka Guna. Click on the image to visit her website!
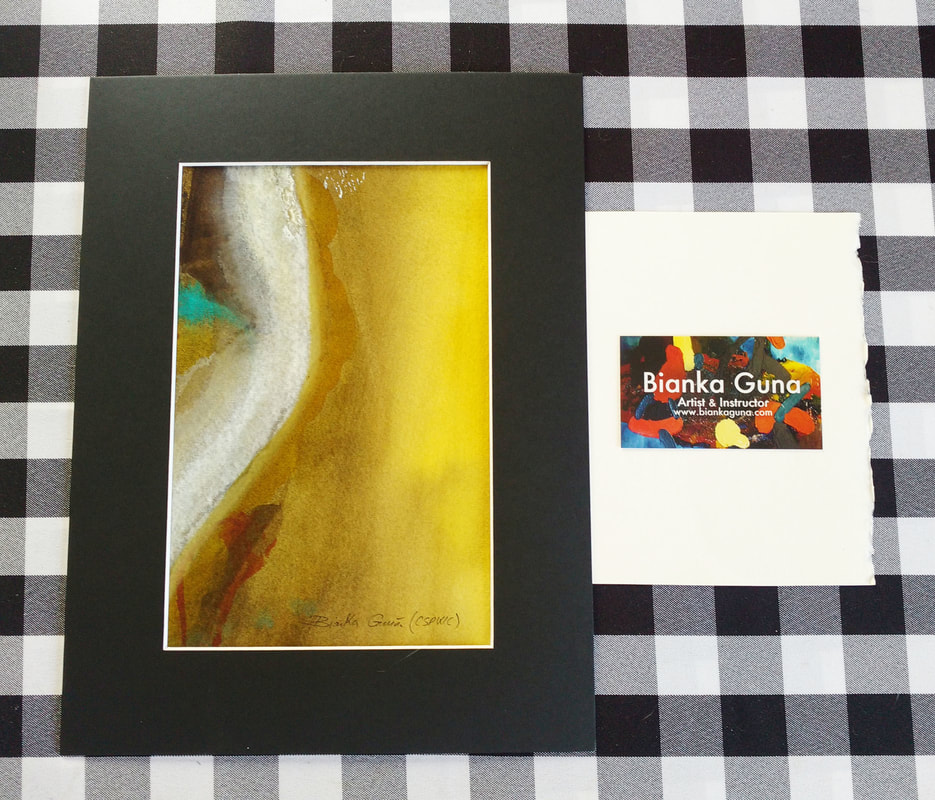
Abstract artwork by Bianka Guna. Click on the image to visit her website!
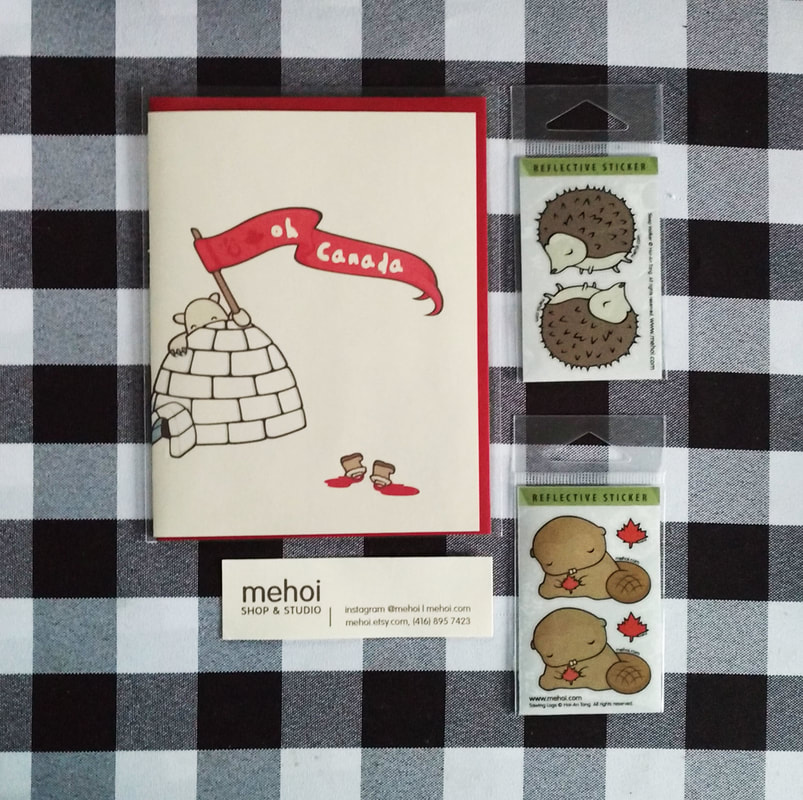
Click on the image to visit Mehoi's Etsy shop!
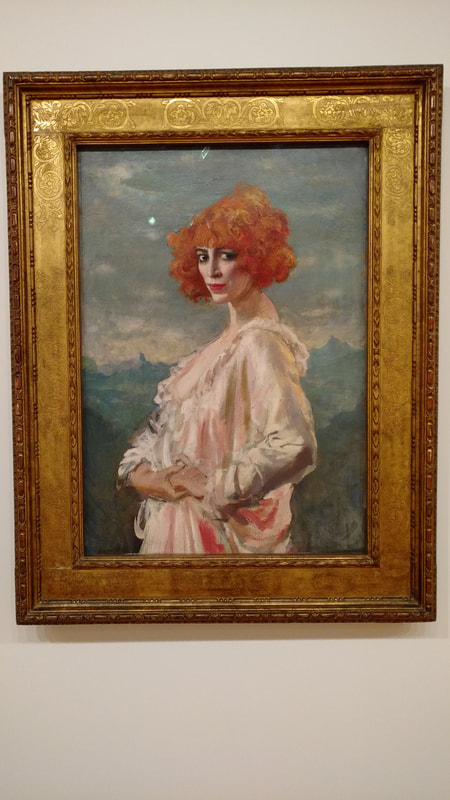
Artusiasm is an amazing art gallery that was recommended to me by an artist/designer kind enough to respond to my calling through Instagram! I'm so thankful for this recommendation because the gallery and its owners are truly amazing people! Thanks Ben!! :)
*Click on the images below to visit Artusiasm's site.
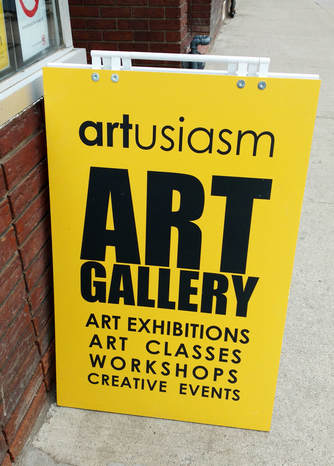
Artusiasm art gallery
|
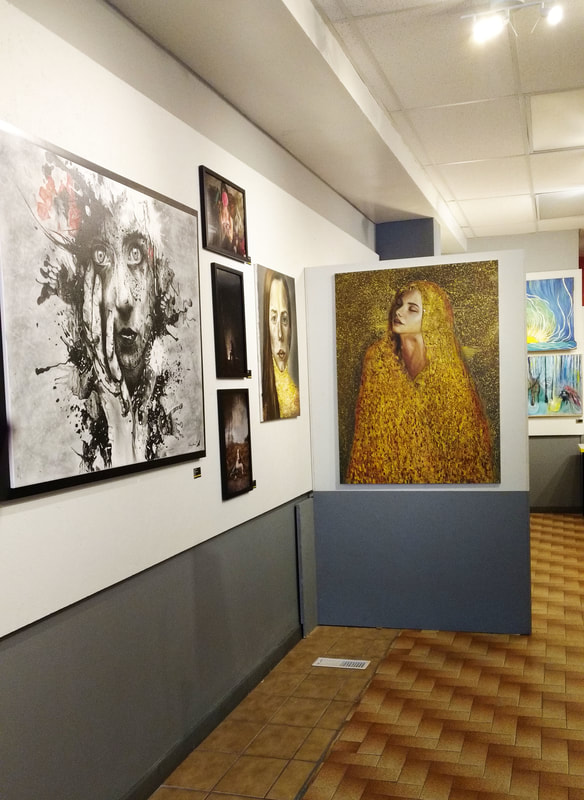
Artusiasm art gallery
|
To end this blog post, I want to remind you to try to find a balance between enjoying life, taking care of yourself, and staying productive. If you're lucky enough to travel, enjoy the experience as much as possible, remain open, and most likely, inspiration will happen naturally. Don't pressure yourself and focus more on recording your thoughts, feelings and ideas!
I wish you the best of luck in your art journey and lots of opportunities for traveling!
Cheers!

4 Comments
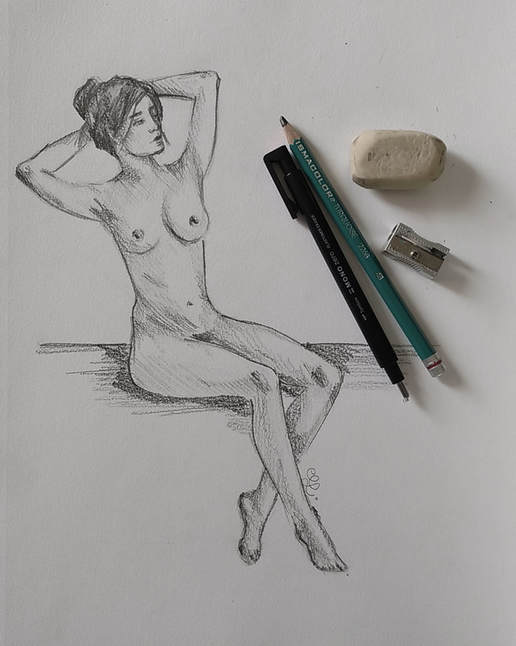
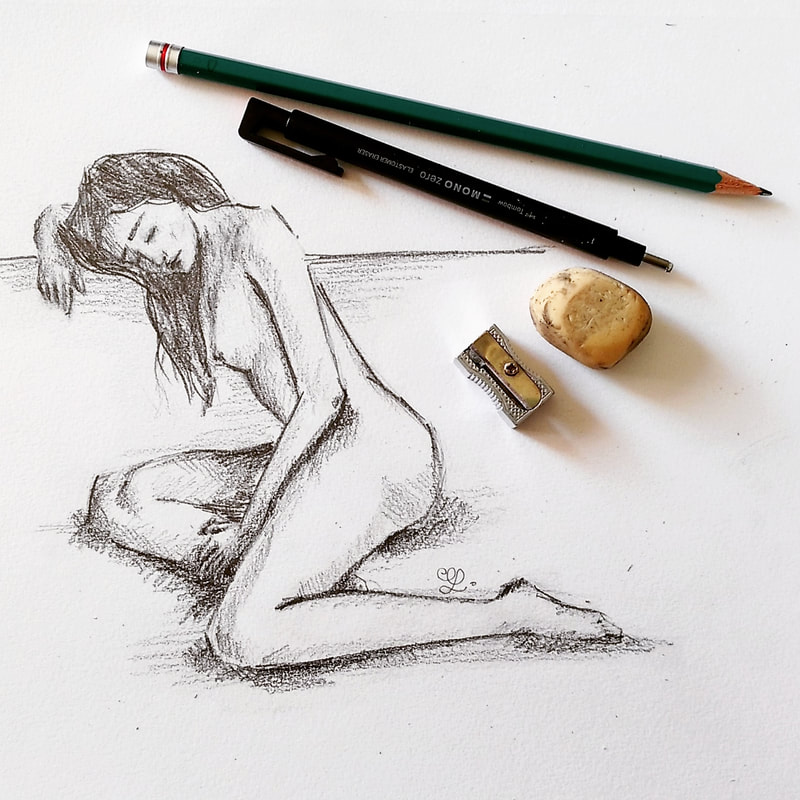
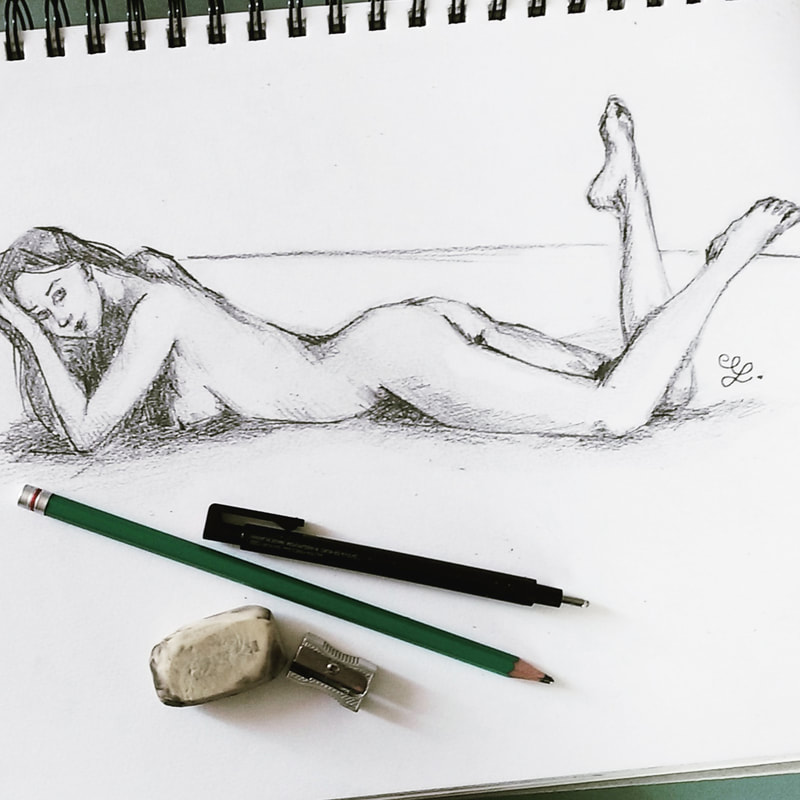
Female figure pencil sketch by Erika Lancaster
*This post contains affiliate links. I receive small commissions for purchases made through these links at no extra cost to you. These commissions help me keep this site up and running, in order for me to keep providing helpful and inspiring art content. :)
Hey there, artist friends!
I just arrived from a week in Toronto day-before-yesterday and am getting back into track with my usual work schedule.
Yesterday I allowed myself to wake up late after my full day of traveling back to Mexico, and I spent the day mostly catching up on emails and social media (I only had a few minutes of Internet here and there during my trip).
Today, I was able to set my monthly plan in terms of the content I will be putting out for you both here on my blog and on YouTube!
I'm very excited for the posts I have coming up regarding my trip! I will be sharing everything from what art supplies I took along with me, how I stayed creative during my trip, the artsy items I bought during my trip, and also, how I managed to meet some amazingly talented artists. Stay tuned for that.
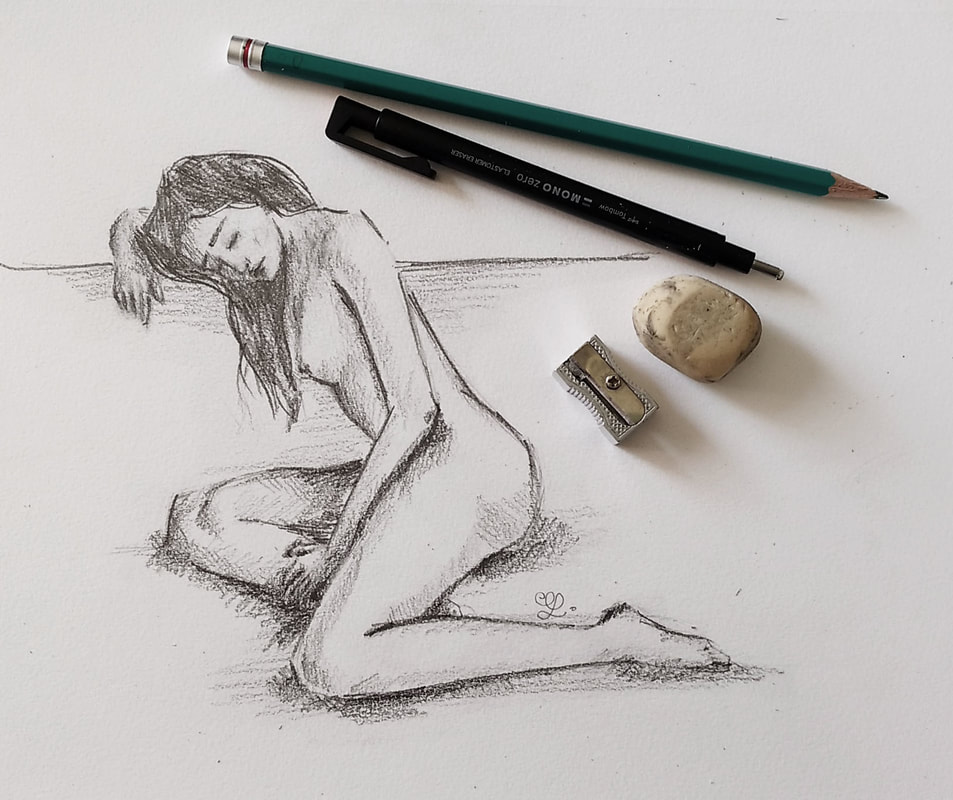
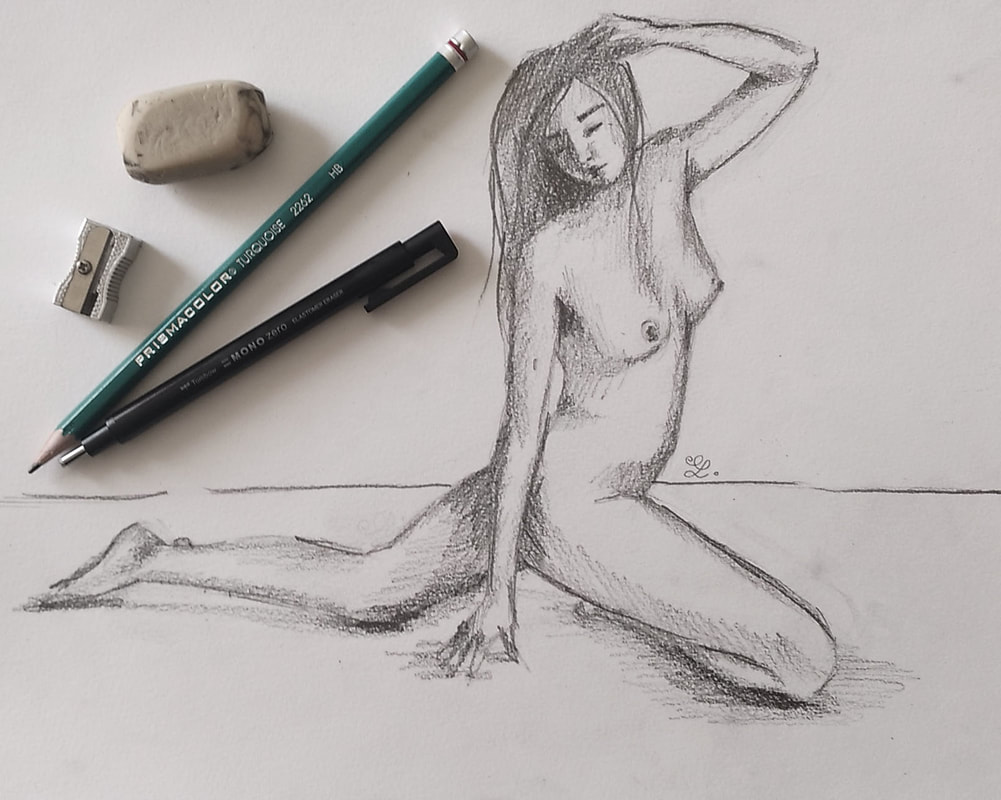
Today I'm sharing a few of my most recent sketches.
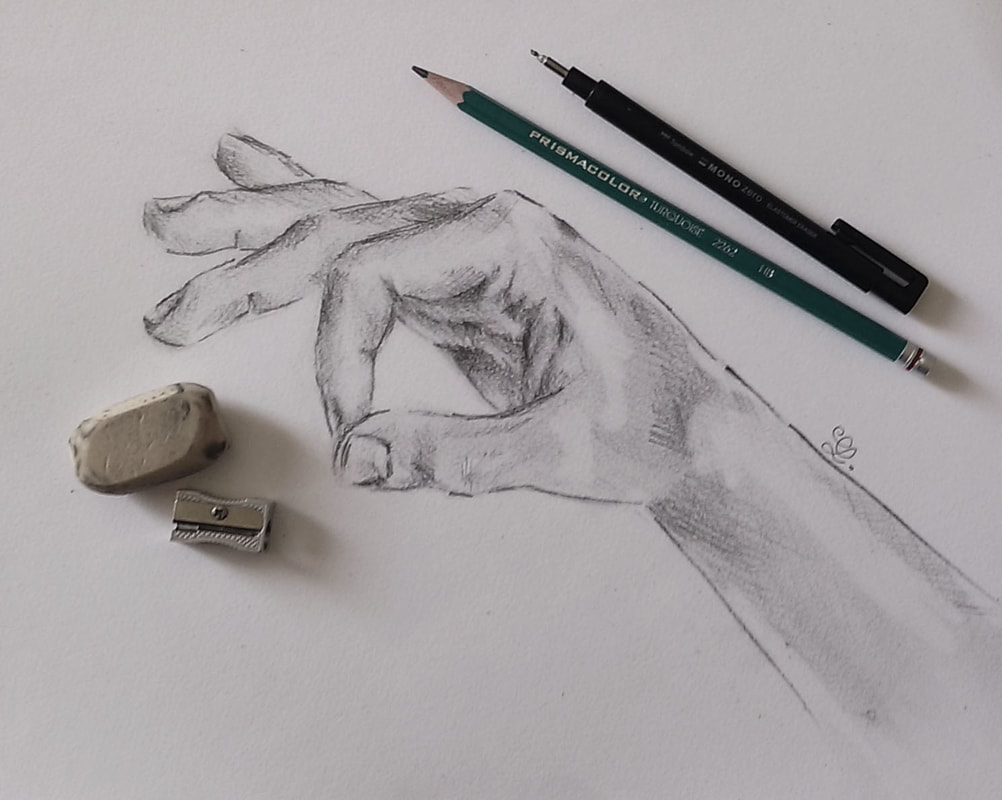
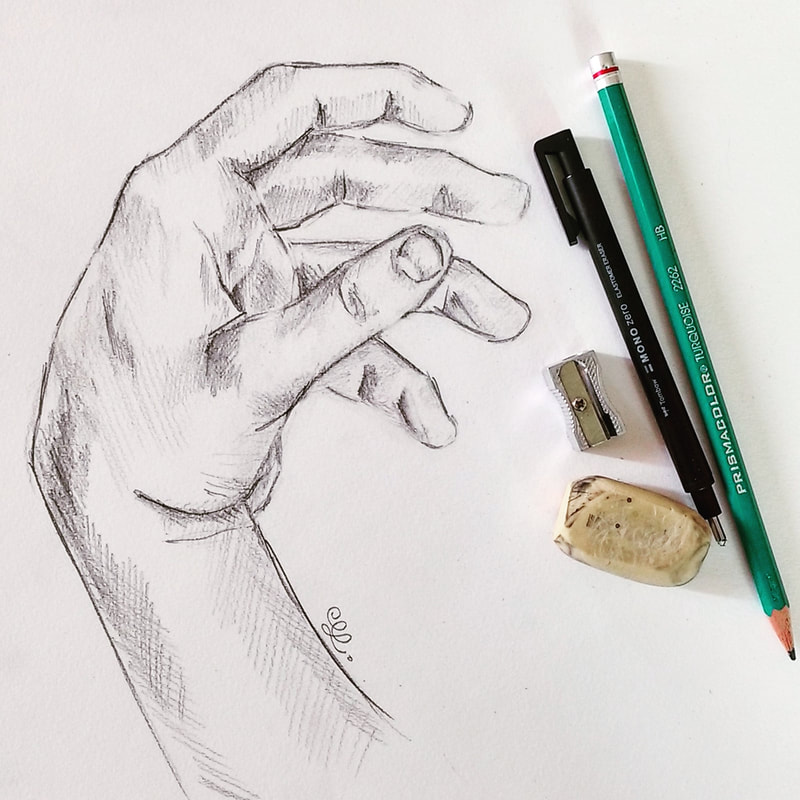
Lately, I've been trying to make time for sketchbook studies and improving my drawing, and I love challenging myself with subjects I find difficult, like hands and the human figure.
I hope you enjoy, and make sure to stay tuned for next Friday's blog post/YouTube video!
Female figure pencil sketch by Erika Lancaster
Female figure pencil sketch by Erika Lancaster
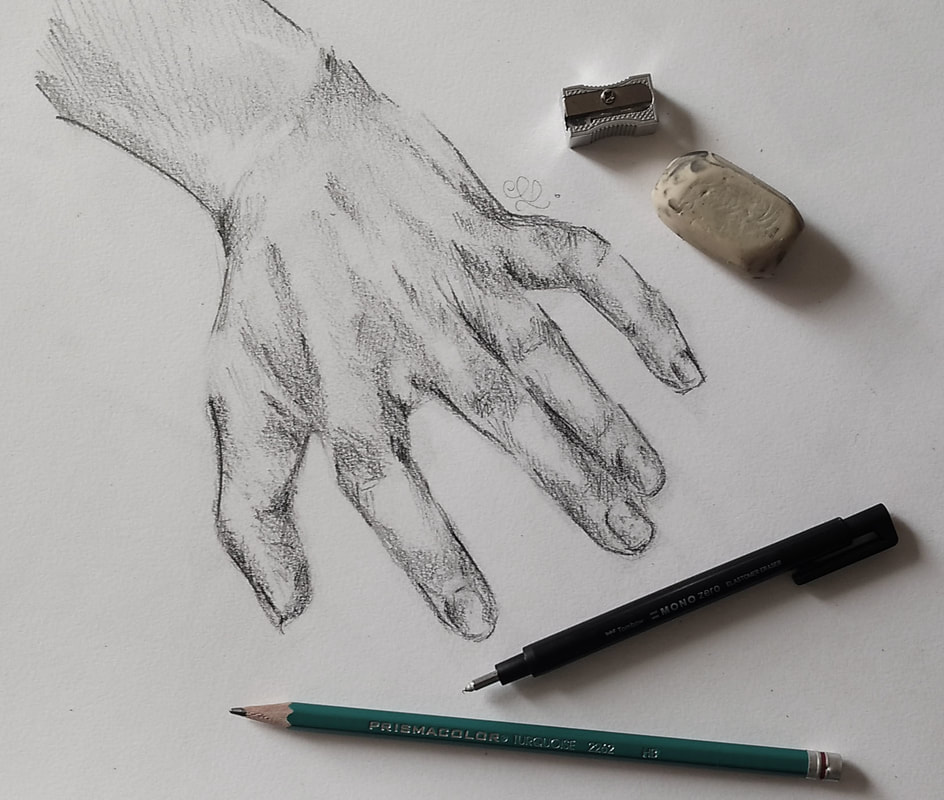
Hand pencil sketch by Erika Lancaster

Hand pencil sketch by Erika Lancaster
|
|
|
|
|
|
|
|
|
|
Hand pencil sketch by Erika Lancaster


I'm almost embarrassed to say that I have kind of neglected my sketchbook studies the last couple of months because I've been so busy. I've been working on plenty of paintings, but I honestly believe that drawing is the basis for everything else.
If you've read my blog post titled Why Sketchbooks Are Essential Tools for Artists and a Few Usage Tips, you're probably already aware of how much I believe in keeping a sketchbook as a means of exploration and finding one's personal artistic voice.
I highly recommend continuing with your drawing practice, no matter what your artistic medium of choice is. It's essential to keep improving your drawing skills and to always remember that the journey is just as important as any of the final pieces you create.
Thanks so much for dropping by and I hope you enjoy these drawings!
Pencil female figure study by Erika Lancaster
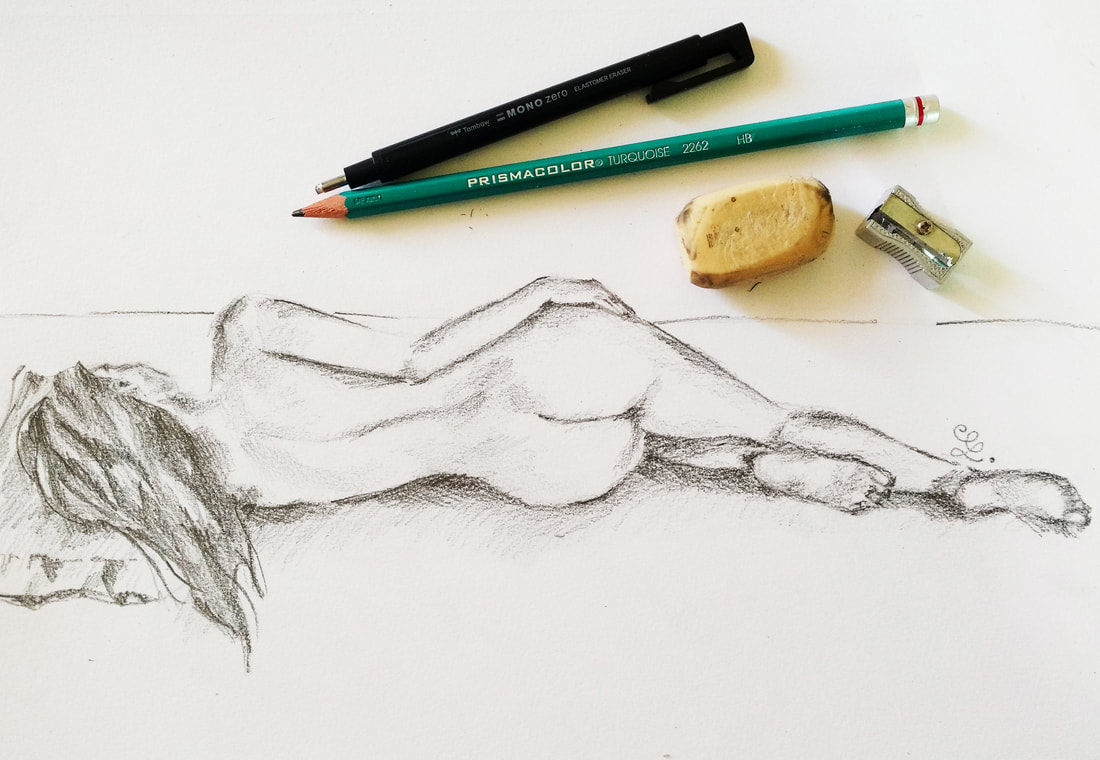
Pencil female figure study by Erika Lancaster
Pencil female figure study by Erika Lancaster

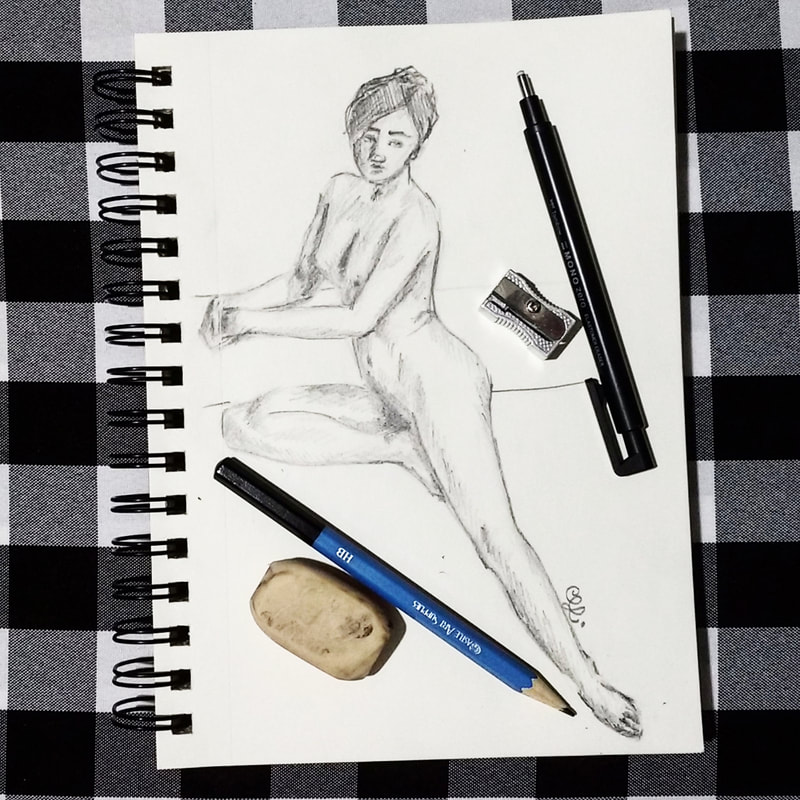
Pencil female figure study by Erika Lancaster

Pencil female figure study by Erika Lancaster
*This post contains affiliate links. I receive small commissions for purchases made through these links at no extra cost to you. These commissions help me keep this site up and running, in order for me to keep providing helpful and inspiring art content. :)
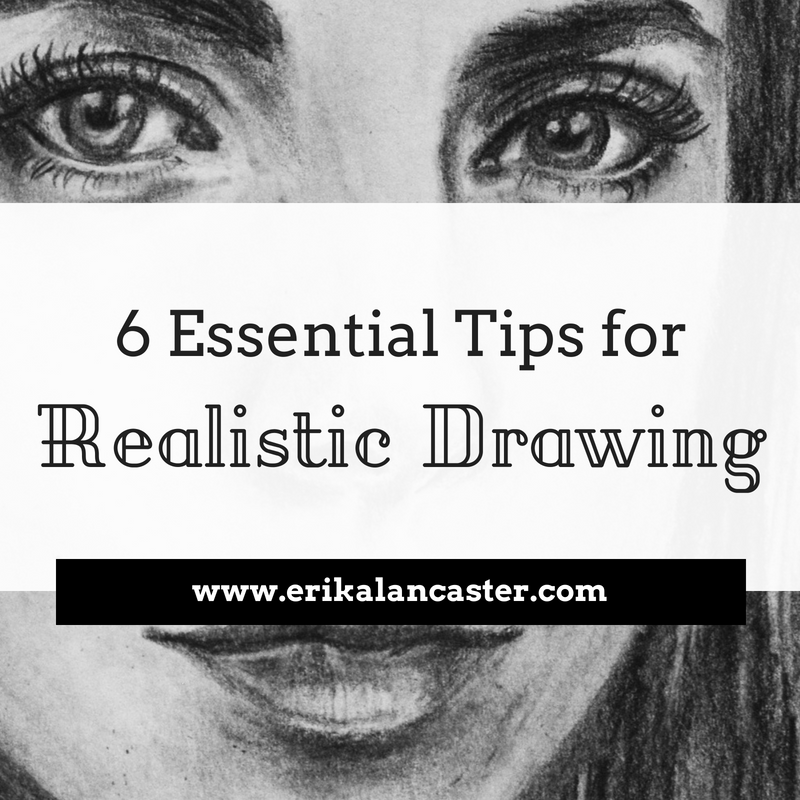
Do you feel your portrait drawings or paintings lack realism, even though you've thoroughly understood facial proportions and placement of elements within the head shape? Do you get stuck when trying to draw realistic eyes, noses, lips, or any other part of the face?
In this post, I'll be explaining why it's so important to study each facial feature in isolation when we're trying to improve our portrait drawing or painting skills. I will also be sharing how I personally like to create facial feature studies in my sketchbook.
Check out the video time-lapse included within this post to see me paint a few monochromatic/grayscale eye studies using black watercolor paint. In this YouTube video, I also share five essential things I make sure to keep in mind when creating realistic eyes.
Realistic eyes drawing with pencil. Sketchbook study by Erika Lancaster.
Why Study Facial Elements in Isolation?
Drawing a face is a complex process because, like any other part of the human anatomy, it is made up of so many different parts!
The large variety of expressions a face could have, as well as the positions the human head can be in, create an insane amount of variables that can make drawing a portrait very difficult.
Not to mention, there is an endless combination of face shapes and shapes/sizes of individual facial features!
This is why it's so important to take time to dissect and learn about each feature individually. If you're studying eyes, for example, take time to understand their different parts and make notes of important characteristics.
Look up videos and collect pictures in order to better understand how they are located within the human head, how they move/work and what kinds of shapes they can have.
By making time to analyze and draw eyes, noses, lips, and ears individually, you are not only improving your drawing skills, but preparing yourself to create more effective portraits later on. Not to mention, the process will be much less intimidating for you and you'll be able to work a lot faster.
Have you already studied the basics of facial proportions and how to draw facial elements in their simplest form? If you haven't, I highly recommend you check out my How to Draw a Face for Beginners blog post. In it, I share basic information on drawing portraits that you should grasp and practice before moving on to higher levels of realism.
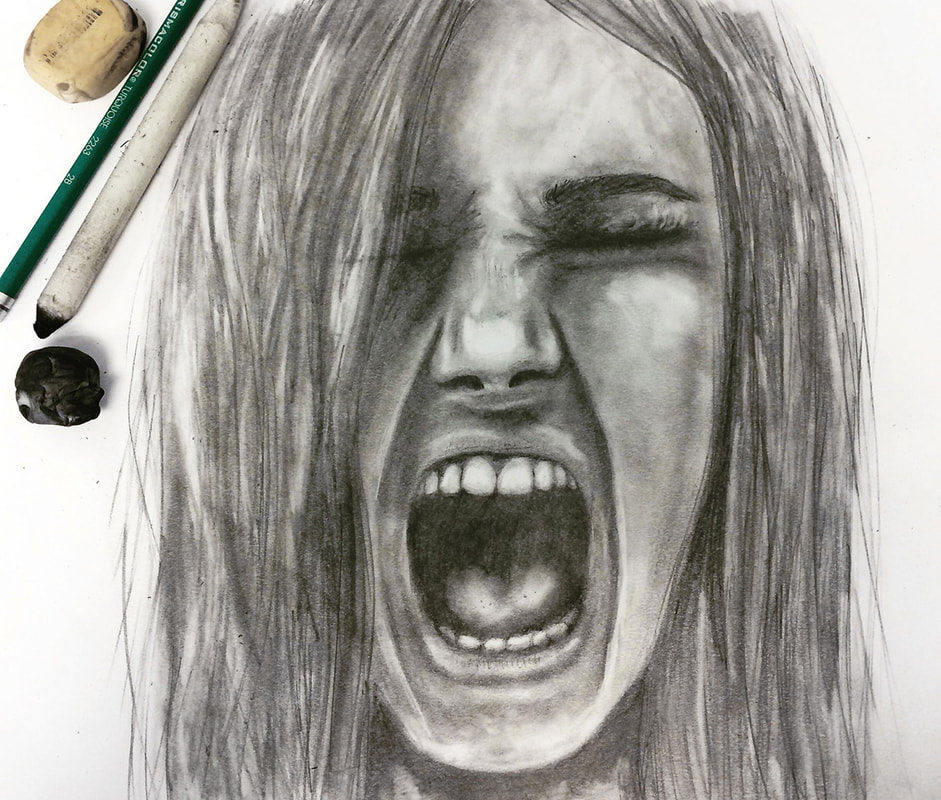
Girl screaming drawn with pencil by Erika Lancaster.
It's important to know that, even if you're not intending for your personal art style to be completely realistic, you should make time to study how things actually look like in real life. This knowledge and experience will give you a solid foundation to work off of and will enhance anything you decide to do later on.
I've written a couple of blog posts in the past that you should totally check out! If you're just starting to draw faces, I recommend my step-by-step tutorial titled How to Draw a Face (for Beginners).
If you've already understood basic facial proportions as well as location of facial features and are looking to start drawing faces in different angles, I totally recommend last week's blog post titled How to Effectively Draw Faces at a 3/4's Angle (My 4-Step Process and Practice Freebies).
If you enjoyed this video and found it helpful, make sure to subscribe to my YouTube channel. I share a brand new video every week with art tips, drawing and painting tutorials and mindset/productivity tips for artists. *Subscribe HERE*
My Method for Studying Facial Features
1. Collect high quality close-up photographs of the specific facial feature
I usually like creating anywhere from three to five studies in one sitting, but do whatever you can with the time you have. Collect good photographs to work from! A great tip is to pick images that include the facial feature at hand at different angles/perspectives, as well as in different types of lighting.
2. Prepare drawing or painting supplies
For my studies, I'm currently sticking with pencil and/or black watercolor. This allows me to focus on value placement, texture and form. I suggest bringing in color only after one has succeeded at achieving realism using grayscale or monochromatic schemes.
Practice using whatever drawing supplies you are already comfortable with, so that you can focus on studying the facial features, and not on practicing a specific technique. These are two different things!
I really believe that the most basic drawing supplies will get you far. You don't need anything fancy to create awesome-looking drawings. Here are a few of the drawing tools I use for my own drawings/sketches.
|
|
|
3. Take time to really observe each picture before starting
Pinpoint darkest and lightest areas, irregularities, as well as forms. Notice the shadows created by the different planes of the facial element. Take notes if this will help you remember these things as you're drawing or painting.
Check out my blog post titled My Favorite Free Image Sites to find beautiful, high quality reference images for your art!
4. Draw main shapes and lines using light pencil strokes
Now is not the time to move into any details. Focus on recreating the largest shapes and lines you see. When drawing an eye, for example, I start with the shape created by the visible part of the eyeball, then I move on to the pupil, iris, tear duct, and the general shape of the eyebrow (no hairs yet!).
Check out this past blog post on my step-by-step process for drawing eyes.
Also create the tiny shapes of white reflection that are almost always visible on the pupil and iris to remind yourself that they should be left white. The only line I draw at this point is the one created by the crease of the eyelid.

5. Develop your values
Create your values patiently and in layers of graphite. Constantly observe your reference picture and recreate what you're actually seeing. Don't guess!
You really don't want to exert much pressure on your paper at all, as this will lead to visible scratch marks that you won't be able to fix. By using the right pencil grades throughout the process (which I explain all about in my free Drawing Mini Course for the Total Beginner), you'll be able to develop dark values without having to press down much at all.
If you do use burnishing techniques, make sure to leave them until the very end.
Practice discerning between lightest, darkest and midtone areas in your image. If you're studying eyes, for example, one of the darkest areas is going to be the pupil and perhaps areas along the crease of the eyelid.
Make sure that you protect your lightest areas as best as you can when working on your values. If you're using pencil, it's very useful to have a good eraser at hand (preferably a thin one) in order to go back in at the end and lighten any areas that were darkened by accident. To learn about the types of erasers I personally use, visit my blog post titled My Favorite Art Supplies (So Far).
*If you decide to do these studies with watercolor, it's important to allow your layers to dry before continuing to add more details or darken certain areas. I love working on several sketches simultaneously so that I'm able to jump around and keep working while allowing another study to dry.
6. Create any final details
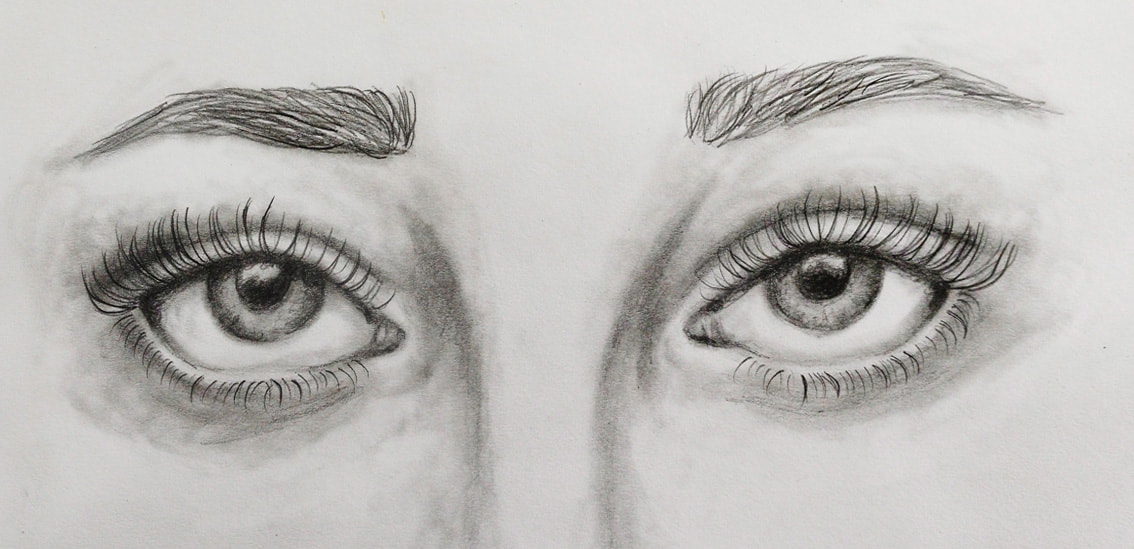
Leave the final details until the very end, once values have been effectively developed. In the case of drawing or painting eyes, it's very important to leave the eyelashes until the end! *Watch the video included in this post to learn tips about drawing eyelashes, as well as five essential things to have in mind when drawing eyes.
Check out this blog post that I've shared on How to Draw Realistic Hair.
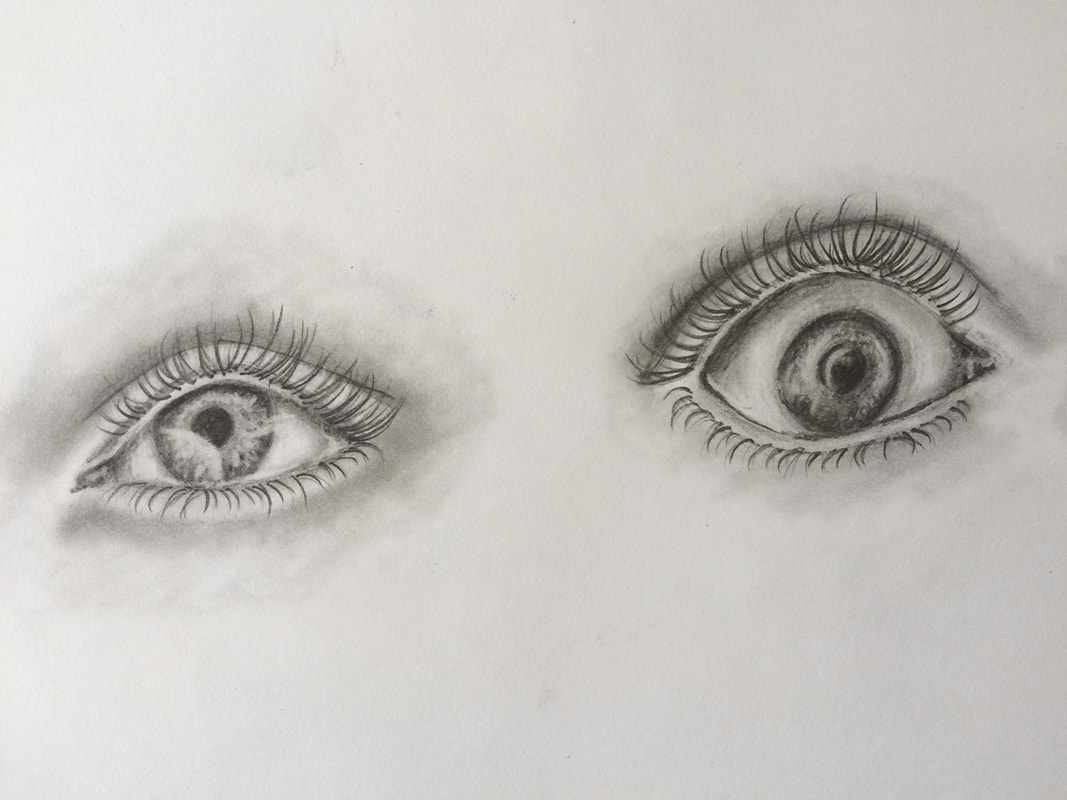
Pencil eye studies by Erika Lancaster.
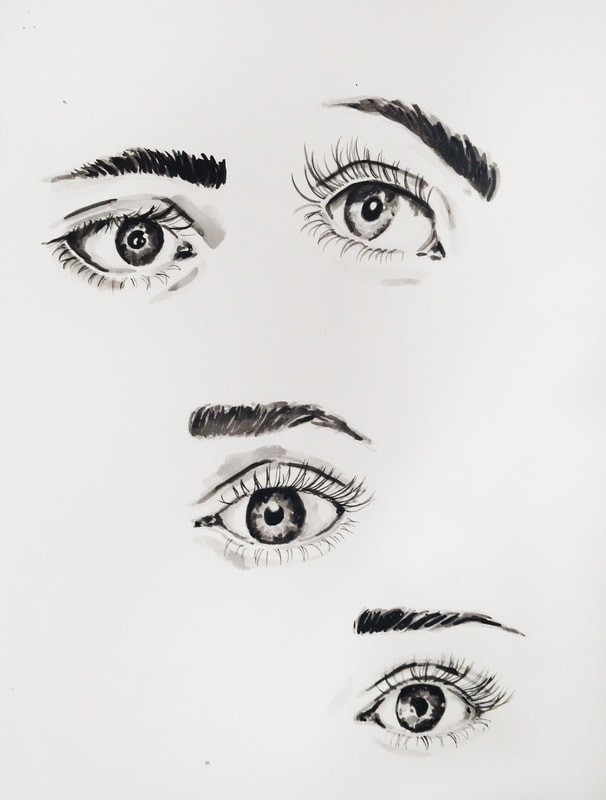
Watercolor eye studies by Erika Lancaster.
Which facial feature do you find most difficult to draw? For me it's noses! Let me know in the comments section below.

*This post contains affiliate links. I receive small commissions for purchases made through these links at no extra cost to you. These commissions help me keep this site up and running, in order for me to keep providing helpful and inspiring art content. :)
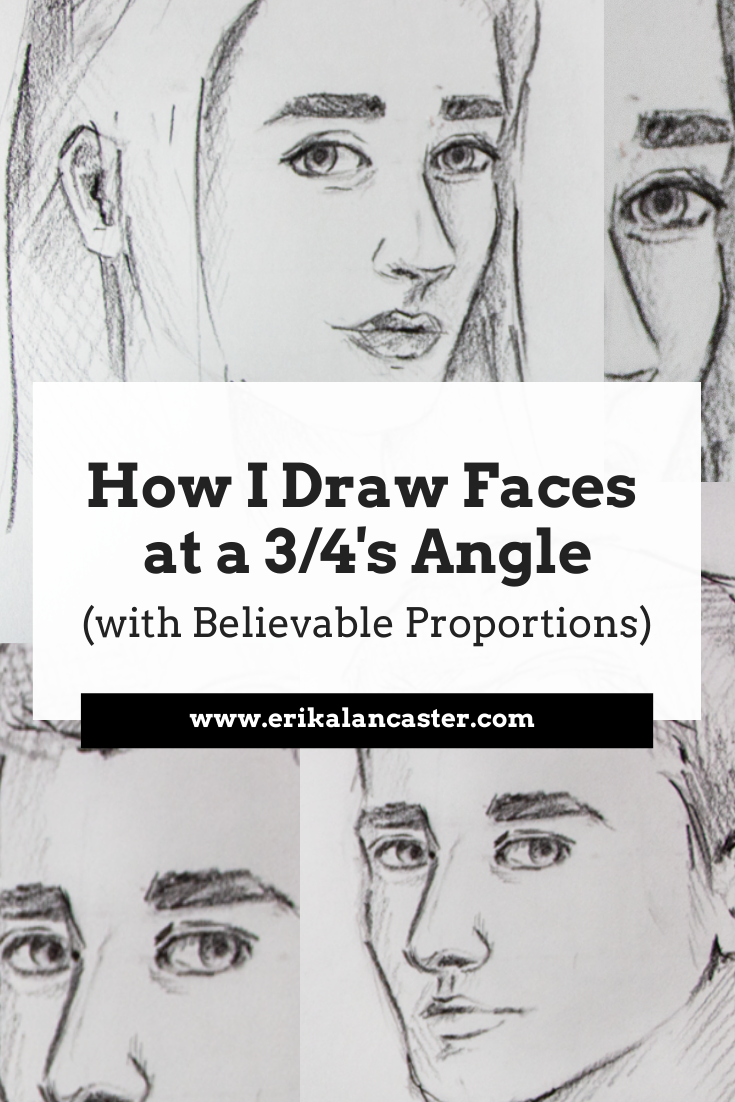
Are you getting a bit tired of always drawing stiff, flat faces looking forward? Would you like to start drawing faces at different angles but have no idea where to start? Do you frequently find something is a bit off when you finish your portrait drawings?
In this blog post/YouTube video I'll explain how I draw faces at a 3/4's angle and with believable proportions. In the video included in this post, I take you step-by-step through drawing a female and male face using Andrew Loomis's method, and below that, I provide a simple 4-step process for drawing faces using reference photos.
This is one of the most-used angles in both painting and photography portraiture and, in my opinion, its the best one to move on to after we've succeeded at drawing a completely forwards-facing face.
Not there yet? No worries! Check out my How to Draw a Simple Face Tutorial for Beginners blog post.
When we're looking to draw faces that are a bit more on the realistic side, it's imperative to start with an effective preliminary outline sketch that shows believable proportions and locations of different facial features within the head shape, before moving on to smaller details and shading.
Why?
Because that preliminary outline sketch is the foundation for everything else. No matter how amazing we may be at shading and texture techniques, if our proportions are off when we finish this first phase of our drawing, something will look off at the end.
We're going to be building on an unstable base.
This is why it's so important to devote enough time to our preliminary outline sketches, especially if we're looking to draw freehand (without tracing or using grids), and our objective is to create believable-looking portraits.
Drawing portraits is challenging!
The main reason being that what we see most everyday are the faces of those around us.
This means that most people, artists or not, will be able to notice if something is off when viewing a portrait, even if at first they can't pinpoint exactly what it is.
With a portrait drawing being off, I don't mean small differences in eye sizes or eyebrow shape. Human faces have natural imperfections and aren't 100% symmetric (most of the time).
What I'm referring to is the overall head shape and shapes of different facial features, proportion and location of facial elements within the head shape.
If you enjoyed this video and found it helpful, make sure to subscribe to my YouTube channel. I share a brand new video every week with art tips, drawing and painting tutorials and mindset/productivity tips for artists. *Subscribe HERE*
The Skull as the Underlying Structure of the Face
When an artist is trying to get better at drawing any part of the human anatomy, it's important to devote some time to studying its underlying structure.
Understanding what is underneath our skin will allow us to create more believable form and three-dimensionality in our artwork, which is key when trying to achieve any level of realism.
The structure beneath the face is....you guessed it! The skull!
Sorry to get a little morbid here, but let's take a moment to analyze the following images:

Skull picture 1
|

Skull picture 2
|
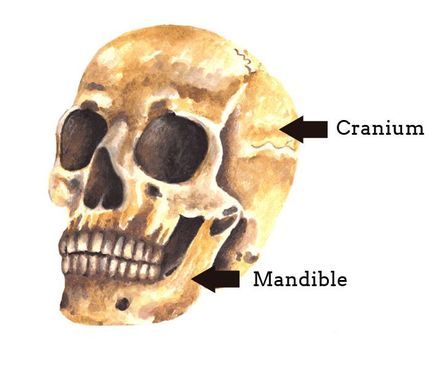
The human skull is made up of two separate parts, the cranium and the mandible. Notice the natural holes, and diverse nooks and crannies all over its structure. It's important to note that the cranium is not a perfect sphere and is composed out of lots of different planes!
And though artists usually start their portraits off by drawing a circle or an oval (depending on the perspective/angle of the head), this initial shape usually gets refined along the drawing process.
Observe the human skull and take note of its main characteristics:
-Large eye sockets (our eyes are placed deep within our heads)
-The mandible is connected to the cranium and is the only part of the skull that can move (aside from our eyeballs)
-Our teeth and the bones onto which they are attached actually jut out a bit, creating a curved effect where our lips usually fall
-Our brow bones and cheekbones create very visible bumps
-Our temples (sides of our heads) sink inwards
Watercolor skull study
|
I've made studies of skulls like this one to the left and have found them very helpful, as they've helped me gain an understanding of the nooks, crannies, bumps, holes, etc. throughout the skull. This knowledge of the different planes involved in the structure of the skull really helps when getting to the shading phase! |
As previously mentioned, most artists start off their portraits by creating simple shapes much like the ones below. These shapes and lines allow them to visualize where the facial elements will be placed.
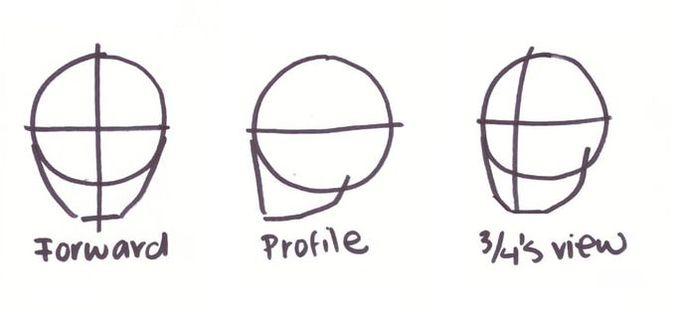
Quick head angle visualization
Understanding Basic Facial Proportions
While there is an incredibly vast array of face shapes, as well as shapes and sizes of individual facial elements (eyes, nose, lips, ears), it's very helpful to understand the basic proportions of a standard, adult face.
Once we succeed at this, we can slightly shift guidelines when we're trying to draw a specific person (ex. someone with a large forehead, a very wide mouth, wide-set eyes, etc.
Here are some important measurements to consider when drawing faces:
-The face can be divided into three equal parts if we measure from the hairline down to the chin (Part 1: Hair line to Eyebrow line / Part 2: Eyebrow line to Nose line / Part 3: Nose line to Chin line).
-The width of approximately five eyes should fit along the main horizontal line. It's important to make sure that the width of one eye fits in between both eyes to ensure they aren't too close together or too far apart. Placing approximately the width of one eye to either side is going to ensure that we don't make the eyes too large or too small, too.
-The hair line is below and not on or above the head shape
-We can use the inner corner of the eyes to define where the eyebrows should start and, if we bring two vertical lines downwards, they will also tell us where the curves of the nostrils should end.
-The lower part of the face (from end of the nose to tip of the chin) can also be divided into three parts. The first tick mark placed within this area will be where we draw the opening of the mouth. *See video tutorial included.
-The ears start at the eyebrow line and end at the nose line.
So how does this information translate into a head at a 3/4's angle?
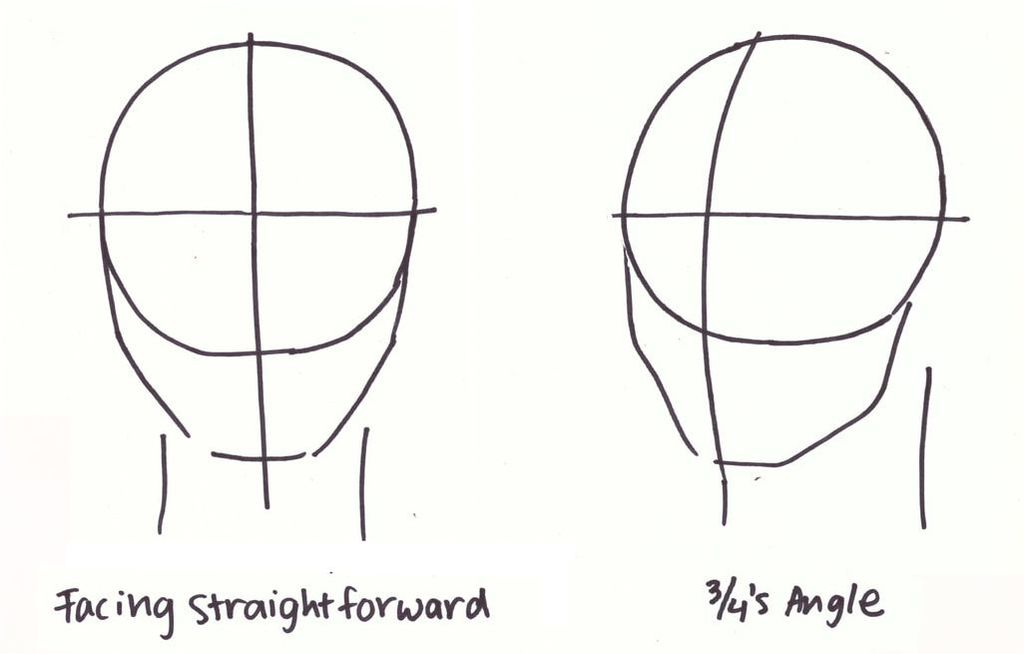
Simple map of a forward-facing head compared to a head at 3/4's angle.
In a sense, we are distorting facial proportions when drawing a face at an angle. We are no longer looking to create symmetry, as we usually do when drawing someone facing forward.
We are now dealing with certain levels of foreshortening, depending on the angle of the head and what perspective we're seeing it in.
When viewing a face at a 3/4's angle, we are able to see much more of one side of the face than the other. We are able to see one eye completely, but perhaps only part of the other one.
Usually the eye on the side opposite to us is at least a tiny bit smaller! We're able to clearly see one half of the person's nose and mouth. All this means we have to be able to draw believable facial elements that are skewed.
Something I'd highly recommend is making time to observe reference photos and what faces look like in real life from different angles. It's essential to take in information from these places if we're looking to improve the sense of realism in our work.
Here are some (very) basic ways to draw facial elements in both forward-facing and 3/4's angles:
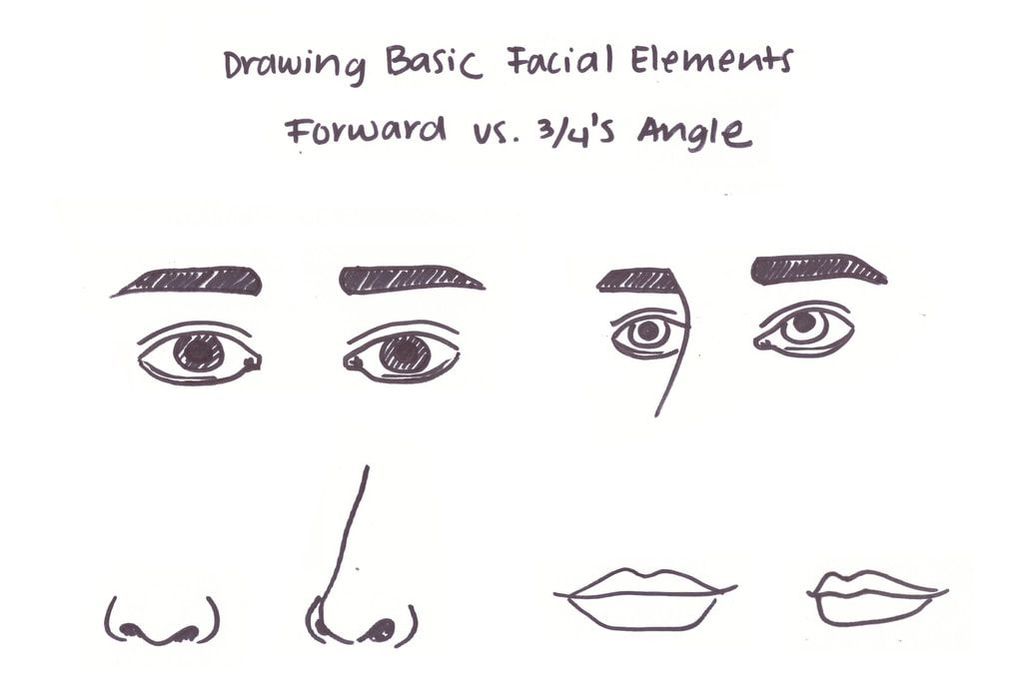
How to draw simple facial elements. Forward vs. 3/4's angle.
Check out my FREE Patreon-exclusive tutorial and class samples here!
Supplies
-Pencils (I recommend HB-4B)
-Eraser
-Quality reference pictures (you can use your computer or print them out)
-Paper or sketchbook
*Optional: Tracing paper
Supplies
-Pencils (I recommend HB-4B)
-Eraser
-Quality reference pictures (you can use your computer or print them out)
-Paper or sketchbook
*Optional: Tracing paper
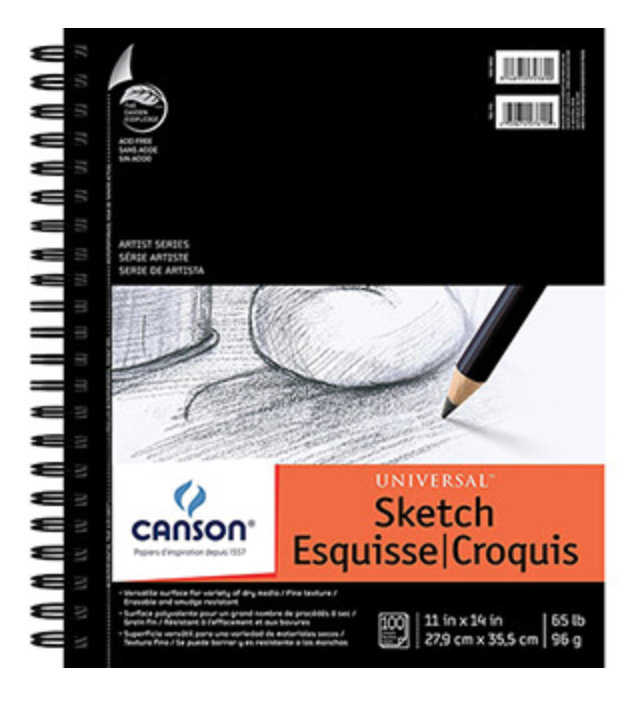
Canson Spiral-bound Sketchbook 11 x 14 inches 100 sheets $9.72
|
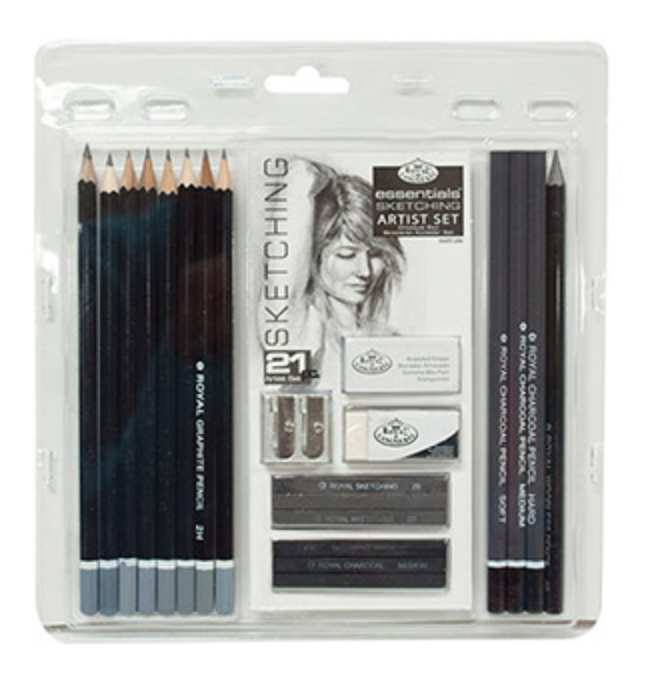
Royal & Langnickel Essentials Sketching Art Set - 21 Pieces $4.31
|
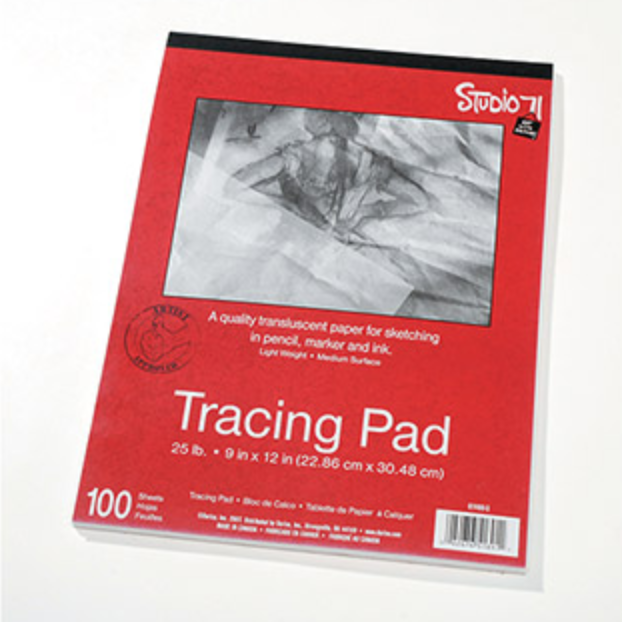
Studio 71 Tracing Paper - 9 x 12 inches $2.70
|
4-Step Process Using Reference Photos
1. Find a quality picture to use as reference
I thoroughly recommend using reference photos when starting to draw portraits. Even if you're not intending to create a full-on realistic representation of the person in the image, having a reference will give you a solid foundation to work from.
It's always awesome to take your own pictures to use as references, so never hesitate to take a photo of your own face to study from!
Really observe your reference image and compare the facial elements with each other in terms of size and shape. Notice the distance between them and where they rest on the head structure.
Compare one side of the person's face with the other and pinpoint differences. Pay attention to the silhouette created by the brow bone and cheekbone of the side opposite to us.
Analyze the shapes of the eyes, the nose, mouth and ears, as well as those created by the shadows within the picture.
For the purpose of this tutorial I will be using the following two images found at Pexels and Unsplash. If you wish to use them, simply click on the photos to get to their original sources and download from there.
Pexels, Unsplash and Pixabay are great options if you need free quality images to use as references for your artwork. To find a list of my favorite free image sites visit my blog post My Favorite Free Image Sites & Two Examples of References with Finished Illustrations.
Female portrait at 3/4's angle.
|

Male portrait at 3/4's angle.
|
2. Create your initial face 'map'
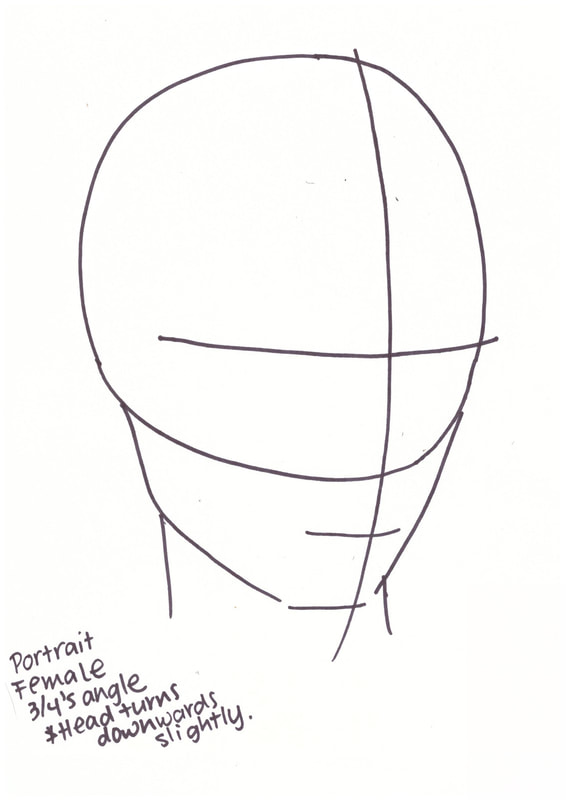
Female portrait at 3/4's head map.
|
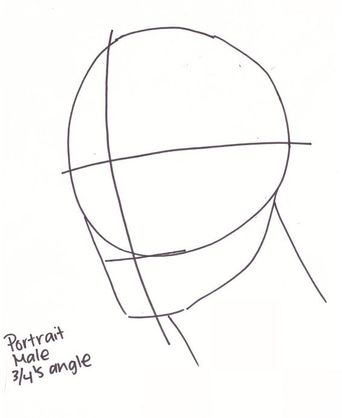
Male portrait at 3/4's head map.
|
Using the information you already know about facial proportions and locations of facial elements, create a 'map' using vertical and horizontal lines. Usually, these lines are going to be slightly curved, as opposed to the straight lines created when drawing a map for a forward-facing portrait.
It'll depend on whether the person is looking slightly upwards or downwards.
If you take a moment to observe the image of the woman I used, you'll notice that her chin is pointed slightly inwards. This was probably a deliberate choice made by the photographer, as it emphasizes her eyes and makes them seem bigger.
Even though the photograph is cut and we can't see the top of her head entirely, there is a bit of foreshortening happening for sure! We are able to see more of the top of her head when compared to the picture of the man, who has more of a leveled head.
*If this is your first time drawing a face at an angle, I highly recommend printing out your reference photo (preferably letter-sized) and using a piece of tracing paper to create your face map, then transferring it to the paper you'll be drawing on.
3. Start placing individual facial elements
Once your face map is set, start drawing your eyes, nose and mouth lightly (this will allow you to erase mistakes). I usually start with the eyes because they fall in the center of the face and allow me to visualize the other facial elements.
Look at your reference photo constantly and try to replicate the shapes you see. Drawing eyes, noses and lips on heads at different angles is a lot harder than drawing them on a head that is facing straight forward. This is why practicing individual face elements is so important!
As previously stated, the elements on one side of the face are going to look different from the ones on the other side. We are no longer trying to create perfect symmetry! However, they do have to look like they are all part of the same face.
Draw lightly and don't get discouraged if you need to erase a lot. The following image will help you get an idea of how to draw eyes, noses, lips and eyebrows at a 3/4's angle. At this point, focus on achieving adequate shape, size and proportion. Don't even think about starting with your shading yet!

*I love using a desk easel when drawing so that my surface angle is more similar to the angle of the image I'm looking at. When I draw faces on flat, horizontal surfaces, I often find that my drawings end up distorted! If you're having this problem, I can't recommend a desk easel enough.
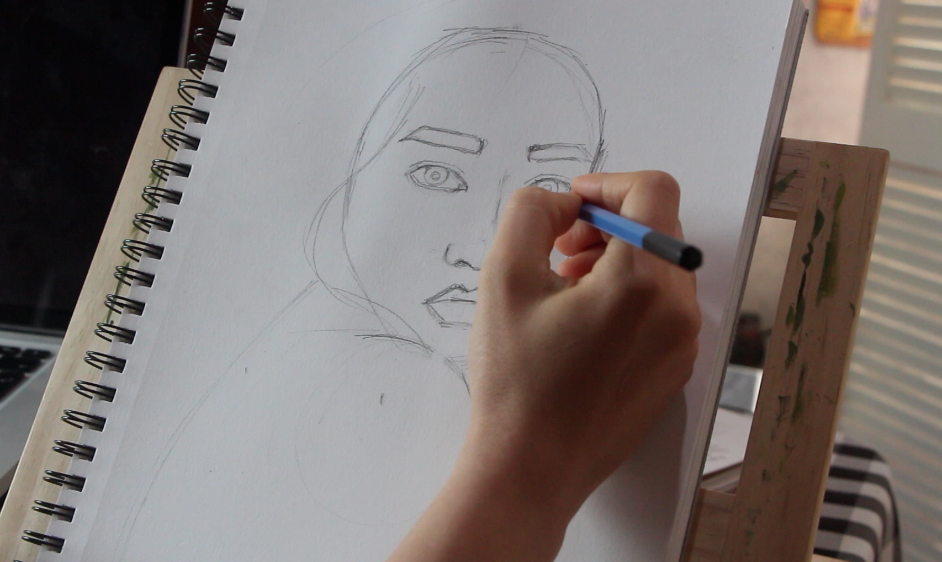
Drawing on my desk easel.
4. Once your initial sketch is set, move on to shading
Take a final look at your initial outline sketch and make sure that the location and proportion of facial elements looks correct. Don't worry about your drawing not looking like the person in the picture, just focus on making things look believable.
Afterwards, decide how you will be creating your tonal range throughout your drawing. To learn about crosshatching and other ways to create shadows/values in your drawings, visit my blog post titled Guide to Shading Techniques: Hatching, Cross-Hatching, Scribbling and Others.
Having a picture to work from provides you with a solid reference of where to place your darks, lights and mid-tones which will later lead to believable form and three-dimensionality.
Pay close attention to your reference image. If you're having trouble discerning lights from darks, I recommend opening the image in a photo-editing software and desaturating it so that you're working only with grayscale.
Personally, I enjoy the sketchy/unfinished look, but this final step is where your personal style comes in. I love to create values using hatching and crosshatching, and give a lot more emphasis to the face than I do to the hair or anything else, which is were I want to draw the viewer's attention towards.
Take your drawings as far as you'd like and remember to have fun with it!


www.erikalancaster.com
is a participant in the Amazon Services LLC Associates Program, an affiliate advertising program designed to provide a means for sites
to earn advertising fees by advertising and linking to amazon.com.
www.erikalancaster.com
is a participant in the Shareasale.com Affiliate Program, an affiliate advertising program designed to provide a means for sites to earn advertising fees by advertising and linking to Shareasale.com partner companies.
 RSS Feed
