*This post contains affiliate links. I receive small commissions for purchases made through these links at no extra cost to you. These commissions help me keep this site up and running, in order for me to keep providing helpful and inspiring art content. :)
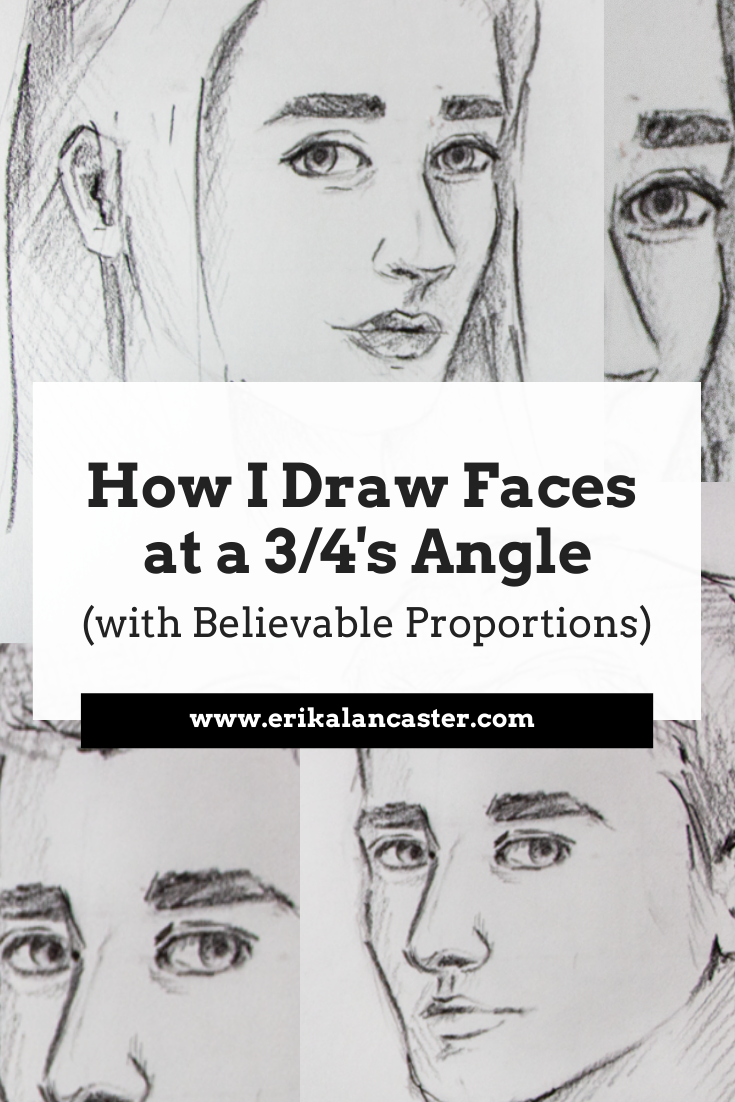
Are you getting a bit tired of always drawing stiff, flat faces looking forward? Would you like to start drawing faces at different angles but have no idea where to start? Do you frequently find something is a bit off when you finish your portrait drawings? In this blog post/YouTube video I'll explain how I draw faces at a 3/4's angle and with believable proportions. In the video included in this post, I take you step-by-step through drawing a female and male face using Andrew Loomis's method, and below that, I provide a simple 4-step process for drawing faces using reference photos. This is one of the most-used angles in both painting and photography portraiture and, in my opinion, its the best one to move on to after we've succeeded at drawing a completely forwards-facing face. Not there yet? No worries! Check out my How to Draw a Simple Face Tutorial for Beginners blog post. When we're looking to draw faces that are a bit more on the realistic side, it's imperative to start with an effective preliminary outline sketch that shows believable proportions and locations of different facial features within the head shape, before moving on to smaller details and shading. Why? Because that preliminary outline sketch is the foundation for everything else. No matter how amazing we may be at shading and texture techniques, if our proportions are off when we finish this first phase of our drawing, something will look off at the end. We're going to be building on an unstable base. This is why it's so important to devote enough time to our preliminary outline sketches, especially if we're looking to draw freehand (without tracing or using grids), and our objective is to create believable-looking portraits. Drawing portraits is challenging! The main reason being that what we see most everyday are the faces of those around us. This means that most people, artists or not, will be able to notice if something is off when viewing a portrait, even if at first they can't pinpoint exactly what it is. With a portrait drawing being off, I don't mean small differences in eye sizes or eyebrow shape. Human faces have natural imperfections and aren't 100% symmetric (most of the time). What I'm referring to is the overall head shape and shapes of different facial features, proportion and location of facial elements within the head shape.
If you enjoyed this video and found it helpful, make sure to subscribe to my YouTube channel. I share a brand new video every week with art tips, drawing and painting tutorials and mindset/productivity tips for artists. *Subscribe HERE*
|
|
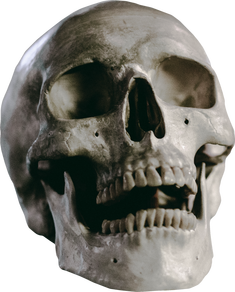
Skull picture 1
|
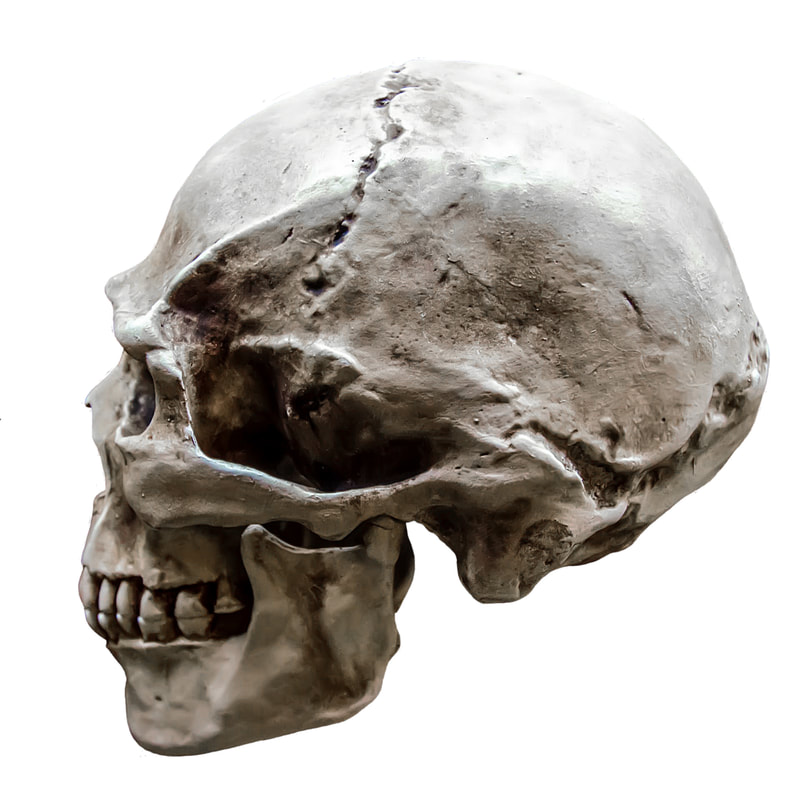
Skull picture 2
|
The human skull is made up of two separate parts, the cranium and the mandible. Notice the natural holes, and diverse nooks and crannies all over its structure. It's important to note that the cranium is not a perfect sphere and is composed out of lots of different planes!
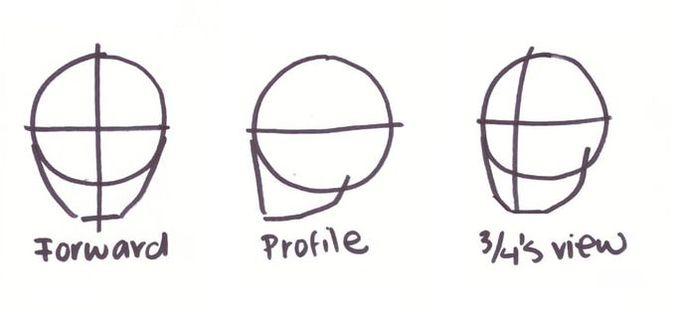
And though artists usually start their portraits off by drawing a circle or an oval (depending on the perspective/angle of the head), this initial shape usually gets refined along the drawing process.
Observe the human skull and take note of its main characteristics:
-Large eye sockets (our eyes are placed deep within our heads)
-The mandible is connected to the cranium and is the only part of the skull that can move (aside from our eyeballs)
-Our teeth and the bones onto which they are attached actually jut out a bit, creating a curved effect where our lips usually fall
-Our brow bones and cheekbones create very visible bumps
-Our temples (sides of our heads) sink inwards
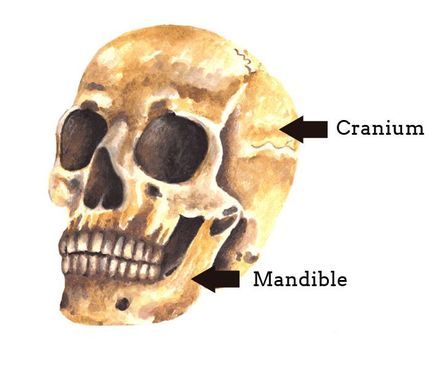
Watercolor skull study
|
I've made studies of skulls like this one to the left and have found them very helpful, as they've helped me gain an understanding of the nooks, crannies, bumps, holes, etc. throughout the skull. This knowledge of the different planes involved in the structure of the skull really helps when getting to the shading phase! |
As previously mentioned, most artists start off their portraits by creating simple shapes much like the ones below. These shapes and lines allow them to visualize where the facial elements will be placed.
Understanding Basic Facial Proportions
While there is an incredibly vast array of face shapes, as well as shapes and sizes of individual facial elements (eyes, nose, lips, ears), it's very helpful to understand the basic proportions of a standard, adult face.
Once we succeed at this, we can slightly shift guidelines when we're trying to draw a specific person (ex. someone with a large forehead, a very wide mouth, wide-set eyes, etc.
Here are some important measurements to consider when drawing faces:
-The face can be divided into three equal parts if we measure from the hairline down to the chin (Part 1: Hair line to Eyebrow line / Part 2: Eyebrow line to Nose line / Part 3: Nose line to Chin line).
-The width of approximately five eyes should fit along the main horizontal line. It's important to make sure that the width of one eye fits in between both eyes to ensure they aren't too close together or too far apart. Placing approximately the width of one eye to either side is going to ensure that we don't make the eyes too large or too small, too.
-The hair line is below and not on or above the head shape
-We can use the inner corner of the eyes to define where the eyebrows should start and, if we bring two vertical lines downwards, they will also tell us where the curves of the nostrils should end.
-The lower part of the face (from end of the nose to tip of the chin) can also be divided into three parts. The first tick mark placed within this area will be where we draw the opening of the mouth. *See video tutorial included.
-The ears start at the eyebrow line and end at the nose line.
So how does this information translate into a head at a 3/4's angle?
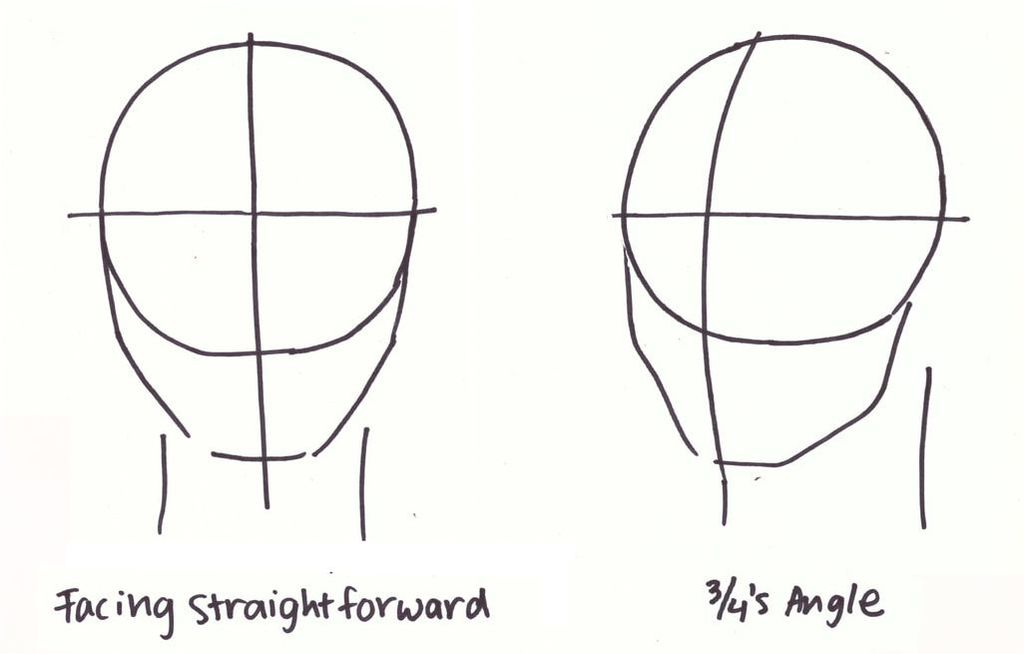
In a sense, we are distorting facial proportions when drawing a face at an angle. We are no longer looking to create symmetry, as we usually do when drawing someone facing forward.
We are now dealing with certain levels of foreshortening, depending on the angle of the head and what perspective we're seeing it in.
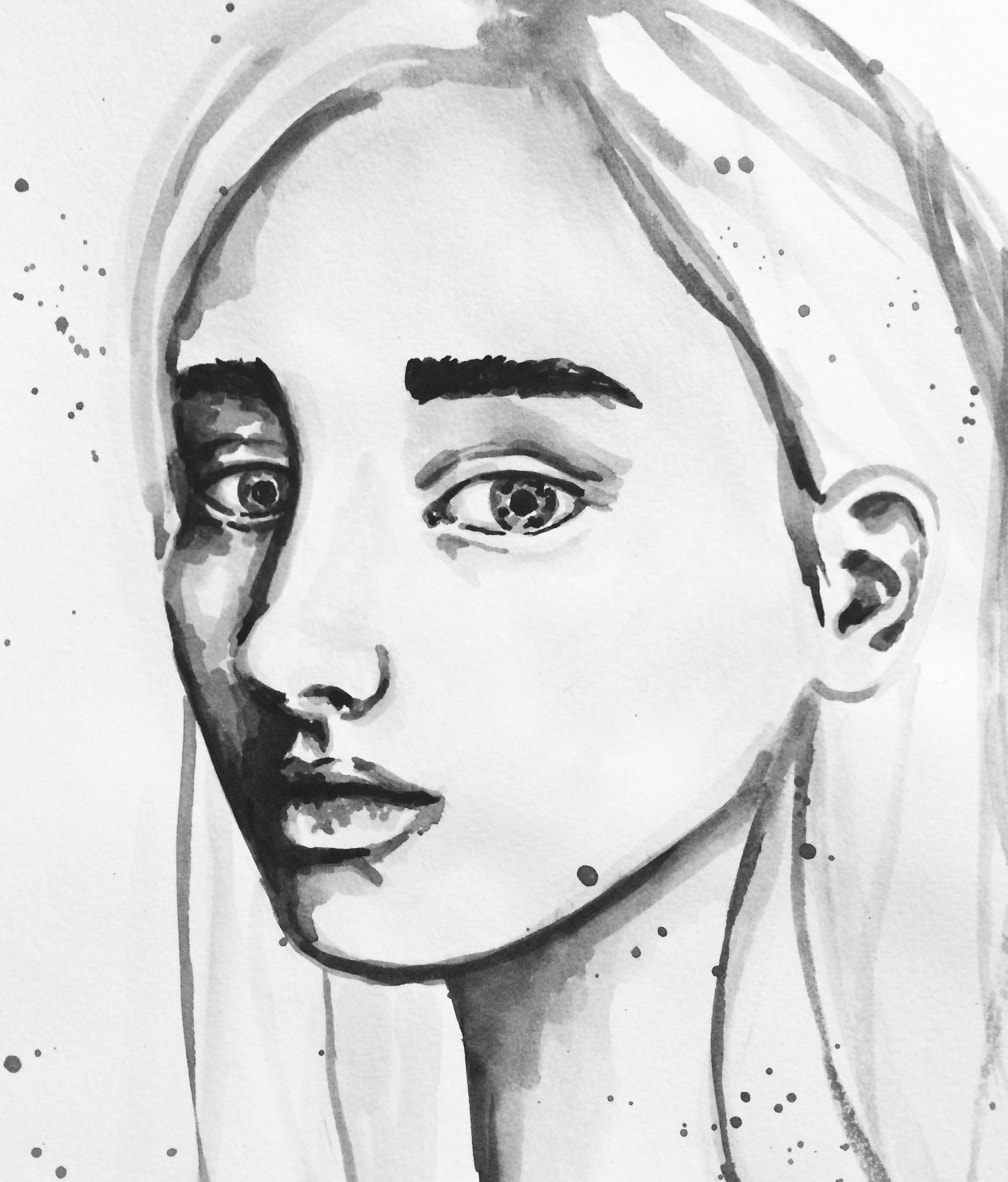
When viewing a face at a 3/4's angle, we are able to see much more of one side of the face than the other. We are able to see one eye completely, but perhaps only part of the other one.
Usually the eye on the side opposite to us is at least a tiny bit smaller! We're able to clearly see one half of the person's nose and mouth. All this means we have to be able to draw believable facial elements that are skewed.
Something I'd highly recommend is making time to observe reference photos and what faces look like in real life from different angles. It's essential to take in information from these places if we're looking to improve the sense of realism in our work.
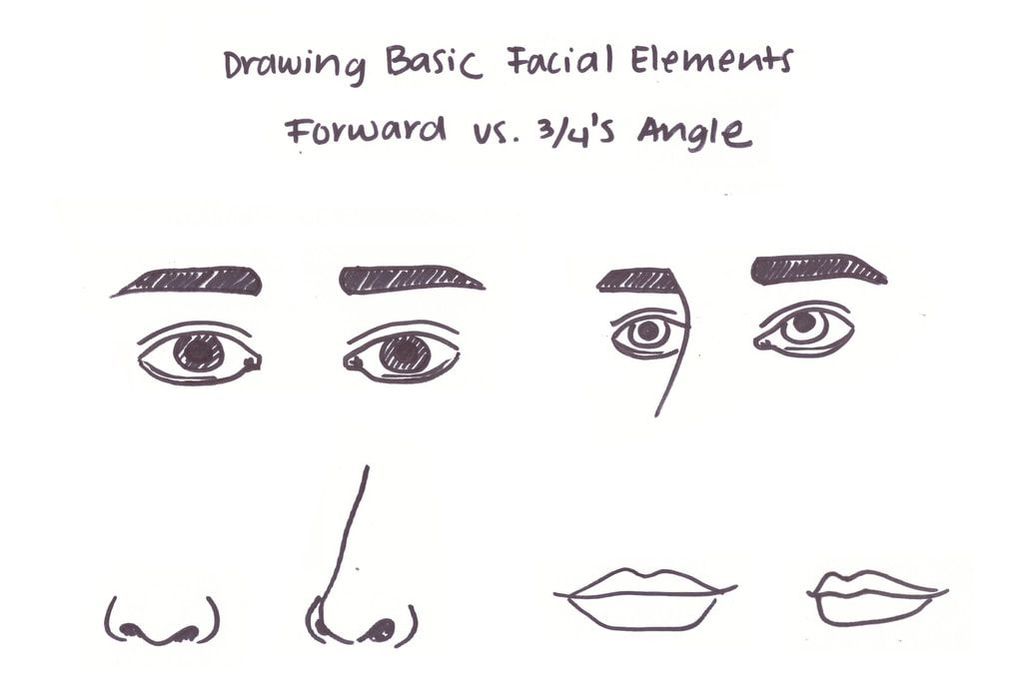
Here are some (very) basic ways to draw facial elements in both forward-facing and 3/4's angles:

Supplies
-Pencils (I recommend HB-4B)
-Eraser
-Quality reference pictures (you can use your computer or print them out)
-Paper or sketchbook
*Optional: Tracing paper

Prismacolor Premier Turquoise Drawing Pencil Set

Tombow Mono Zero Eraser
|

Strathmore 9x12" Sketchbook

Milan Soft Graphite Erasers
|
4-Step Process Using Reference Photos
1. Find a quality picture to use as reference
I thoroughly recommend using reference photos when starting to draw portraits. Even if you're not intending to create a full-on realistic representation of the person in the image, having a reference will give you a solid foundation to work from.
It's always awesome to take your own pictures to use as references, so never hesitate to take a photo of your own face to study from!
Really observe your reference image and compare the facial elements with each other in terms of size and shape. Notice the distance between them and where they rest on the head structure.
Compare one side of the person's face with the other and pinpoint differences. Pay attention to the silhouette created by the brow bone and cheekbone of the side opposite to us.
Analyze the shapes of the eyes, the nose, mouth and ears, as well as those created by the shadows within the picture.
For the purpose of this tutorial I will be using the following two images found at Pexels and Unsplash. If you wish to use them, simply click on the photos to get to their original sources and download from there.
Pexels, Unsplash and Pixabay are great options if you need free quality images to use as references for your artwork. To find a list of my favorite free image sites visit my blog post My Favorite Free Image Sites & Two Examples of References with Finished Illustrations.
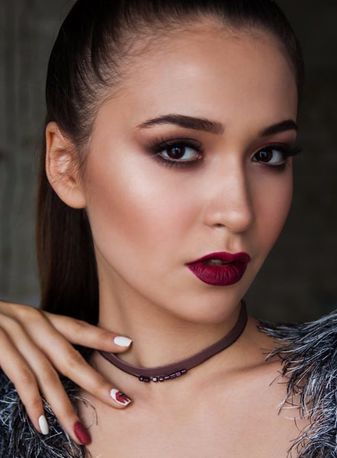
Female portrait at 3/4's angle.
|

Male portrait at 3/4's angle.
|
2. Create your initial face 'map'
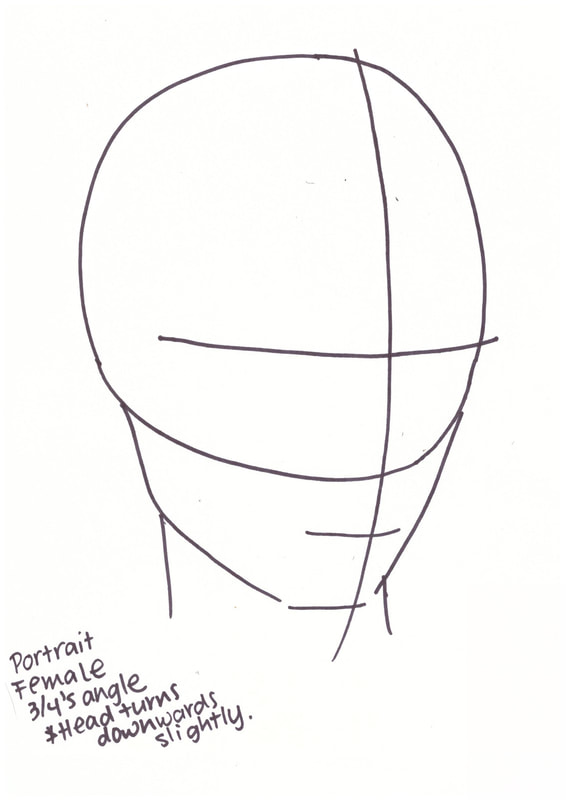
Female portrait at 3/4's head map.
|
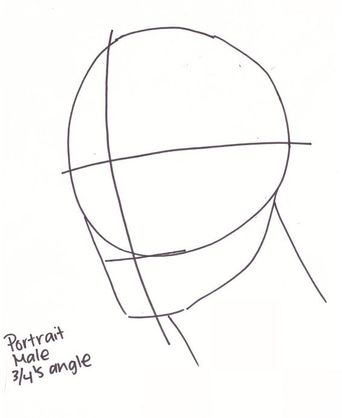
Male portrait at 3/4's head map.
|
Using the information you already know about facial proportions and locations of facial elements, create a 'map' using vertical and horizontal lines. Usually, these lines are going to be slightly curved, as opposed to the straight lines created when drawing a map for a forward-facing portrait.
It'll depend on whether the person is looking slightly upwards or downwards.
If you take a moment to observe the image of the woman I used, you'll notice that her chin is pointed slightly inwards. This was probably a deliberate choice made by the photographer, as it emphasizes her eyes and makes them seem bigger.
Even though the photograph is cut and we can't see the top of her head entirely, there is a bit of foreshortening happening for sure! We are able to see more of the top of her head when compared to the picture of the man, who has more of a leveled head.
*If this is your first time drawing a face at an angle, I highly recommend printing out your reference photo (preferably letter-sized) and using a piece of tracing paper to create your face map, then transferring it to the paper you'll be drawing on.
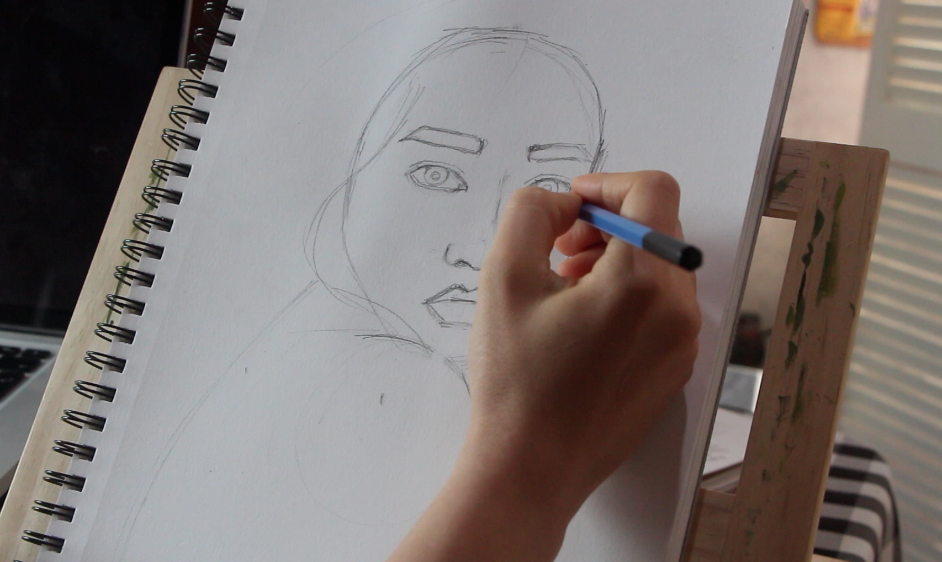
3. Start placing individual facial elements
Once your face map is set, start drawing your eyes, nose and mouth lightly (this will allow you to erase mistakes). I usually start with the eyes because they fall in the center of the face and allow me to visualize the other facial elements.
Look at your reference photo constantly and try to replicate the shapes you see. Drawing eyes, noses and lips on heads at different angles is a lot harder than drawing them on a head that is facing straight forward. This is why practicing individual face elements is so important!
As previously stated, the elements on one side of the face are going to look different from the ones on the other side. We are no longer trying to create perfect symmetry! However, they do have to look like they are all part of the same face.
Draw lightly and don't get discouraged if you need to erase a lot. The following image will help you get an idea of how to draw eyes, noses, lips and eyebrows at a 3/4's angle. At this point, focus on achieving adequate shape, size and proportion. Don't even think about starting with your shading yet!

*I love using a desk easel when drawing so that my surface angle is more similar to the angle of the image I'm looking at. When I draw faces on flat, horizontal surfaces, I often find that my drawings end up distorted! If you're having this problem, I can't recommend a desk easel enough.
4. Once your initial sketch is set, move on to shading
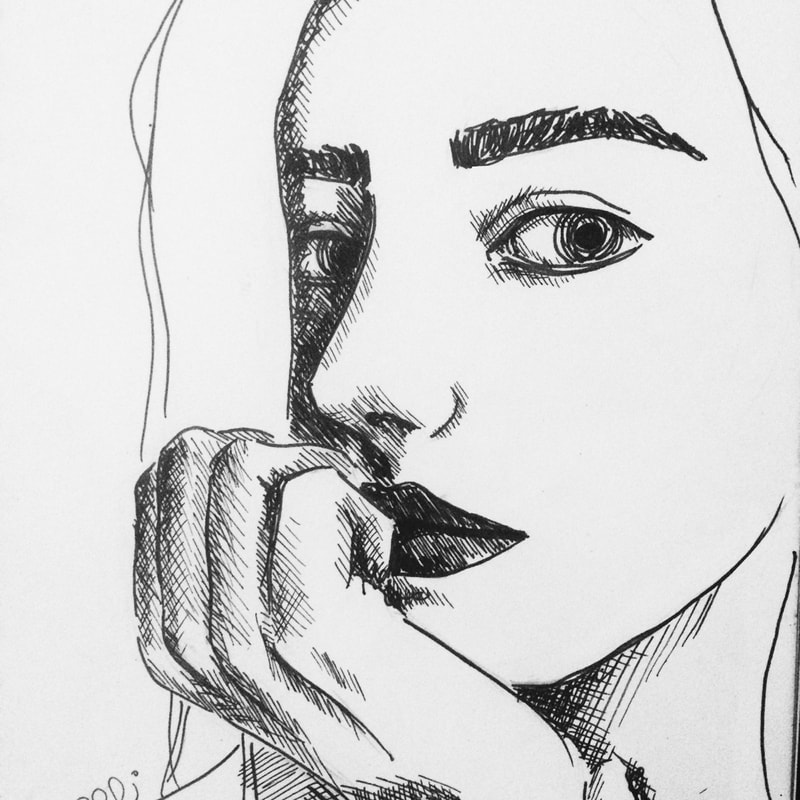
Take a final look at your initial outline sketch and make sure that the location and proportion of facial elements looks correct. Don't worry about your drawing not looking like the person in the picture, just focus on making things look believable.
Afterwards, decide how you will be creating your tonal range throughout your drawing. To learn about crosshatching and other ways to create shadows/values in your drawings, visit my blog post titled Guide to Shading Techniques: Hatching, Cross-Hatching, Scribbling and Others.
Having a picture to work from provides you with a solid reference of where to place your darks, lights and mid-tones which will later lead to believable form and three-dimensionality.
Pay close attention to your reference image. If you're having trouble discerning lights from darks, I recommend opening the image in a photo-editing software and desaturating it so that you're working only with grayscale.
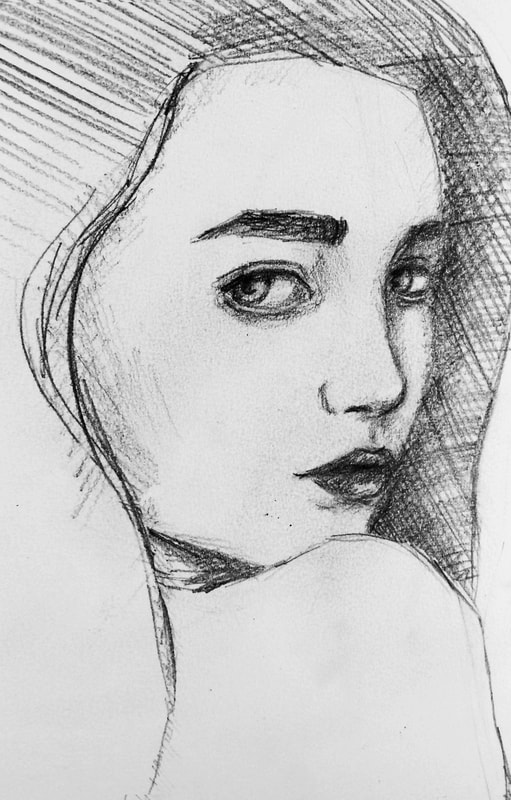
Personally, I enjoy the sketchy/unfinished look, but this final step is where your personal style comes in. I love to create values using hatching and crosshatching, and give a lot more emphasis to the face than I do to the hair or anything else, which is were I want to draw the viewer's attention towards.
Take your drawings as far as you'd like and remember to have fun with it!


thanks this is useful.
I'm glad this was helpful, Ian!
Have a great day! :)
Hi Mike,
I'm glad you find my post useful. :)
Let me know how your drawing practice goes!
Your anecdotes and processes are just what I needed to give me the push to get serious about my art. I'm in my 70th decade and up until now haven't given myself credit for my latent abilities. I still can't get used to drawing something and it really looks like my inspiration. LOL. I recently took up watercolor painting and of course drawing is very important. Just wanted to say that you have inspired me to buckle down and work. Of course it's also pleasure when it's what you really love to do.
Thank you, Mary
Hi Mary,
Your words truly make me want to keep doing what I'm doing! It made me SO, incredibly happy to hear that you've finally decided to give importance to your abilities and passions. :)
How is your watercolor painting going? I'd love to know what you're finding enjoyable about the process, what kinds of subjects you like painting most, as well as any difficulties you may be having!
Please do keep in touch!
Hi Manasi,
You're so right! Eyes are so expressive!
I love drawing and painting eyes for this reason, too.
I also find hands very interesting and expressive.
I'm so glad to hear you found this blog post helpful. :)
Thanks so much for visiting and taking time to comment.
Have a fantastic week!
Erika
Thanks Erika, I love your videos, your style of teaching is great and really encouraging, I've always had trouble with faces, when I put figures in any of my drawings or paintings I always place them facing away but watching your lessons has given me the urge to really have a go again. Now with your help, hopefully I can make some serious improvements.
Thanks again, Gary
Hi, Gary!
Thank you so much for checking out this blog post and taking time to leave a comment. It means the world and it makes me so happy to hear that you've found my content helpful/inspiring.
Please feel free to e-mail me your portrait sketches/drawings if you'd like any feedback. :)
[email protected]
Also, if you haven't become an email subscriber, and you'd like to receive a couple of emails a me a month with helpful content, as well as a free calendars featuring my watercolor illustrations and opportunities to win free one-on-one classes: https://pages.convertkit.com/d32ef80353/80b2afa85f
I wish you tons of progress and enjoyment in your artistic journey.
Much love,
Erika
Would you happen to have one for bodies in general like other limbs and torsos at a 3/4 angle?
Hi Ian,
Thanks so much for popping by and checking this one out.
I don't! But I've written the topic down in my list for future posts to create.
If you're into figure drawing, I'd highly recommend checking out Draw With Jazza or Stan Prokopenko's channels over on YouTube. They are super helpful. :)
Wish you a lovely weekend,
Erika
Thank you evika it's very simple easy to learn for beginners
Hey, there!
Thanks so much for reading. :)
Glad you liked it.
Wish you a lovely day,
Erika
Leave a Reply.


is a participant in the Amazon Services LLC Associates Program, an affiliate advertising program designed to provide a means for sites
to earn advertising fees by advertising and linking to amazon.com.
www.erikalancaster.com
is a participant in the Shareasale.com Affiliate Program, an affiliate advertising program designed to provide a means for sites to earn advertising fees by advertising and linking to Shareasale.com partner companies.
 RSS Feed
