*This post contains affiliate links. I receive small commissions for purchases made through these links at no extra cost to you. These commissions help me keep this site up and running, in order for me to keep providing helpful and inspiring art content. :)
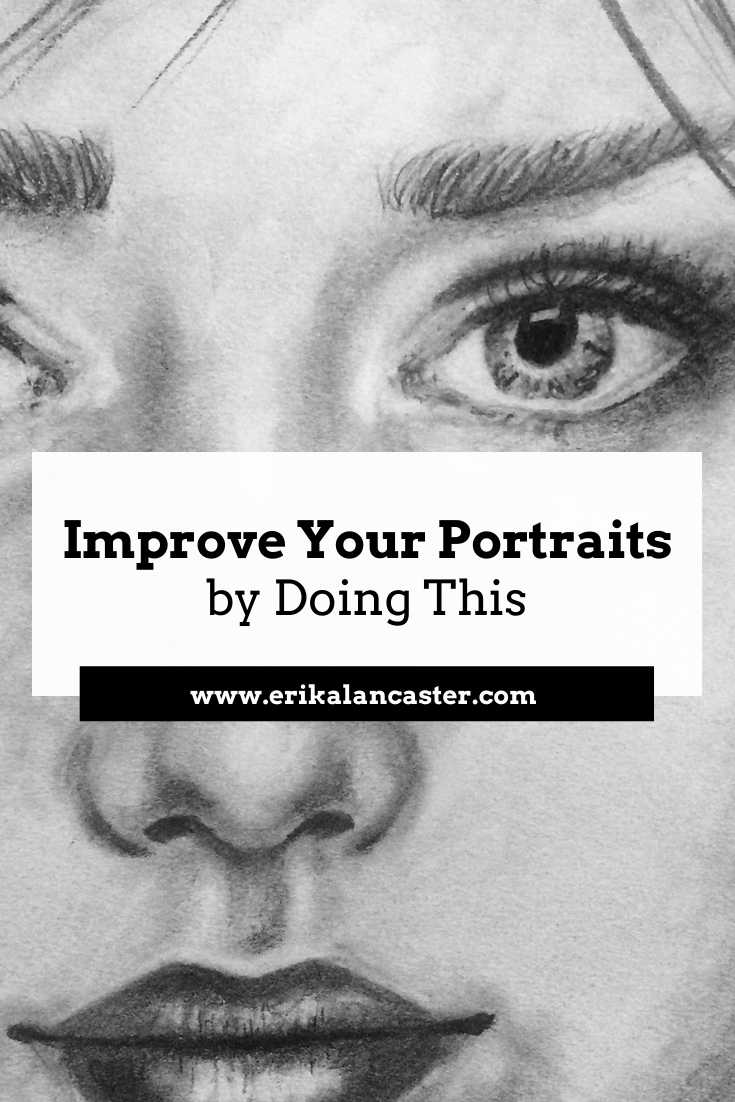
Do you feel your portrait drawings or paintings lack realism, even though you've thoroughly understood facial proportions and placement of elements within the head shape? Do you get stuck when trying to draw realistic eyes, noses, lips, or any other part of the face? In this post, I'll be explaining why it's so important to study each facial feature in isolation when we're trying to improve our portrait drawing or painting skills. I will also be sharing how I personally like to create facial feature studies in my sketchbook. Check out the video time-lapse included within this post to see me paint a few monochromatic/grayscale eye studies using black watercolor paint. In this YouTube video, I also share five essential things I make sure to keep in mind when creating realistic eyes. 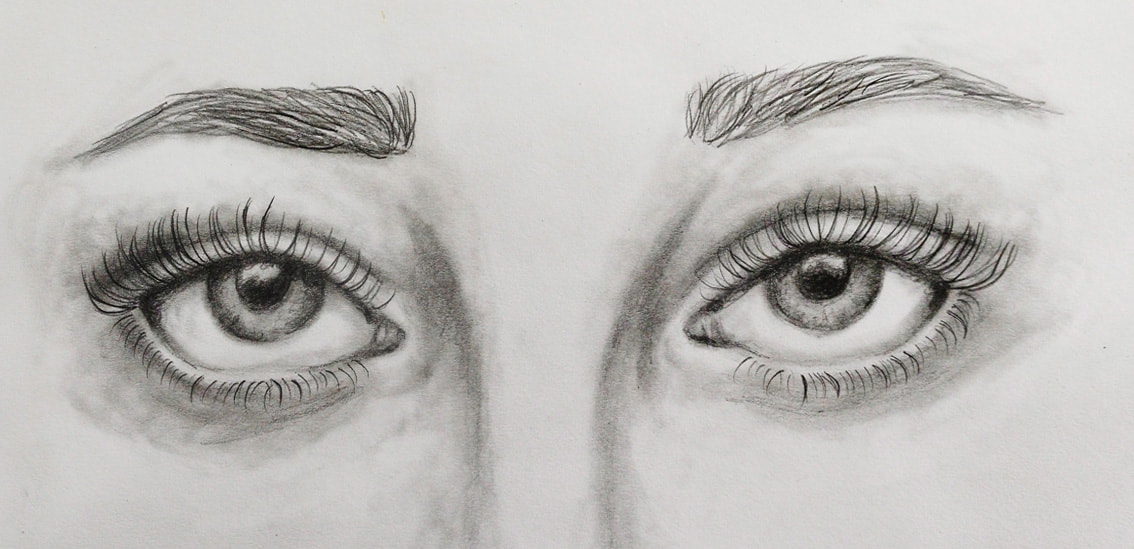
Realistic eyes drawing with pencil. Sketchbook study by Erika Lancaster.
Why Study Facial Elements in Isolation?Drawing a face is a complex process because, like any other part of the human anatomy, it is made up of so many different parts! The large variety of expressions a face could have, as well as the positions the human head can be in, create an insane amount of variables that can make drawing a portrait very difficult. Not to mention, there is an endless combination of face shapes and shapes/sizes of individual facial features! This is why it's so important to take time to dissect and learn about each feature individually. If you're studying eyes, for example, take time to understand their different parts and make notes of important characteristics. Look up videos and collect pictures in order to better understand how they are located within the human head, how they move/work and what kinds of shapes they can have. By making time to analyze and draw eyes, noses, lips, and ears individually, you are not only improving your drawing skills, but preparing yourself to create more effective portraits later on. Not to mention, the process will be much less intimidating for you and you'll be able to work a lot faster. Have you already studied the basics of facial proportions and how to draw facial elements in their simplest form? If you haven't, I highly recommend you check out my How to Draw a Face for Beginners blog post. In it, I share basic information on drawing portraits that you should grasp and practice before moving on to higher levels of realism. 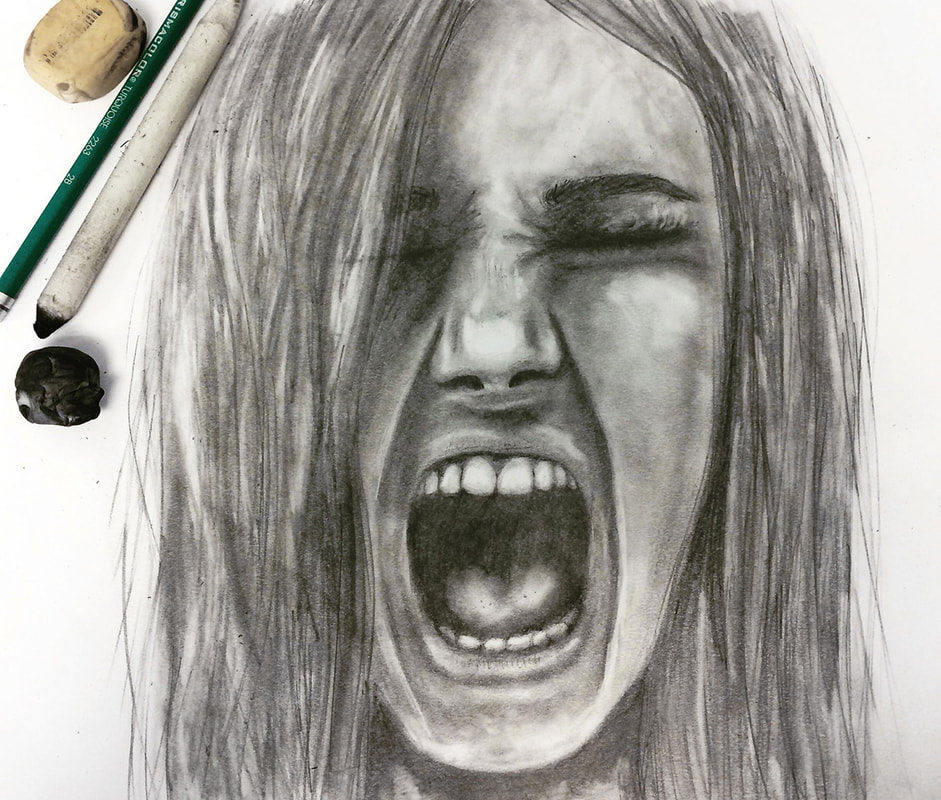
Girl screaming drawn with pencil by Erika Lancaster.
It's important to know that, even if you're not intending for your personal art style to be completely realistic, you should make time to study how things actually look like in real life. This knowledge and experience will give you a solid foundation to work off of and will enhance anything you decide to do later on. I've written a couple of blog posts in the past that you should totally check out! If you're just starting to draw faces, I recommend my step-by-step tutorial titled How to Draw a Face (for Beginners). If you've already understood basic facial proportions as well as location of facial features and are looking to start drawing faces in different angles, I totally recommend last week's blog post titled How to Effectively Draw Faces at a 3/4's Angle (My 4-Step Process and Practice Freebies).
If you enjoyed this video and found it helpful, make sure to subscribe to my YouTube channel. I share a brand new video every week with art tips, drawing and painting tutorials and mindset/productivity tips for artists. *Subscribe HERE*
My Method for Studying Facial Features1. Collect high quality close-up photographs of the specific facial feature I usually like creating anywhere from three to five studies in one sitting, but do whatever you can with the time you have. Collect good photographs to work from! A great tip is to pick images that include the facial feature at hand at different angles/perspectives, as well as in different types of lighting. 2. Prepare drawing or painting supplies For my studies, I'm currently sticking with pencil and/or black watercolor. This allows me to focus on value placement, texture and form. I suggest bringing in color only after one has succeeded at achieving realism using grayscale or monochromatic schemes. Practice using whatever drawing supplies you are already comfortable with, so that you can focus on studying the facial features, and not on practicing a specific technique. These are two different things! I really believe that the most basic drawing supplies will get you far. You don't need anything fancy to create awesome-looking drawings. Here are a few of the drawing tools I use for my own drawings/sketches.
Check out my full list of current art supplies here. 3. Take time to really observe each picture before starting Pinpoint darkest and lightest areas, irregularities, as well as forms. Notice the shadows created by the different planes of the facial element. Take notes if this will help you remember these things as you're drawing or painting. Check out my blog post titled My Favorite Free Image Sites to find beautiful, high quality reference images for your art! 4. Draw main shapes and lines using light pencil strokes Now is not the time to move into any details. Focus on recreating the largest shapes and lines you see. When drawing an eye, for example, I start with the shape created by the visible part of the eyeball, then I move on to the pupil, iris, tear duct, and the general shape of the eyebrow (no hairs yet!). Check out this past blog post on my step-by-step process for drawing eyes. Also create the tiny shapes of white reflection that are almost always visible on the pupil and iris to remind yourself that they should be left white. The only line I draw at this point is the one created by the crease of the eyelid. 

5. Develop your values Create your values patiently and in layers of graphite. Constantly observe your reference picture and recreate what you're actually seeing. Don't guess! You really don't want to exert much pressure on your paper at all, as this will lead to visible scratch marks that you won't be able to fix. By using the right pencil grades throughout the process (which I explain all about in my free Drawing Mini Course for the Total Beginner), you'll be able to develop dark values without having to press down much at all. If you do use burnishing techniques, make sure to leave them until the very end. Practice discerning between lightest, darkest and midtone areas in your image. If you're studying eyes, for example, one of the darkest areas is going to be the pupil and perhaps areas along the crease of the eyelid. Make sure that you protect your lightest areas as best as you can when working on your values. If you're using pencil, it's very useful to have a good eraser at hand (preferably a thin one) in order to go back in at the end and lighten any areas that were darkened by accident. To learn about the types of erasers I personally use, check out my list of current favorite art supplies here. *If you decide to do these studies with watercolor, it's important to allow your layers to dry before continuing to add more details or darken certain areas. I love working on several sketches simultaneously so that I'm able to jump around and keep working while allowing another study to dry. 6. Create any final details Leave the final details until the very end, once values have been effectively developed. In the case of drawing or painting eyes, it's very important to leave the eyelashes until the end! *Watch the video included in this post to learn tips about drawing eyelashes, as well as five essential things to have in mind when drawing eyes. Check out this blog post that I've shared on How to Draw Realistic Hair. 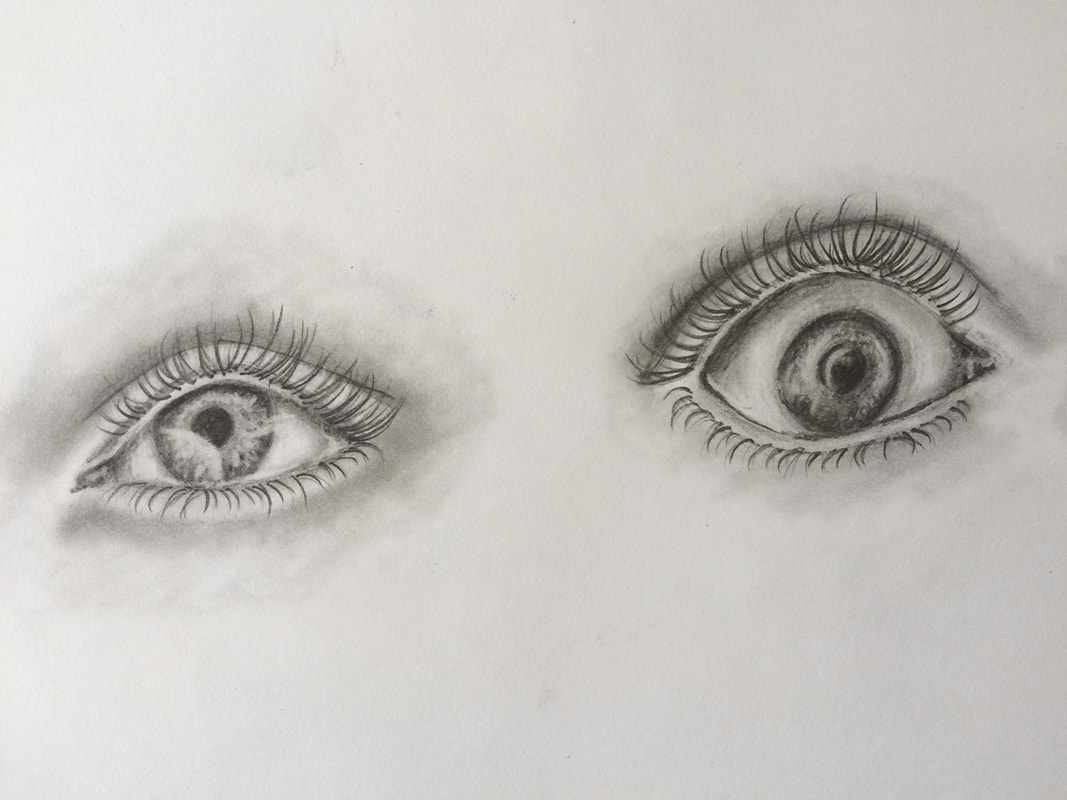
Pencil eye studies by Erika Lancaster.
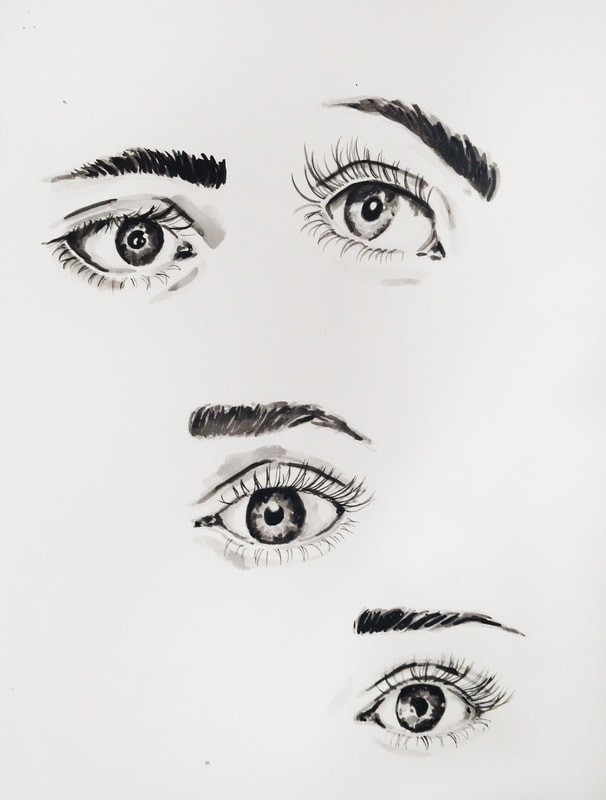
Watercolor eye studies by Erika Lancaster.
Which facial feature do you find most difficult to draw? For me it's noses! Let me know in the comments section below.
16 Comments
1/31/2018 01:08:41 pm
Wow!
Erika Lancaster
2/1/2018 08:37:38 am
Ashutosh, thank you so much for your kind words and taking time to comment! :) Do you like to draw realism? 5/30/2021 09:46:03 am
Hi, there! 6/18/2019 05:13:56 am
Look at drawings. Whether simple line drawings or meticulously detailed renderings, you can learn a lot from looking at the work.
Erika Lancaster
6/24/2019 06:07:04 pm
Hey there Sunil,
ramiro sanchez Jr
4/8/2021 06:34:18 pm
Noses,I have trouble with position on face .and I can leave it even if told it's ok ,but I know it's not .really bugs me and I throw it in the trash. 4/11/2021 02:23:39 pm
Hi, Ramiro!
Johan Schoeman
5/26/2021 04:23:48 pm
Hi, 5/30/2021 09:46:48 am
Hi, Johan! 2/22/2022 09:42:21 am
Hi, Charley!
Mia
3/10/2022 02:35:05 pm
I am a self taught artist!I'm really good at portraits but still learning.These tips were great! 3/14/2022 10:59:21 am
Thanks for checking this one out, Mia! 3/15/2022 04:17:52 am
Thanks so much Erika but l would like you to teach me more...please this is my WhatsApp, chat me up-+2347052784183 3/21/2022 01:47:39 pm
Hey, there! Leave a Reply. |


 www.erikalancaster.com
is a participant in the Amazon Services LLC Associates Program, an affiliate advertising program designed to provide a means for sites to earn advertising fees by advertising and linking to amazon.com. www.erikalancaster.com is a participant in the Shareasale.com Affiliate Program, an affiliate advertising program designed to provide a means for sites to earn advertising fees by advertising and linking to Shareasale.com partner companies. |


 RSS Feed
