*This post contains affiliate links. I receive small commissions for purchases made through these links at no extra cost to you. These commissions help me keep this site up and running, in order for me to keep providing helpful and inspiring art content. :)
Do you find your eye drawings look slightly "off" and have trouble pinpointing areas of improvement? Have you wondered what you can do to make your drawings of facial elements look a bit more realistic? Would you like to take your portrait drawings a step further and give them more expression and life? A lot of artists love drawing eyes (myself included) and this makes total sense! I really believe eyes are the windows to the soul. They play a huge role in portraiture because they have the ability of expressing emotion and the story behind the subject on hand. In this blog post, I'll be sharing the method I go through when drawing realistic eyes, as well as the key components of eyes that should always be included in order to make them look believable. To finish up, I will also be sharing a few essential tips to have in mind whenever attempting to draw anything realistically. Drawing portraits, or any individual facial element, is difficult and requires practice. We are used to seeing faces day-in-and-day-out, which makes us highly susceptive to noticing mistakes in a portrait drawing or painting. Even if a non-artist wasn't able to decipher where the error is located specifically, he/she will most likely know that something doesn't look quite right. This makes it essential for us, as artists, to study facial features in isolation and understand their structures and proportions, as well as their appropriate location within the head area. This knowledge, together with an effective rendering of values, is what will make a portrait (or facial elements) look believable. I highly recommend checking out this past blog post in which I explain why studying facial features individually will help you improve your portraits and what I personally do to study them: Improve Your Portrait Artwork By Doing This One Thing Also, learn about how and when it's okay to use other people's photographs as art references in this blog post: When and How to Use Other People's Photographs to Create Art 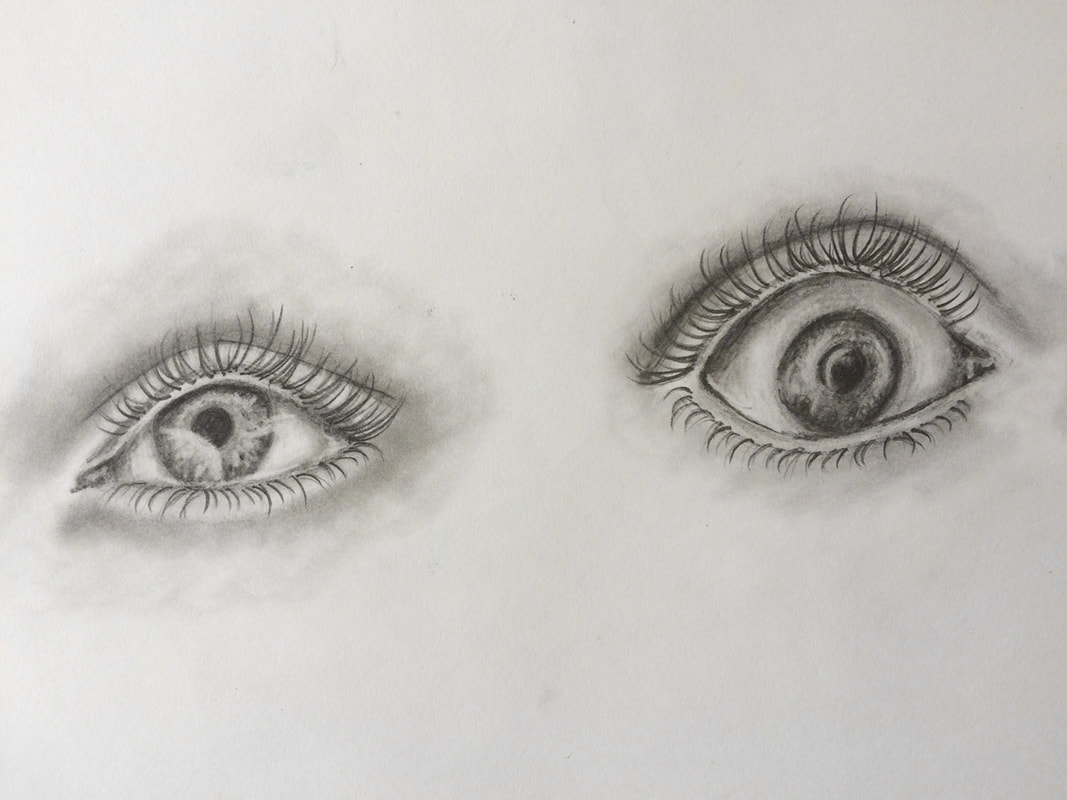
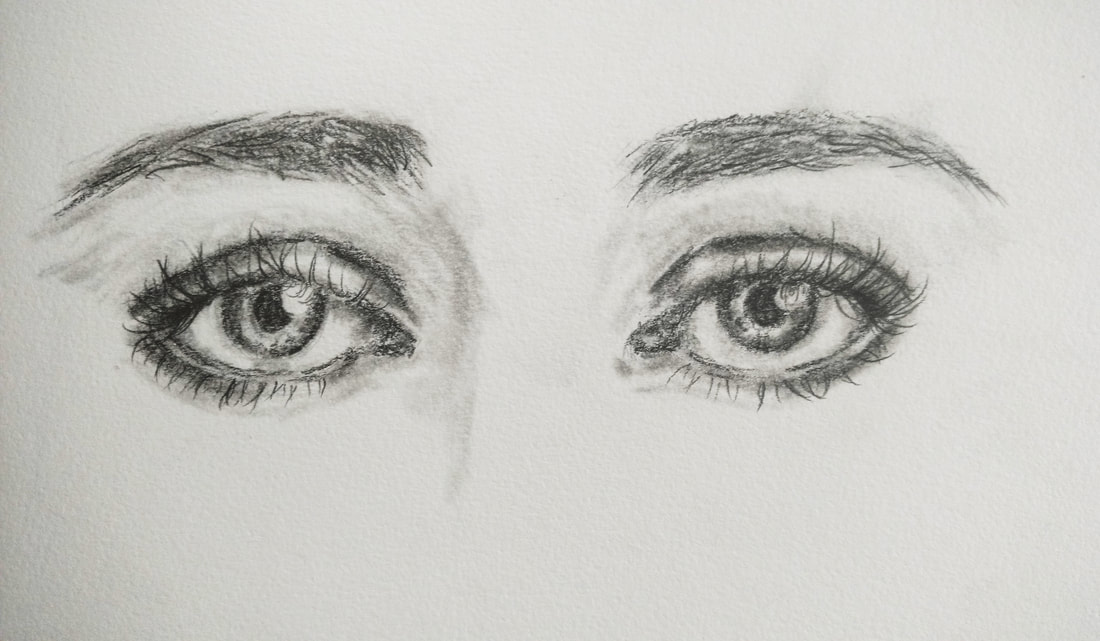
Realistic eye drawings by Erika Lancaster. Sketchbook studies.
If you enjoyed this video and found it helpful, make sure to subscribe to my YouTube channel. I share a brand new video every week with art tips, drawing and painting tutorials and mindset/productivity tips for artists. *Subscribe HERE*

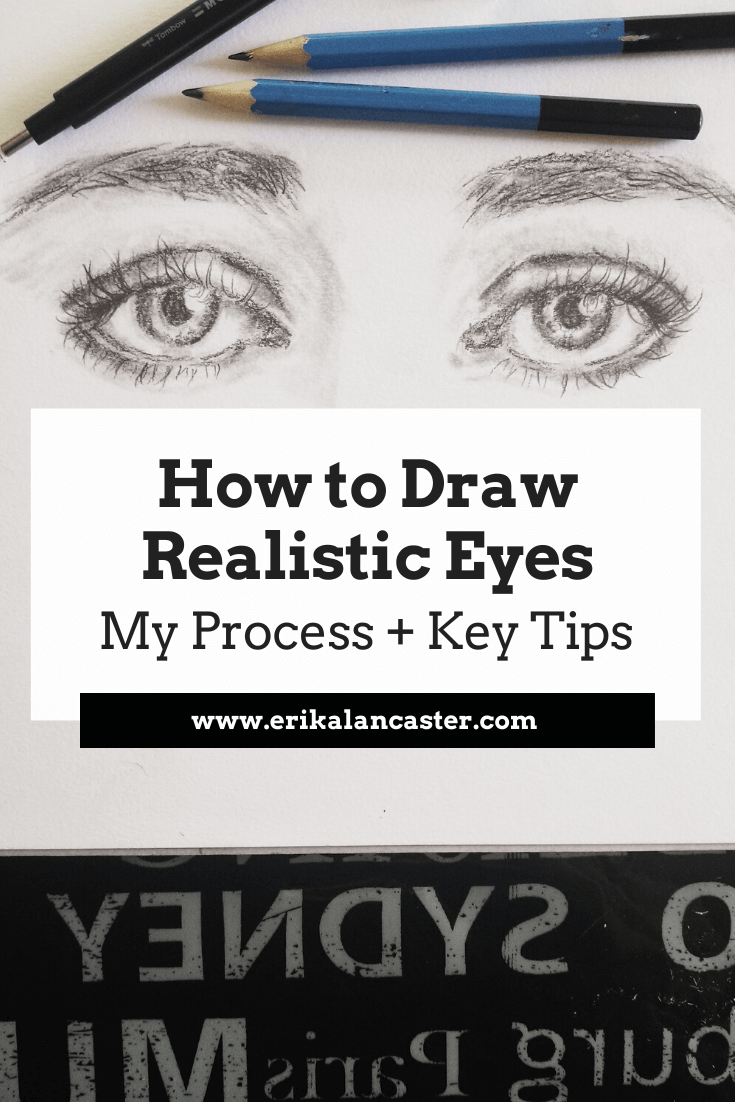
How to Draw Realistic Eyes
|
|

Canson Sketchbook 11x14" Spiral Bound

Strathmore Bristol Paper Vellum Surface 9x12"

12 Piece Blending Stump Set
|

Prismacolor Premier Turquoise Drawing Pencils

Mr. Pen Kneaded Erasers 12 Pack

Tombow Mono Zero Eraser Round
|
Drawing Process:
1. Start with a great, high-quality photo reference
When attempting to draw anything realistically, it's extremely important to use a great photographic reference (unless you're drawing from life but we will not be getting into this at the moment as this is more of a beginner-oriented tutorial).
Why? Working with a reference allows us to develop our observational skills, which is absolutely key. As artists looking to improve the sense of realism in our work, me must learn to see.
Not to mention, a reference informs us about what the subject actually looks like and reminds us of details that we can easily forget if we didn't have it. These details can make or break our drawings/paintings!
It's important to draw our subject how it actually looks like in real life and not how we think it looks like.
What makes a high-quality photograph?
For the most part, you want to look for pictures that demonstrate good lighting and have a high resolution that allows you to zoom in to clearly see details as needed.
Find a list of my favorite free, quality image sites in my blog post titled:
My Favorite Free Image Sites and Two Examples of References With Finished Illustrations


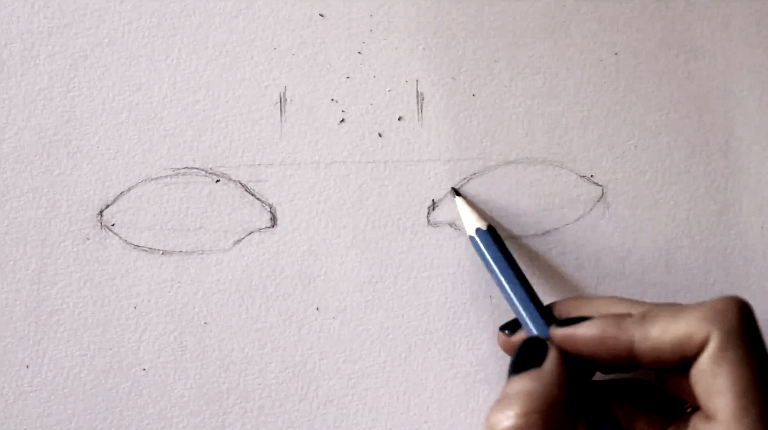
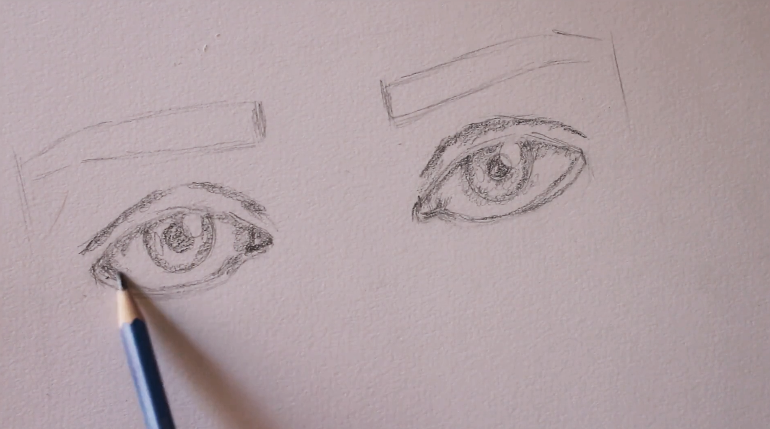
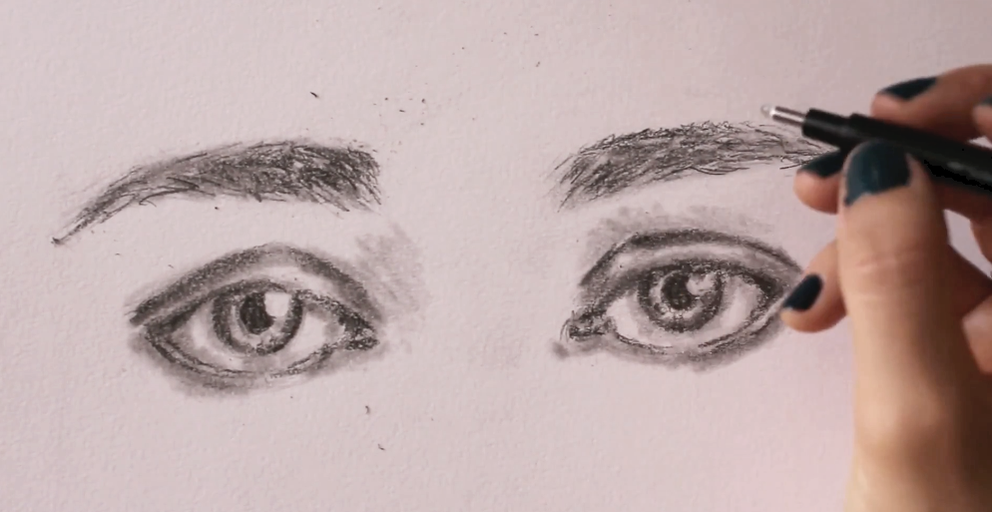
2. Create your preliminary outline sketch
You want to start out any drawing by creating a light sketch that integrates all necessary elements and demonstrates effective proportion and placement of each of these elements in regards to each other.
For this initial sketch, use your harder-lead pencil (H-HB).
Because achieving adequate proportion and location of individual facial elements is very important when drawing faces, I like creating guidelines for myself in the form of small ticks before actually starting my drawing.
I use a ruler or another tool to measure out sizes and distances as needed, as well as vertical and horizontal lines to keep things in alignment.
After having studied facial proportions, I know that there should be a certain symmetry to eyes and that the width of one eye should be able to fit between the two.
Learn about facial proportions and adequate locations of facial elements in this blog post:
How to Draw a Face (for Beginners)
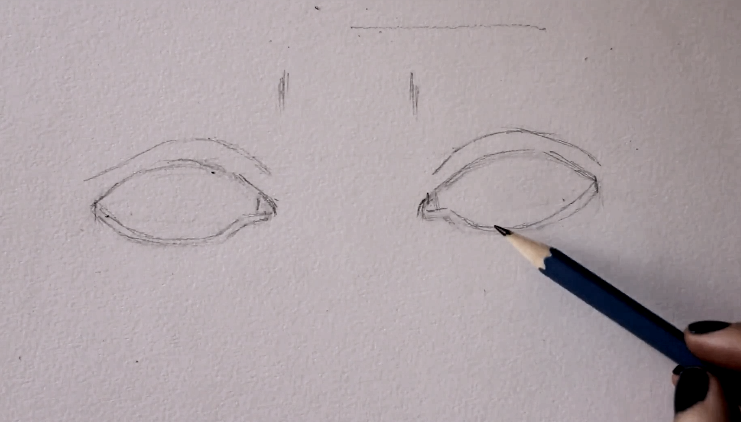
Though there are many different eye shapes out there, there are certain key parts of eyes that are always at least partially visible and, therefore, you should make sure to integrate them into your drawing.
Though there isn't a set sequence that you must to draw these individual elements in, do make sure to leave your eyelashes until the end!
Always include the following:
a) The shape that represents the visible part of the eyeball
b) The pupil (darkest/blackest part in of the eye)
c) The iris (the part of the eye that contains color) *This part is almost NEVER visible in its entirety, unless you want your subject to look very surprised! It usually has darker edges and flecks of lighter color within it.
d) At least some reflection within the pupil and iris *These reflections give life to the eye and create the effect of eyes being moist.
e) The tear-duct in the inner corner of the eye
f) The tear-line along the bottom eyelid
g) The crease above the upper eyelid
h) The eyebrow
i) The eyelashes (which I highly recommend drawing until the very end)
*Notice how each of these are present in your selected picture before actually drawing them out.


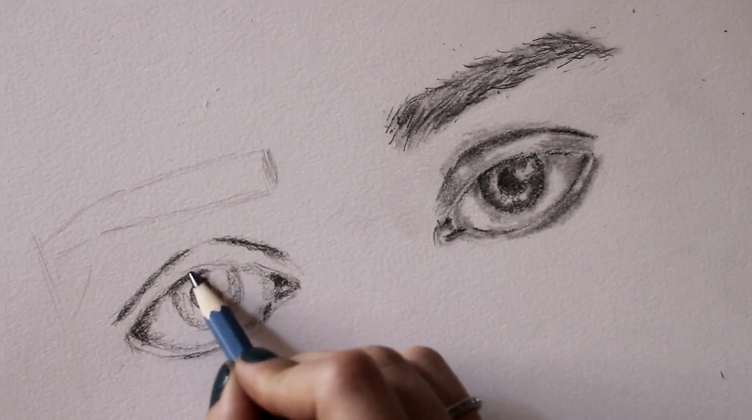
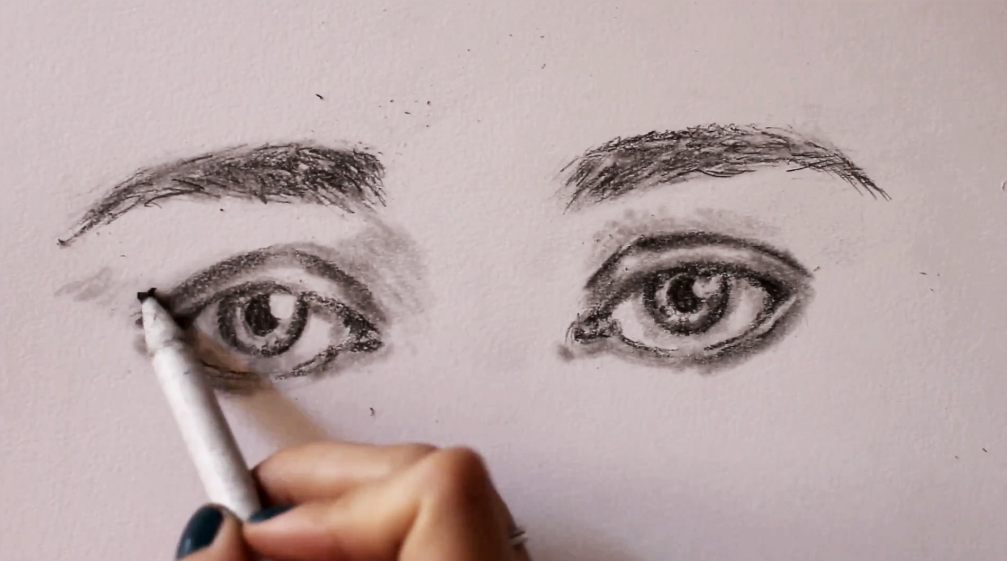
3. Start developing values and textures gradually
This is the part of the process that is probably going to take the longest, but take your time and observe your reference picture constantly.
Remember it's different values (highlights, midtones and darks) that give a drawing a sense of three-dimensional form. Therefore, you should observe where these different values are located within your subject so that you're able to recreate them.
Seriously! Around 50% of your time should be spent observing!
If you're having trouble with this, I recommend two things:
a) Choose a better picture with clearer lights/shadows, or
b) Desaturate your picture in Photoshop or another photo-editing software so you can see it in grayscale as opposed to full- color.*You can also do this in Gimp, which is a free photo-editing software you can download for free.
Using your softer-grade pencils (starting with 2B and progressing to 6B-8B as needed), take your time developing a wide range of values in layers, working from lights to darks as you go.
If you need help understanding different pencil grades, check out this video.
When it comes to shading, I always like starting in the darkest areas than I'm able to perceive in my reference picture, but I lay down my graphite lightly. I know that darkest darks are going to get developed incrementally, in layers.
Lay down your layers of graphite by exerting only a small amount of pressure on your paper and use your blending stump to create smooth transitions between your different values, as well as to get rid of any visible pencil lines.
Do your best not to cover up areas of highlights (lightest lights) with graphite. If you do cover them, no worries. You can pick up those highlights again later using a kneaded eraser or a Mono Zero eraser.
You should end up with parts that look almost entirely white, parts that look very dark, and an ample range of mid-tones in between.
Make sure that you create gradual transitions between your values and stay away from leaving visible outlines and harsh marks!
Remember, there are no visible outlines in realism!
Many beginners tend to believe that the sclera (the white part of the eyeball) should be left completely white, but it's not! There is shadow within the sclera created by the top eyelid and, usually, at the corners (which helps create the spherical shape of the eyeball).
Once again, don't guess. Observe your reference picture and make sure to develop your values as you see them.
When drawing the hair texture of the eyebrows, create a variety in values and draw them incrementally, starting from lights and making your way towards darks as you go.
Work back and forth as much as you need to, until you arrive at a good sense of three-dimensional form.
Resist the urge to add in your eyelashes until the end!
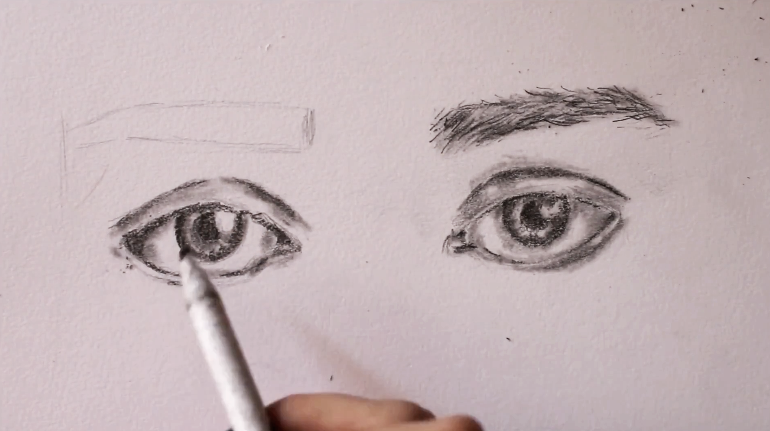

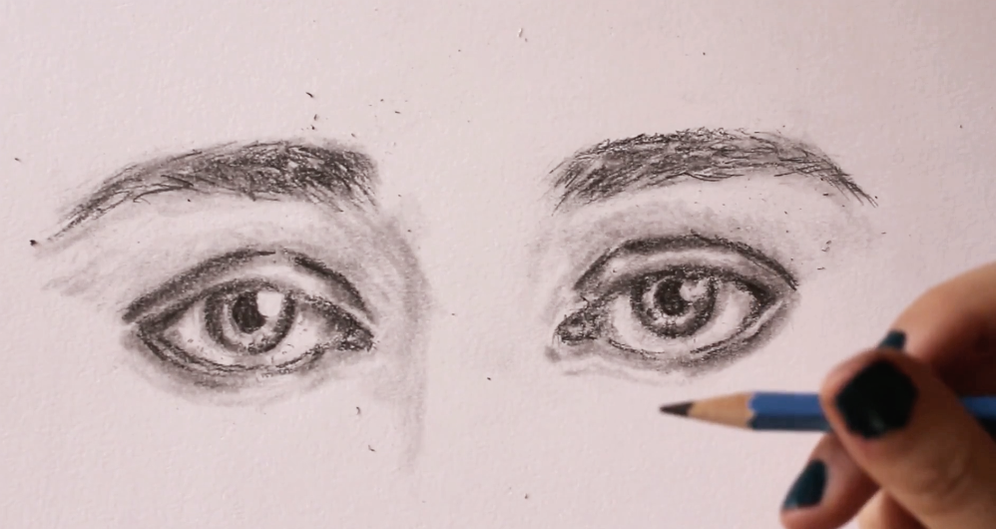
Our eyes are spherical forms that are set in deep sockets in our skulls. They also have a large protruding form in between them (the nose) and a brow bone above them.
All of these things create nooks and crannies, and interesting shadows around our eyes. Take your drawing a bit further and bring your eyes together by adding in the shadows you see around them.
I like using my blending stump for this, gliding it gently in the areas where I need to create shadows. By this point in the drawing process it usually has plenty of graphite collected in its tip, but if yours doesn't, simply lay down more graphite where you see fit, making sure to start lightly.
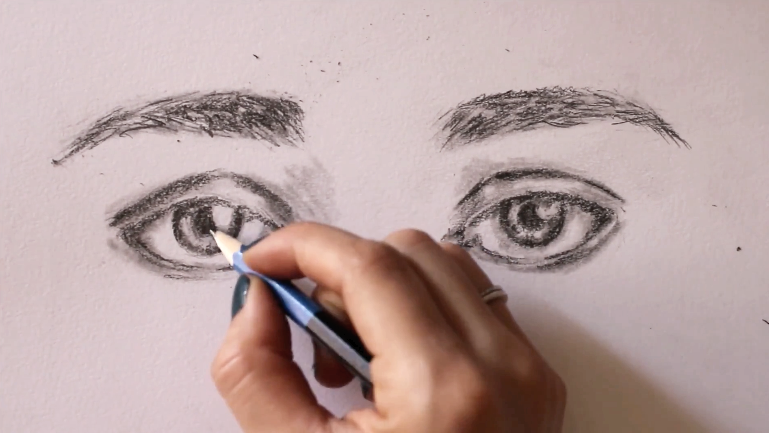
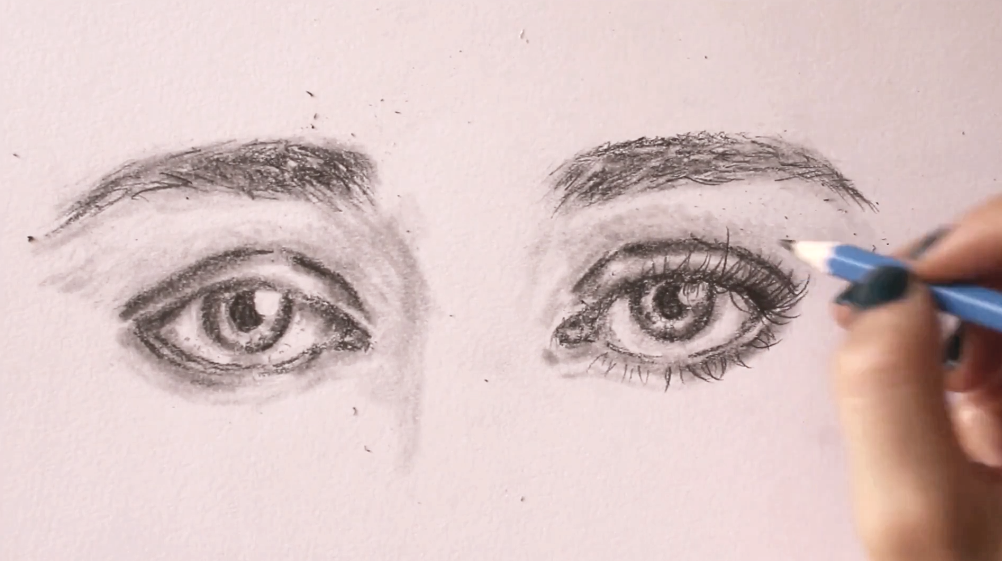
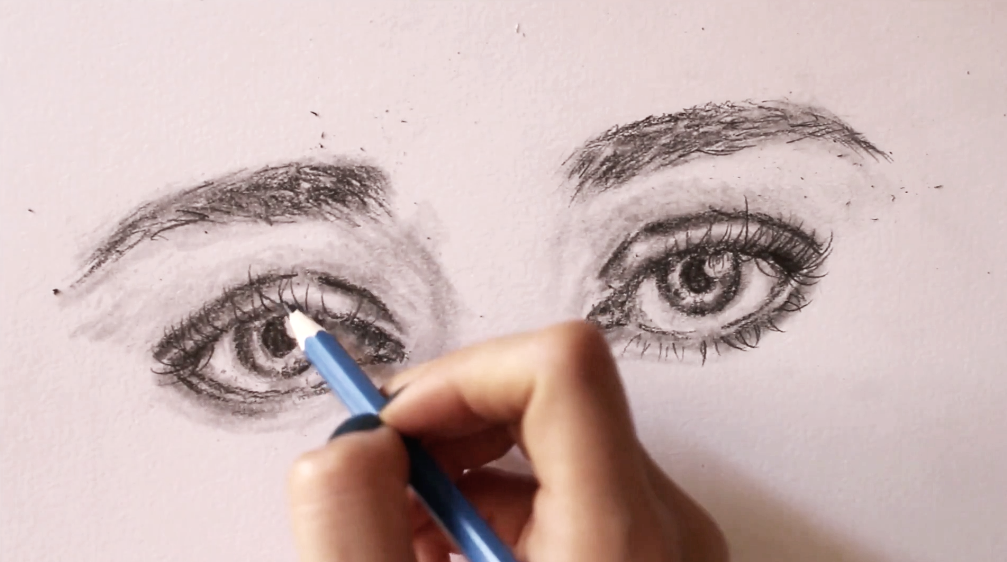
5. Draw the eyelashes
When you're done with the development of your values, it's time to draw in the eyelashes! For this part of the process, I like using my HB pencil, and I need to make sure that it's nice and sharp.
Natural eyelashes aren't perfect. Some of them are shorter than others, they are set at irregular distances from each other, and they go off in different directions depending on the angle and the direction the eye is looking towards. Also, many of them overlap!
Because the eyeball has a sphere-like structure, eyelashes located the inner-corner of the eye (close to the tear duct) tend to curl toward the nose, those in the middle section of the eyelid curl straight forward, and those in the outer corner of the eye curl away from the face.
Of course, the curl is generally emphasized more when drawing females than males and there are eyelashes that are completely straight.
Once again, draw what you see in the picture.
Another thing to note is that, usually, eyelashes located in the inner-corner of the eye and those along the lower eyelid are a lot shorter.
Be very careful not to oversaturate your eyelashes and create a variety amongst them in terms of value and thickness. This is easier said than done!
When drawing males, I've found that the less lashes I can get away with, the better!
Keep the aforementioned characteristics in mind and remember that natural things are imperfect.
And we're done!
Key tips to have in mind for realistic drawings:
2. Realize that value is more important than color and train yourself to discern highlights, mid-tones and shadows in your reference images.
3. Get used to observing your references constantly throughout the drawing process.
4. Draw what you see and not what you think things look like.
5. Steer clear of outlines and stark shapes (embrace subtleties).
6. Develop a wide variety in values and create gradual transitions between them.
I hope you found this post helpful! Which facial feature do you find most difficult to draw? Is it the eyes, nose, lips, ears....? Let me know in the comments section below! :)


Hi Vox,
Thanks so much for checking my post out and for letting your friends know about it!
Thanks so much for your kind words! I'm glad you enjoyed this tutorial. :)
One of best tutorials I’ve watched. Step by step with careful explanation. Thank so much!
This is FANTASTIC! Thank you for sharing such a detailed 'How To'. I'll be showing this to my 10 year old as she really struggles with human faces, especially the eyes, but she's fine when drawing animals.
Hi Mel,
I'm glad to hear that you found this post helpful! Human faces are tough! We are used to seeing faces so much that we can tell right away when something doesn't quite look right in a drawing or painting (even if we're unable to pinpoint where the error is exactly).
Thanks so much for letting your daughter know about my blog. :) She might find this post helpful: http://www.erikalancaster.com/art-blog/how-to-draw-a-face-for-beginners
Thank you for your comment!
Hi, Emily!
Glad you found this one helpful.
Thanks so much for checking it out and leaving a comment.
Wish you a lovely day!
I love that
Hey, there!
Thanks so much for checking this one out. Glad you enjoyed it. :)
Your talent shines through your work, and your willingness to share your techniques is truly appreciated. It's articles like this that inspire and empower the artistic community. Thank you for being a guiding light for artists on their journey to master the art of drawing!
Hey, there!
Thanks so much for reading and for your kindness.
I'm glad to hear this one was helpful and inspiring.
Wish you tons of progress and enjoyment moving forward in your art journey.
Leave a Reply.


is a participant in the Amazon Services LLC Associates Program, an affiliate advertising program designed to provide a means for sites
to earn advertising fees by advertising and linking to amazon.com.
www.erikalancaster.com
is a participant in the Shareasale.com Affiliate Program, an affiliate advertising program designed to provide a means for sites to earn advertising fees by advertising and linking to Shareasale.com partner companies.
 RSS Feed
