*This post contains affiliate links. I receive small commissions for purchases made through these links at no extra cost to you. These commissions help me keep this site up and running, in order for me to keep providing helpful and inspiring art content. :) Wondering what the difference between acrylic and oil paint is? How do they compare in regards to required supplies, painting process and overall finish? Which one of these two painting mediums is best for you, your artistic goals and your current life situation? In today's blog post (and the YouTube video included), I'll be explaining the key similarities and differences between acrylic and oil paint. I'll also be clearing up common misconceptions so that you can make an informed decision about which supplies to invest in and, most importantly, start moving forward in your artistic journey right away. When I was first starting to look into painting, I was very confused about the similarities and differences between these two mediums. Not only did the examples of artwork I found created with each vary immensely, but there were also tons of contradictions between one article/book to the next in terms of the required supplies, the preparation phase, and the painting process itself. It was honestly overwhelming and I didn't have time to make sense of it all. Quite often, I held myself back from buying any supplies and moving forward due to this. Eventually, there came a point at which I could no longer ignore my desire to improve artistically, highly-demanding full-time job and all. I had already wasted too much time and knew that the best way to learn and to make sense of it all would be through actually doing. I visited my local art supply store, and with the information I had learned from my research (as well as with the help graciously provided by the lady at the store), bought a few items to explore. Suffice to say, a lot of supplies were wasted or left completely unused. And not only were a lot of bad paintings created, but several of them literally fell apart after a couple of months (don't ask). I don't regret it though, because I learned so much through this first-hand exploration, both about different painting mediums, as well as about myself as an artist. What I like, don't like, what techniques suit the style I'm going for best, etc. After years of practice and exploration I've been able to learn a lot about acrylics, oils and even watercolors. I love them all, use them all on a month-to-month basis, and have come to know the pros and cons of each throughout this time. If you're just as confused and overwhelmed as I was all those years ago, but still feel that nagging inside telling you to get painting (it never goes away by the way), the following information will definitely help you make faster progress. However, as with all artistic mediums and supplies, it's going to be up to you to commit to this journey and the exploration it entails, in order to get to know yourself artistically and the specific supplies you personally enjoy. In this page, you'll find a list of my favorite oil and acrylic painting supplies. Let's get into today's topic!
If you enjoyed this video and found it helpful, make sure to subscribe to my YouTube channel. I share a brand new video every week with art tips, drawing and painting tutorials and mindset/productivity tips for artists. *Subscribe HERE*
Introduction
|

|
|
|
5. Overall Look and Finish
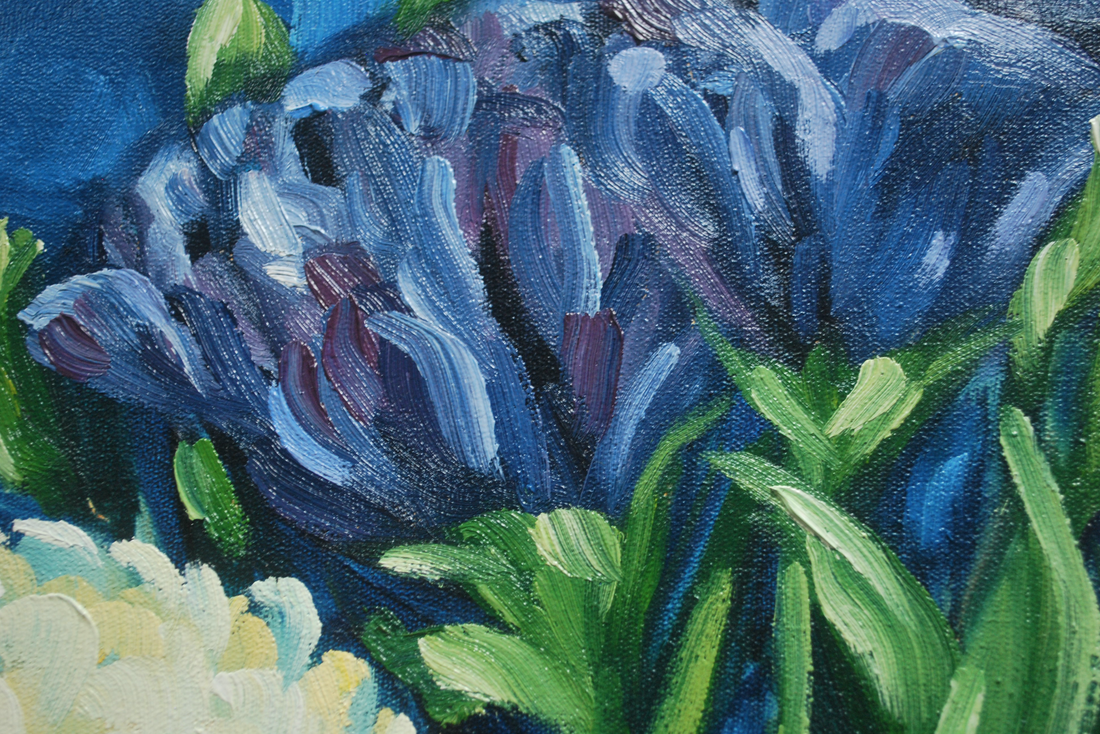
Because oil paint contains more pigment than acrylic paint, colors in oil paintings usually look a lot richer, more vibrant and glossy.
This said, even though oil paintings can last a very long time if they have been created using quality supplies and proper methods, they do tend to fade and/or yellow over time.
It'll be years and years before this happens though.
Acrylic paintings, on the other hand, usually look a lot more matte and flat when compared to oil paintings. Colors also tend to darken during the drying phase.
However, once this drying process is completed and this color change happens, they don't change after that as long as they are kept in an optimum environment (away from direct sunlight and humidity).
As far as texture goes, we can find both acrylic and oil paintings that are very smooth, as well as highly-textured. Oil paint lends itself to very easily be placed thickly on the canvas, leading to beautiful, palpable textures, if that's what the artist is intending to create.
However, texture mediums can be added to acrylic paint and impasto-like effects can also be created by placing it heavily on the substrate using different tools like painting knives. The artist can also create a textured surface prior to starting to paint.
The overall finish of both acrylic and oil paintings can also be altered by using different types of varnishes, depending on whether you'd like your painting to appear more matte or glossy.
There aredifferent varnishes available in both spray and liquid form that offer a variety of finishes.
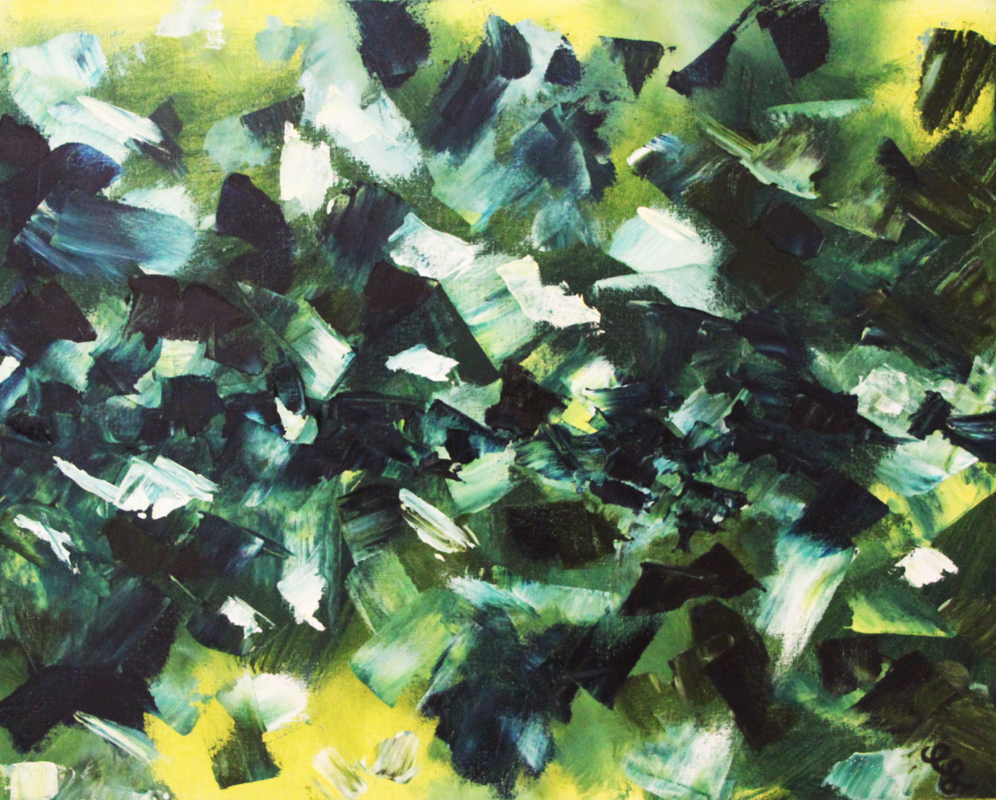
Bats- Abstract oil painting on stretched canvas by Erika Lancaster

Oil painting close-up
So, which medium is best for you?
This is going to depend on your personal circumstances, as well as your tastes and what you're looking to improve upon.
If you usually don't have much time for your art, don't have a designated space to work in, or you have kids or pets running around, acrylics are probably the best option for you (at least for now).
On the other hand, if you do have a space you can work in for hours-on-end, you aren't too sensitive to strong smells, you're interested in learning classical techniques, and/or you really care about the depth/color/richness of your paintings, then I'd definitely explore oils!
Whatever medium you choose to go for, make sure you exercise safety measures.
I hope you enjoyed this post and learned something new, or got inspired to go and create a sketch for yourself. I wish you tons of progress and enjoyment in your artistic journey! :)
16 Comments
*This post contains affiliate links. I receive small commissions for purchases made through these links at no extra cost to you. These commissions help me keep this site up and running, in order for me to keep providing helpful and inspiring art content. :)
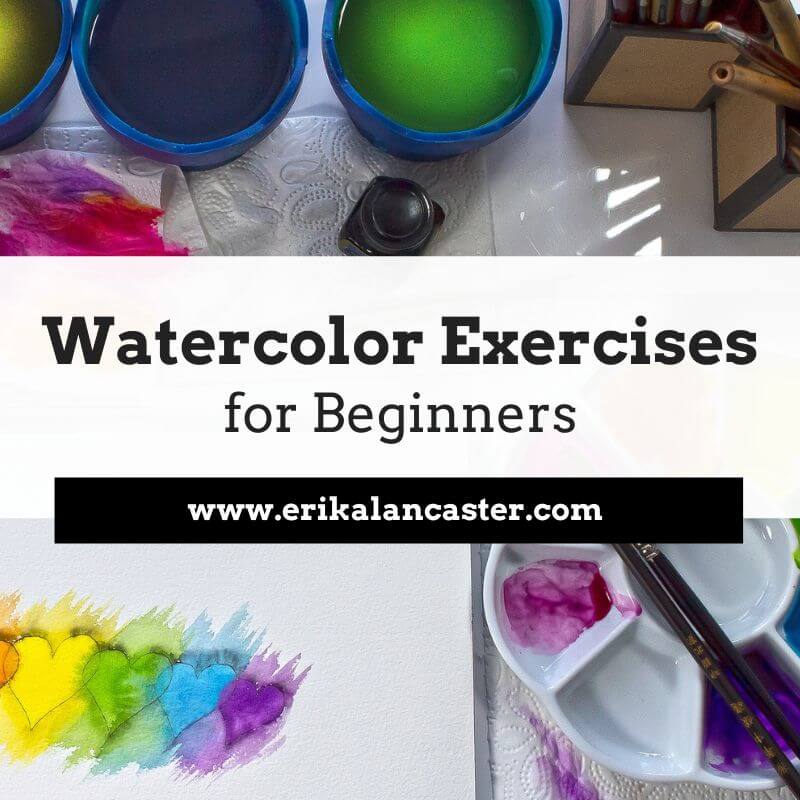
Are expensive, super-high quality supplies really necessary to progress your watercolor painting skills? What can you do as a beginner just starting out to ensure that you're spending your money wisely and not on cheap materials that are going to make the learning process more difficult than it needs to be?
In my Watercolor Supplies 101 class I explain about the common types of watercolor paint, paper and paintbrushes that you'll be able to find in art supply stores, a well as what I'd recommend for beginners.
Today, I'll be sharing the exact products that I finally came across at the beginning of my watercolor painting journey that really allowed me to make substantial progress without breaking the bank.
In the video included within this post, I'll be talking about these items. I'll also be sharing a time lapse of an illustration I created using a combination of these.
When I was first getting started, I didn't have money to spend on the high-end paper, paintbrushes and paint sets that I saw professional artists using and recommending on Instagram and/or YouTube.
As I tried to learn what I could from the pros, I heard them saying time and time again, that the higher the quality of the supplies, the better results will be. Especially, it seemed, when painting with this very volatile medium.
Though you should definitely avoid the super-cheap watercolor paint/paper varieties because they will not really help you understand the medium's characteristics and will probably make the learning process much more frustrating, there are brands that offer excellent quality products at affordable prices that are perfect for those starting out.
Rest assured that you can progress your skills far with accessibly priced products. I also think there's a lot to say for artists who're able to create amazing looking artwork with what they have on hand and that don't rely on only the best-of-the-best supplies.
I still use several of these items, to-the-day.
Not only for teaching and filming tutorials, but also whenever I'm not creating a painting or illustration I'm intending to sell or when the art will be scanned for prints or uploading onto shops online.
Let's get to the video!
If you enjoyed this video and found it helpful, make sure to subscribe to my YouTube channel. I share a brand new video every week with art tips, drawing and painting tutorials and mindset/productivity tips for artists. *Subscribe HERE*
After almost four years of painting with watercolors I can honestly say that, while it's true that artists selling their work must be able to offer high-quality, durable artwork to their customers, beginners shouldn't feel the pressure to spend $40 dollars on sable brushes or $50 dollars on watercolor paper.
Beginners should be exploring, trying different techniques, learning the do's and don'ts of the medium on hand, and thinking about what subjects and styles they'd love to become better at.
They shouldn't stop themselves from creating because they're afraid of wasting expensive supplies.
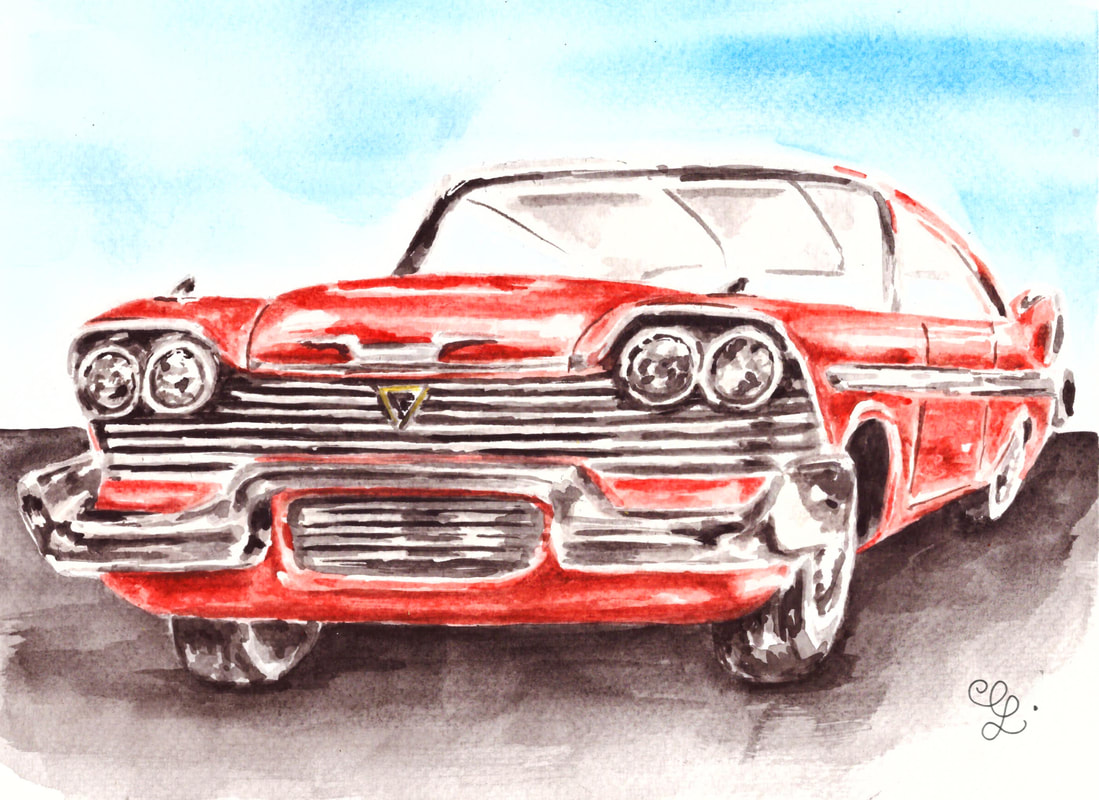
Watercolor Plymouth Fury by Erika Lancaster. Winsor & Newton 12-pan set on Fabriano watercolor paper.
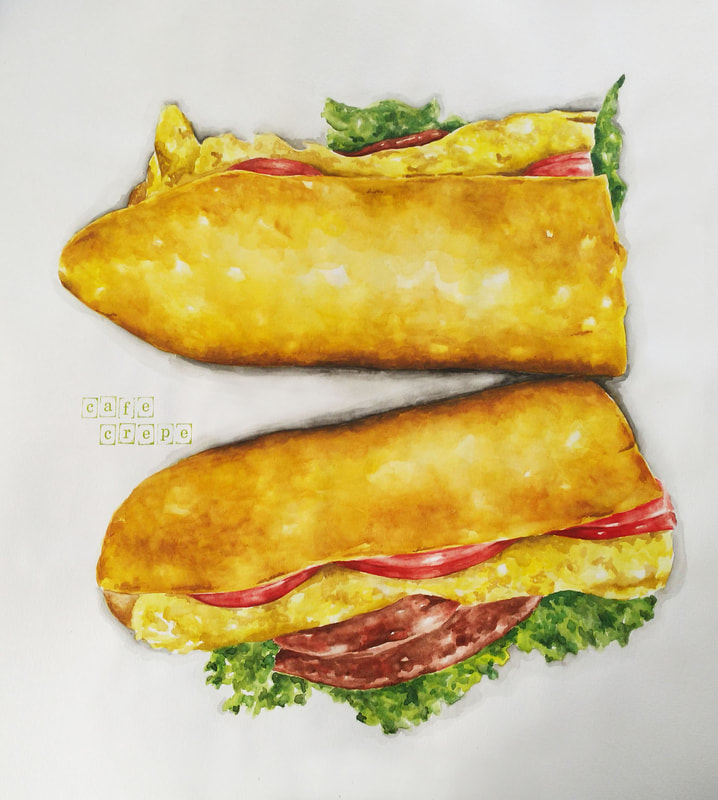
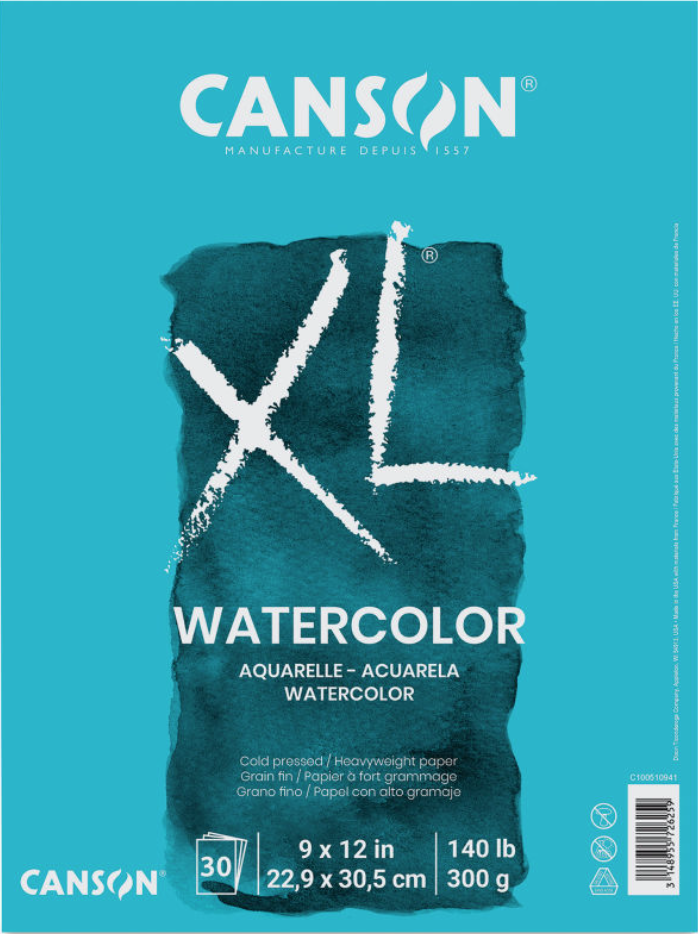
Watercolor Sandwich by Erika Lancaster. Sakura Koi Watercolors on Canson Watercolor Paper.

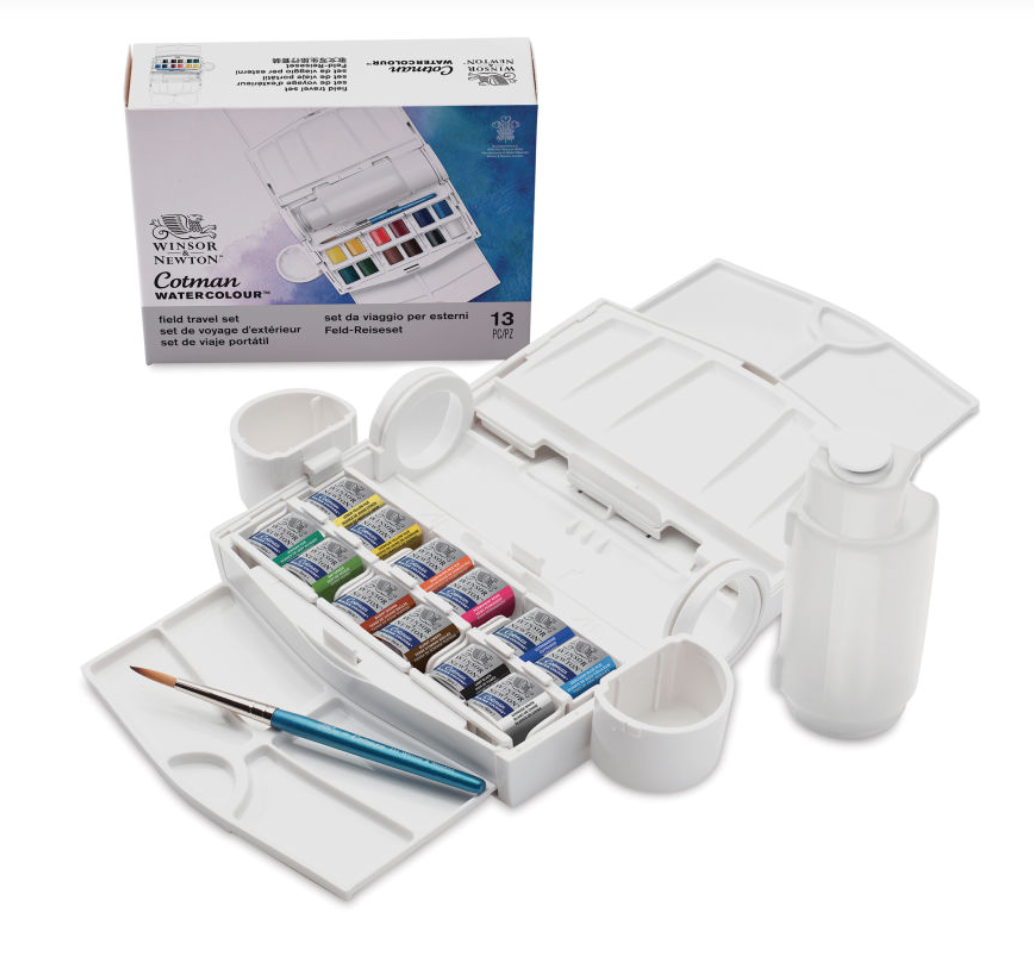
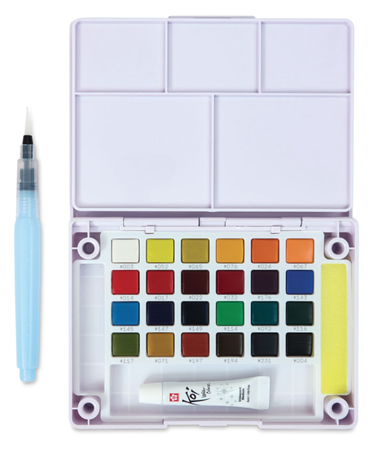
Awesome Watercolor Paint Sets for Beginners
|
|
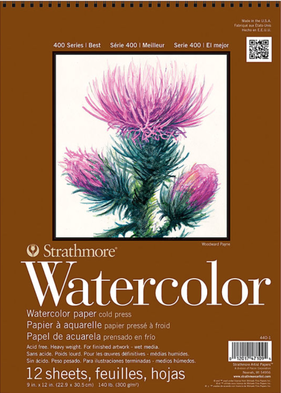
Watercolor Paper
|
|
|
|
|
Watercolor Paintbrushes
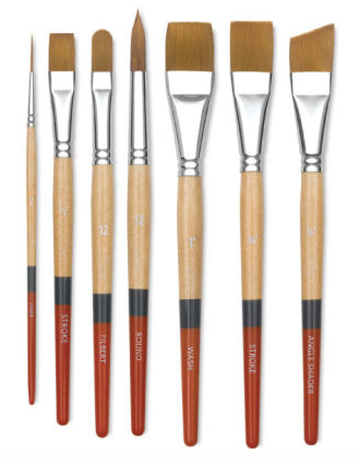
Princeton SNAP! Golden Synthetic Brushes $3.09 - $10.01
Princeton Neptune Series 4750 Synthetic Squirrel Brushes $4.18 - $51.15
Royal Langnickel Zen Watercolor Brushes $2.99 - $5.99
I hope you enjoyed this post and learned something new, or got inspired to go and create a sketch for yourself. I wish you tons of progress and enjoyment in your artistic journey! :)

*This post contains affiliate links. I receive small commissions for purchases made through these links at no extra cost to you. These commissions help me keep this site up and running, in order for me to keep providing helpful and inspiring art content. :)
Welcome back, fellow artists and art lovers!
I’m unbelievably excited to be sharing another segment of my Artists from Around the World interview series!
This is one of the many exciting projects I’ve been working on behind the curtain, and I hope these interviews inspire aspiring artists out there to keep pursuing their passions, as well as help get amazing artwork in front of people looking to buy from or hire amazing creatives.
One of the things I love about being active in the online world, is that it enables me to connect with other art lovers and passionate creatives around the world. In the short amount time I’ve been working on this site,my YouTube channel, and sharing my work on social media, I’ve been able to get to know amazingly talented people that I would have otherwise never met.
Haydn Symons is one of the people I've had the fortune of getting to know.
He's an incredibly talented illustrator and designer based in the U.K. that has not only developed a unique and appealing art style, but has been able to gain experience working with world-wide clients in a variety of fields. Haydn designs logos and branding work for clients, as well as editorial and book cover illustrations.
Something I admire about Haydn is that he's constantly pushing himself to explore new subjects and techniques, and that his style and personality is palpable in everything he does.
A few months ago, he wrote an incredibly helpful blog post for us titled 3 Tips to Combine Watercolor and Gouache Like a Pro, in which he shares the similarities and differences between these two painting mediums, as well as useful tips to help us combine them effectively.
Haydn was very kind to answer a few questions I sent over and will be sharing with us how his artistic journey started, how he arrived at his art style, insights into what it's like to make a living as an artist, and much more.
So grab a cup of coffee, tea or your beverage of choice, and join me for this interview! :)
Interview with Illustrator/Designer Haydn Symons
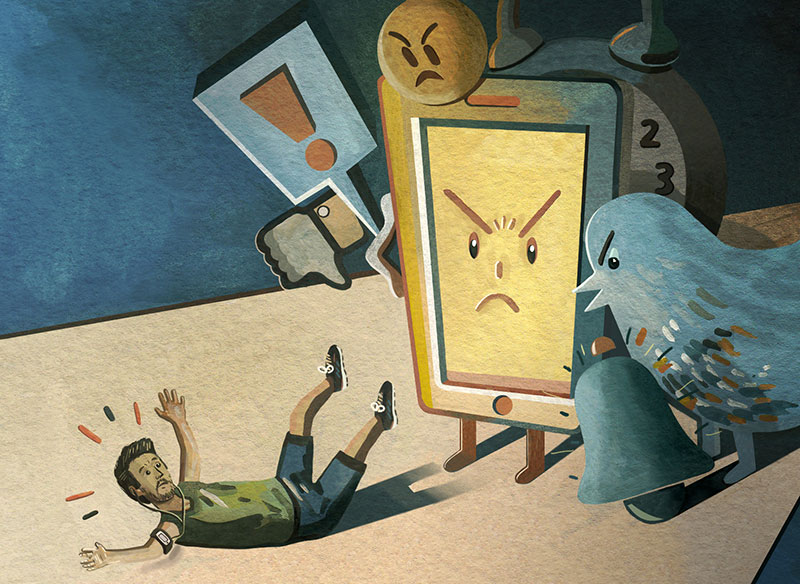
Editorial illustration by Haydn Symons. Click on image to check out more of his work!
1. What made you want to become an artist/illustrator?
I’ve been interested in art and design for a long time and have been drawing since I was around three years old. I’ve always loved to create new drawings and paintings, as well as learn about art. I studied Art and Design at Secondary School, took an Illustration course at college, and finally studied Illustration at Falmouth University, which I absolutely loved.
Illustration covers a lot of industries, from publishing, advertising to editorial, which makes it such a exciting discipline!
Throughout the years I've developed my craft and style, and have learned what it takes to become a successful freelance illustrator. I'm very passionate about the field and am 100% committed to what I do. I believe this dedication is what has allowed me to evolve my skill to what it is today.
2. You have a very distinguishable art style! Can you tell us a bit about how you arrived at it?
I started developing my illustration style during my years at Falmouth University. Throughout this time, I experimented with different mediums and materials, and pushed the boundaries of what I could produce.
My style is a mixture of traditional and contemporary elements. I consider it to be eye-catching and friendly. The artistic mediums I use most are gouache and watercolor, but I love constantly challenging myself with new techniques.
After finishing a new piece, I scan it into Adobe Photoshop in order to tidy it up a bit and do any necessary editing.
My illustration style has changed a lot from graduating back in 2013, and has evolved through a lot of practice, into what it is today.
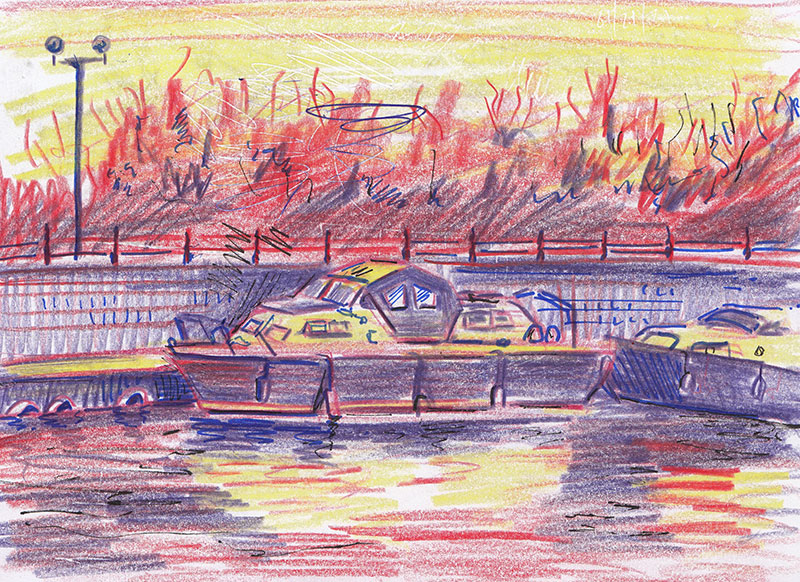
Sketch by Haydn Symons. Click on image to check out more of his work!
3. What would you consider to be the most challenging aspect about being a working artist?
The most difficult part about being an artist is the unsteady income. It can really fluctuate from month to month and those bills need to get paid. This makes people hesitant about becoming freelance illustrators, designers or fine artists.
It can be scary and stressful when you don’t get commissions or money coming in. However, it’s an amazing feeling when you're asked to work on a new project and get paid for doing what you love. Being creative and using your artistic talent is extremely rewarding and there's nothing like being able to make a living by doing what you're most passionate about.
I've found it's incredibly important to know about marketing, sales, networking and business in general, to become successful as an artist.
4. What are your main sources of inspiration?
My sources of inspiration change from day-to-day. I’m inspired by the things around me - everything from landscapes and portraits, to news articles and popular culture.
I’m also very inspired by fine artists like David Hockney, who has become well-known figure in the art world. I really admire his use of color. I also love more traditional artists like Caravaggio, Canaletto, Rembrandt and Edward Hopper. Alongside them, I’m also inspired by well-known illustrators like Oliver Jeffers, Mr. Bingo and Sam Webber.
Lastly, I gain a lot of inspiration from reading and writing on a daily basis. I feel these practices really impact my work positively.
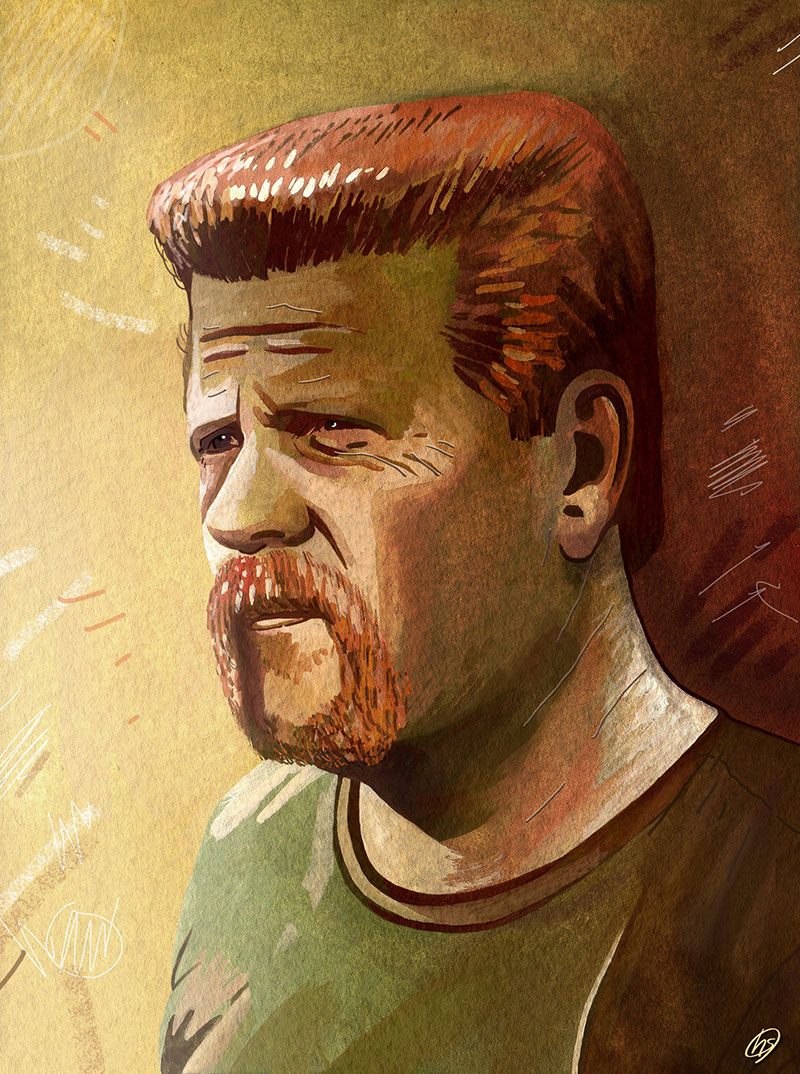
Abraham Ford illustration by Haydn Symons. Click on image to check out more of his work!

5. What are your must-have art supplies?
Paint
My go-to art supplies include gouache and watercolor. As I shared here at Erika's blog, I really enjoy combining both painting mediums. The paint sets I'm currently using are both by Winsor and Newton.
I usually like painting the background/base of my illustrations using watercolors, and using gouache for elements in the middleground/foreground.
I usually like painting the background/base of my illustrations using watercolors, and using gouache for elements in the middleground/foreground.
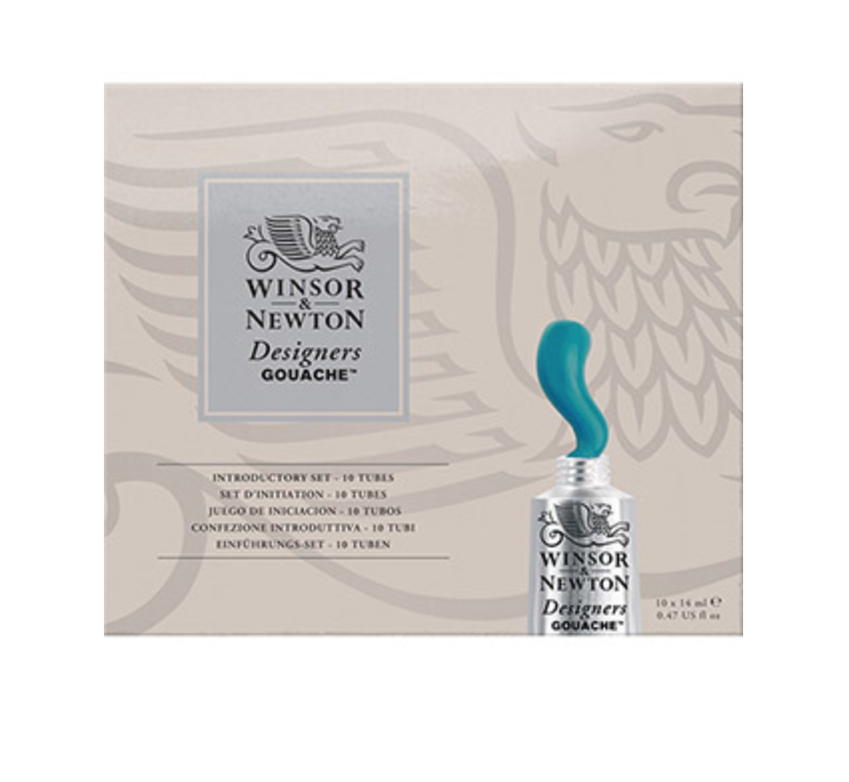
Winsor & Newton Gouache Set: Assorted Colors (10 pack) $ $52.50
|
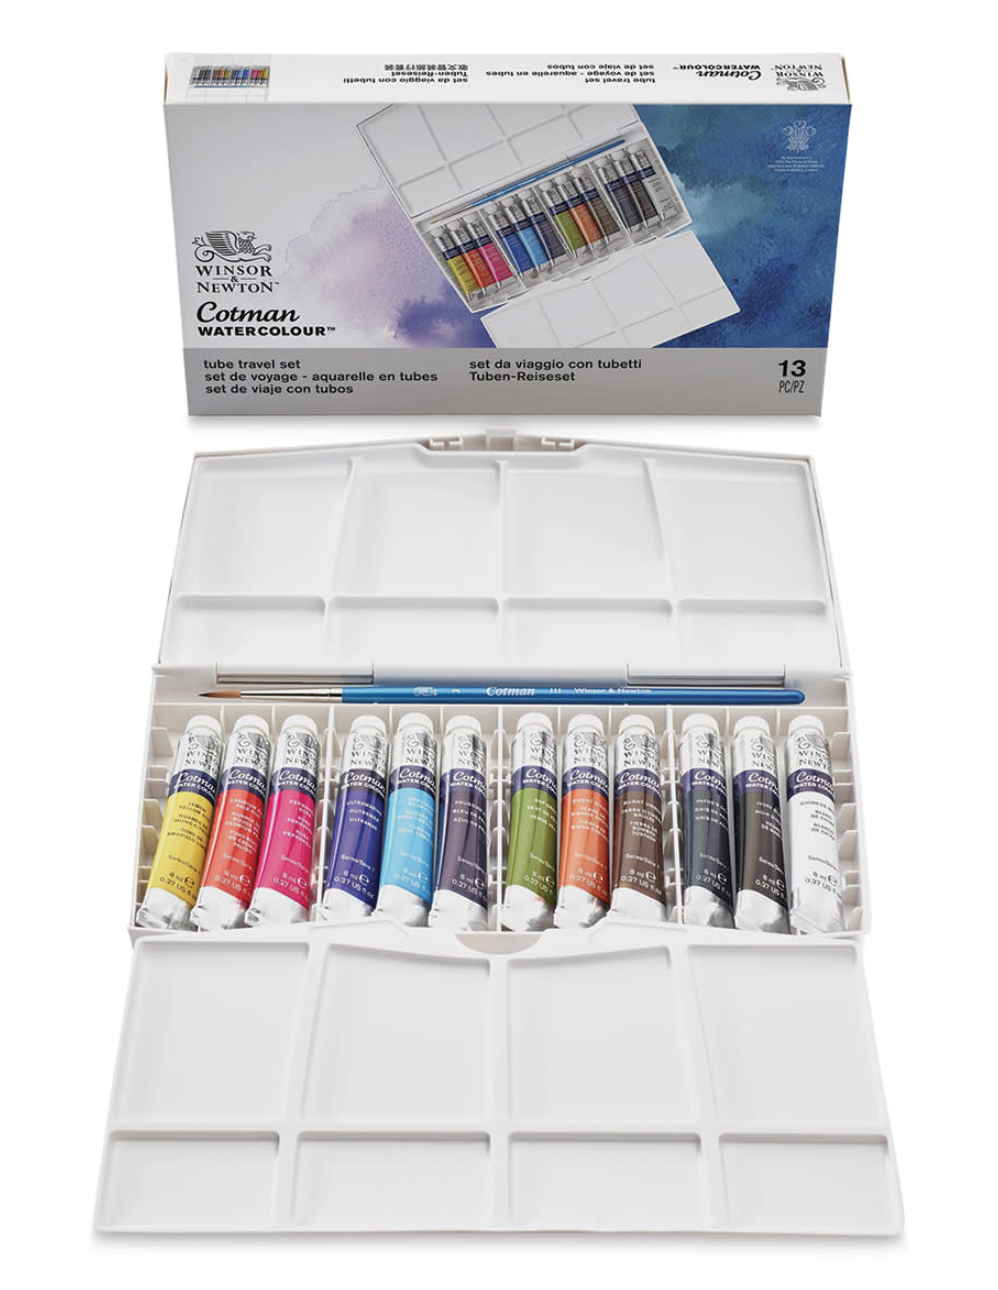
Winsor & Newton Cotman Water Color Pocket Set of 12 Tubes $31.40
|
Paper
I highly recommend using thick, strong watercolor paper if you’re using water-soluble painting mediums. Having to deal with buckling during the painting process is very frustrating and so is damaging our paper! I really enjoy using Seawhite Heavy Watercolor Paper in 350gsm.
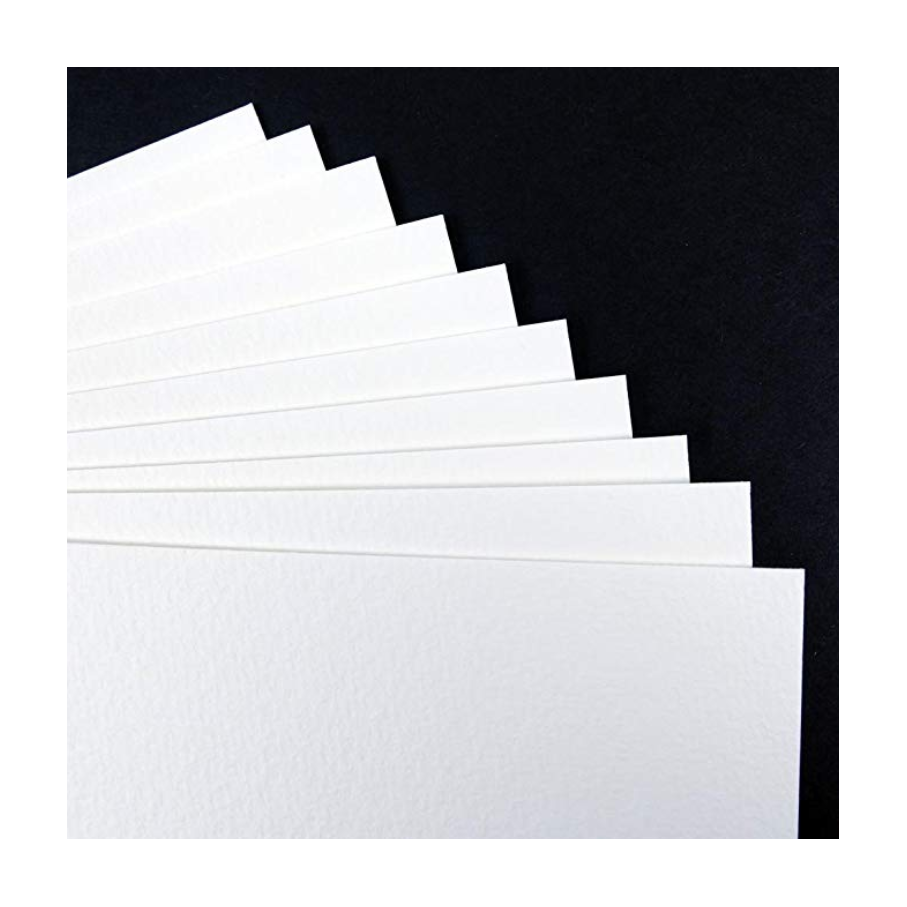
Seawhite Heavy Watercolour Paper 350gsm - 10 Sheet Pack A3 (11.7x16.5)
|
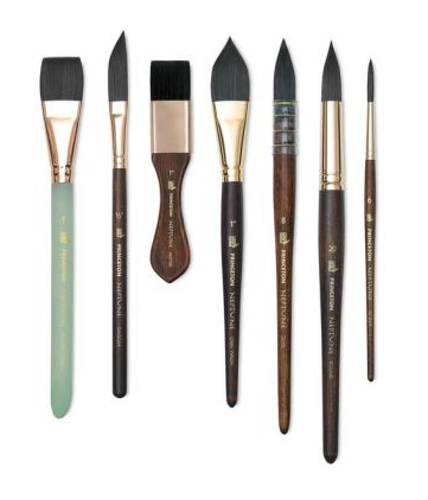
Paintbrushes
Lately, I've been using a set of paintbrushes by HeartyBay that I acquired through Amazon. It's affordable and perfect for use with both watercolor and gouache.
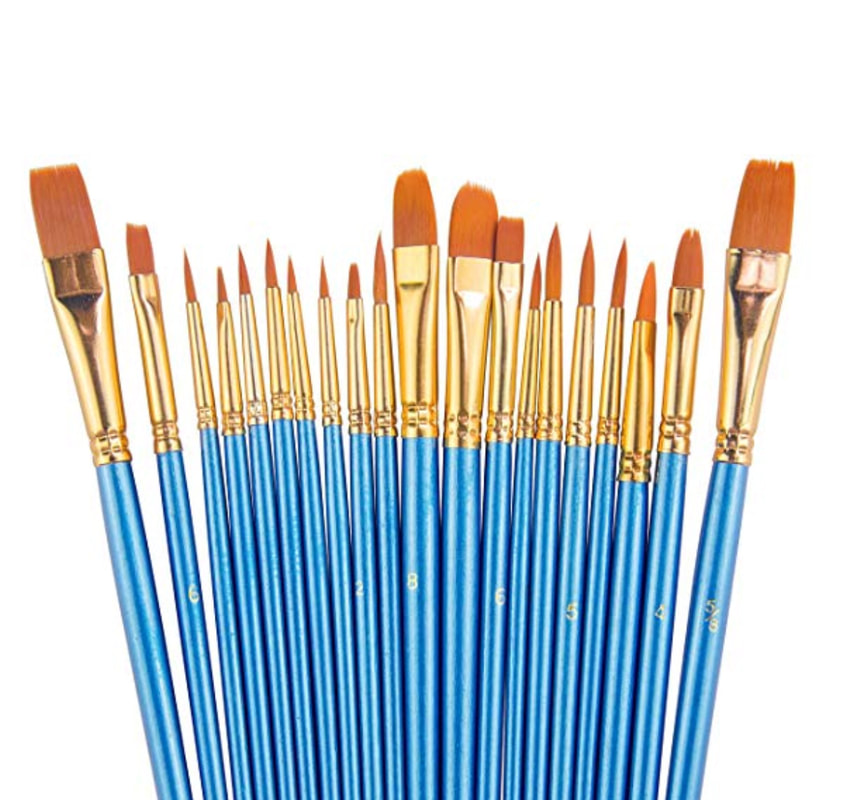
Paintbrush Set by HeartyBay (20 pcs) Nylon Hair Brushes for Acrylic Oil Watercolor Painting
|
Software applications that I use on a daily basis which are very common in the creative industry include Adobe Photoshop, Adobe InDesign to Adobe Illustrator. These are paramount for any creative.
6. Do you have any tips on how to stay motivated/productive as an artist?
To stay motivated you need to commit to creating the work that you love producing. Set goals for yourself based on your passions, and actually see them through.
Read Erika's blog post titled Time Management for Artists: My Secrets for Staying Consistently Productive to learn how to define life goals and set objectives to ensure you're progressing towards them every week.
As an artist, you'll discover the specific subjects and styles you like creating, whether they are portraits, landscapes, abstract paintings, etc. If you continue focusing on getting better at what you want to be producing, and sharing your work with the world, people will start knowing you for that kind of work. But you have to stay consistent!
It's normal to have to do work to pay the bills that we're not necessarily passionate about doing, especially when we're starting out, but it's essential to keep making time for self-initiated projects that light us up.
Whenever I'm struggling or feeling unmotivated, I always think back to my why.
Why am I a freelancer?
Why am I an artist?
What will I gain (professionally and personally) if I keep pushing towards my dreams, and what will I have to give up if I stop?
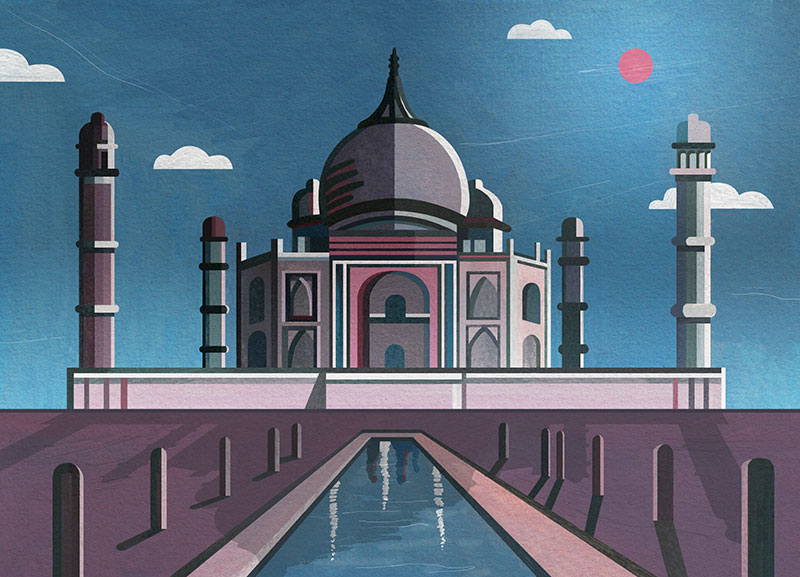
Taj Mahal illustration by Haydn Symons. Click on image to check out more of his work!
7. Do you have any projects you'd like to make happen in the near future?
I traveled a lot last year and am super pumped about creating a series of illustrated maps, soon! I visited some amazing places that I really want to document in my own way. My illustrations will help me remember those amazing moments, and will be awesome additions to my portfolio.
It's so important to include the kind of work you actually want to be doing in your portfolio, whether these projects are ones you're actually getting paid for, or self-initiated ones!
I’m currently working on a couple of illustrations for magazines, and would love to do more of this kind of work in the near future, along with publishing and advertising projects.
Aside from this, it's very important for me to keep developing my illustration and artistic style, and just keep producing and creating new things consistently.
8. If you could give one piece of advice to aspiring artists, what would it be?
My one piece of advice for aspiring artists is to not give up. Even if you keep receiving knock back after knock back, keep going. Learn from your mistakes, get better, and improve.
If you’re constantly creating, improving and putting yourself out there, nothing will stop you.
Keep going and never give up on your dreams!
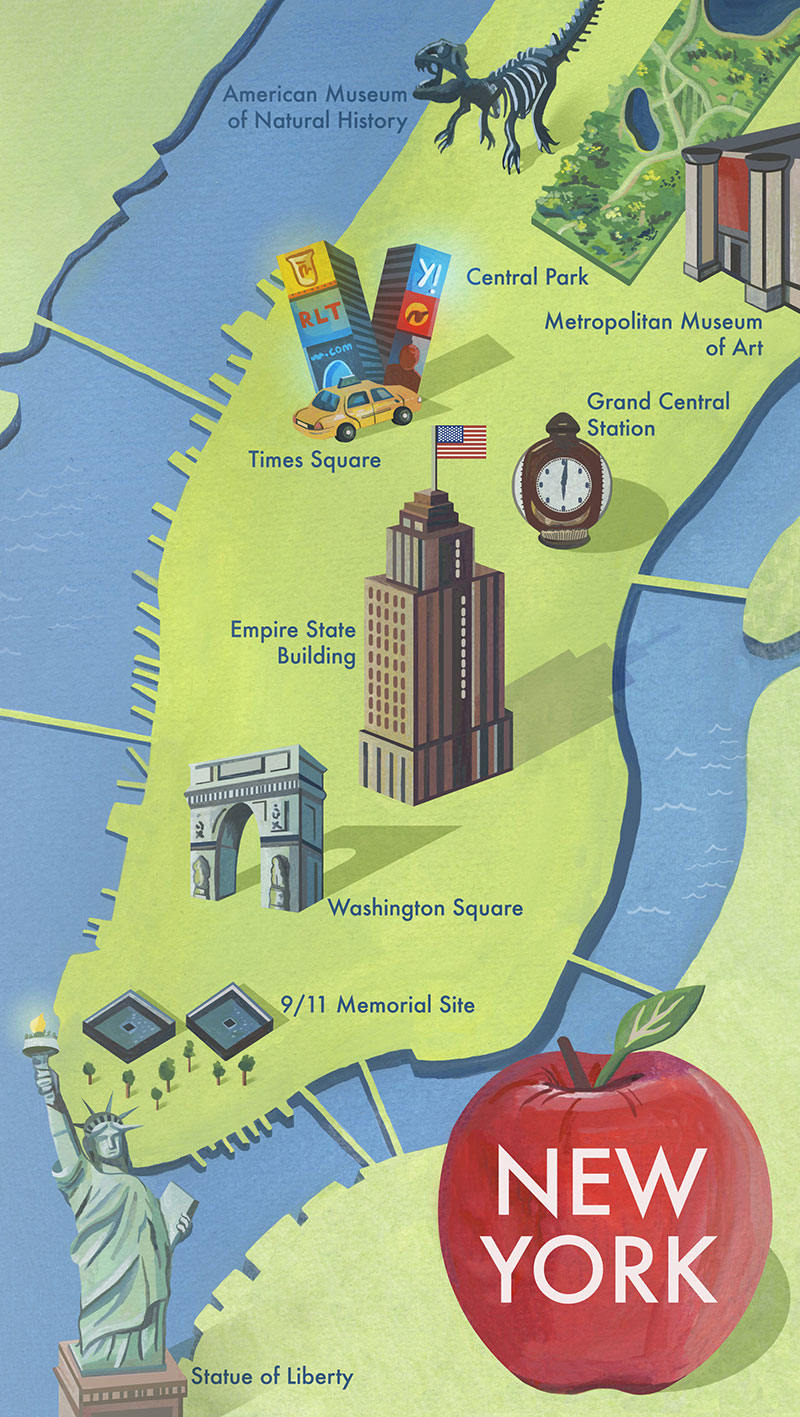
New York Map illustration by Haydn Symons. Click on image to check out more of his work!
9. Lastly, could you share where we can find more of your work and news from you?
You can find my portfolio and personal blog over at www.haydnsymons.com.
You can also find me on social media:
Instagram: https://www.instagram.com/haydnsymons/
Twitter: https://twitter.com/haydnsym
Facebook: https://www.facebook.com/haydnsymonsillustration
A huge thanks to Haydn, for taking time to answer my questions, sharing his experience with us and, most importantly, for inspiring us to pursue our passions.
Hope you enjoyed this interview and make sure to follow Haydn's work. I personally can't wait to see what he'll be producing in the future!
Cheers!
Are you interested in starting to sell your artwork online but are lost as to how to start digitalizing and editing your work using photo-editing software? Have you started learning Photoshop and want to know which tools to use in order to remove the background from your scanned work as efficiently as possible?
It's essential for traditional media artists to familiarize themselves with some kind of photo-editing software at least on a very basic level.
Whether you're looking to sell prints of your work through your own website, create products with drawings or paintings via print-on-demand platforms, create mock-ups using pictures you've taken of your work, or you're simply looking to share your art on social media, it's essential to make it shine and transmit a sense of quality to the viewer if you intend to make any sales.
Today, I'll be sharing a video that is perfect for artists just getting started with Photoshop and digital editing. I'll be explaining three different selection tools commonly used by artists/illustrators to separate their artwork from its background, and I'll also be sharing which my personal favorite is and why.
Throughout the video, I also give important tips that you should definitely be aware of when digitalizing art made with traditional mediums. These apply to whatever photo-editing software you choose to use.
Check out my blog post How to Sell Artwork on Society6 + Pros and Cons to find out more about my entire process, from finishing a watercolor illustration, to scanning it, editing it, and finally uploading it onto Society6 to design products.
In this past post, I also share the positives and negatives I've learned in regards to print-on-demand platforms like Redbubble and Society6 throughout the time I've been using them.
If you enjoyed this video and found it helpful, make sure to subscribe to my YouTube channel. I share a brand new video every week with art tips, drawing and painting tutorials and mindset/productivity tips for artists. *Subscribe HERE*
I hope you enjoyed this post and learned something new, or got inspired to go and create a sketch for yourself.
I wish you tons of progress and enjoyment in your artistic journey! :)
For a list of my favorite watercolor supplies, go here.
I hope you enjoyed this post and learned something new, or got inspired to go and create a sketch for yourself.
I wish you tons of progress and enjoyment in your artistic journey! :)
For a list of my favorite watercolor supplies, go here.
Are people starting to show interest in your work, but you're a bit nervous about getting into a paid project? Have you started taking commissions and have been disappointed with the experience of working with clients? Interested in streamlining your commission processes and getting others to see you as a professional working artist?
As artists, it can be difficult to tap into that business-mindset, but it's an absolute must if we plan on making a consistent income with our art.
In today's blog post, I'll be sharing six tips that will help you look professional in the eyes of prospective clients, ensure your art commission processes go as smoothly as possible, and help you build a positive reputation that will attract more clients in the future.
A great amount of self-employed artists make the majority of their income by working on commissions for clients who demonstrate a liking of their work and ask them to create a piece based on their particular needs. This said, I want to preface this post by saying that there is a vast amount of ways that we can create an income for ourselves through our art and our artistic skills.
There are artists who only sell their work through galleries, others who make the majority of their income through teaching (online or offline), artists who create YouTube channels and/or blogs and become ambassadors for art supply brands, artists who have Etsy shops through which they sell original artwork and/or prints, artists who sell at local art markets/events... The possibilities are literally endless.
And I 100% believe that you can become successful at any path you wish you pursue, as long as you're willing to put your entrepreneurial shoes on, are willing to step out of your comfort zone to make your dreams happen, continuously learn from other artists that have become successful in what you wish to do (and actually put that knowledge into action), and stay persistent.
Be aware that things take time, though, and that you have to be smart about how you go about pursuing your dreams.
Whatever combination of paths you decide to pursue is entirely up to you and what you're personally willing to do to make your goals happen. I do highly recommend you look into setting up a variety of income streams for yourself, as this will help you always have something to fall back on.
Not to mention, this will allow you the possibility of turning down commissions when they don't align with who you are as an artist and/or you feel the potential client on hand doesn't entirely respect your work.
Working with clients is definitely an experience all beginner artists should go through, as it helps us develop a vast array of skills such as artist-client communication, time-management, etc.
However, every artist should give serious thought to what his/her professional long-term goals are, so that he/she can go about establishing short-term objectives and focus on making them happen.
Check out my blog post titled Time Management for Artists: My Secrets for Staying Consistently Productive to learn how I go about establishing goals for the different important areas of my life and plan short-term objectives/weekly tasks to ensure I'm consistently moving towards them.
If you enjoyed this video and found it helpful, make sure to subscribe to my YouTube channel. I share a brand new video every week with art tips, drawing and painting tutorials and mindset/productivity tips for artists. *Subscribe HERE*
Tips on Taking Art Commissions
1. Have a set method for pricing your artwork
There are two common methods that artists use to price their work:
a) By hour: Amount of hours worked on painting x hourly rate
This method requires you to determine your hourly rate, which will be completely dependent on your experience and skill level. I always add the cost of supplies to this total afterwards.
b) By size: Set cost per square inch x amount of square inches in painting
This method entails you set a particular cost per painted square inch, which will be dependent on the quality of the supplies you're using, as well as the level of detail rendered in your work.
Think about which option would be best for your particular situation and stick to it. This way, whenever anyone asks you how much you charge you have a clear, definite answer, which will make you seem a lot more professional.
In my particular situation, I use both for separate situations. When I create artwork to sell at art shows or to sell through my Etsy shop, I go by size. This tends to make the pricing/buying process less confusing for both myself and my customers.
When I do commissions, however, and I'm asked to create a piece in specific dimensions, using specific materials and perhaps even different subjects from those I'm most used to painting, I price by hour.
A few extra things to ask yourself when establishing your prices:
-How comfortable are you drawing/painting the particular subject on hand? Is your lack of skill with that particular subject going to make you take longer? *If so, consider how you'll be lowering your prices to keep things fair (cost per hour wouldn't make sense in this case).
-Is the work urgent? Will it entail you working long hours or weekends? *If so, consider raising your prices.
-Will this project help you expand your knowledge and/or skills in a particular area your interested in developing? Would it be a great portfolio piece that will help you get the projects and clients you'd like to work with in the future? Is it fun/meaningful for you? *If you answered "yes" to any of these questions, consider taking the job even if the pay isn't as high as you'd like it to be.
2. Plan your time wisely
As a working artist, it's absolutely imperative to learn about time management, get systems in place, and stick with them as best as possible.
We have to treat creating art as our job if we intend to make a living from it, which entails, among many other things we have to do to keep out business running, sending our customers/clients updates and turning in work whenever we've promised to do so.
As a general rule, I never promise I'll get something done by a certain date if there's even the slightest chance I won't be able to finish on time. I like being as transparent and as honest as possible, right from the beginning.
I love the idea that I heard from a business specialist a while back about "underpromising and overdelivering", and I apply this when it comes to estimating a delivery date. In other words, I almost always tell my customers that the painting is going to take me at least a couple of days longer than I think it will and do my best to finish before that day.
This way I can surprise my customers and even make the unboxing experience more special by making the packaging extra awesome and maybe even adding small gifts.
Whether I'm going to be working on a shorter project or a longer one, I like creating a time table that I send to my prospective clients and include in the document I will be talking about in point number 3.
I make time to sit down for a few minutes to create a calendar/timeframe using InDesign (whatever software allows you to make tables will work perfectly) and give thought to how many hours I'm going to have available to work on said project, day-by-day, throughout the next few weeks. *See example of an estimated project timeline I sent to a prospective client below.
I never commit to any due dates and take my other responsibilities into consideration when creating this timeline, as well as the time I need for my mental and physical health (this info is omitted in the version I send of course!). As I mentioned, I add in a couple of extra days just in case any emergencies happen, clients don't send feedback when requested, or if I have to re-do something.
Creating this time table is especially important when you're being asked to work on a longer project that will take over a month to complete.
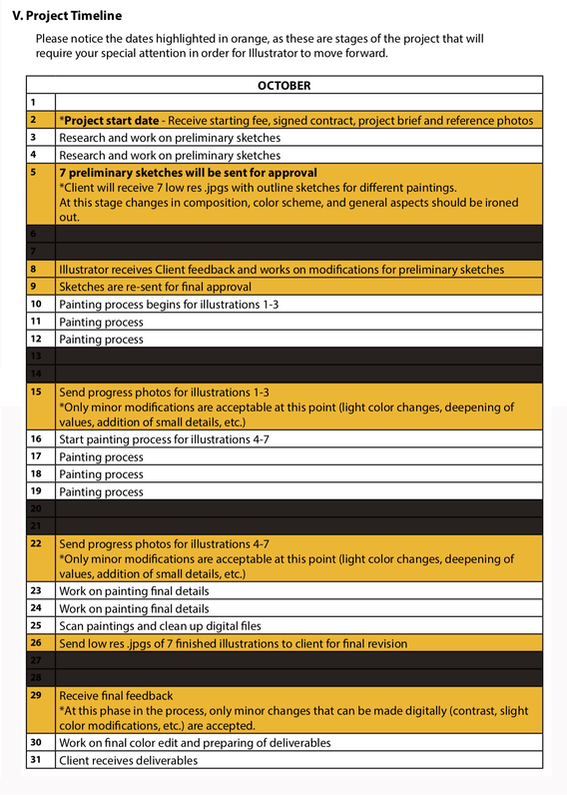
Prospective client started communications with me at the beginning of September and clearly stated he needed the project to reach completion by the end of October. Taking the brief and the due date into consideration, I created this timeline as part of the quote document I sent over.
3. Have information available on your website for possible customers, as well as a formal document to send whenever you're asked for a quote
It's extremely useful to have a section of your website in which you share information about your creative process and any general terms pertaining to how you sell your work. Some artists do this in the form of a Frequently Asked Questions section in which they list common inquiries they receive.
For a solopreneur like me, this is incredibly useful, as this helps you not have to answer the same questions over and over again and serves as a type of tripwire, so that only those that would seriously be interested in working with you seek further communication.
One suggestion is to make this area of your website fun and actually educational. Add pictures of yourself at work, your workspace, your supplies, your work in progress, etc. Actually use it to help educate non-artists on what your creative process actually entails. Make it known that you love your work and make an effort to provide quality drawing/paintings.
Some information you should definitely include in this section:
-Your method(s) for accepting payment (bank deposit/PayPal/etc.)
-What percentage of the total cost you need to get started (make this non-refundable)
-Do you offer refunds?
-Whether you ship your work internationally (if so- what are your shipping terms/costs?)
-Will you require anything specific from the customer to get the work done (high-resolution images, etc.)?
Aside from having this information available on your website, it's also very useful to send over a formal document whenever you're asked for a quote. It doesn't have to be overly complicated, especially if the commission on hand is a simple project.
However, when projects are a bit more complex and/or will entail you working on it for over a month, I do recommend spending a longer time on this document.
It should establish the specifics of the project on hand (what it is the client is asking for-exactly), state the cost (I like clearly describing how I arrived at that total by making my hourly rate and cost of materials known), and provide at least a general timeframe (I like including when each "phase" of the project will be finished by and when I'll be sharing progress notes and/or attending meetings).
In this document, it's also very useful to re-state important payment terms that were already stated in the informational section of your website, along with any other notes you want to make extra clear (i.e. how much extra changes or meetings would cost, etc.).
If you're starting to work on more complex projects that will take a longer time to complete, or are taking on a project commissioned by an established business, I highly recommend starting to read into Client Agreements and actually getting a contract signed before starting to work on anything at all.
4. Make sure your prospective customers are aware of your artistic style and aren't expecting something you can't/won't do
Having a portfolio available for customers to see and keeping it updated with the kind of work you're interested in producing is very important. I would say that your portfolio should have at least 10 different pieces so that people can have a good idea of what it is you do, as well as what range of subjects you'd be willing to work with.
By sharing your portfolio and consistently sharing what you're currently working on, there will be much more of a chance that people who like your work will reach out with their inquiries.
Get business cards made that include your website and social media channels on it! Have them on you at all times when you're out and about, and don't be afraid to tell people you're an artist and let them know where they can find your work.
5. Ask questions and make sure you clearly understand what you're being asked to do
Make sure you ask a ton of questions and have a clear idea of what you're being asked to do. Don't be shy about it, either. I've had people reach out to me thinking they know what they want, but as soon as I start asking specific questions, they realize they don't.
Getting started on a project in which the customer is unsure of what they need will leave you guessing, and this is a surefire way of making the art-making process way more stressful than it should be.
I've also found that I'll if I actually take time to get to know my customer a bit before getting started, there's more of a chance that I'll create a piece they'll absolutely love.
Here are a few questions I always ask:
-What art styles do you like? *Have them send over a couple of pictures of specific artworks that call to them.
-What color schemes do you enjoy? *Do they like warm colors? Cool colors? A combo of both?
-What area of your home/office will you be decorating with this piece? *I've even had customers send over pictures of the space that will be decorated with my painting(s) to have a good idea of their decorative style, the color of the furniture, etc.
6. Be responsive and make communication a priority
If a prospective client emails or messages you with inquiries in regards to a possible commissioned piece and you don't respond quickly, you may loose the opportunity. Make yourself as accessible as possible and always try to answer back within a reasonable amount of time.
Also, make communication a priority throughout the process. This isn't to say you should be calling or emailing back and forth every-single-day, but make sure you don't let a long period of time go by without informing them about your progress, possible setbacks, etc.
This will help avoid confusion, surprises, and prevent any negative ideas about you and your working process pop up in your clients' heads.
Put yourself in your customers' shoes. Think about what it would feel like to pay for a job and have no idea of what's going on.
I once hired a photographer who let months go by without sending me any information in regards to his progress editing the photos from our photoshoot.
My mind couldn't help but wonder if he was prioritizing other peoples' projects over mine, if something had happened (i.e. did he lose the photos?) or if he simply didn't care about getting the job done on time.
And, yes, I could have simply called him to ask him what was going on, but I'm always very busy and also wanted to be respectful (I know how time-consuming editing photos can be as I've done it myself).
Not to mention, I really believe that if you're the professional getting paid to do the job, you should take it upon yourself to keep the client informed about what's going on and not rely on them calling you.
*Final bonus tip:
Don't be afraid to turn down prospective clients if you feel who they are or what they are asking you for doesn't align with you.
If you feel that what they're asking you to do goes against your moral compass or beliefs, or if you feel there's any possibility that the person doesn't respect your work and your creative process, it's not worth it! Avoid getting into these high-stress situations in the first place.
Always remember that it's your decision whether to take a project on or not. Never to let anyone minimize your passions and undervalue your work.
I hope you found this post helpful and wish you tons of success in your artistic endeavors.
Do leave me a comment below letting me know if you've had any negative experiences while working on commissions. I'd love to hear about it!
For a list of my favorite art supplies and books, go here.


www.erikalancaster.com
is a participant in the Amazon Services LLC Associates Program, an affiliate advertising program designed to provide a means for sites
to earn advertising fees by advertising and linking to amazon.com.
www.erikalancaster.com
is a participant in the Shareasale.com Affiliate Program, an affiliate advertising program designed to provide a means for sites to earn advertising fees by advertising and linking to Shareasale.com partner companies.
 RSS Feed
