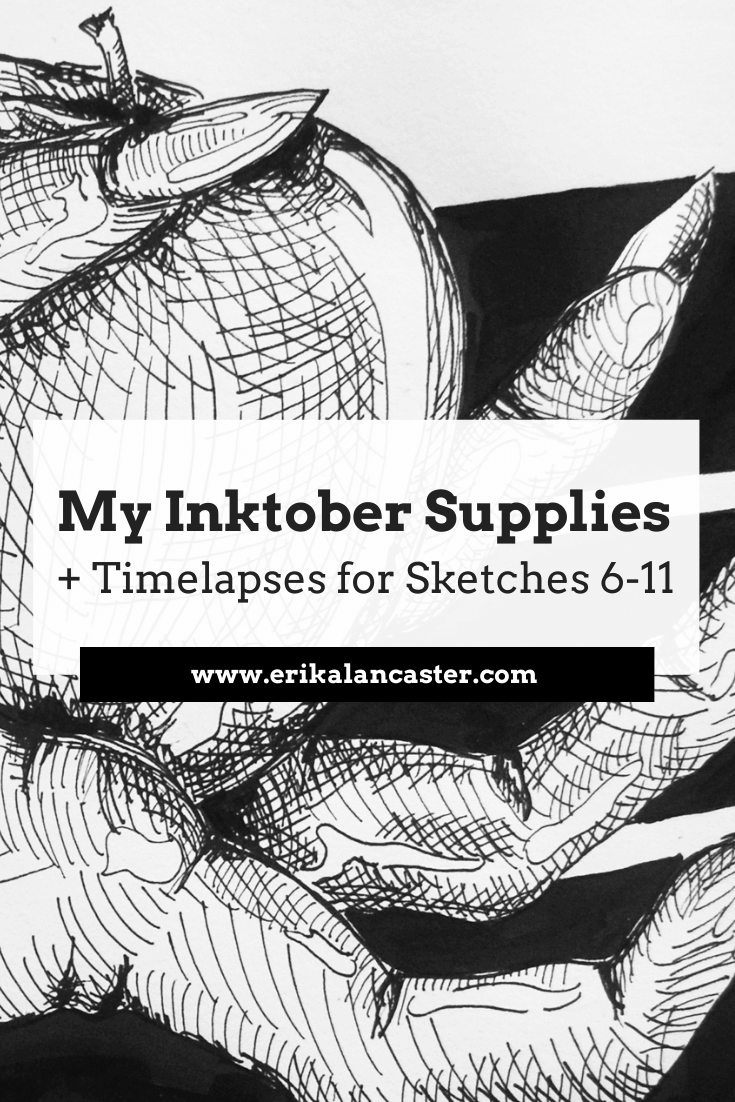
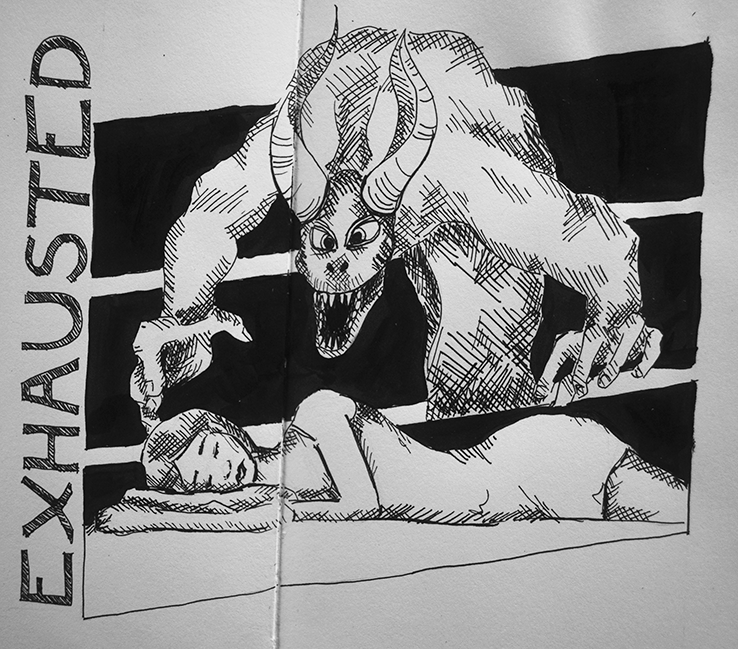
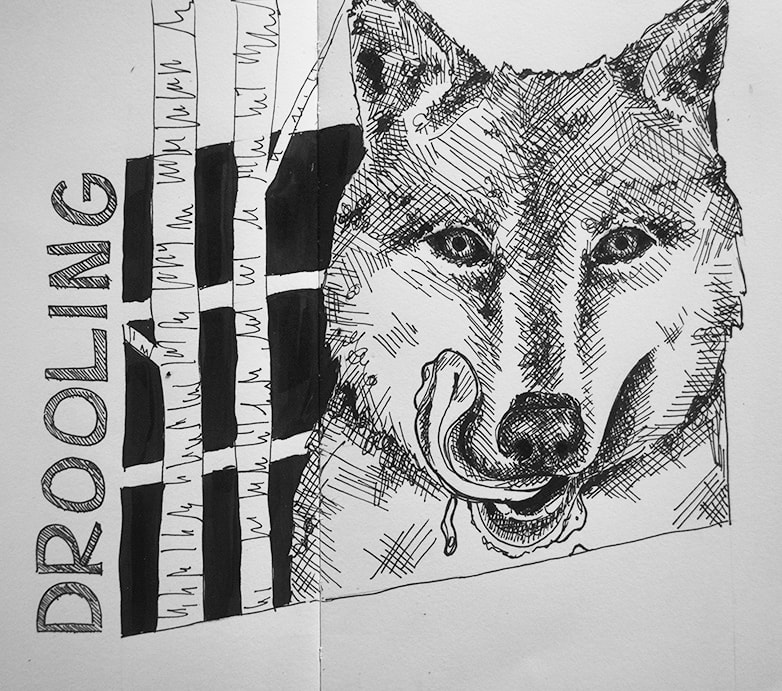
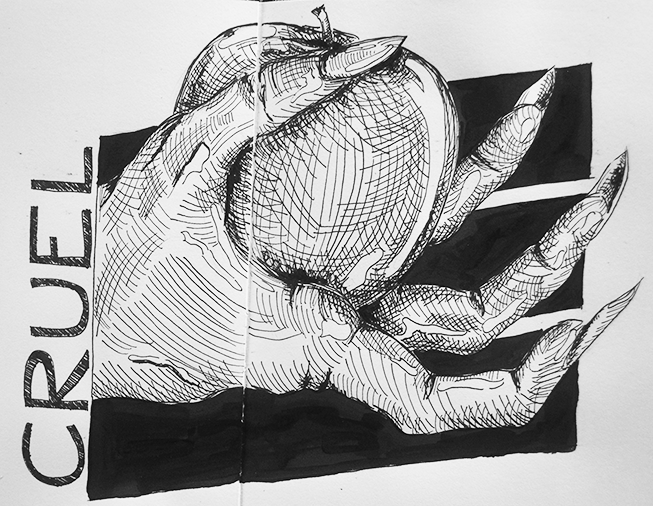
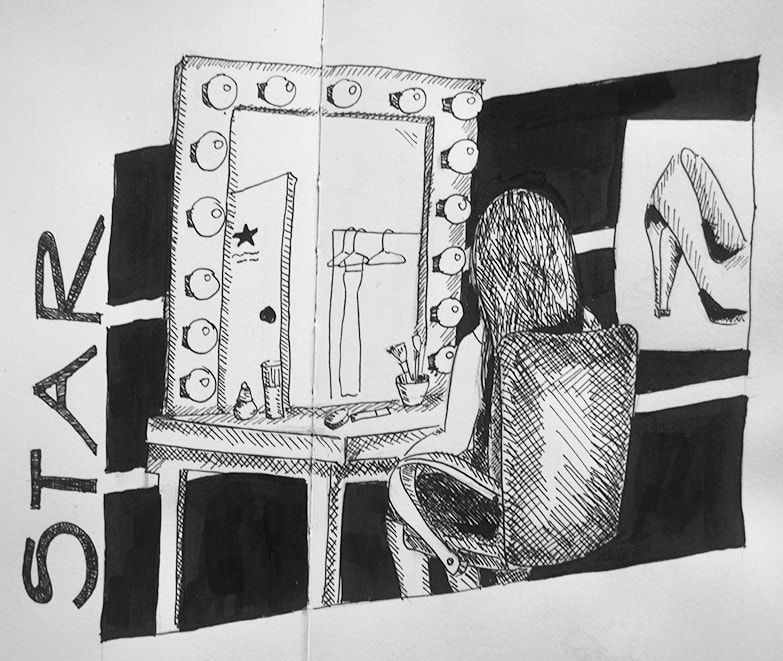
*This post contains affiliate links. I receive small commissions for purchases made through these links at no extra cost to you. These commissions help me keep this site up and running, in order for me to keep providing helpful and inspiring art content. :) Why, hello there! Thanks so much for visiting my little artistic corner of the Internet today! Today's post includes a video in which I'll be sharing the sketching time lapses for Inktober prompts 6-11, as well as how I came up with the ideas behind these quick pen and ink illustrations. It's definitely a challenge to come up with a new original idea every-single-day, but I'm still going strong and am hoping to make it through! I'm also sharing links to the exact sketchbook, drawing pens and ink that I'm using for this year's challenge, so make sure to find those at the end if you're interested in buying some new supplies for yourself. Check out my previous Inktober-related blog post/video titled: 5 Tips to Make it Through Inktober and How I'm Going About it for specific tips to get the most out of this drawing challenge. Also, here are a few past blog posts and YouTube videos in which I share a ton of helpful info about pen and ink drawing/shading. They will definitely help you step up your game throughout the rest of this challenge! Pen and Ink Alternative Shading Techniques (Shading a Sphere) How to Shade a Hand Using Pen and Ink Must-Know Pen and Ink Drawing Tips
If you enjoyed this video and found it helpful, make sure to subscribe to my YouTube channel. I share a brand new video every week with art tips, drawing and painting tutorials and mindset/productivity tips for artists. *Subscribe HERE*
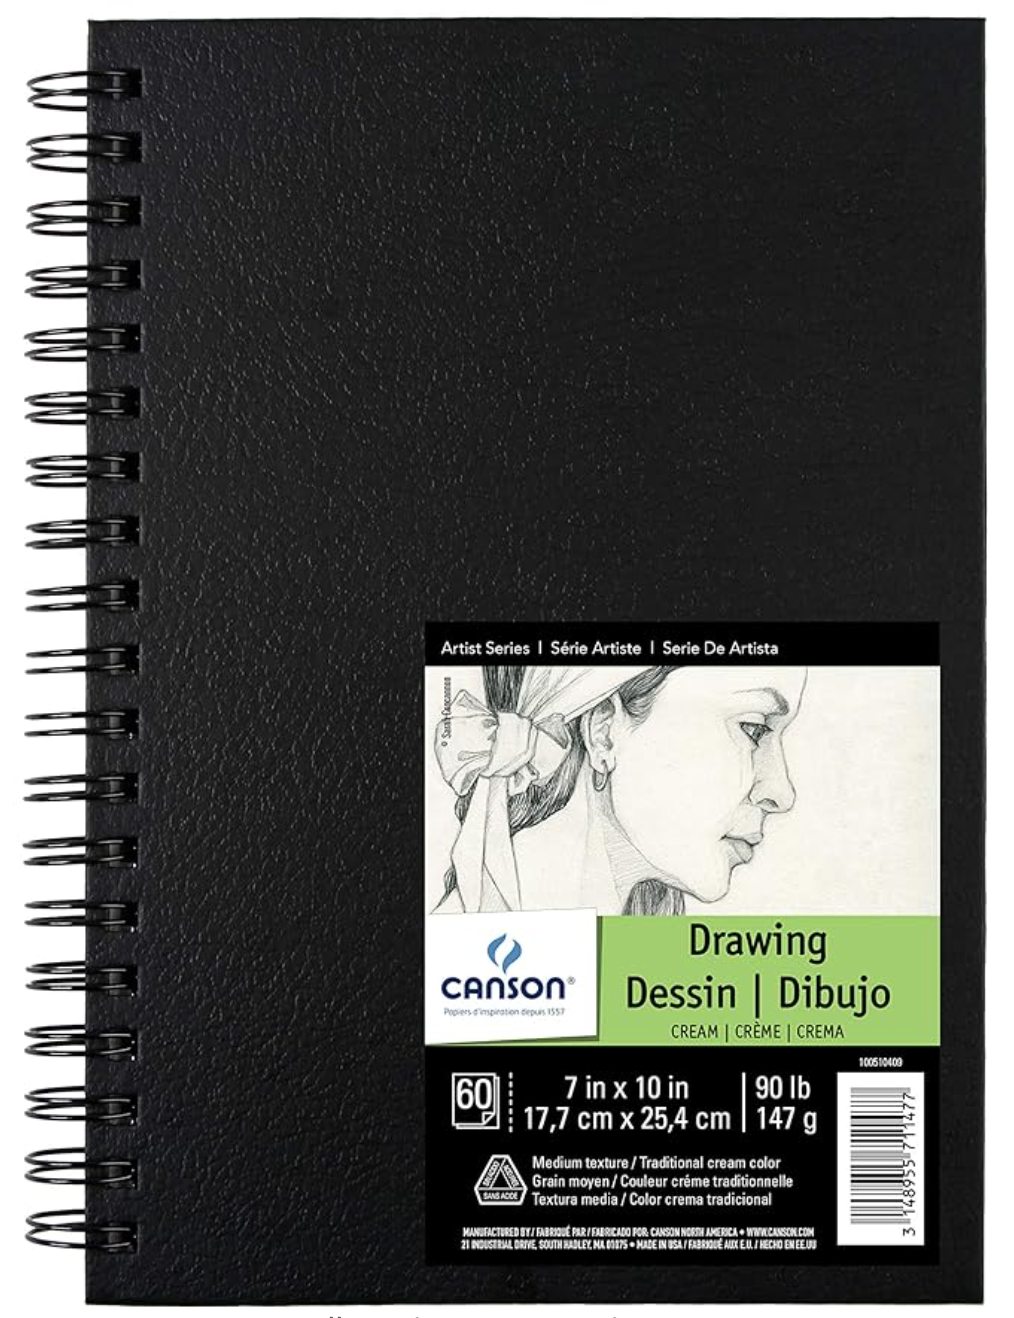
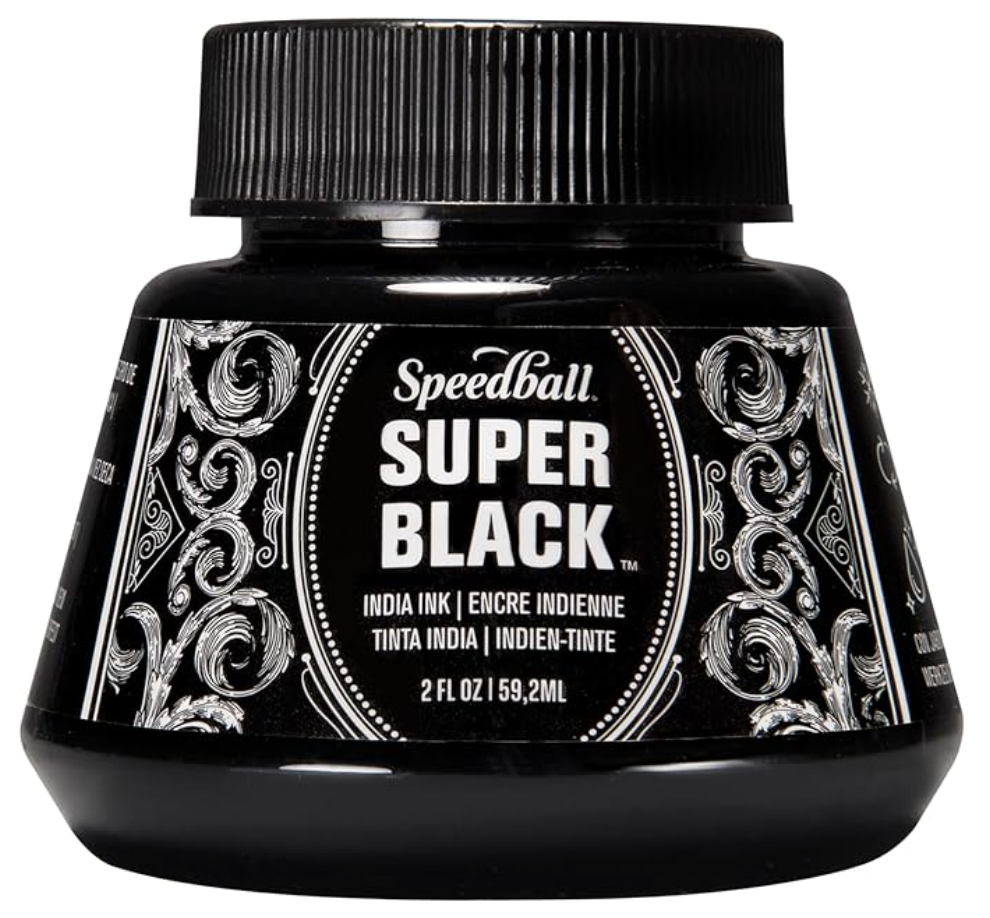
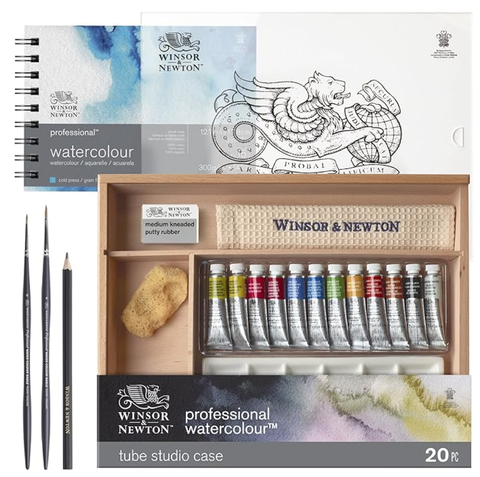
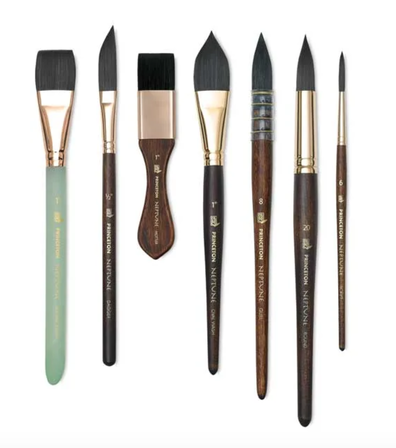
My Inktober SuppliesHere are the supplies I'm using for all of my Inktober sketches this year. I buy most of my art supplies through Amazon and Blick Art Supplies.
*The Leuchtturm1917 sketchbook is no longer available on Amazon, but you can find it on the brand's website here.
For a complete list of my current favorite art supplies, go here. 

I hope you enjoyed this post and learned something new, or got inspired to go and create a sketch for yourself. I wish you tons of progress and enjoyment in your artistic journey. :) Thanks so much for popping by today!
0 Comments
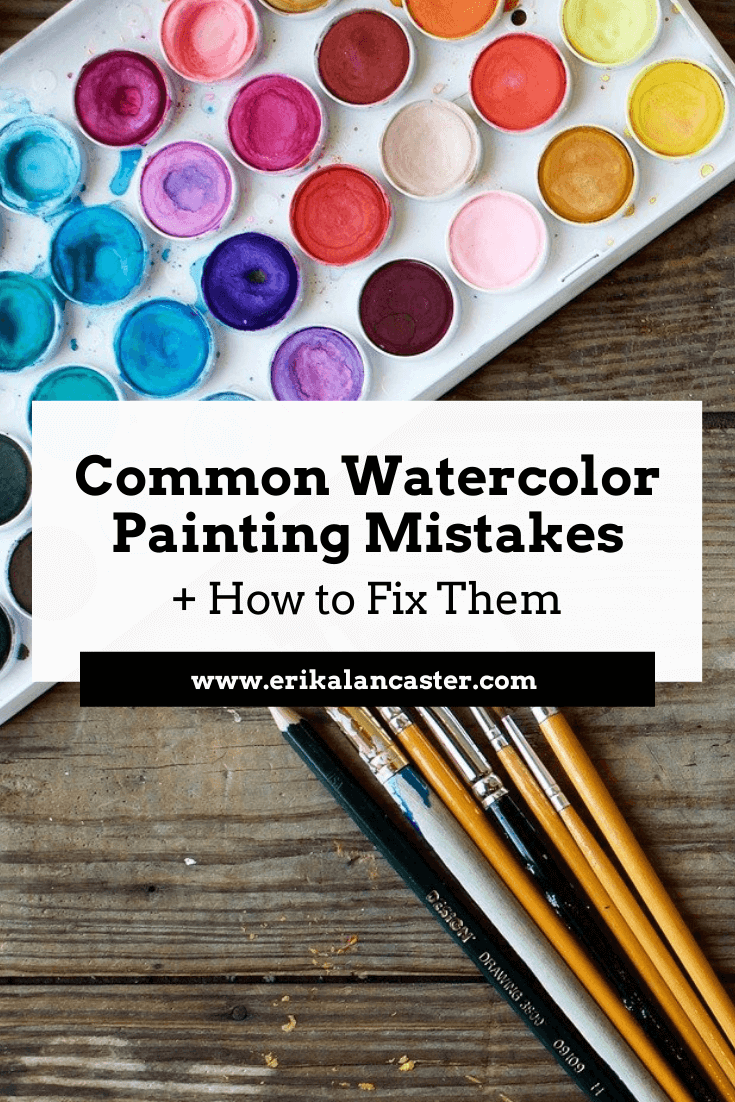
*This post contains affiliate links. I receive small commissions for purchases made through these links at no extra cost to you. These commissions help me keep this site up and running, in order for me to keep providing helpful and inspiring art content. :)
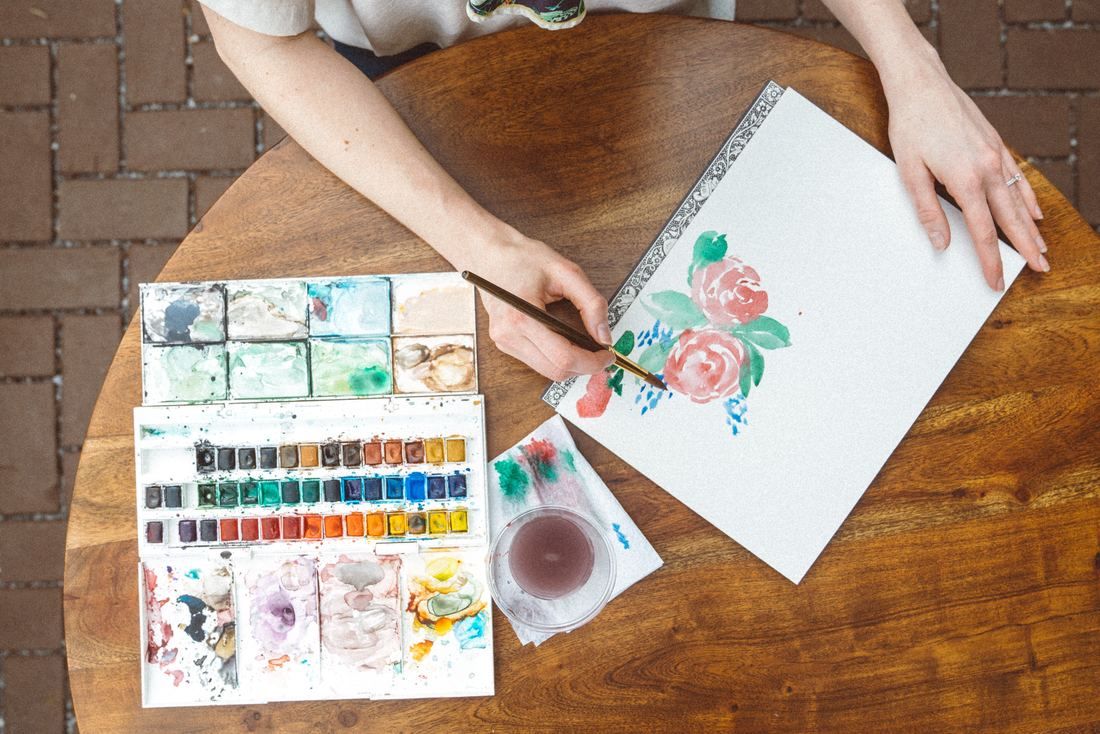
Do you feel like you're constantly fighting against your supplies when painting with watercolors? Feel like a failure after every single little mistake you make throughout your painting process? Do you frequently end up frustrated with yourself and throw away more paintings than you actually keep? In today's post, I'll be sharing five common watercolor painting mistakes and what I personally do to fix them or avoid them altogether. By making use of these tips and tricks, you'll end up with a painting that is going to have way more positives than negatives. When using watercolors, we cannot just simply cover up our mistakes with a new layer of paint. This artistic medium requires us to be much more mindful and delicate, even, right from the start of the painting process. As an artist who uses different painting mediums, it's helpful to remember that I'm using this medium's transparency in combination with the whiteness of my paper, to produce a wide range of values. I am not covering up my substrate and layering paint, as I would with oils or acrylics, but using my paper in itself as my lightest value. This is what's going to help create watercolors' distinctive "glowing" effect. There's way more of a chance that you'll produce a great watercolor painting if you do, at least, a bit of planning before starting, and are able to remain patient throughout the process. It's also essential that you are aware of this medium's characteristics and have practiced basic exercises before jumping into a more complex subject. I highly recommend reading my blog post titled 10 Things I Wish I Knew Before Starting With Watercolors if you're just getting started. All this said, it's important to know that you don't have to get frustrated with yourself and throw away a painting every-single-time you've made a mistake. If you're mistake is small (which it should be if you're staying focused throughout the process), there most likely will be a way to make it less noticeable. There are also specific things you can do to avoid these mistakes in the first place. Five Ways to Avoid or Fix Watercolor MistakesIt's important to understand that no mistake will be completely erased with any of these techniques. What you're trying to do is make them less noticeable, so that they don't distract from the great areas of your painting.
|
|||||||||||||||||||||||||||||||||||||||||||
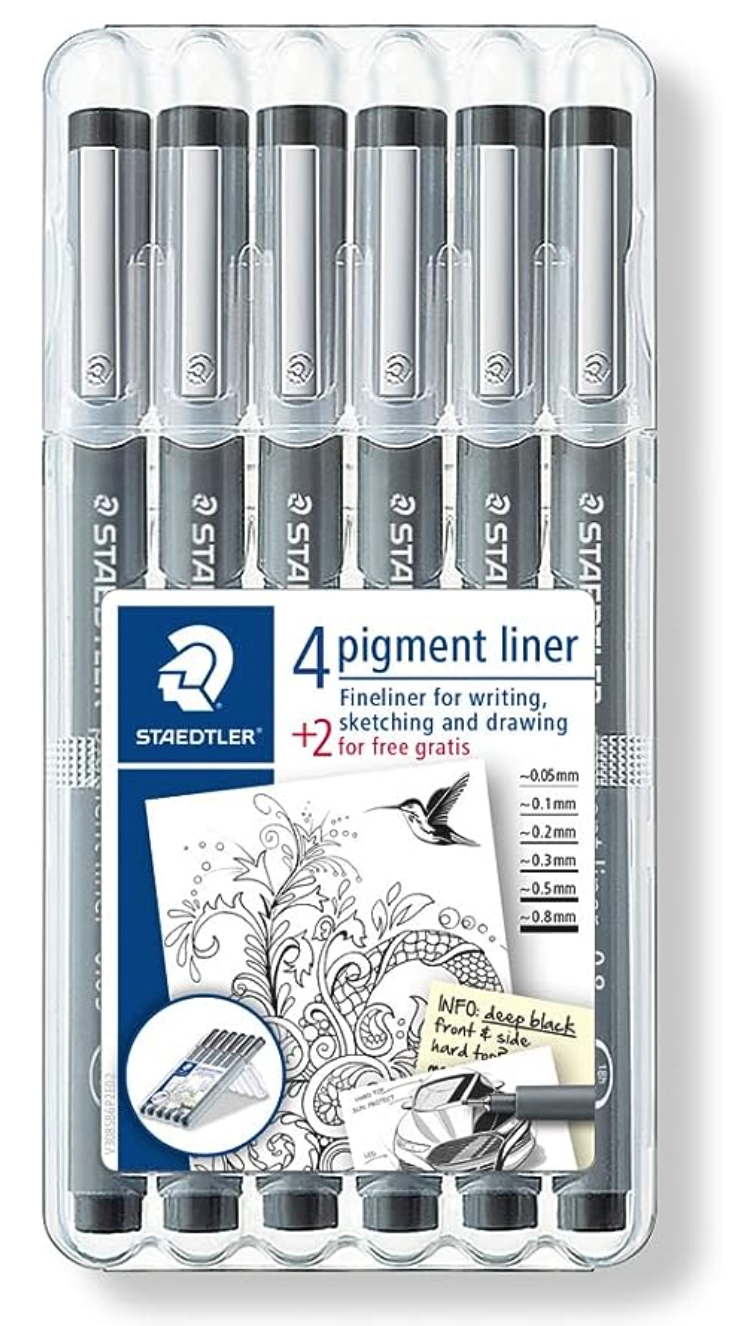


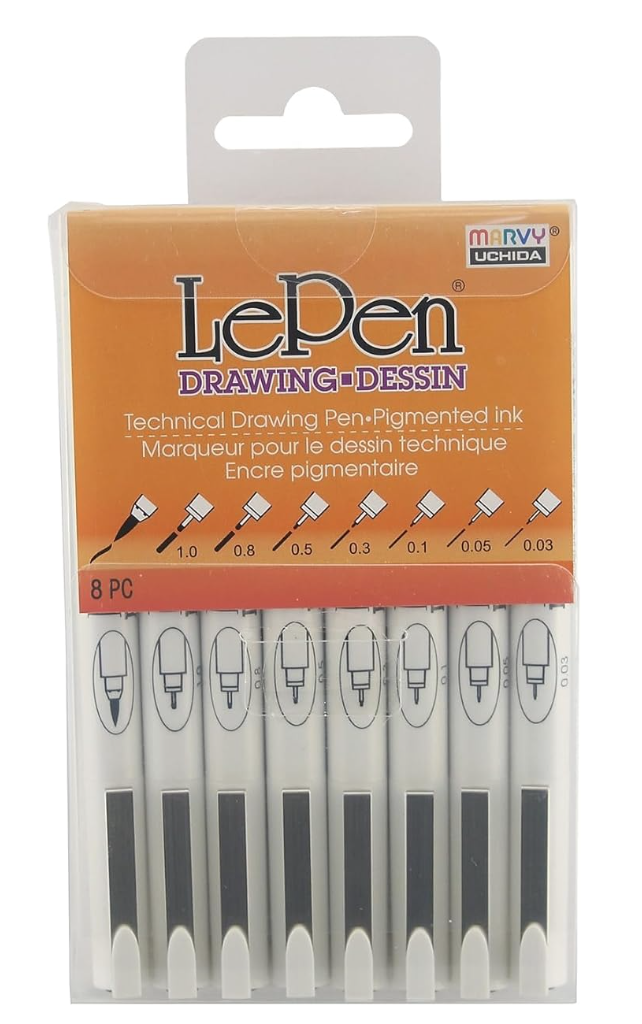
LePen Drawing Pens 8 Piece Set

Strathmore Bristol Paper Vellum Surface
|
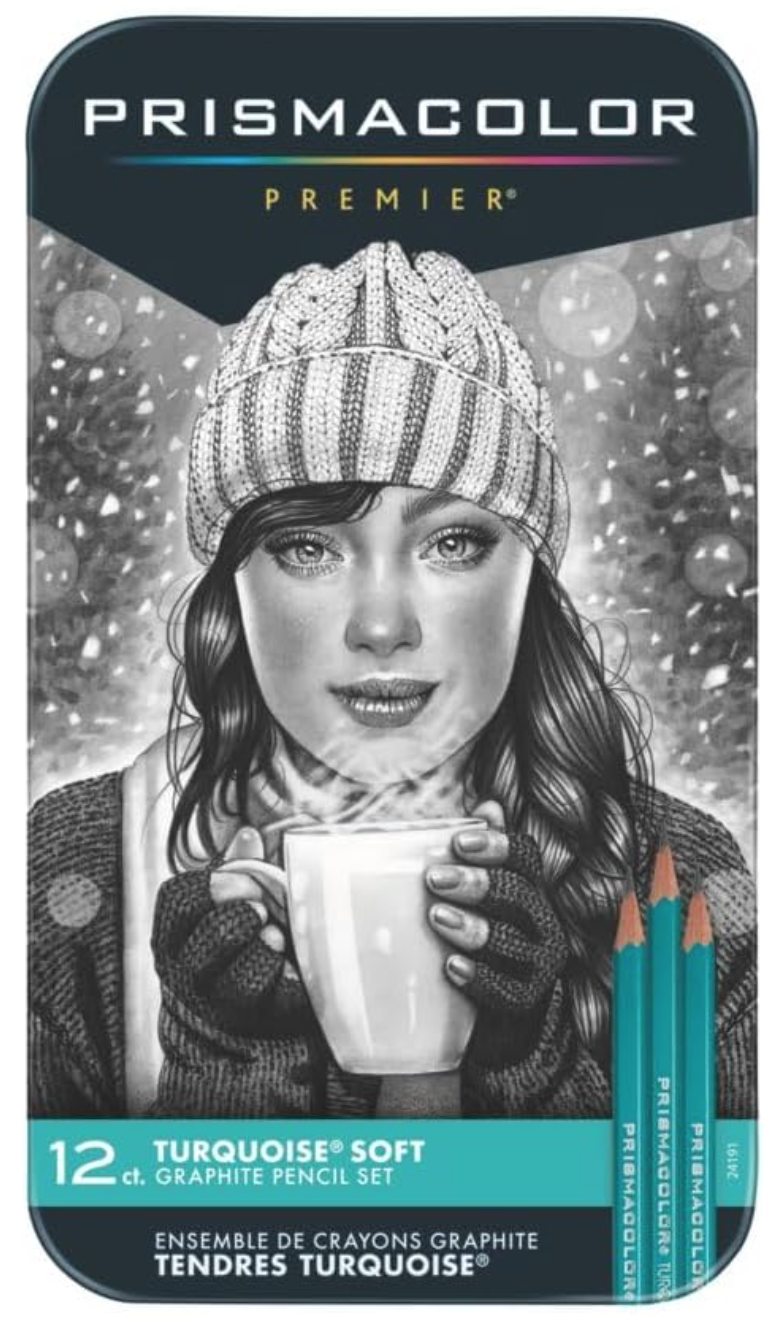
Prismacolor Premier Turquoise Drawing Pencils
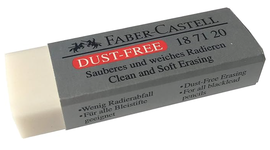
Faber-Castell Dust Free Soft Graphite Erasers
|
2. Warming up
I enjoy warming up my hand by practicing the marks I will be using in my studies on a scrap piece of paper. If you're a beginner just starting with pen and ink and you're setting out to sketch an object in a way that actually transmits form, I suggest practicing value strips as well (there is a pdf at the end of the post that you can use to practice with).
It's absolutely essential that you understand how to create a variety in values using marks when it comes to sketching with a drawing pen, especially if you're looking to add believable structure and form to a drawing.
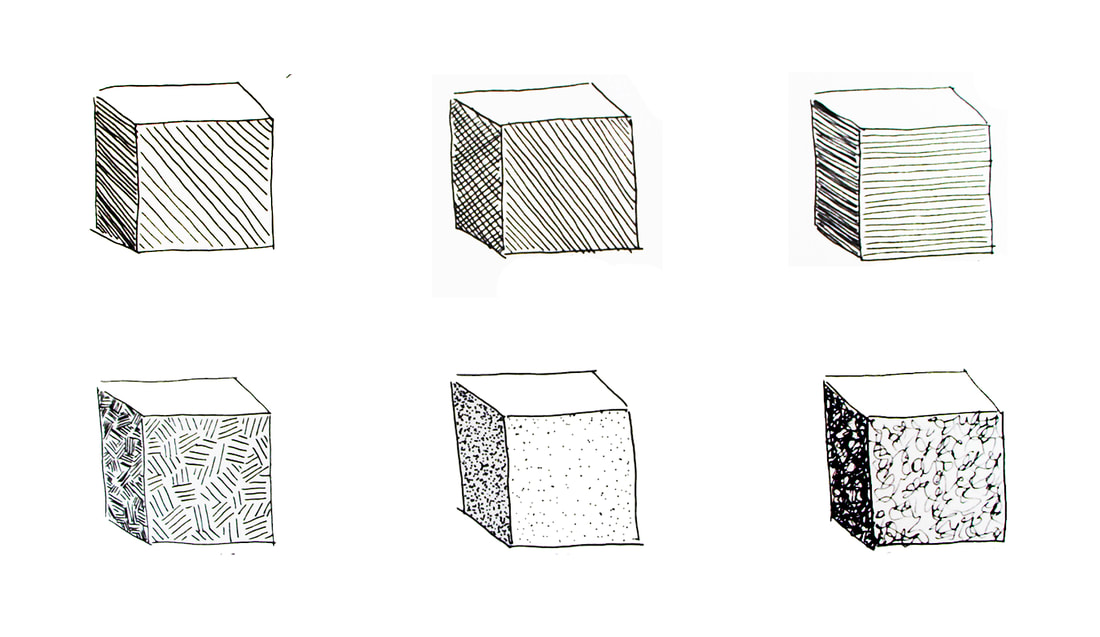
Practicing different types of marks to shade a simple geometric shape.
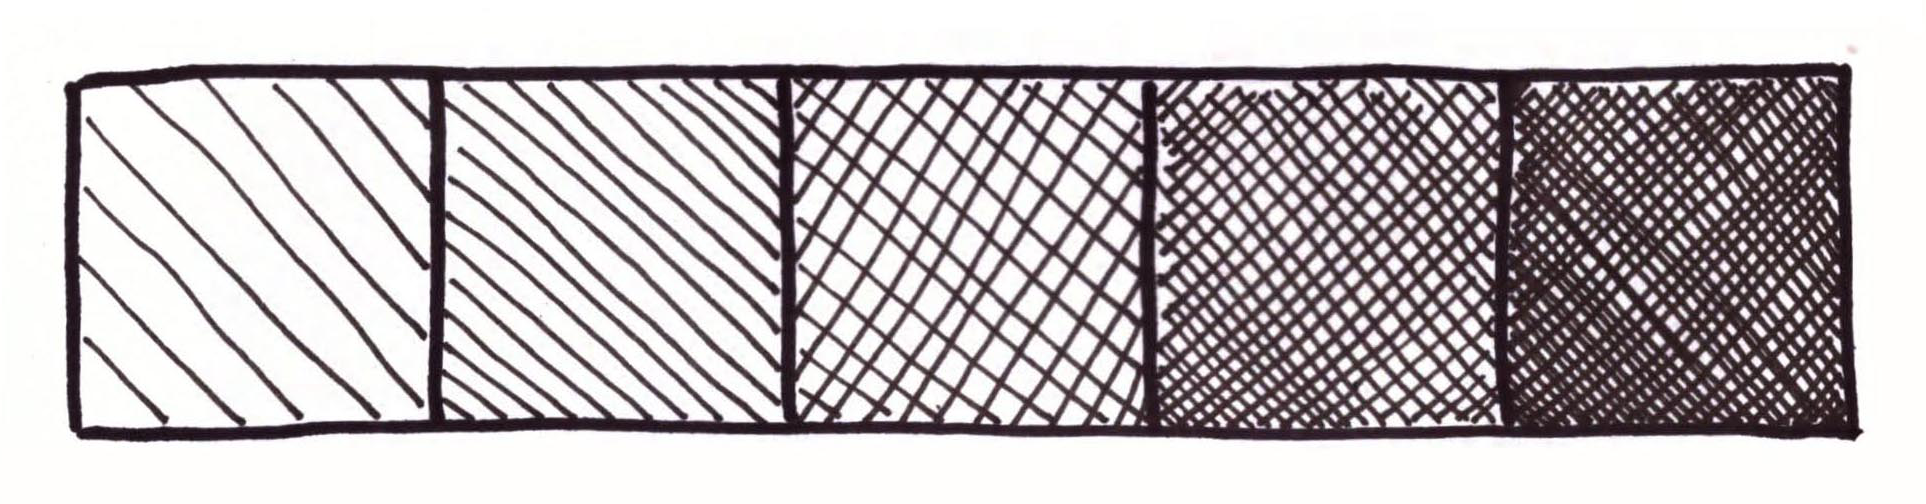
Value strip showing hatching and crosshatching.
3. Choosing a great reference photo
When searching for a photograph to use as reference for any kind of art study, there are a few things you have to keep in mind. First, make sure that its contents are suited for your current skill level, especially when you are exploring a new medium.
This way, you'll be able to focus more on the new medium or technique. Aside from this, you must select a photograph that is high quality.
When I am choosing a photograph to work from, I make sure that it has a great resolution that will allow me to zoom in to view details as needed.
Photographs should also have great lighting, which means that they are not over or underexposed, and that there is a good range of values/balance between lights and darks.
If you have trouble discerning between light, mid-tone and dark areas, I highly recommend looking for photographs with a single light source and possibly opening up your image in an image-editing software like Photoshop to desaturate it.
Keep practicing this, because it's imperative that you gain practice doing this so that you're able to render values and place them accordingly when you're trying to make your drawings more believable.
To find more free, quality photographs to practice with, visit my post titled My Favorite Free Image Sites and Two Examples of References with Finished Illustrations!
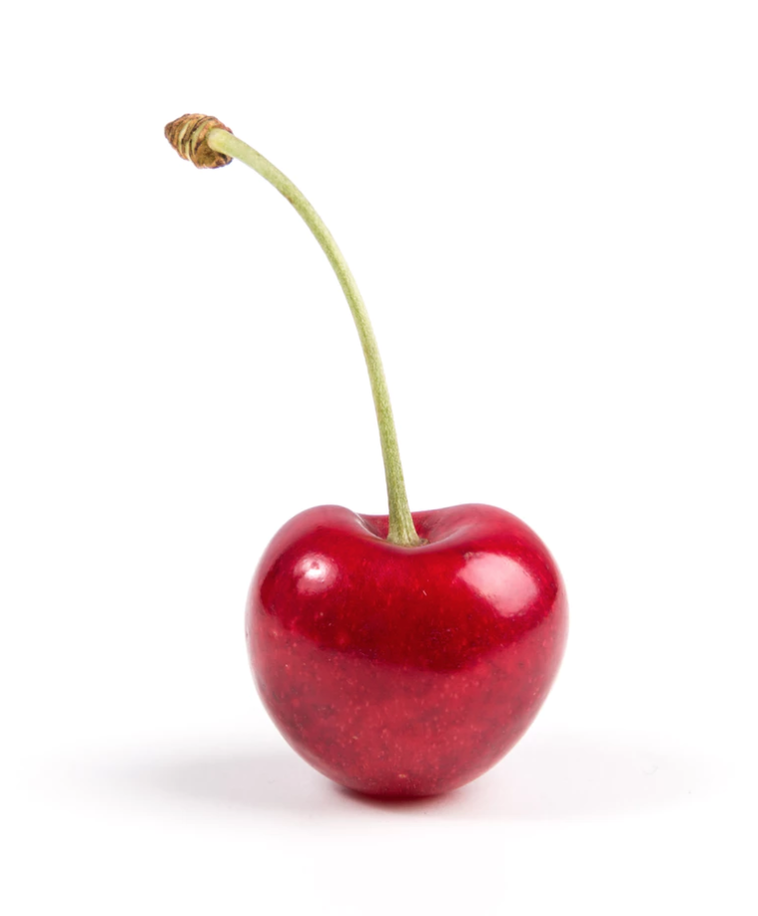
Photo by Thomas Quaritsch from unsplash.com. Click on link to visit site and download for your studies.
|
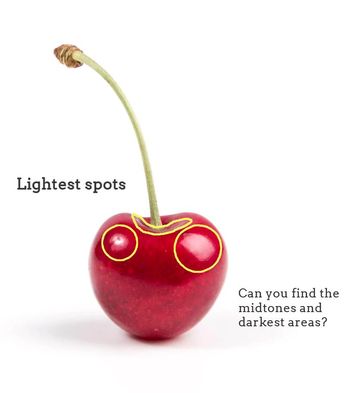
Photo showing lightest areas.
|
4. Creating an initial outline sketch (and lightest values map)
Once I have taken a moment to observe my reference picture and have pinpointed lightest and darkest areas, as well as mid-tones, it's time to create my initial pencil sketch!
This will entail creating a simple outline drawing of my object, paying attention to proportion and location of separate elements in regards to each other.
Also, at this point I also create a "map" for myself that will remind me where my lightest areas are located, so that I can protect them and leave them untouched by any marks. You can make this "map" as detailed as you'd like if you feel that creating more shapes with your pencil will help you throughout the mark-making process.
If you'd like to skip the outline drawing phase of this study and jump straight onto the ink mark-making, you can download either the large single cherry outline pdf or the six cherry outline pdf so you can practice all of the mentioned techniques!
Both of these free downloadable worksheets can be found at the end of this blog post.

5. Laying down initial layer of marks
First, I outline my initial pencil sketch (minus the smaller "map" shapes) using my drawing pen. Then, similarly to my watercolor painting process, I leave the lightest lights completely untouched by any ink and start adding in my first layer of ink.
What I like to do with these faster studies, is fill in all my mid-tone to darkest areas simultaneously using light pressure on my pen, making sure to work around my lightest areas.
In other words, by the end of this step, my entire mid-tone and darkest areas already are covered with that first "light" layer of marks.
6. Adding darker values
This is the part of the process that is the most time-consuming, as I work back and forth between mid-tone to darkest areas doing my best to create gradual shifts in value until the desired form is achieved.
Throughout this process, I constantly look at my reference picture.
It's essential to not go overboard by adding too many marks in mid-tone areas, but also to not be scared of going dark where needed (which is usually only in small areas).
Remember that there has there has to be a good range of values within your sketch or you risk "flattening" it out!
At the end, you can outline your sketch using your drawing pen once more if you wish! :)
Comparing Different Mark-Making/Shading Techniques
Hatching
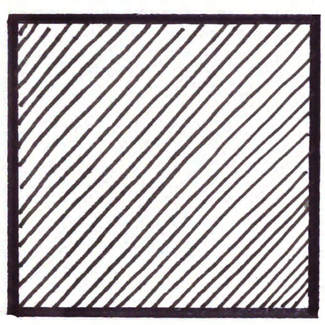
Hatching- Mark-making/ Shading technique
|
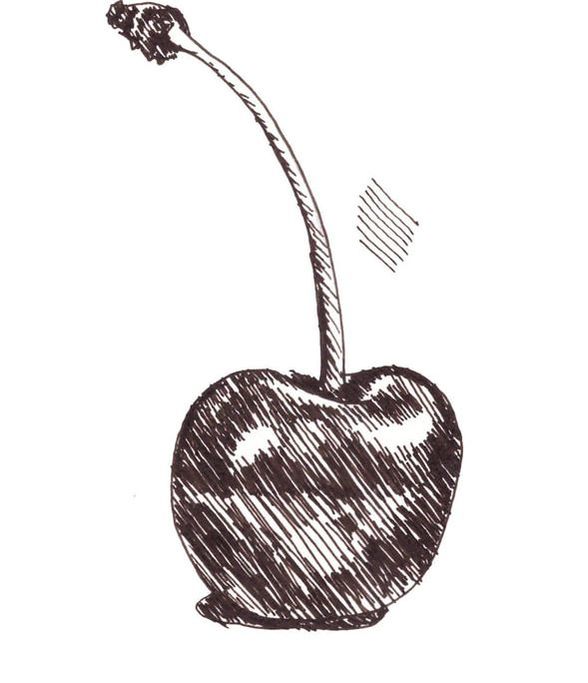
Cherry sketch showing hatching.
|
Crosshatching
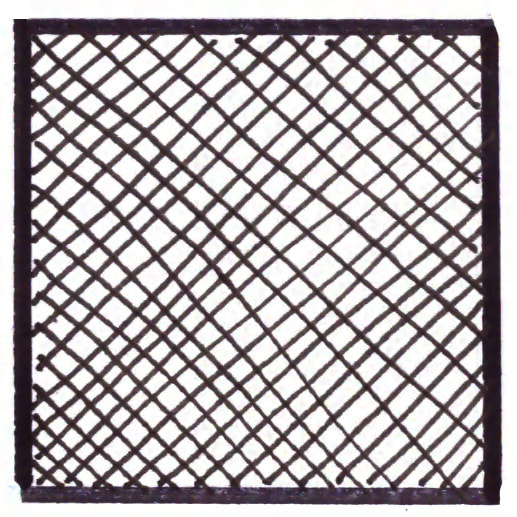
Crosshatching- Mark-making/ Shading technique
|
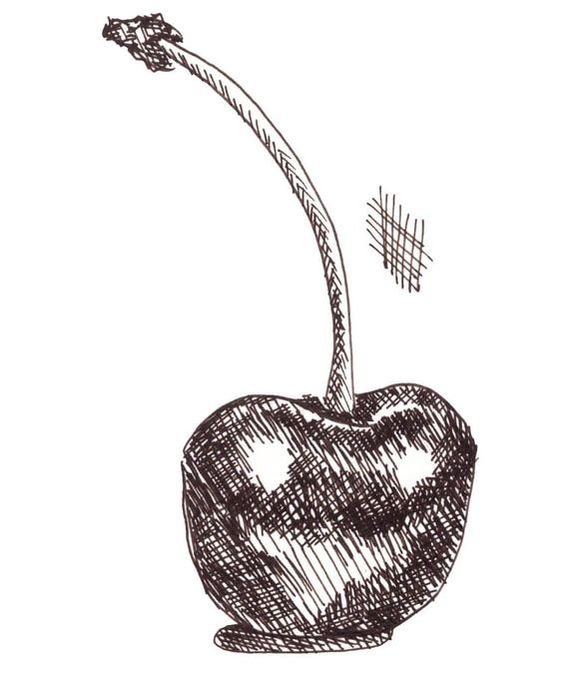
Cherry sketch showing crosshatching.
|
Contour Lines
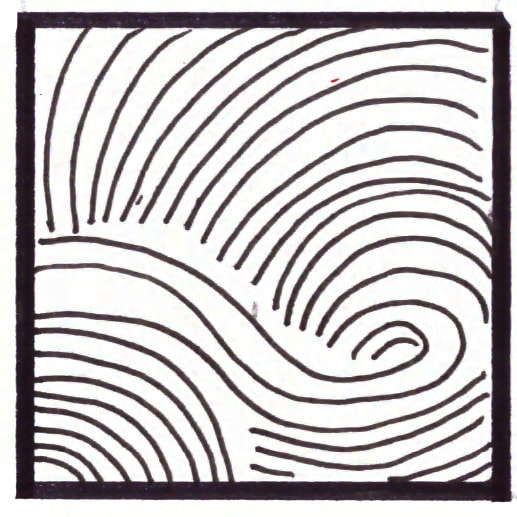
Contour Lines- Mark-making/ Shading technique
|
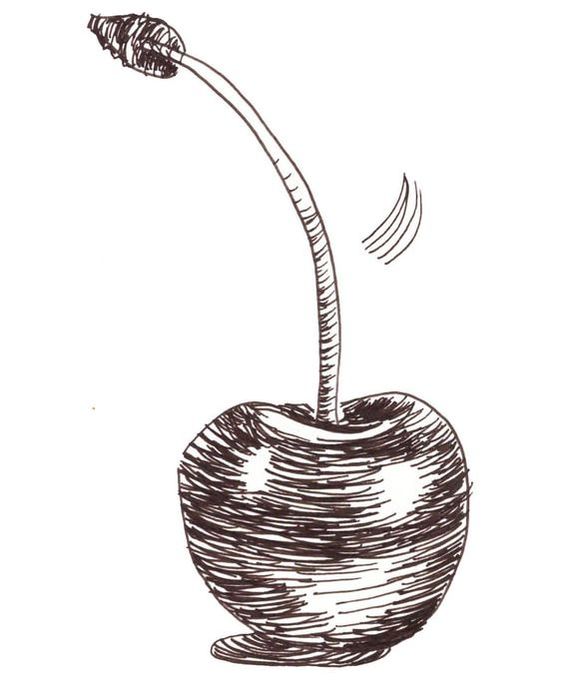
Cherry sketch showing contour lines.
|
Weaving
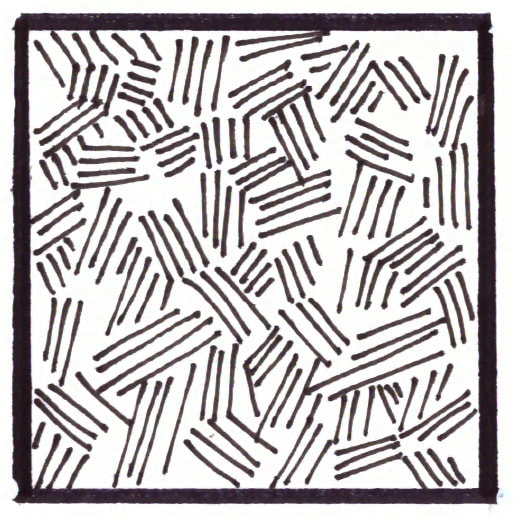
Weaving- Mark-making/ Shading technique
|
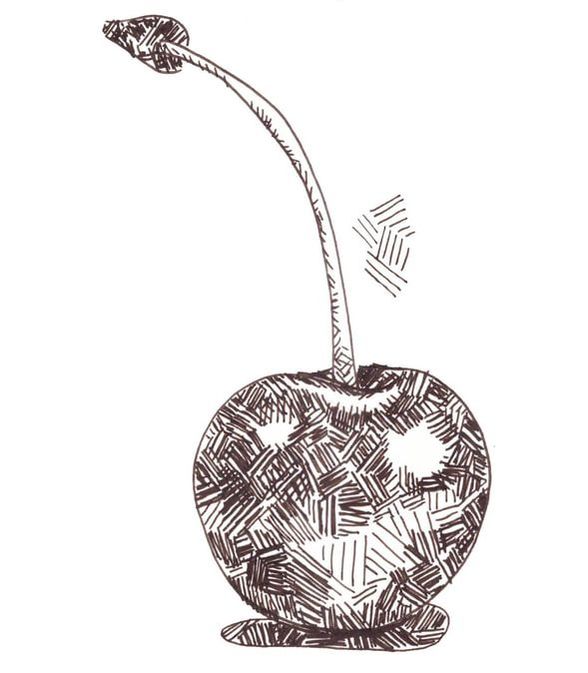
Cherry sketch showing weaving.
|
Stippling

Stippling- Mark-making/ Shading technique
|
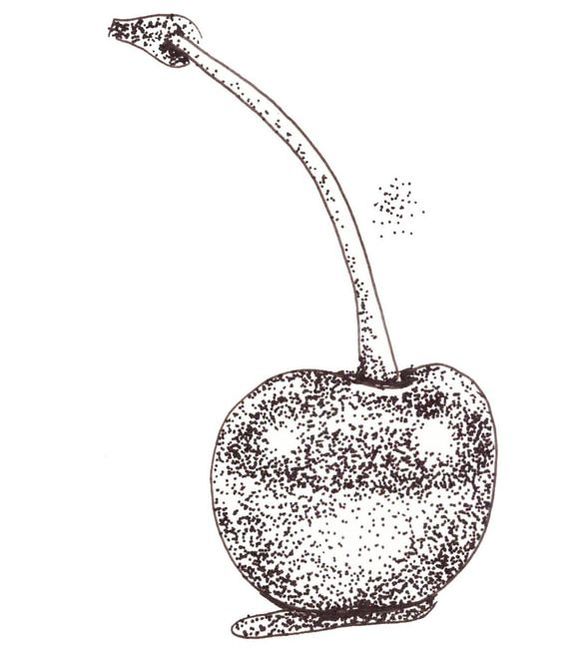
Cherry sketch showing stippling.
|
Scribbling
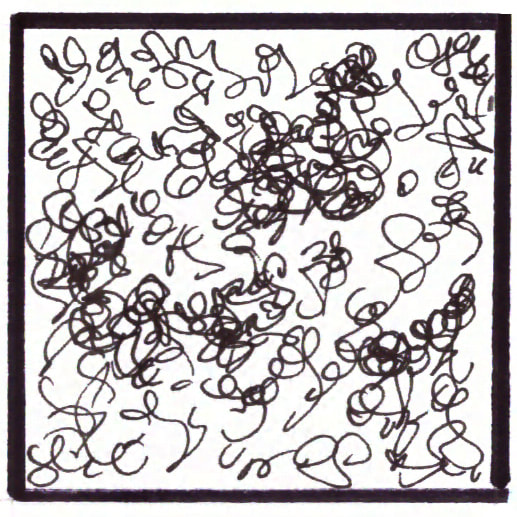
Scribbling- Mark-making/ Shading technique
|
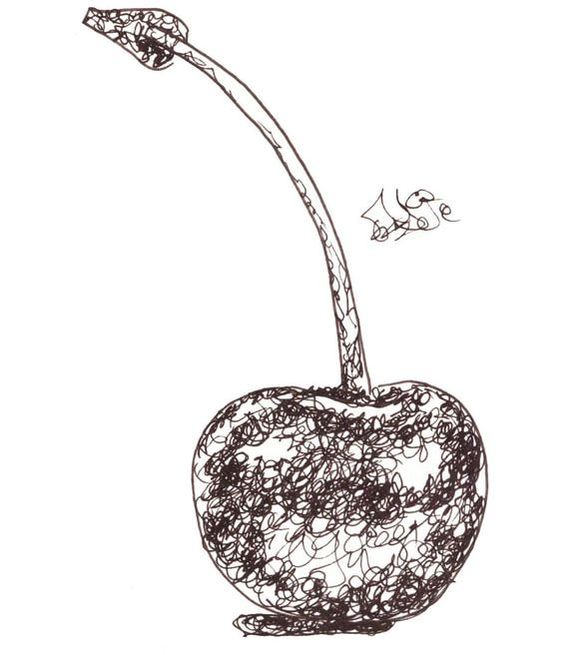
Cherry sketch showing scribbling.
|
I would recommend practicing at least a few different pen and ink mark-making/shading techniques because it's the only way you'll be able to know which ones come more naturally to you, as well as which can best create the effects you're going for.
My personal favorites are hatching/crosshatching and contour lines. I'd love to know which you like best below!
*Free downloadables!
| drawing_marks_lines.pdf |
| value_transitions_shading.pdf |
| cherry_outline_drawing.pdf |
| 6_cherry_outline_drawings.pdf |
*This post contains affiliate links. I receive small commissions for purchases made through these links at no extra cost to you. These commissions help me keep this site up and running, in order for me to keep providing helpful and inspiring art content. :)
Are you struggling with saving your whites when painting with watercolors? Have you been considering the use of masking fluid but are unsure about how to use it effectively and whether it's really necessary at all? Have you avoided using masking fluid in your work because it makes the process longer and more tedious?
One of the most difficult things to get used to when starting with watercolors, is planning where the lightest areas of our paintings will be and keeping them protected throughout the painting process.
Watercolors are quite different from other painting mediums due to the fact that they are translucent and require us to work from lightest to darkest values. As opposed to acrylics, oils or gouache, this painting medium doesn't allow us to simply cover up mistakes.
By doing a bit of planning beforehand and knowing what tools/techniques to use for each project individually, we can ensure that we're using watercolors to their full potential.
When used effectively, this artistic medium is able to create very striking paintings that have a lighter feel to them than those created with acrylics or oils, and also seem to glow from within.
Protecting our lightest areas is essential in order to achieve such qualities.

In this blog post, I am sharing the steps I personally go through when using masking fluid in a watercolor painting. I will also provide some essential tips that will help you avoid accidents.
To illustrate each step, I have included a beginner-friendly masking fluid exercise. It's very important to do a few explorations with new tools before actually trying them out in a painting!
Even though many watercolor sets contain white paint, traditional watercolor artists avoid using it. There's no need because the watercolor paper itself IS the white and the areas left free of pigment will stand as the highlights of the painting.
Whether the artist decides to use masking fluid or not, he/she makes sure to protect those whites because, once pigment touches paper and is absorbed, there's no way to get that white back.
Traditional watercolor artists also avoid using black, but that is a story for a different day.
To learn about the ten most important things you should make sure to apply when painting with watercolors, read my blog post titled 10 Things I Wish I Knew Before Starting with Watercolors.
Now-a-days, there are tons of amazing artists who use watercolors in combination with other types of mediums, creating beautiful mixed-media artworks. There are those who complete a watercolor painting without paying much mind to highlights until the end, when they add them in using white gouache, acrylic paint, paint pens, and/or other drawing mediums.
I'm all about exploring mediums and creating one's own artistic style!
However, I've found it invaluable to study each medium individually and challenge oneself to create desired effects using that medium alone. I noticed the biggest improvement in my painting quality when I pushed myself to complete a project using only one medium.
So, I recommend making time to explore each medium on its own once you're at a certain skill level, especially if you find that you're continuously reaching out for a second/third medium as a crutch because you were unable to create the effects you were intending to.
Once you've learned the characteristics of each medium and the general do's and don'ts, then go ahead and combine them, if you wish to.
But let it be because it's your stylistic choice, and not because you needed another medium as extra support. It's hard! But I promise you you, that it will help you improve a whole ton.
Masking fluid is absolutely not necessary in order to create a great watercolor painting, but it sure is a great tool to know about, especially when painting certain kinds of subjects that have shiny, reflective surfaces and/or tiny areas you want to block out.
If you don't have masking fluid or wish not to use it, you have the option of carefully working around your planned white highlights, but because watercolors are so fluid, it may be a challenge.
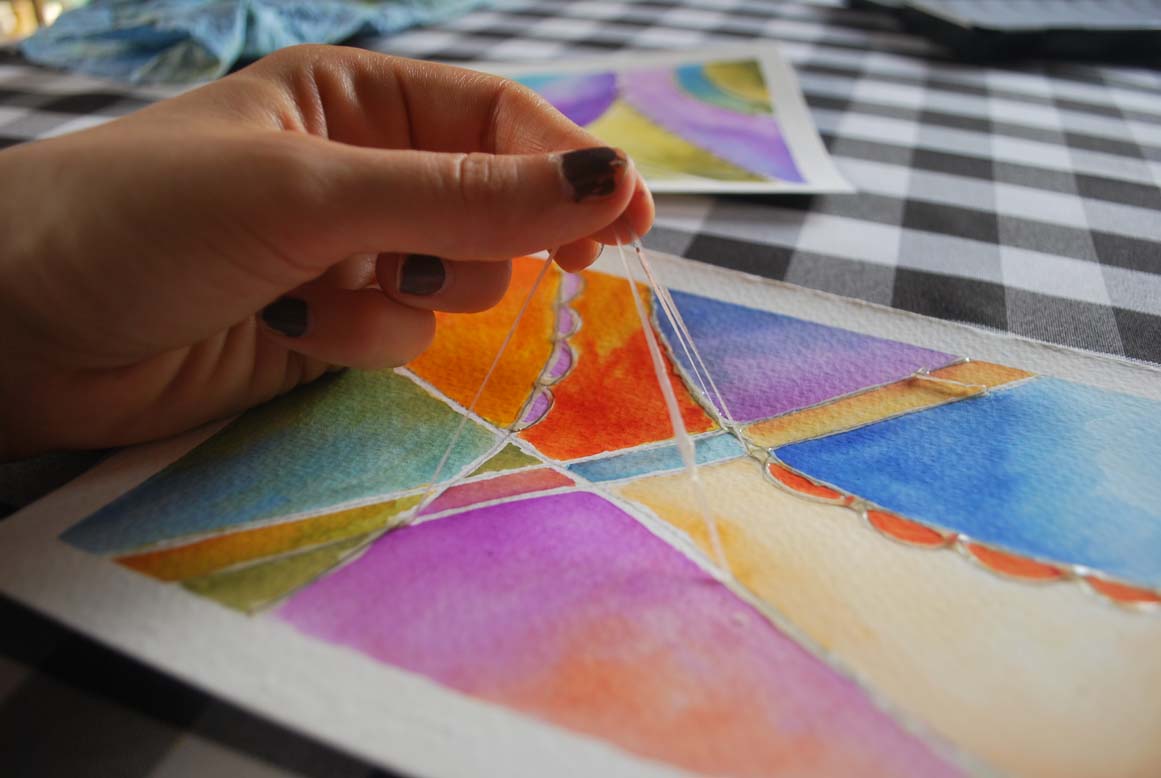
Here is an example of a painting I created by very carefully working around the areas I wanted completely white at the end (no masking fluid). See all those tiny white spaces? I consciously made an effort not to get any pigment in them!
If I had accidentally covered up those spaces, my painting would look flat and wouldn't have that "glow" to it.
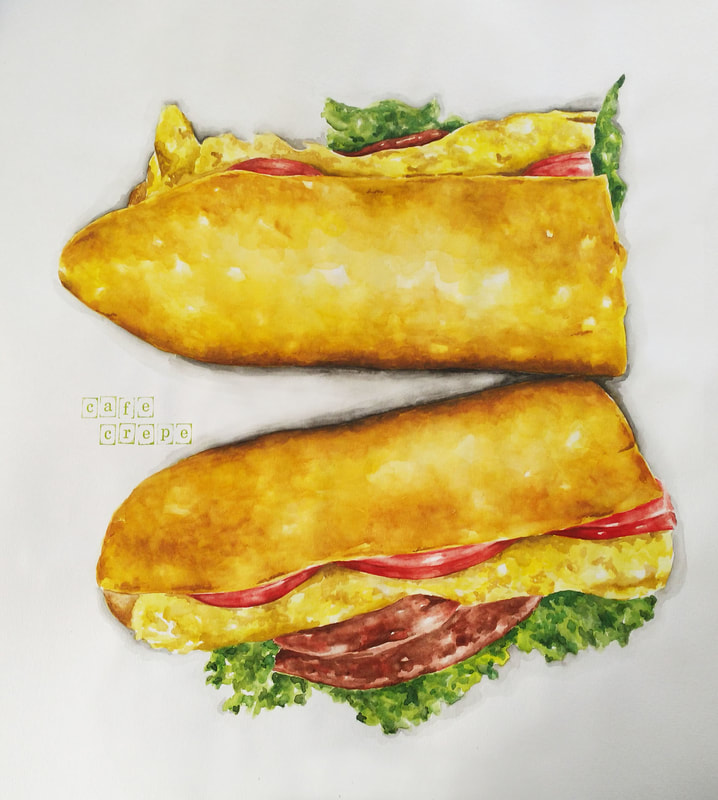
Watercolor sandwich by Erika Lancaster
If you enjoyed this video and found it helpful, make sure to subscribe to my YouTube channel. I share a brand new video every week with art tips, drawing and painting tutorials and mindset/productivity tips for artists. *Subscribe HERE*
So, what is masking fluid, exactly?
Masking fluid (also referred to as liquid frisket) is liquid latex that dries to a rubbery/waterproof film, allowing us to block out areas in our paintings that we want free of pigment. It contains ammonia, which makes the liquid very smelly and makes it necessary to work in a well-ventilated room.
Usually, we're presented with masking fluid options at art supply stores that look white while in the bottle and dry to a transparent/yellowish film. However, pigmented varieties are available, in case the artist requires a greater visibility throughout the placement process.
Though the use of masking fluid entails adding in a couple of extra steps and makes the painting process longer, it does make protecting the whites a lot easier and is a great tool to have when painting complex, detailed subjects!
How to Use Masking Fluid
You will need:
-Watercolor paper
-Masking fluid
-Watercolor paint
-Paintbrushes
-Pencil
-Eraser
-Paint-mixing palette
-Cup of water
-Old rag or paper towel
-Bar of soap or dishwashing liquid
-A tool for placing your masking fluid (old paintbrush, wooden skewer, paper clip, cotton swab, etc.)
*Optional:
-Masking tape
-Rubber cement pick up or soft eraser
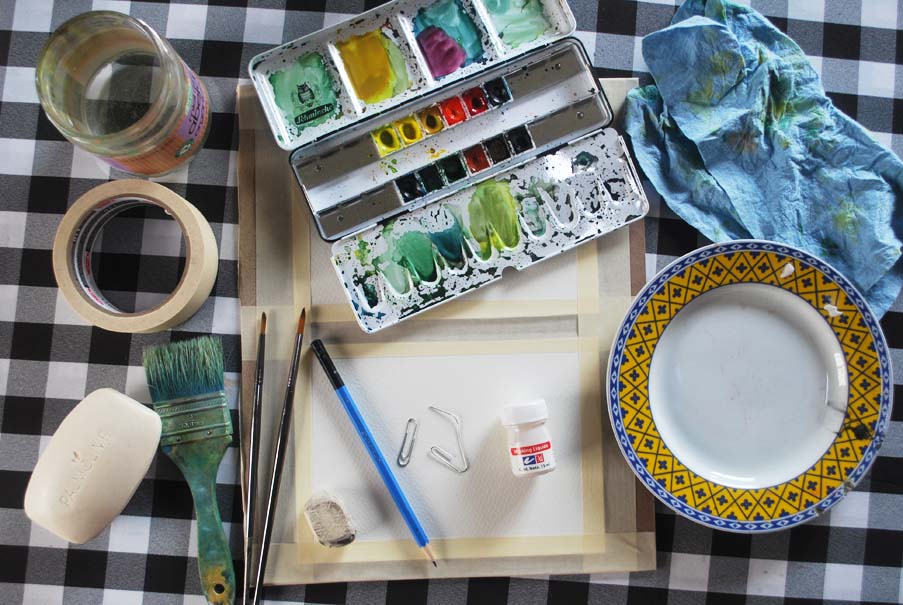
Watercolor painting supplies
|
|
|
|
Instructions:
1. Create your initial sketch
As always, start with a good, light pencil drawing. Once you're done, map out where you want your highlights to be. Usually, this will entail having a good look at your reference picture and pinpointing lightest areas. Then, we would lightly outline these small shapes.
*Illustrative exercise (recommended for beginners):
For the purpose of this little abstract exercise, we will be blocking out lines. Create a simple design using straight or curved lines and keep them as light as possible (so you can erase them later)!
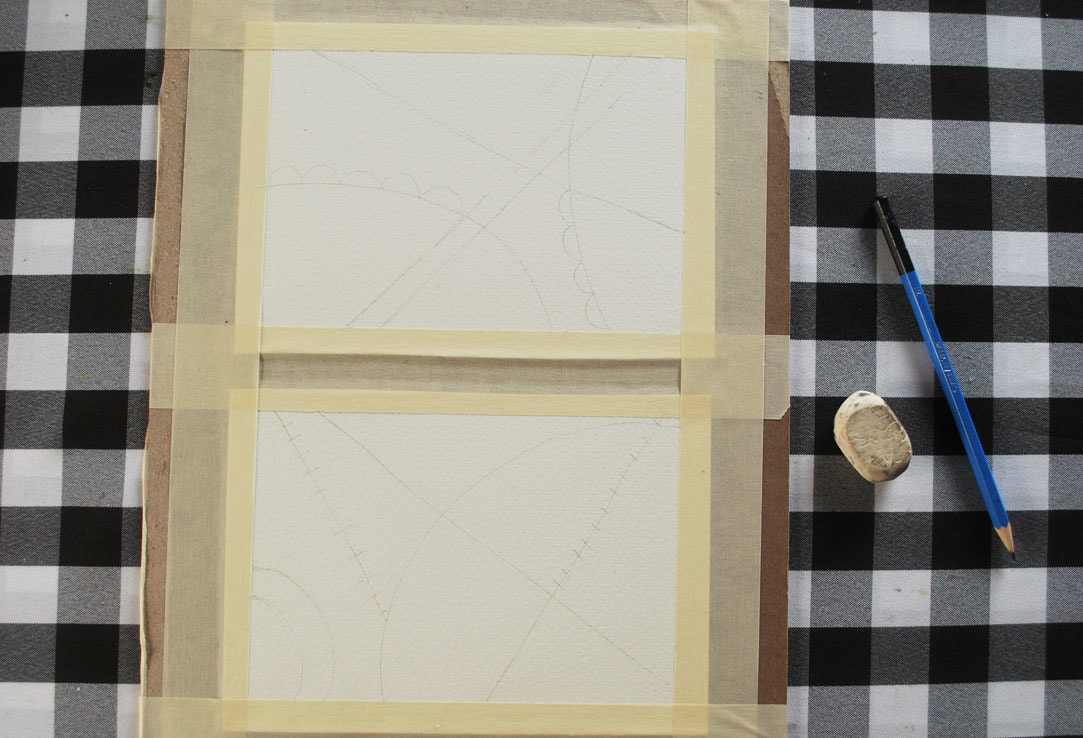
Initial pencil sketch
2. Select a tool to place your masking fluid with
Depending on the effect you're going for in your painting, this tool can range from a paintbrush, to a wooden skewer, to a cotton swab, or even a toothbrush (for splattering). If you do decide to use a paintbrush, make sure you use an older one that you don't mind damaging because it doesn't take much for masking fluid to kill those bristles!
Personally, I've already ruined at least a couple of paintbrushes and have gotten used to applying masking fluid with paper clips!
*For this exercise, you'll need a pointier tool so you're able to trace your pencil lines.
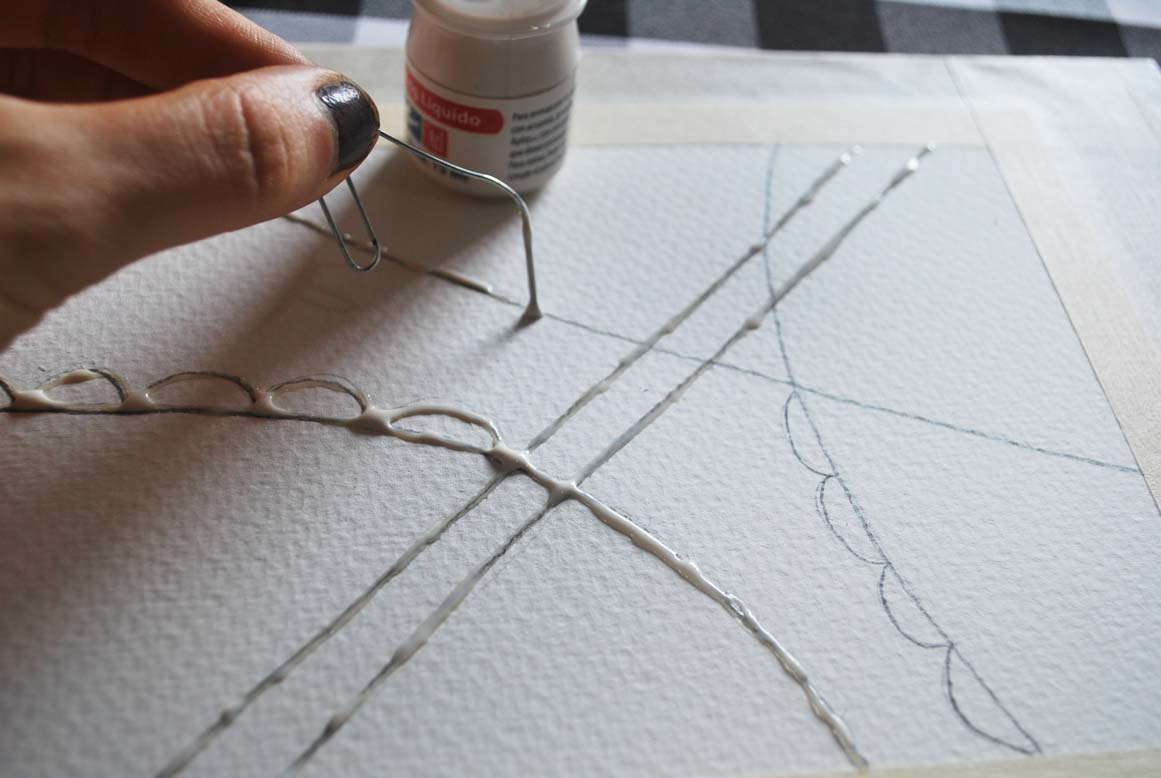
Placing masking fluid with a paper clip
3. Take your time placing your masking fluid on desired areas
Do this carefully and take your time! Make sure your not scraping or otherwise damaging your paper, especially if you're using a sharp, pointy tool to place your masking fluid with.
If you're creating a finalized painting using a reference picture, try to look at it constantly so you make sure to block out all areas you want protected.
*Carefully trace your pencil lines. It's totally normal to have to re-dunk your paper clip into your masking fluid every few seconds! When you're done, allow it to dry completely (this can take up to 30 minutes depending on the thickness it was placed in. Make sure it's completely dry to the touch before continuing with the next step.
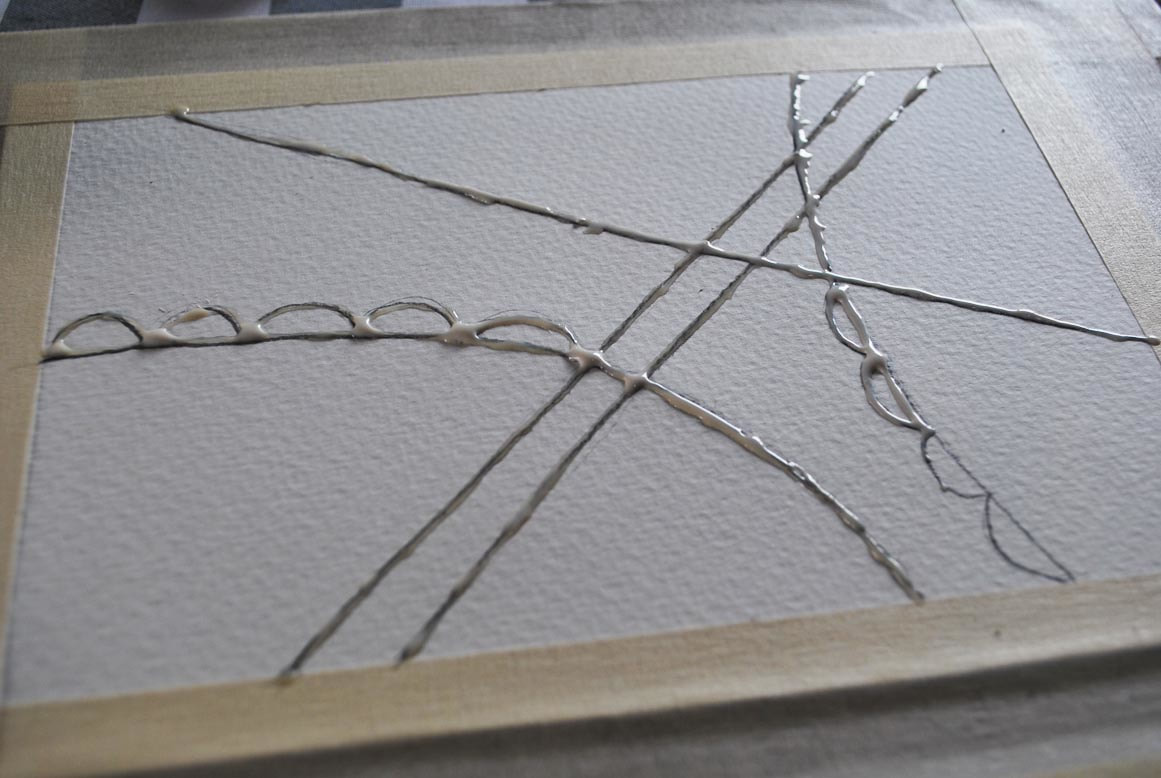
Placing masking fluid
Nearly dry, yellowed masking fluid

Check out my FREE Patreon-exclusive tutorial and class samples here.
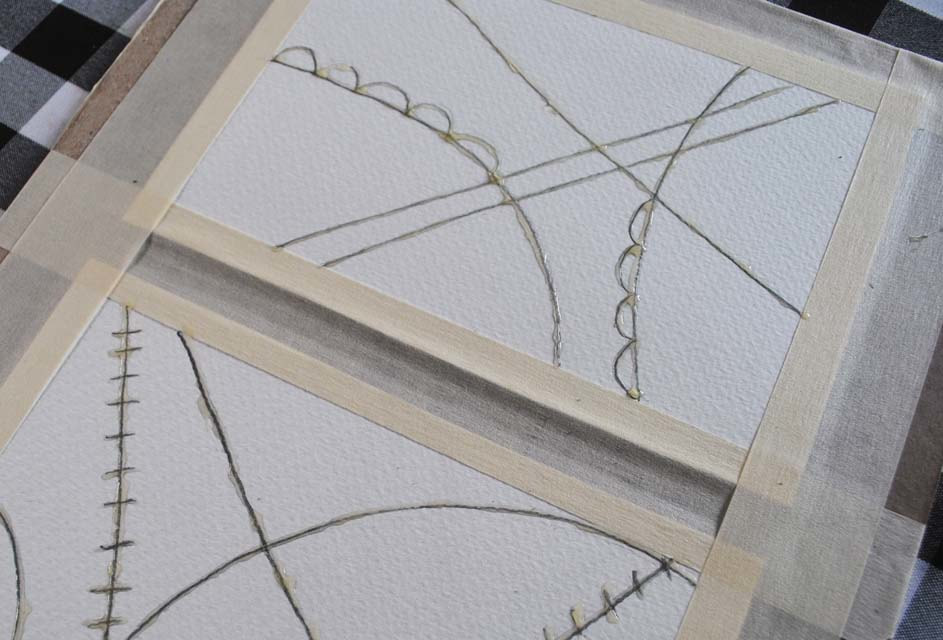
4. Paint as per usual
Move on to the painting process, starting from lightest and most translucent values to darker values, allowing each layer to dry before applying the next. Don't be afraid of painting over the masking fluid. That's what it's there for!
If you're creating a finalized painting, take your time developing those values and get your painting as close to being done as possible before removing the masking fluid.
What I personally do, is to make sure I've arrived at a point at which I feel I can't advance any further until my masking fluid is out of the way. Once you're done, allow your painting to dry naturally and completely.
To see how I create striking paintings working in layers, visit my blog post Realistic Watercolor Sandwich Process
*For this beginner-friendly exercise, explore different colors and effects until you arrive at something you like.
Watercolor painting process
Watercolor painting process
5. Remove that masking fluid!
This is the time we've all been waiting for!
Once your painting is completely dry, carefully and gently remove that masking fluid with a rubber cement pick up, a soft eraser or using your fingers (I wouldn't recommend using your fingers if your hands are usually sweaty or greasy though!).
Rub gently until part of it lifts and then gently pull the rest off. Make sure you remove it completely and lightly dust your painting off so no pieces are left behind.
Removing masking fluid
6. Soften hard edges and finish any last details
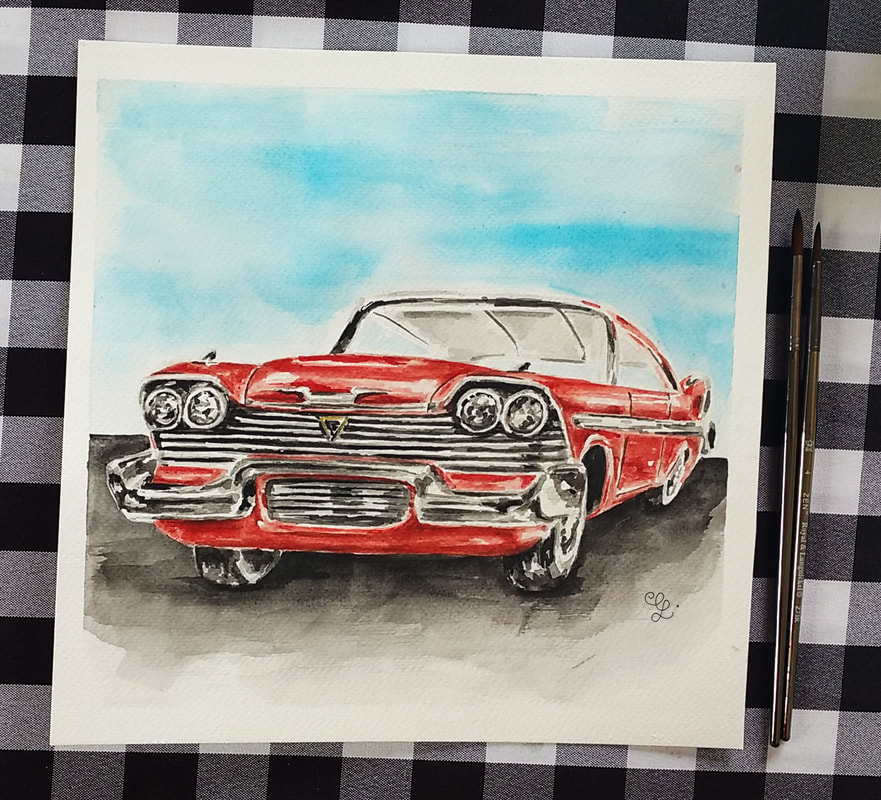
Once your masking fluid has been removed, you'll notice that you're left with very stark-looking, sharp white shapes. If you're creating a painting that's more on the realistic side (like in the car painting time lapse video I've included in this post), you'll probably want to soften at least some of these.
To do this, simply wet your paintbrush in clean water and do some gentle scrubbing on those sharp lines, moving the pigment around on your paper. However, be very careful not to cover up all of your white!
Now is also the time at which you can further deepen values in your painting if you need to, or carefully create any washes you feel would improve your painting.
Allow to dry completely before removing any masking tape.
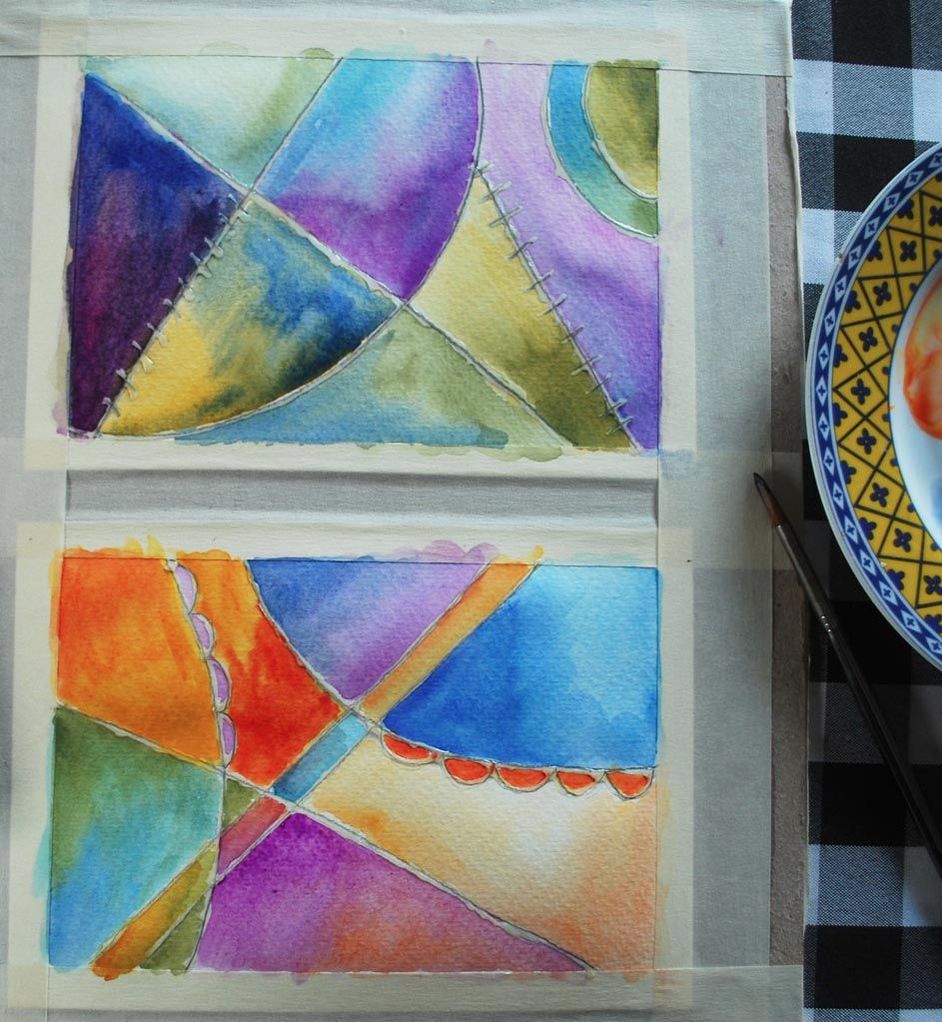
*For the purpose of this abstract exercise, I left my white lines as they were after having removed my masking fluid because I liked the look of it. If you'd like to explore softening some of them or even adding in extra washes of color, go for it!
Once your masking fluid has been removed, you'll notice that you're left with very stark-looking, sharp white shapes. If you're creating a painting that's more on the realistic side (like in the car painting time lapse video I've included in this post), you'll probably want to soften at least some of these.
To do this, simply wet your paintbrush in clean water and do some gentle scrubbing on those sharp lines, moving the pigment around on your paper. However, be very careful not to cover up all of your white!
Now is also the time at which you can further deepen values in your painting if you need to, or carefully create any washes you feel would improve your painting.
Allow to dry completely before removing any masking tape.
*For the purpose of this abstract exercise, I left my white lines as they were after having removed my masking fluid because I liked the look of it. If you'd like to explore softening some of them or even adding in extra washes of color, go for it!
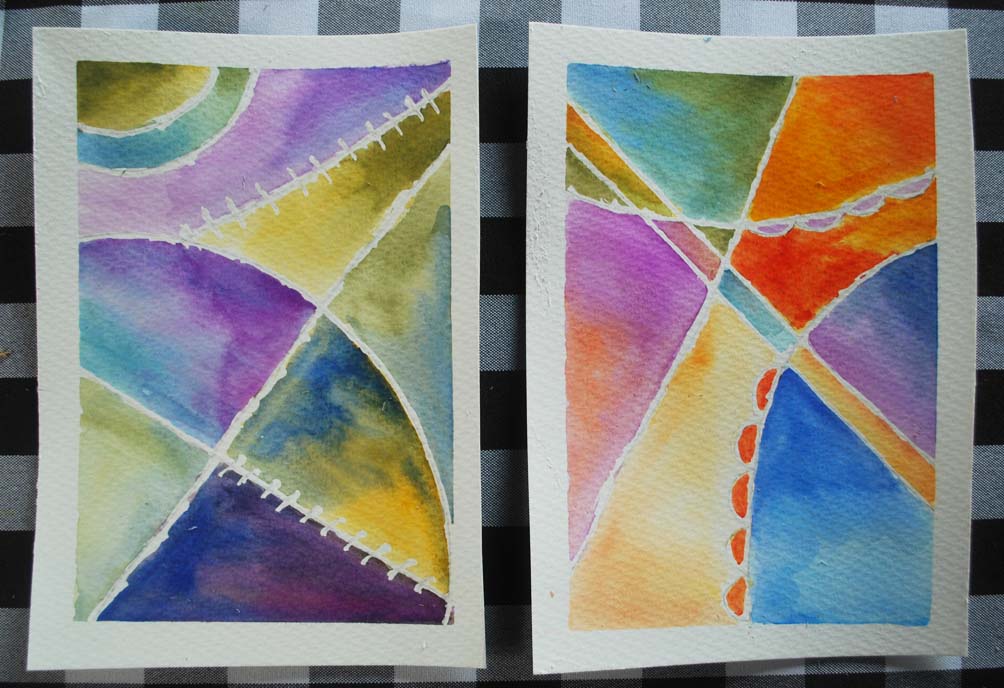
Erase those pencil lines!
Masking Fluid Pro Tips!
1. If you want to use a paintbrush for masking fluid placement, soak its bristles in dishwashing soap (or rub them gently on a bar of soap) before dipping it into the masking fluid. This will make it easier to remove the masking fluid when you're done.
2. Never shake your masking fluid bottle before starting with its application. This creates air bubbles and may lead to coagulation, which may make it harder to place on desired areas and may affect the outcome of your work.
3. Only apply masking fluid on bone-dry paper and only remove it from bone-dry paper.
4. When using masking fluid, resist the urge to speed up drying times using a hairdryer or any sort of heat tool. Warm air can cause the already-hardened masking fluid to stick to your paper even more, which can later lead to rips and tears as you try to remove it!
5. Never allow hardened masking fluid to be on your paper for extended periods of time (over two days). Whether this is a problem or not will depend on a number of variables such as masking fluid and paper brands/types, environmental temperature, etc. However, be wary of leaving masking fluid on your paper for long periods of time because it can get to a point at which it may be impossible to remove!
6. Explore different ways you can apply and use masking fluid! There are so many ways to do it, from placing it carefully the way we did in today's exercise, to splattering, smearing, etc. Experimenting with different tools and techniques can definitely open up your horizons about what's possible with watercolors and will also allow you to have different tricks up your sleeve whenever you're painting complex subjects!
What method do you personally use to create highlights in your watercolor paintings? Do you have any negative experiences with masking fluid? I'd love to know in the comments section below!

Hey there, creative friends!
In this week's blog post, I'll be sharing some of my recent sketchbook entries and finished paintings (both watercolor and oils).
As far as sketchbook work, I continue challenging myself whenever I'm able to, focusing on subjects that are difficult for me. For these last entries, I practiced female figure studies and a male portrait (I rarely draw men!).
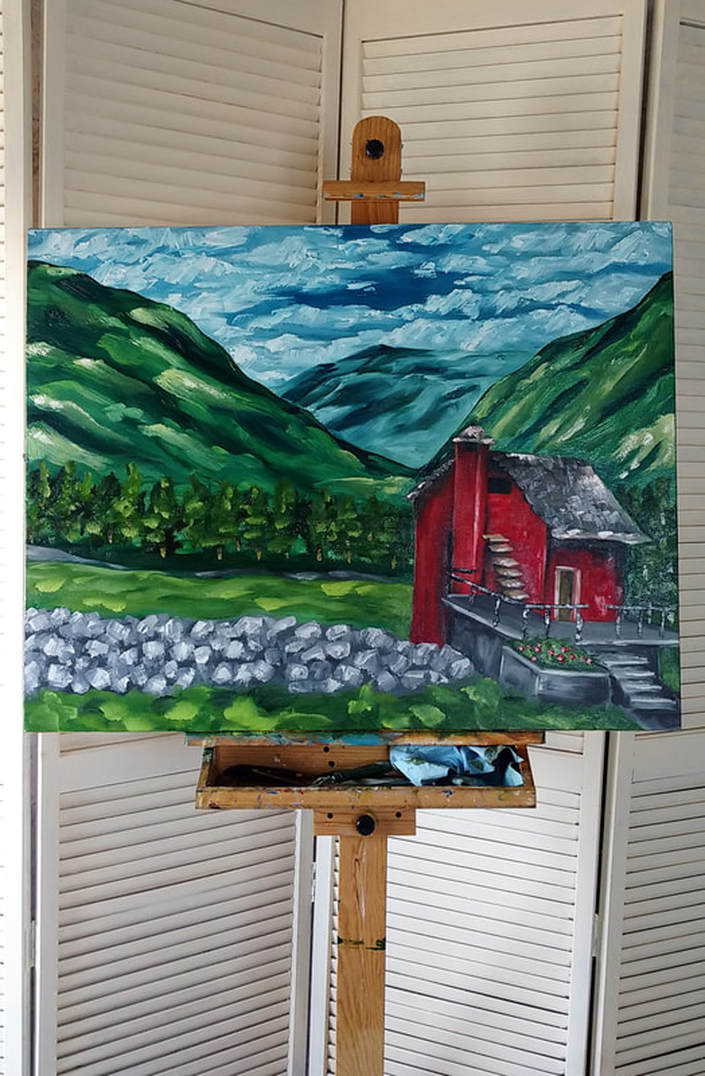
The oil paintings included here are two in my new landscape series. I have now completed three out of the five I will be selling. Very soon, I'll be sharing progress of the fourth one. So do follow me on Instagram if you wish to know how that goes!
Once I complete these five landscapes, I'm going to be working on five still lives. I currently sell my original artwork only in Mexico, but have plans of opening online shops to ship to other countries in the near future! So due stay tuned! :)
The watercolor paintings included here, are part of the group of illustrations I created for the June calendar design I will be sending over to my e-mail subscribers very soon! At the end of each month, I send them free printable calendars in both Letter and Tabloid size featuring my illustrations. :)
If you'd like to become part of my insider group and receive these exclusive freebies, as well as helpful art content and news about offerings that will help you progress artistically, subscribe here:

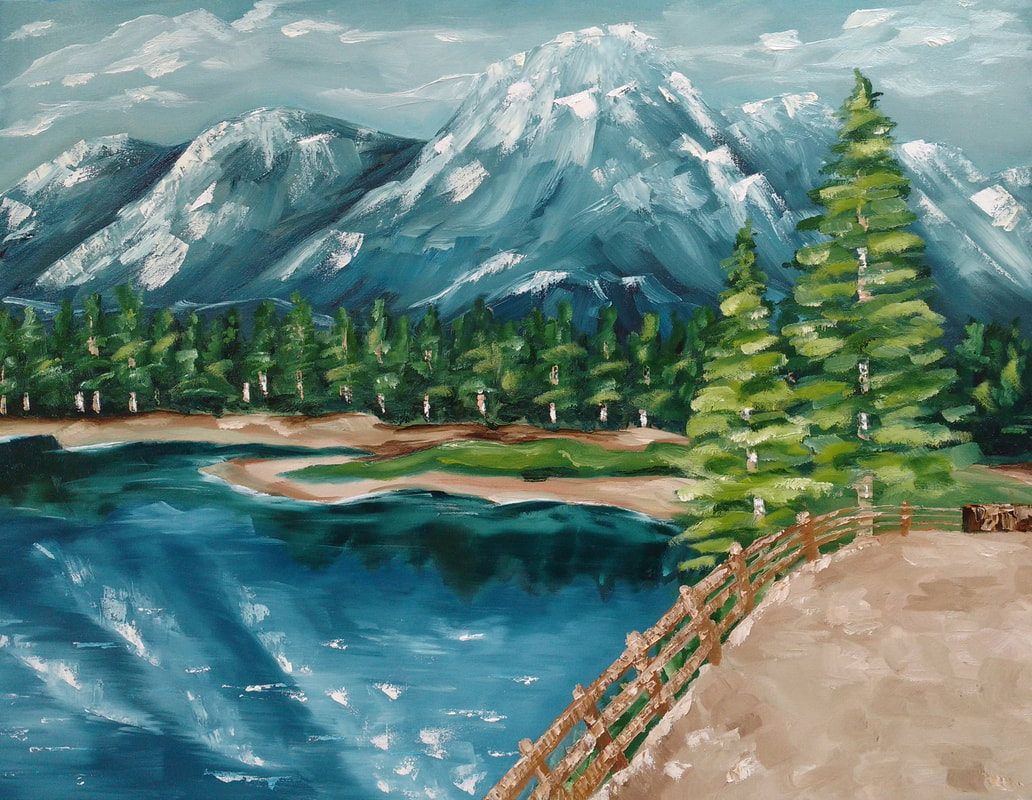
Landscape oil painting by Erika Lancaster. Oils on 90 x 70 cm. stretched canvas.
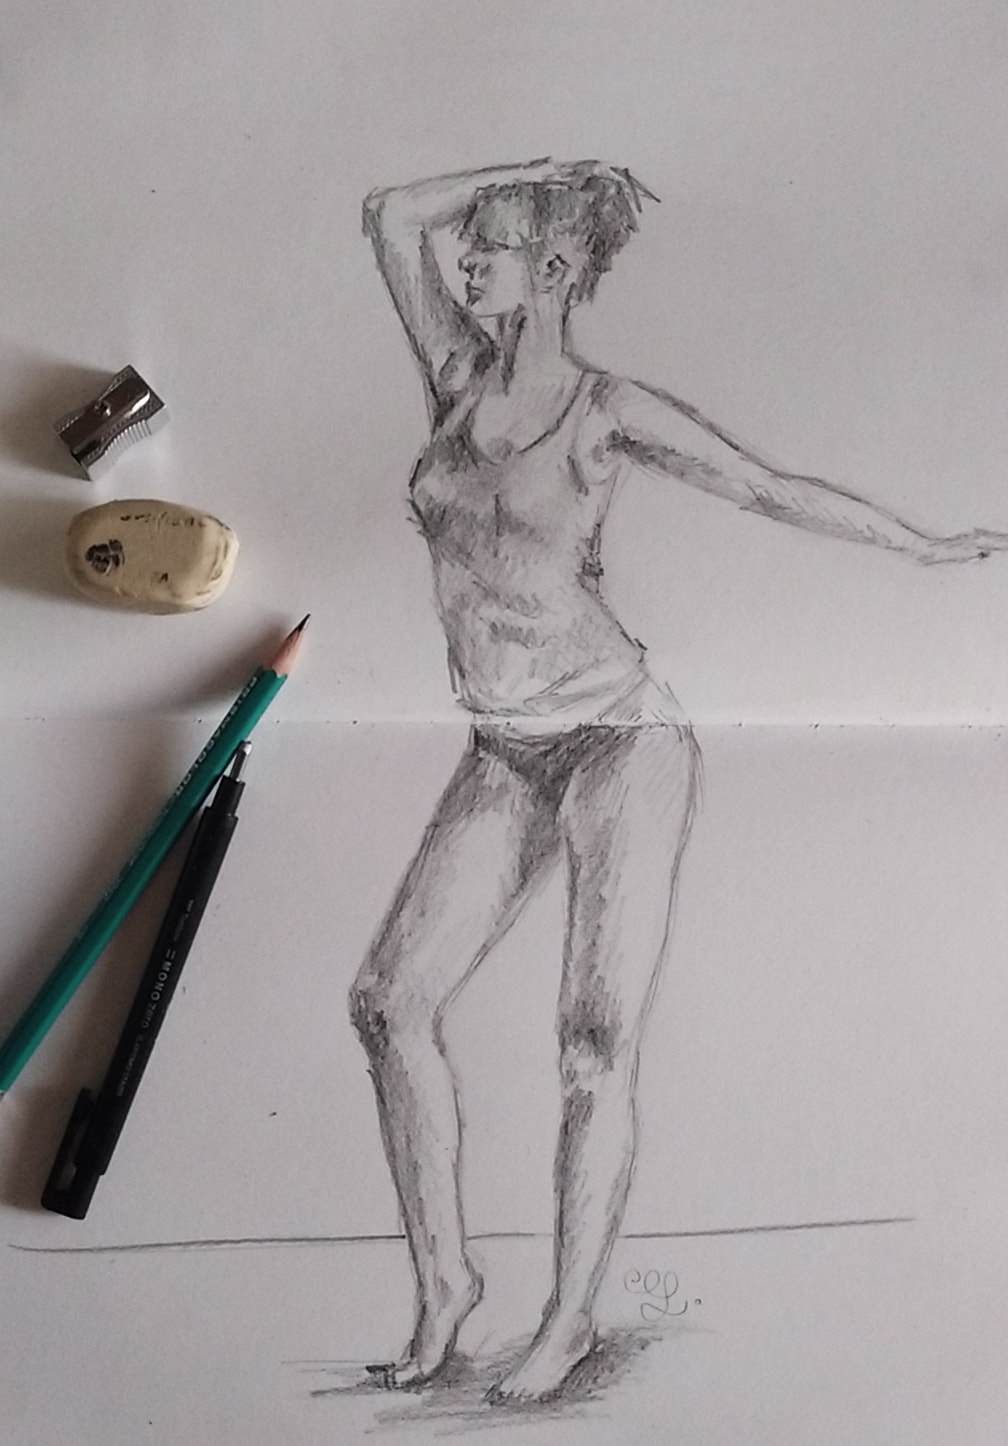
Female pose study 1. Pencil sketch by Erika Lancaster.
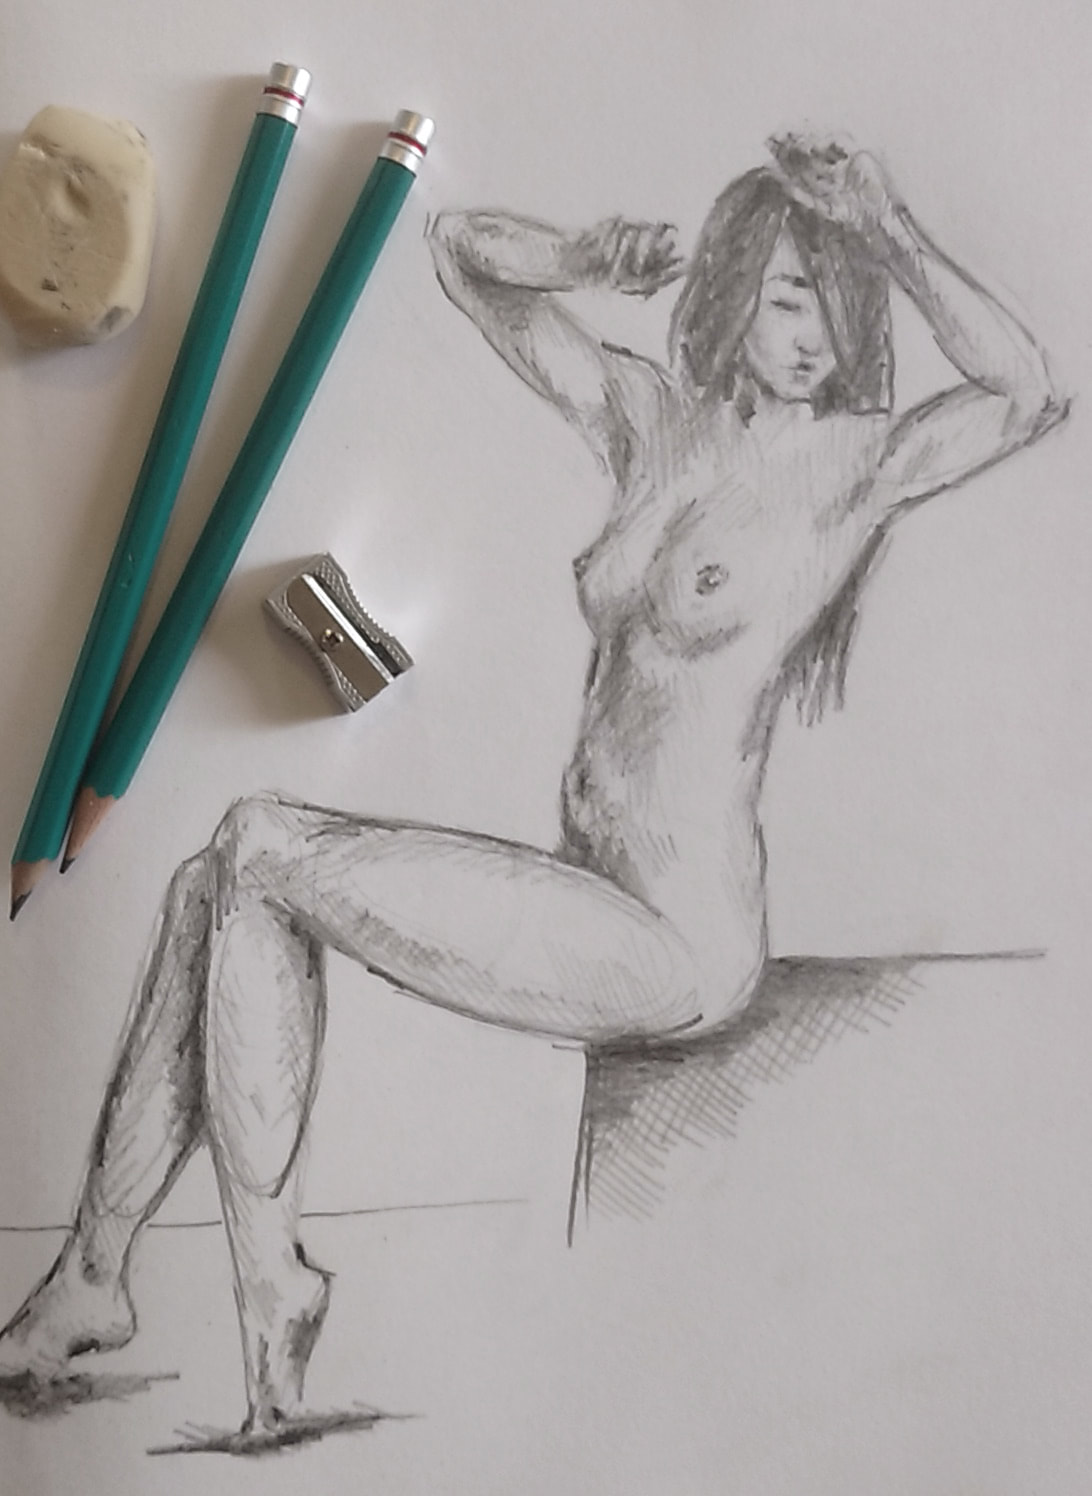
Female pose study 2. Pencil sketch by Erika Lancaster.
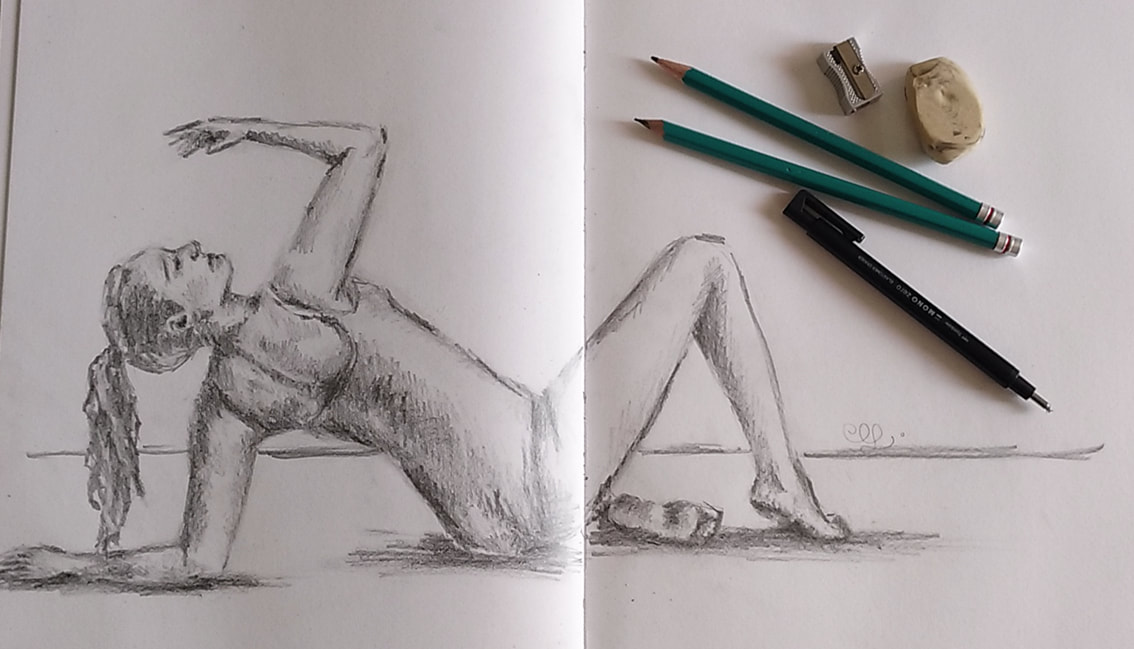
Female pose study 3. Pencil sketch by Erika Lancaster.
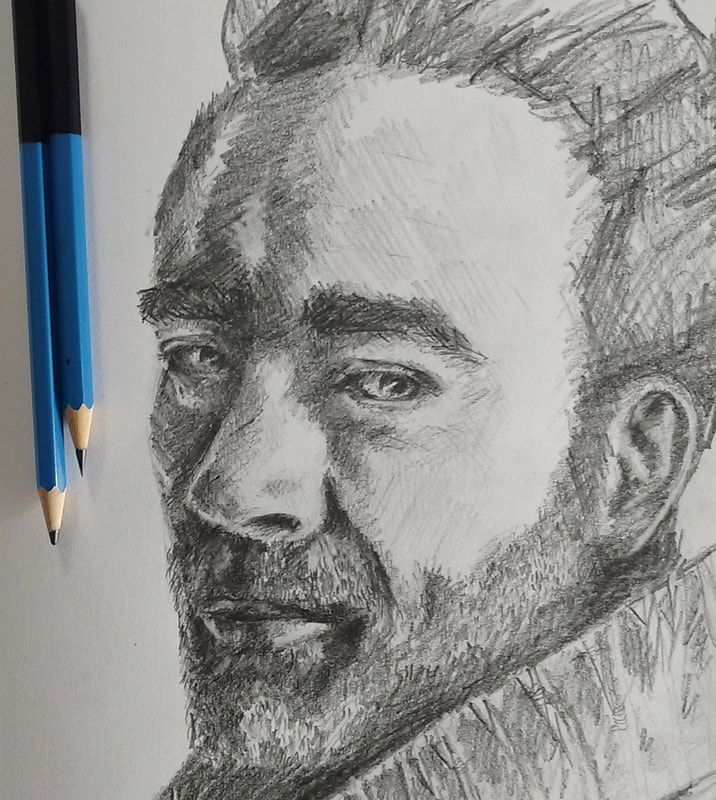
Male portrait study. Pencil sketch by Erika Lancaster.
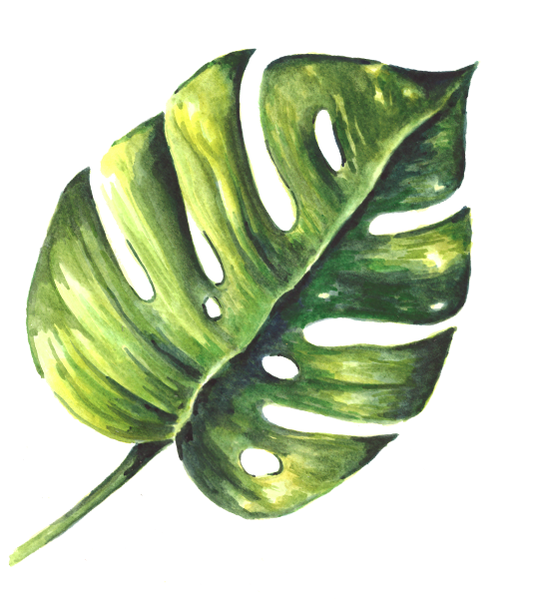
Monstera leaf watercolor painting by Erika Lancaster
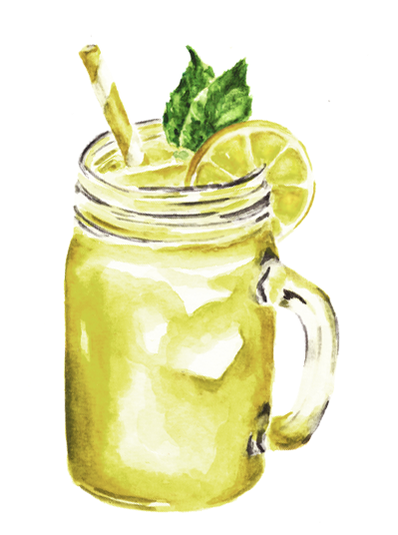
Lemonade in mason jar watercolor painting by Erika Lancaster
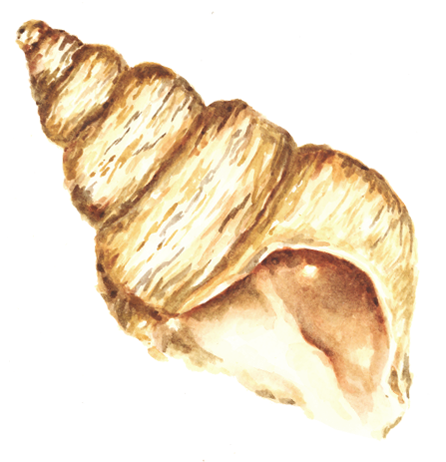
Seashell watercolor painting by Erika Lancaster

Check out my FREE Patreon-exclusive tutorial and class samples here.
Thanks so much for visiting and checking my work out! I really appreciate it!
If you're a beginner/intermediate artist looking to improve your work, do check out the posts below! I constantly produce helpful blog posts and YouTube videos with art tips, tutorials and encouragement!
Have a beautiful weekend!


www.erikalancaster.com
is a participant in the Amazon Services LLC Associates Program, an affiliate advertising program designed to provide a means for sites
to earn advertising fees by advertising and linking to amazon.com.
www.erikalancaster.com
is a participant in the Shareasale.com Affiliate Program, an affiliate advertising program designed to provide a means for sites to earn advertising fees by advertising and linking to Shareasale.com partner companies.
 RSS Feed
