*This post contains affiliate links. I receive small commissions for purchases made through these links at no extra cost to you. These commissions help me keep this site up and running, in order for me to keep providing helpful and inspiring art content. :)
Have you gained confidence with your pen and ink mark-making, but need a bit of guidance when it comes to actually shading more complex subjects? Are you excited to step-up your pen and ink game so that you're able to create drawings that transmit more believable form and three-dimensionality? When using pen and ink to create drawings that are more on the realistic side, it's essential to remember that we are both creating marks AND using said marks to render a wide range of values. I've found that believable form is achieved with this art medium by staying mindful throughout the drawing process and placing marks as deliberately as possible. Ink can be a bit intimidating due to the fact that it's permanent, but if you have enough practice with different mark-making techniques and you understand how to locate darkest areas, mid-tones and highlights in a reference image so that you can then create such values with marks, you'll be just fine! For this blog post/YouTube video, I picked a subject I consider challenging (a hand) to explain my step-by-step process when adding form and three-dimensionality using the contour line/hatching technique. This will help break the process up into more understandable chunks so that you can approach this kind of drawing more intentionally. With practice, you'll gain confidence and you'll be able to enjoy creating more complex pen and ink drawings in no time! This time, I wanted to jump right into the pen and ink explanation, and focus more on the creation of ink marks to render value/form than anything else. You'll see I start out with a previously created outline drawing of a hand. To create this outline drawing, I did something I generally don't do, and traced a photo reference. If you've been following me for a while, you're probably well-aware that I don't like tracing. However, I really wanted to jump right into the pen and ink techniques. Plus, I also wanted to provide both the exact photographic reference I used, as well as the initial outline drawing so we could start at the exact same point. You can download both pdf's at the end of this post and follow along! If you'd like to see how I would draw a hand in my usual freehand method, I highly recommend visiting my blog post titled 5 Essential Sketching Tips for Beginner Artists. I'm usually a huge believer in drawing subjects entirely freehand and not tracing. If you're a beginner just starting out with pen and ink, I highly recommend checking out the blog posts/YouTube videos I released before this one. In those posts, I go much more in depth into different shading techniques and provide great exercises to start off with! *Find them here: Pen and Ink Sketching: 6 Shading Techniques Shading Objects Using Hatching, Crosshatching, Scribbling, and Other Drawing Pen Techniques
If you enjoyed this video and found it helpful, make sure to subscribe to my YouTube channel. I share a brand new video every week with art tips, drawing and painting tutorials and mindset/productivity tips for artists. *Subscribe HERE*

My method for adding believable form to complex subjects using pen and ink techniques 1. Study your reference/subject
I find it extremely useful to take time to study my subject, especially when it comes to drawing or painting something more complex, like a hand. If possible, I make time to learn about its underlying structure (which in this case is a combination of many small bones-muscles-tendons-etc.).
Having at least some knowledge about our subject's underlying structure will greatly improve our ability to render effective form and three-dimensionality! Since we are drawing a hand, we can take a few minutes to study our own from different angles. Though our hands may look different from the next persons', their underlying structure is the same. Take note of its convex vs. concave spots, the fleshy and bony areas, how the different elements within it compare with each other, its overall imperfections and the range of movement the different joints allow, etc. All this said, it's essential to select an excellent photographic reference to work from (if you're not drawing from life). I talk about the things I take into account when selecting this type of reference in my blog post titled Shading Objects Using Hatching, Crosshatching, Scribbling and Other Drawing Pen Techniques). Observe your photograph thoroughly. I've included a letter-sized pdf of this hand photograph at the end of the post, in case you'd like to download and print it for practicing purposes. 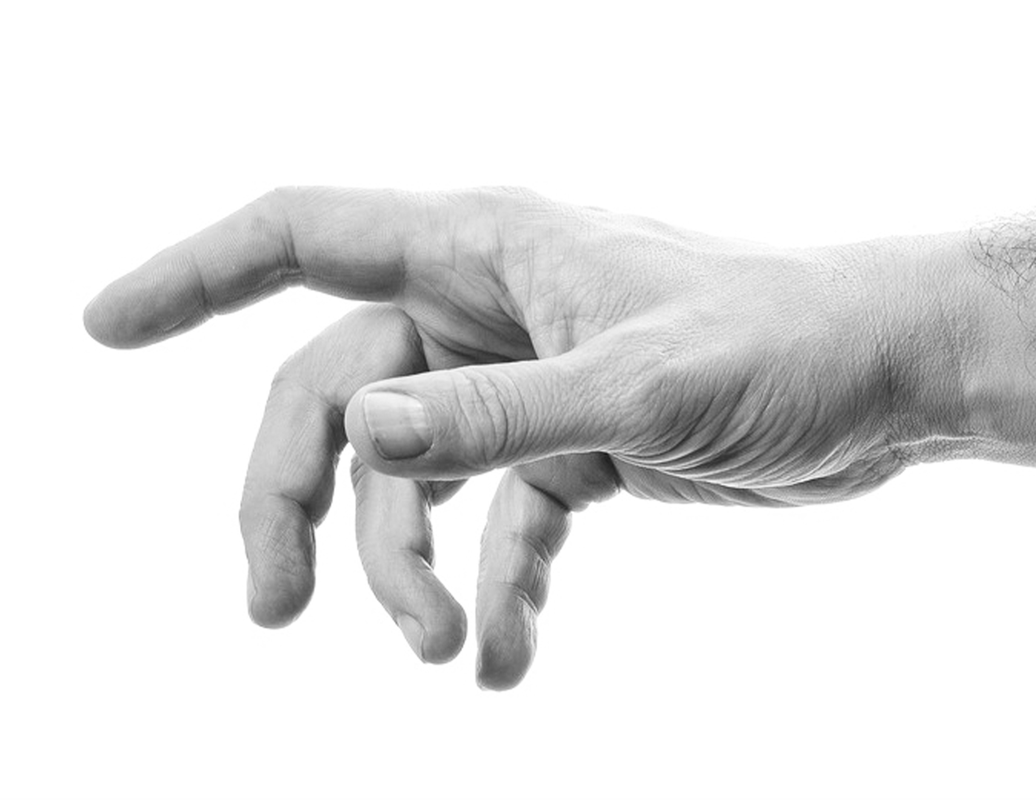
Reference hand photo after desaturating. Click on image to download original photograph from www.pixabay.com.
Once you've gained enough practice with reference photographs, I highly recommend incorporating at least some amount of drawing/sketching from direct observation (otherwise known as drawing/sketching from life) into your practice, as this will bring you much faster progress. In my blog post titled Why Drawing from Direct Observation is Essential and 10 Tips to Improve, I explain why this method is so important for an artist's growth and provide a bunch of tips to make the process less daunting. 2. Start with a pencil outline drawing
Depending on your skill level and the objectives you have set for this study, you can decide whether you want to create your initial pencil sketch completely freehand, or if you'd like to focus on getting right into the pen and ink shading like I did for this tutorial.
I like using an HB or B pencil to create this preliminary drawing and keep it as light as possible because I want to be able to erase it completely later on. If you'd like to download the free pdf that I've used to create this hand, you'll be able to find it at the end of this post. 
Hand outline pencil drawing
Strathmore 400 Series Sketch Pad, 11x14 inch, 50 Sheets
3. Outline your pencil drawing using ink
I used my LePen .5 point drawing pen to go over my pencil sketch carefully. Once the ink was set and dry, I erased all initial pencil lines.
At this point, you may also find it useful to create what I call a "value map" for yourself. You do not want to start adding marks without having a good idea of where your light source is located within the picture, as well as where darkest, mid-tones, and lightest areas are. Draw shapes around these areas so that they can remind you throughout your drawing process where greatest value changes are located. You want to be especially mindful of where the lightest areas are within your reference image, so that those areas can be left untouched by ink. 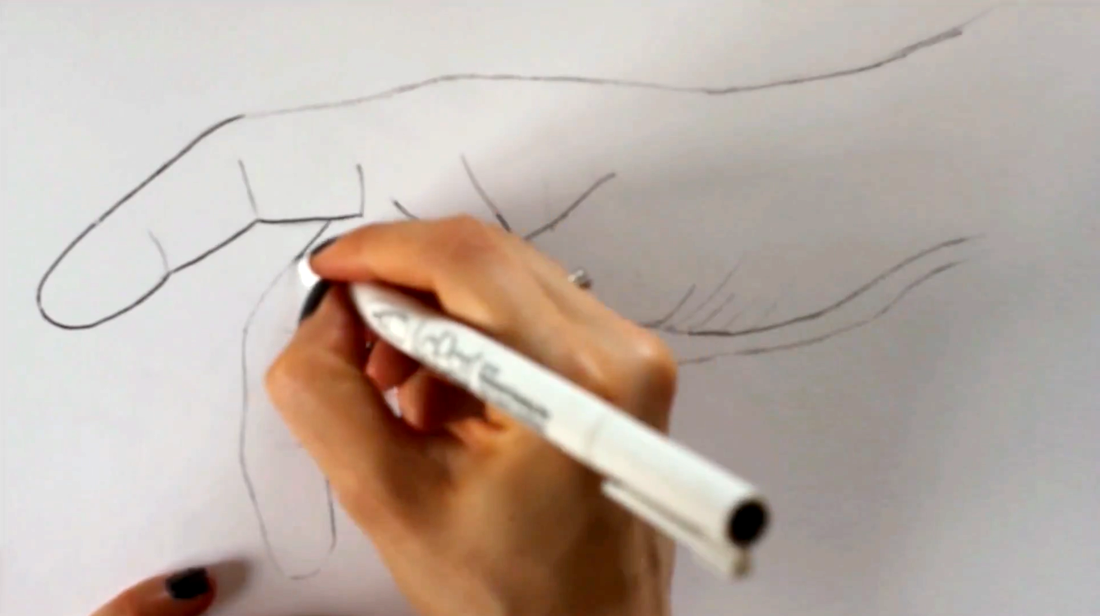
Tracing outline pencil drawing using a drawing pen

4. Start adding in initial layers of marks
Before starting this hand study, I decided that I would be using mostly contour lines/contour hatching for my shading. If used effectively, this mark-making technique allows us to very efficiently create three-dimensional form to more complex subjects that contain curves all throughout.
I usually like starting my pen and ink shading process with the very darkest areas, so I took a good look at where the deepest values of my picture were located and got ready to start laying down my initial sets of marks. I switched to my .3 point LePen drawing pen and let the curves of my outline drawing to guide me, as well as my knowledge of the hand structure. As I mentioned in the past pen and ink tutorials, it's very important to keep a sense of consistency within each group of marks you create. These initial sets of lines are very important because they will be the foundation for everything else, so make sure to pay attention to what you're doing! Notice how curves start shifting in certain areas to best describe folds, fleshy bits, etc? 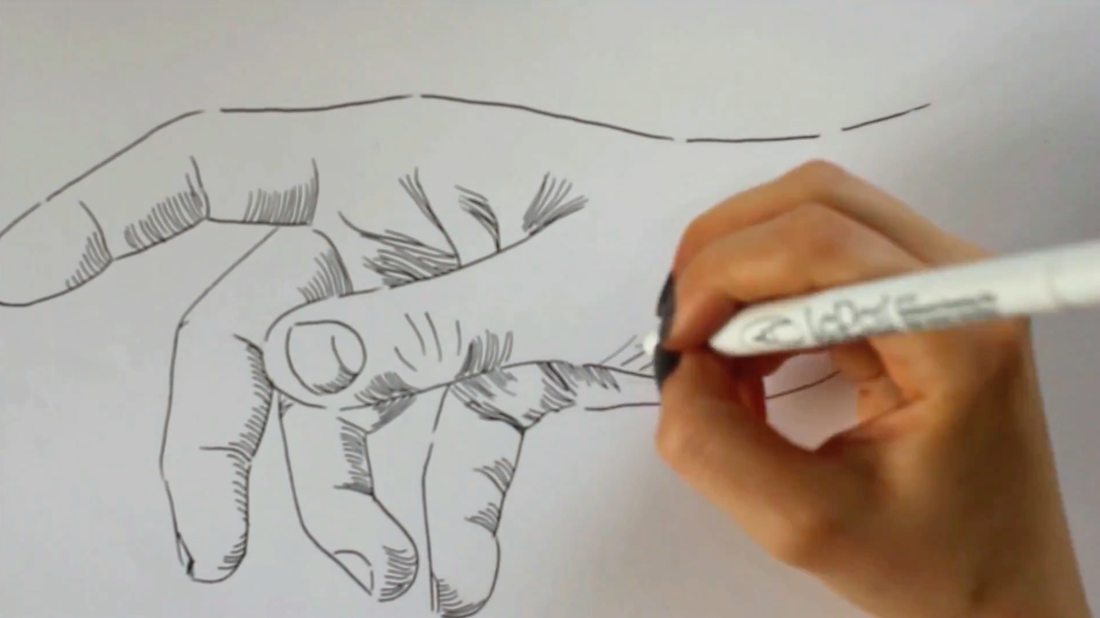
Adding in first groups of marks in the darkest areas within my reference photograph
5. Work on mid-tone range and deepen darkest values
By this point, all of your darkest areas and perhaps even a bit of the mid-tone areas, should be covered with your first layer of marks. It's time to start developing more mid-tones!
Once you start laying down your mid-tones, you're probably going to want to go back to your darkest areas and deepen them because they're not going to seem dark enough anymore. To do this with the contour line technique, all you have to do is add another set of curved lines on top of the first, similar to when you're doing crosshatching. There is no set angle at which you have to draw this second group of curved lines, as long as they are intersecting with the first. Remember there has to be consistency within each group of lines you create. Throughout the drawing process, keep in mind that, developing a wide range of values is essential when you're attempting to create a three-dimensional effect. There have to be very light areas in your drawing (which will be represented by those areas of paper that are completely free of ink), a wide range of mid-tones, and extremely dark areas (those small areas almost entirely covered with ink). 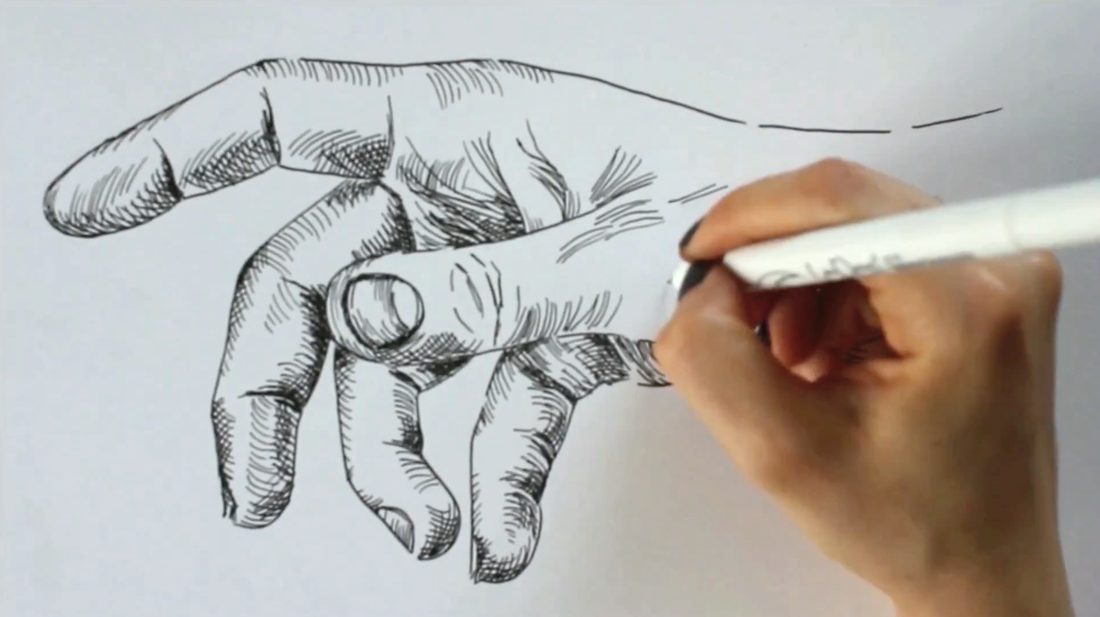
Working on mid-tones and deepening darkest areas with cross-contour lines
6. Fine tuning
Still using my .3 LePen drawing pen, I smoothed out values that needed to transition a bit more gradually. Once I was happy with my drawing, I switched back to my .5 LePen drawing pen and traced my initial outline drawing only in certain areas.
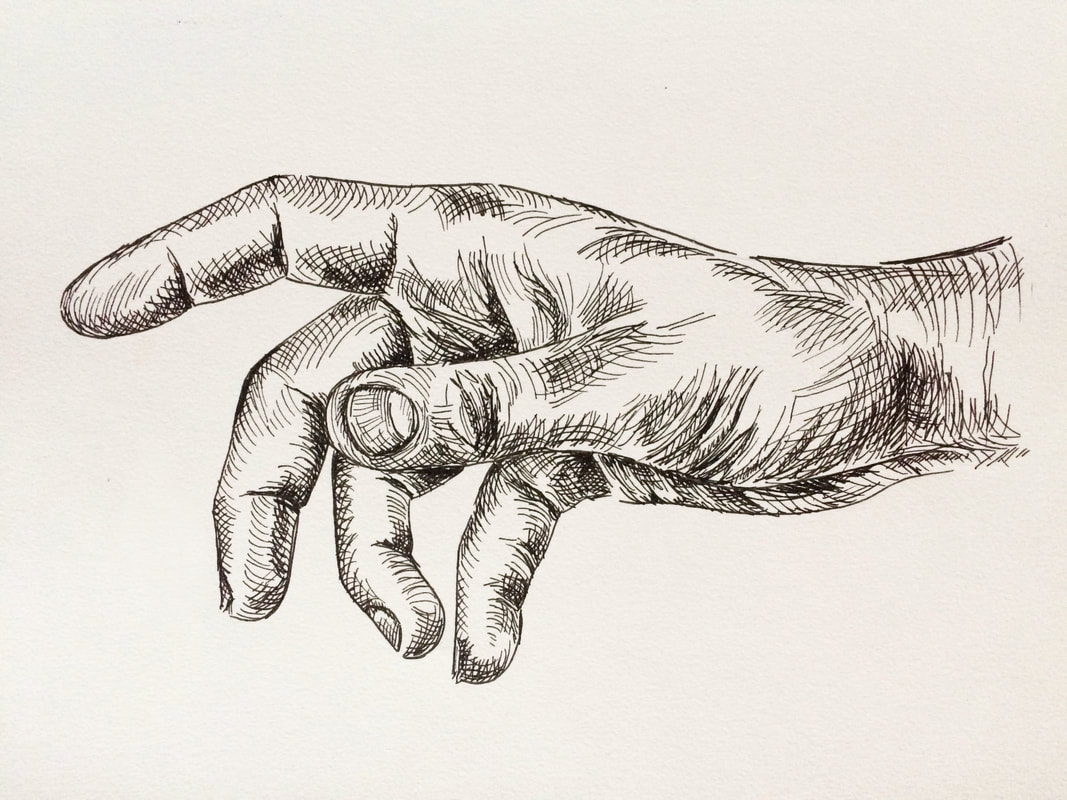
Final pen and ink hand drawing
*Free downloadables!
22 Comments
Noemi
7/22/2018 11:57:28 am
Awesome
Erika Lancaster
7/24/2018 09:23:08 am
Thanks so much for checking my blog post out! :)
Anna
7/22/2018 04:14:56 pm
This is so awesome!
Erika Lancaster
7/24/2018 09:23:40 am
Hi Anna,
Erika Lancaster
7/24/2018 09:24:40 am
Hi Elizabeth,
Emily
7/23/2018 09:45:21 am
Ugh hands are so difficult for me! I’m going to keep trying though! Thanks for your super in depth and helpful tips and tutorial! I’m going to practice tonight!
Erika Lancaster
7/24/2018 09:30:20 am
Hi Emily,
Erika Lancaster
7/25/2018 08:09:27 am
Hi Tara, 7/24/2018 06:39:20 pm
Great tutorial. Saved it for later and will surely try it out!
Erika Lancaster
7/25/2018 08:10:11 am
Hi Anna,
Erika Lancaster
9/17/2018 09:25:42 am
Hi Candice,
Erika Lancaster
9/17/2018 09:27:51 am
Hi Shannon,
Joyce
3/6/2019 06:38:11 pm
Finally retiring and will have more time to pursue my love for art
Erika Lancaster
3/7/2019 11:21:01 am
Hi Joyce,
Ash Paige
11/9/2019 09:42:35 am
This was amazing, I looked at the pencil sketch and retraced it because in my art class we are do body figures, and I got the hand to I made it look like it was reaching out for something, thanks so much! 11/14/2019 11:19:23 pm
Hi, Ash!
Madi
4/30/2022 04:23:22 pm
Aloha, thank you so much for posting this! This helped immensely. I've been wanting to learn cross-hatching and use it for my intro to art class final, but for some reason never got confidence. This really helps, as I can look back and refer to this any time. Thank you for sharing! 5/3/2022 09:54:47 am
Hi, Madi! Leave a Reply. |


 www.erikalancaster.com
is a participant in the Amazon Services LLC Associates Program, an affiliate advertising program designed to provide a means for sites to earn advertising fees by advertising and linking to amazon.com. www.erikalancaster.com is a participant in the Shareasale.com Affiliate Program, an affiliate advertising program designed to provide a means for sites to earn advertising fees by advertising and linking to Shareasale.com partner companies. |
||||||||||


 RSS Feed
