*This post contains affiliate links. I receive small commissions for purchases made through these links at no extra cost to you. These commissions help me keep this site up and running, in order for me to keep providing helpful and inspiring art content. :)
Are you struggling with saving your whites when painting with watercolors? Have you been considering the use of masking fluid but are unsure about how to use it effectively and whether it's really necessary at all? Have you avoided using masking fluid in your work because it makes the process longer and more tedious? One of the most difficult things to get used to when starting with watercolors, is planning where the lightest areas of our paintings will be and keeping them protected throughout the painting process. Watercolors are quite different from other painting mediums due to the fact that they are translucent and require us to work from lightest to darkest values. As opposed to acrylics, oils or gouache, this painting medium doesn't allow us to simply cover up mistakes. By doing a bit of planning beforehand and knowing what tools/techniques to use for each project individually, we can ensure that we're using watercolors to their full potential. When used effectively, this artistic medium is able to create very striking paintings that have a lighter feel to them than those created with acrylics or oils, and also seem to glow from within. Protecting our lightest areas is essential in order to achieve such qualities. In this blog post, I am sharing the steps I personally go through when using masking fluid in a watercolor painting. I will also provide some essential tips that will help you avoid accidents. To illustrate each step, I have included a beginner-friendly masking fluid exercise. It's very important to do a few explorations with new tools before actually trying them out in a painting! Even though many watercolor sets contain white paint, traditional watercolor artists avoid using it. There's no need because the watercolor paper itself IS the white and the areas left free of pigment will stand as the highlights of the painting. Whether the artist decides to use masking fluid or not, he/she makes sure to protect those whites because, once pigment touches paper and is absorbed, there's no way to get that white back. Traditional watercolor artists also avoid using black, but that is a story for a different day. To learn about the ten most important things you should make sure to apply when painting with watercolors, read my blog post titled 10 Things I Wish I Knew Before Starting with Watercolors. Now-a-days, there are tons of amazing artists who use watercolors in combination with other types of mediums, creating beautiful mixed-media artworks. There are those who complete a watercolor painting without paying much mind to highlights until the end, when they add them in using white gouache, acrylic paint, paint pens, and/or other drawing mediums. I'm all about exploring mediums and creating one's own artistic style! However, I've found it invaluable to study each medium individually and challenge oneself to create desired effects using that medium alone. I noticed the biggest improvement in my painting quality when I pushed myself to complete a project using only one medium. So, I recommend making time to explore each medium on its own once you're at a certain skill level, especially if you find that you're continuously reaching out for a second/third medium as a crutch because you were unable to create the effects you were intending to. Once you've learned the characteristics of each medium and the general do's and don'ts, then go ahead and combine them, if you wish to. But let it be because it's your stylistic choice, and not because you needed another medium as extra support. It's hard! But I promise you you, that it will help you improve a whole ton. Masking fluid is absolutely not necessary in order to create a great watercolor painting, but it sure is a great tool to know about, especially when painting certain kinds of subjects that have shiny, reflective surfaces and/or tiny areas you want to block out. If you don't have masking fluid or wish not to use it, you have the option of carefully working around your planned white highlights, but because watercolors are so fluid, it may be a challenge. Here is an example of a painting I created by very carefully working around the areas I wanted completely white at the end (no masking fluid). See all those tiny white spaces? I consciously made an effort not to get any pigment in them! If I had accidentally covered up those spaces, my painting would look flat and wouldn't have that "glow" to it. 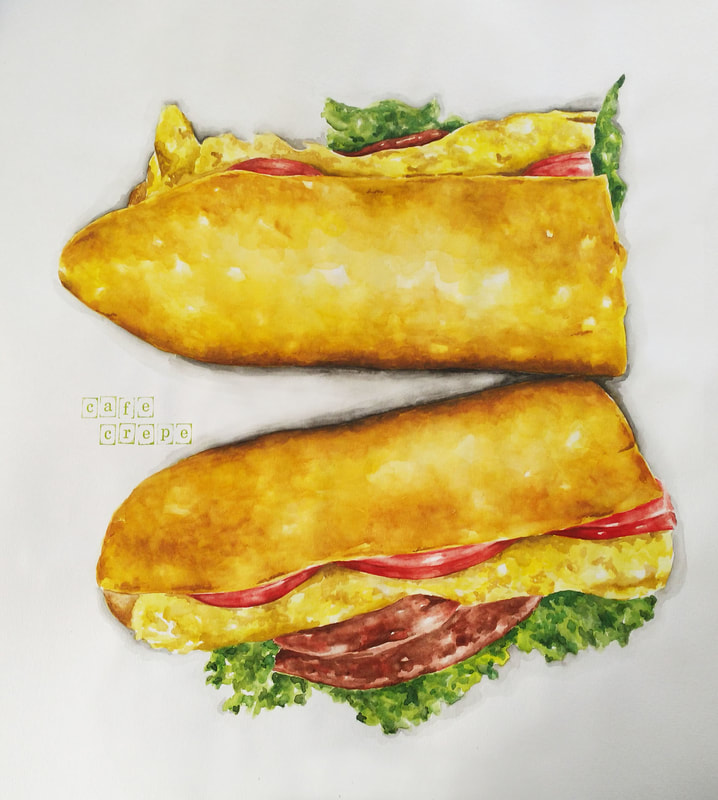
Watercolor sandwich by Erika Lancaster
If you enjoyed this video and found it helpful, make sure to subscribe to my YouTube channel. I share a brand new video every week with art tips, drawing and painting tutorials and mindset/productivity tips for artists. *Subscribe HERE*
So, what is masking fluid, exactly?Masking fluid (also referred to as liquid frisket) is liquid latex that dries to a rubbery/waterproof film, allowing us to block out areas in our paintings that we want free of pigment. It contains ammonia, which makes the liquid very smelly and makes it necessary to work in a well-ventilated room. Usually, we're presented with masking fluid options at art supply stores that look white while in the bottle and dry to a transparent/yellowish film. However, pigmented varieties are available, in case the artist requires a greater visibility throughout the placement process. Though the use of masking fluid entails adding in a couple of extra steps and makes the painting process longer, it does make protecting the whites a lot easier and is a great tool to have when painting complex, detailed subjects! How to Use Masking FluidYou will need: -Watercolor paper -Masking fluid -Watercolor paint -Paintbrushes -Pencil -Eraser -Paint-mixing palette -Cup of water -Old rag or paper towel -Bar of soap or dishwashing liquid -A tool for placing your masking fluid (old paintbrush, wooden skewer, paper clip, cotton swab, etc.) *Optional: -Masking tape -Rubber cement pick up or soft eraser 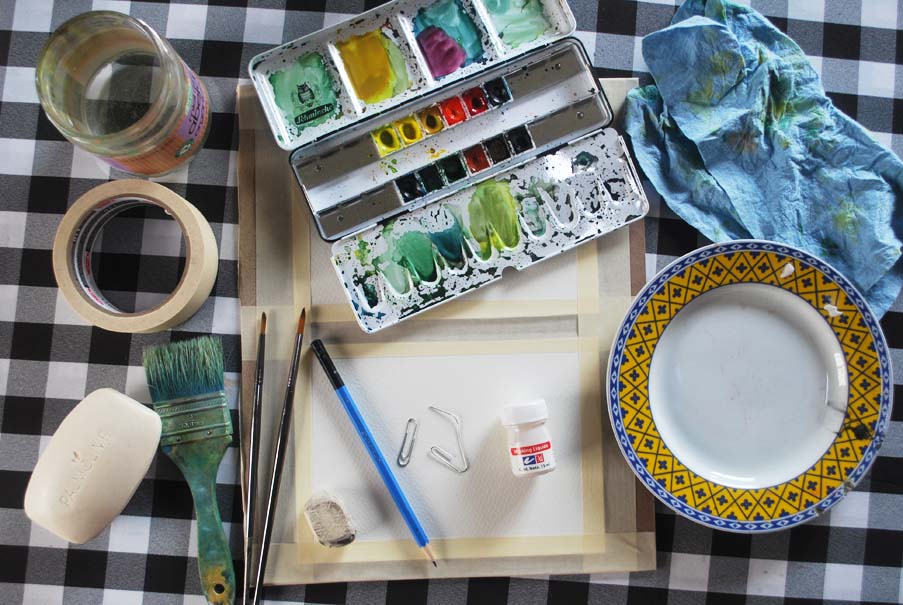
Watercolor painting supplies
Instructions: 1. Create your initial sketch As always, start with a good, light pencil drawing. Once you're done, map out where you want your highlights to be. Usually, this will entail having a good look at your reference picture and pinpointing lightest areas. Then, we would lightly outline these small shapes. *Illustrative exercise (recommended for beginners): For the purpose of this little abstract exercise, we will be blocking out lines. Create a simple design using straight or curved lines and keep them as light as possible (so you can erase them later)! 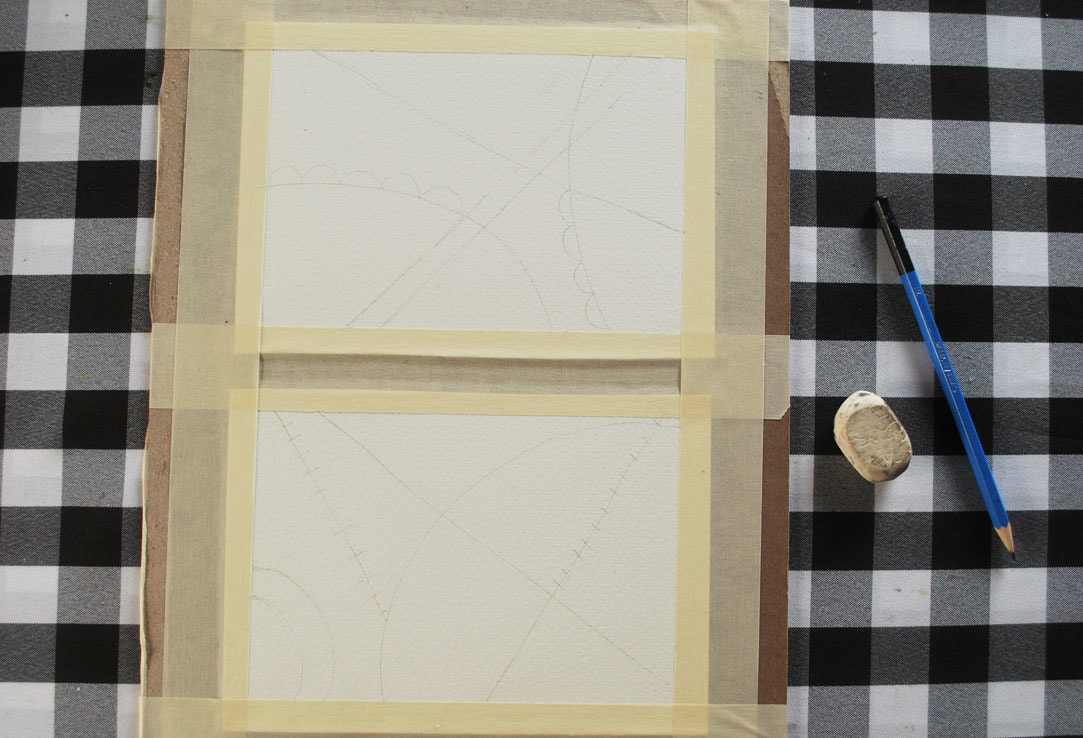
Initial pencil sketch
2. Select a tool to place your masking fluid with Depending on the effect you're going for in your painting, this tool can range from a paintbrush, to a wooden skewer, to a cotton swab, or even a toothbrush (for splattering). If you do decide to use a paintbrush, make sure you use an older one that you don't mind damaging because it doesn't take much for masking fluid to kill those bristles! Personally, I've already ruined at least a couple of paintbrushes and have gotten used to applying masking fluid with paper clips! *For this exercise, you'll need a pointier tool so you're able to trace your pencil lines. 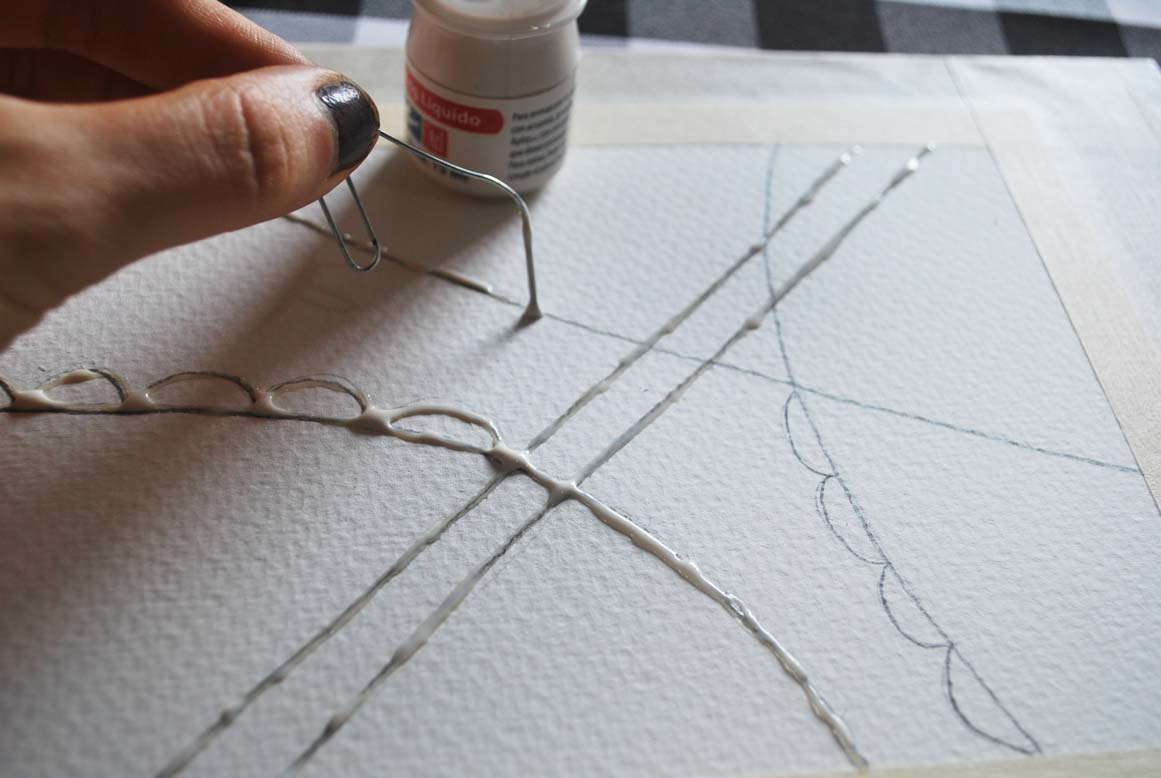
Placing masking fluid with a paper clip
3. Take your time placing your masking fluid on desired areas Do this carefully and take your time! Make sure your not scraping or otherwise damaging your paper, especially if you're using a sharp, pointy tool to place your masking fluid with. If you're creating a finalized painting using a reference picture, try to look at it constantly so you make sure to block out all areas you want protected. *Carefully trace your pencil lines. It's totally normal to have to re-dunk your paper clip into your masking fluid every few seconds! When you're done, allow it to dry completely (this can take up to 30 minutes depending on the thickness it was placed in. Make sure it's completely dry to the touch before continuing with the next step. 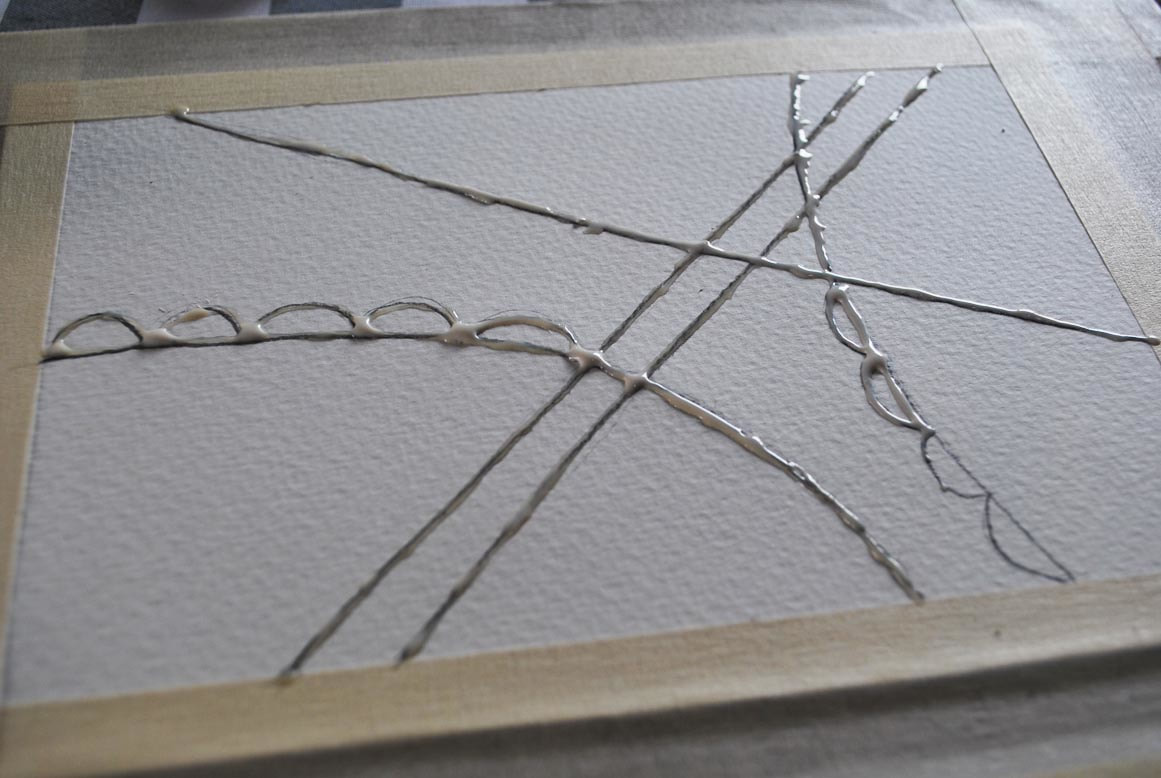
Placing masking fluid
Nearly dry, yellowed masking fluid
Check out my FREE Patreon-exclusive tutorial and class samples here.
4. Paint as per usual Move on to the painting process, starting from lightest and most translucent values to darker values, allowing each layer to dry before applying the next. Don't be afraid of painting over the masking fluid. That's what it's there for! If you're creating a finalized painting, take your time developing those values and get your painting as close to being done as possible before removing the masking fluid. What I personally do, is to make sure I've arrived at a point at which I feel I can't advance any further until my masking fluid is out of the way. Once you're done, allow your painting to dry naturally and completely. To see how I create striking paintings working in layers, visit my blog post Realistic Watercolor Sandwich Process *For this beginner-friendly exercise, explore different colors and effects until you arrive at something you like. 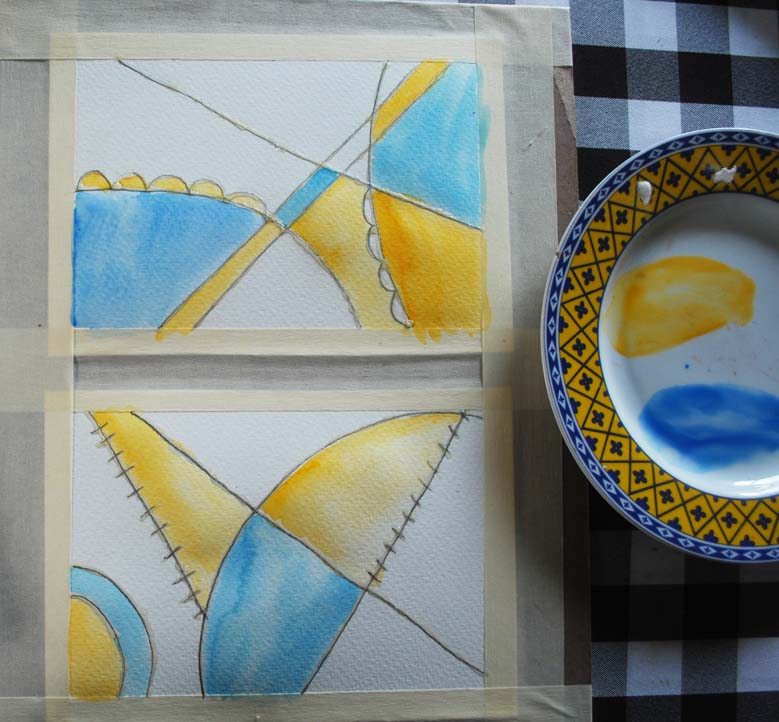
Watercolor painting process
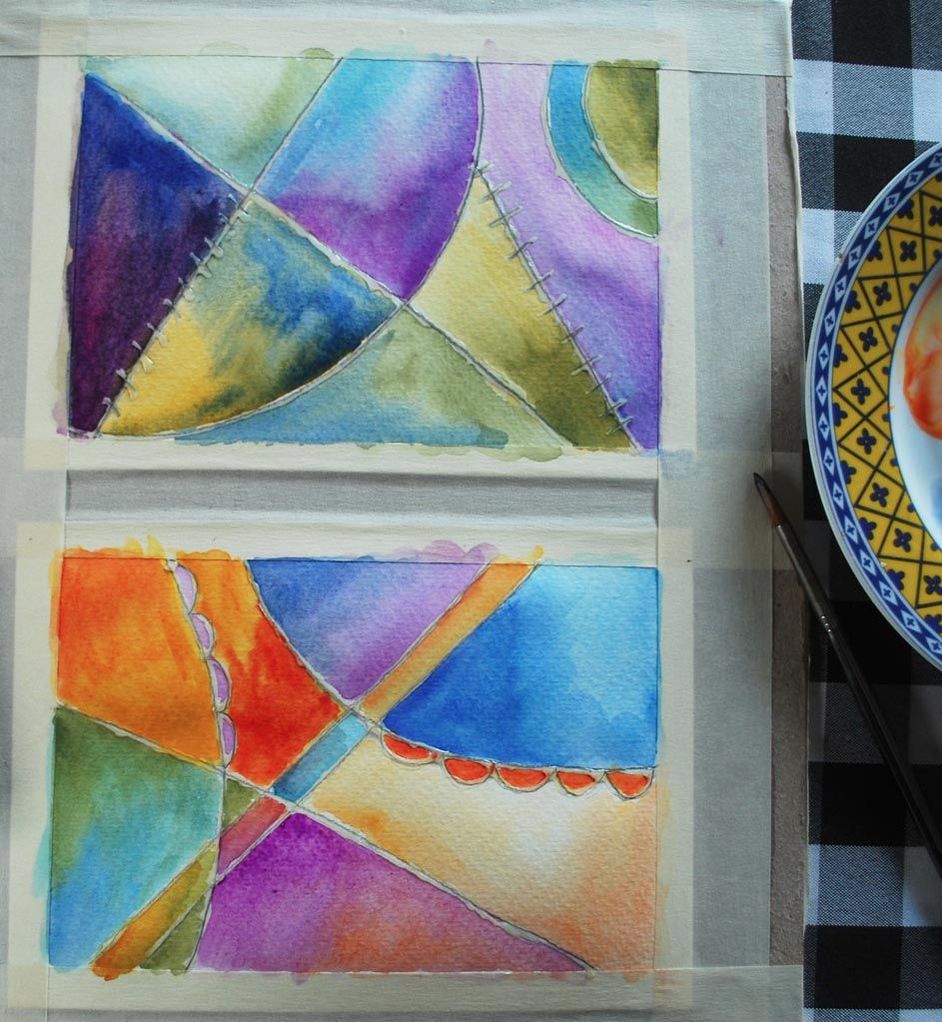
Watercolor painting process
5. Remove that masking fluid! This is the time we've all been waiting for! Once your painting is completely dry, carefully and gently remove that masking fluid with a rubber cement pick up, a soft eraser or using your fingers (I wouldn't recommend using your fingers if your hands are usually sweaty or greasy though!). Rub gently until part of it lifts and then gently pull the rest off. Make sure you remove it completely and lightly dust your painting off so no pieces are left behind. 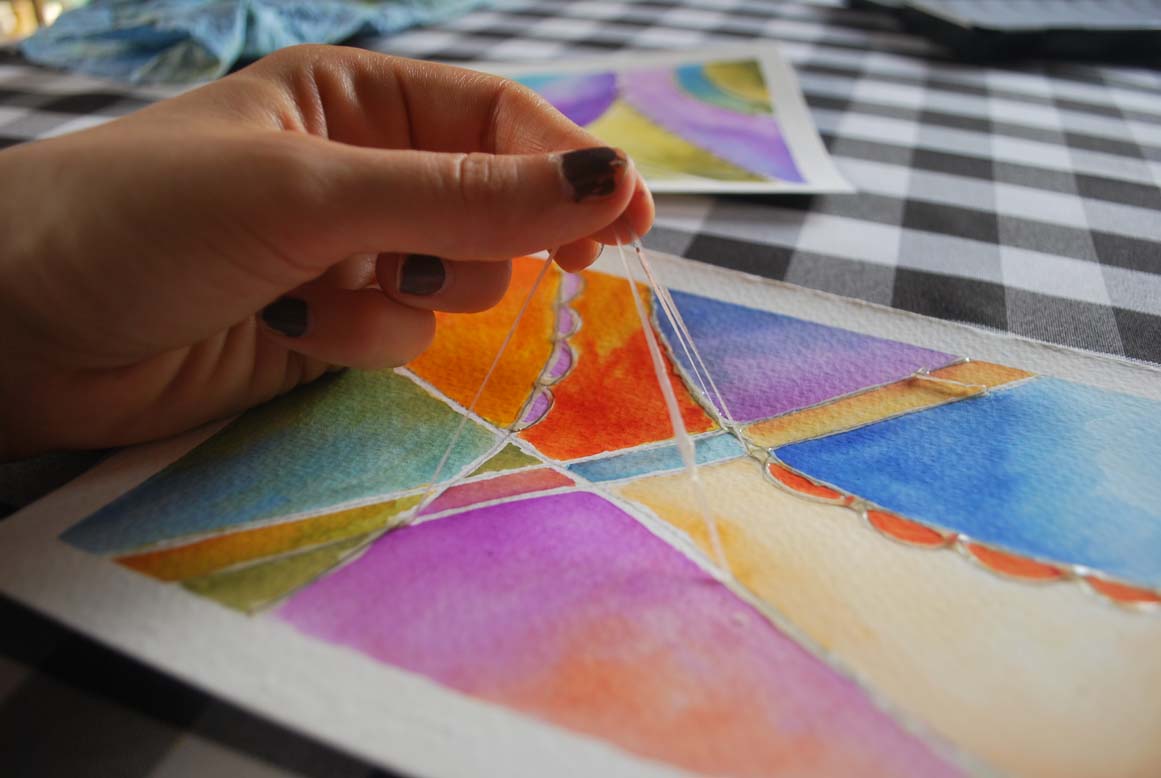
Removing masking fluid
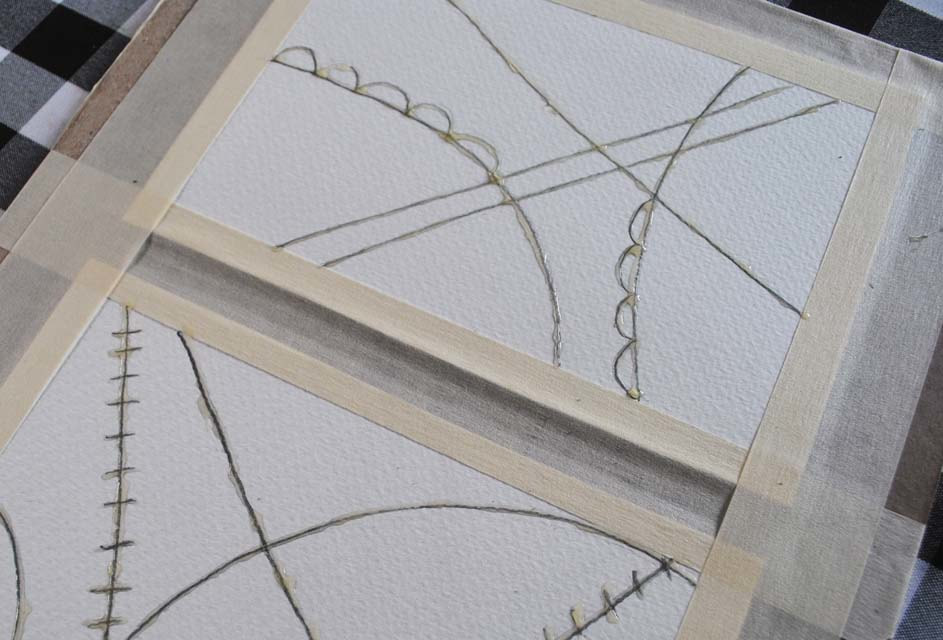
6. Soften hard edges and finish any last details
Once your masking fluid has been removed, you'll notice that you're left with very stark-looking, sharp white shapes. If you're creating a painting that's more on the realistic side (like in the car painting time lapse video I've included in this post), you'll probably want to soften at least some of these. To do this, simply wet your paintbrush in clean water and do some gentle scrubbing on those sharp lines, moving the pigment around on your paper. However, be very careful not to cover up all of your white! Now is also the time at which you can further deepen values in your painting if you need to, or carefully create any washes you feel would improve your painting. Allow to dry completely before removing any masking tape. *For the purpose of this abstract exercise, I left my white lines as they were after having removed my masking fluid because I liked the look of it. If you'd like to explore softening some of them or even adding in extra washes of color, go for it! 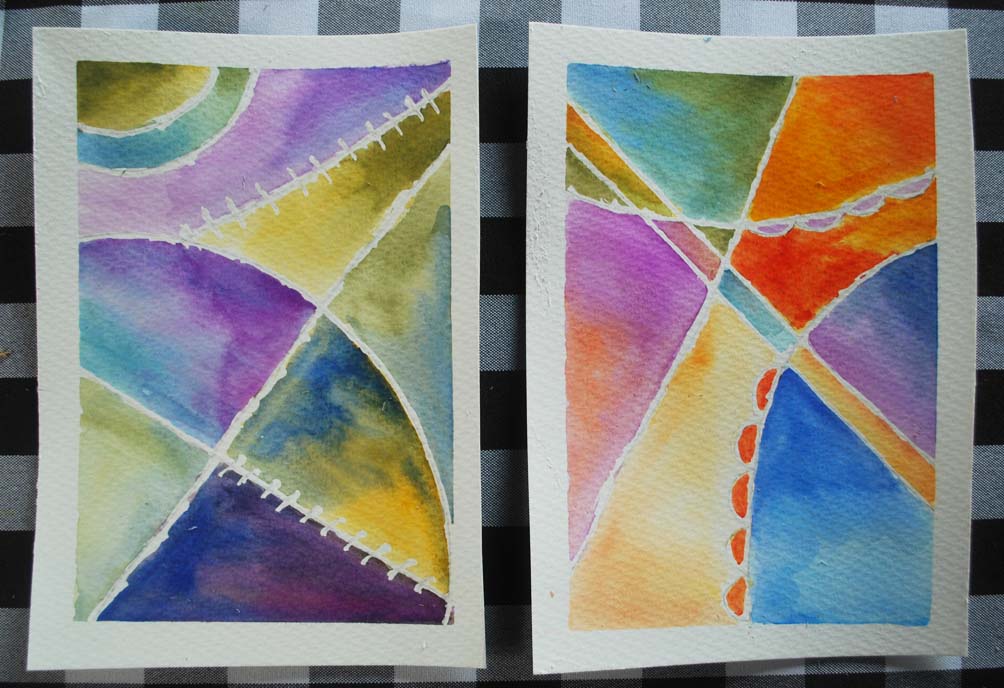
Erase those pencil lines!
Masking Fluid Pro Tips!1. If you want to use a paintbrush for masking fluid placement, soak its bristles in dishwashing soap (or rub them gently on a bar of soap) before dipping it into the masking fluid. This will make it easier to remove the masking fluid when you're done. 2. Never shake your masking fluid bottle before starting with its application. This creates air bubbles and may lead to coagulation, which may make it harder to place on desired areas and may affect the outcome of your work. 3. Only apply masking fluid on bone-dry paper and only remove it from bone-dry paper. 4. When using masking fluid, resist the urge to speed up drying times using a hairdryer or any sort of heat tool. Warm air can cause the already-hardened masking fluid to stick to your paper even more, which can later lead to rips and tears as you try to remove it! 5. Never allow hardened masking fluid to be on your paper for extended periods of time (over two days). Whether this is a problem or not will depend on a number of variables such as masking fluid and paper brands/types, environmental temperature, etc. However, be wary of leaving masking fluid on your paper for long periods of time because it can get to a point at which it may be impossible to remove! 6. Explore different ways you can apply and use masking fluid! There are so many ways to do it, from placing it carefully the way we did in today's exercise, to splattering, smearing, etc. Experimenting with different tools and techniques can definitely open up your horizons about what's possible with watercolors and will also allow you to have different tricks up your sleeve whenever you're painting complex subjects! What method do you personally use to create highlights in your watercolor paintings? Do you have any negative experiences with masking fluid? I'd love to know in the comments section below!
18 Comments
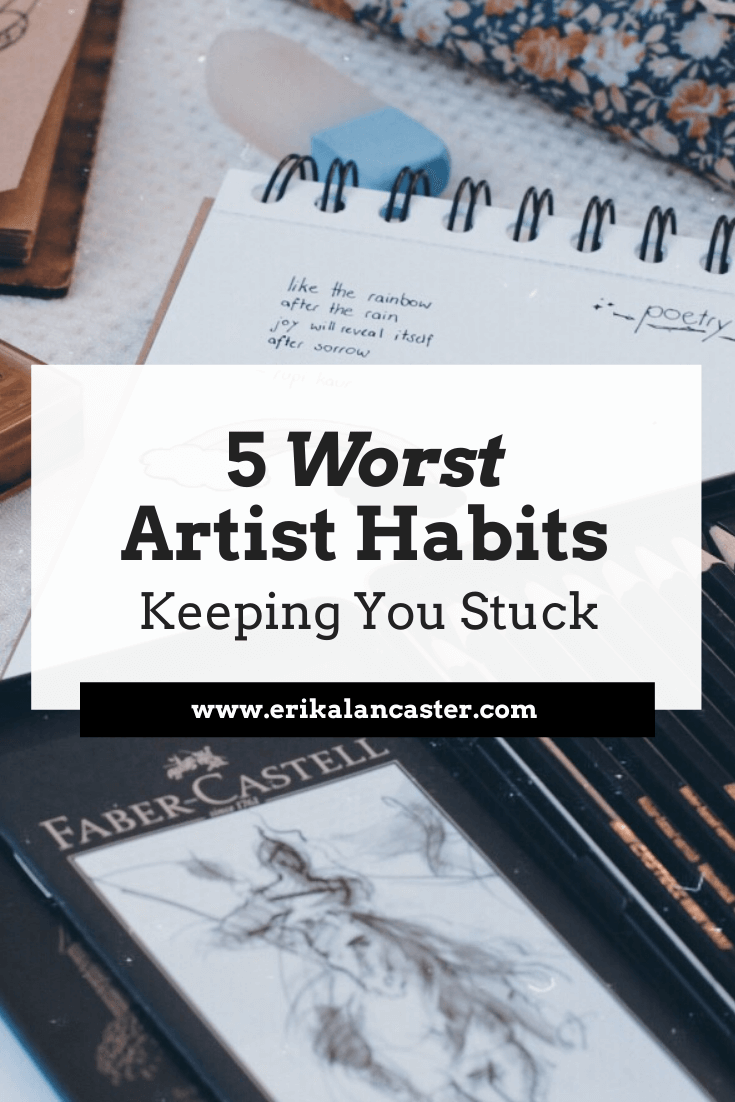
Ever wondered if there's something you could be doing to move your art journey forward aside from practicing your technical drawing/painting skills? Have you ever considered the fact that your daily habits and mental attitudes may be the source of your artistic stagnation and frequent struggles with art block?
If you're a beginner or intermediate artist of any kind, you're most likely spending a lot of time each week searching for tutorials or art classes that will help you improve your drawing and/or painting skills. You may be investing a lot of hours practicing and, while you may be improving, you still feel stuck or frustrated. It's absolutely amazing that you're taking your art seriously and investing time in developing those technical skills. It's incredibly important to build up abilities that will allow us to produce quality artwork. However, being an artist can be tough mentally and it's just as important to work on having healthy and positive mental habits. It's important to embrace the point we're currently at and believe we have it in us to get to the skill level we want to be at. By working on both our cold artistic skills, as well as our positive mental habits simultaneously, there's a much greater chance we'll reach success and will be able to sustain it throughout the years. In today's blog post/YouTube video I'll be sharing the top five issues that keep us from progressing as fast as we could be, and are also probably making our artistic journeys a lot less enjoyable! After each point, I'll be sharing some practical tips that you can use when you find yourself falling into these black holes. Most of us are guilty of at least a few of these and, while it's totally normal for us to experience them from time to time, it's useful to have methods which will help put us back on a constructive path. If you've read more of my past blog posts, or watched any of my YouTube videos, you're probably aware that I owe much of my artistic progress to my mindset and general life habits. As an artist struggling with anxiety, it's incredibly important for me to keep my mental health in check and devote time to my own well-being. Since I've implemented a series of changes in my life, my work and productivity levels have made a huge turn for the better. Check out my past blog post titled 10 Positive Affirmations for Artists to Maximize Productivity and Happiness.
If you enjoyed this video and found it helpful, make sure to subscribe to my YouTube channel. I share a brand new video every week with art tips, drawing and painting tutorials and mindset/productivity tips for artists. *Subscribe HERE*
Landscape oil painting by Erika Lancaster. 90 x 70 cms. stretched canvas.
Habits and Attitudes to Set Aside NOW1. Chasing Perfection + Fear of Failure Perfectionism and fear of failure are the absolute worst enemies of creativity. Exploration is a fundamental part of being an artist, and, how are we going to embrace it if we are always living in fear of not producing the most beautiful outcome? It's essential for us to be able to produce large quantities of work and learn to view mistakes as signs of artistic growth. Though in many life situations, quality is more important than quantity, I don't think this is the case for artists, especially when he/she is just starting out. At the beginning, production should be constant, and we should expect it to be messy. The more you produce, the better you become. Never fear a blank page or canvas. Art is not meant to be perfect, and chasing perfection all the time isn't going to make you more of an artist. In fact, I believe that it's imperfections that make an artwork special. This means it was created by a human hands and not a machine! *What to do if you feel you can't get out of this: Build up your confidence incrementally. Make sure that you've learned and practiced art fundamentals enough. Then, create smaller sketches and artworks, and build from there. Slowly but surely, you'll gain more and more confidence and you'll face greater challenges more organically. Learn to embrace exploration as a fundamental part of the artistic process. Smaller studies are just as important as those larger pieces you're striving to create! Check out my blog post titled Why Sketchbooks are Essential Tools for Artists + A Few Usage Tips, to learn about why it's so important to create art consistently and useful tips to make the most out of your sketchbook practice. 2. Constantly comparing yourself to other artists No two people in the world are the same and we know this. We have all been through different life situations and have been influenced by combinations of different things. All of us have our own quirks, tastes, strengths and weaknesses, and unique traits that make us....us. And all of this is great because, we can work towards creating unique art that truly represents us! Why would you want to be somebody else, in the first place? I mean, I get it! It's hard not to compare your skill level to other artists' when you're constantly seeing so many magnificent artworks through social media. However, most of the time, these people aren't sharing their struggles and mistakes and only their finalized successful pieces. Not to mention, you have no idea how long he/she has been working to get to that point. How long have YOU been working at it? When you see works by an artist you consider amazingly talented, view them as a point that you can get to if you work really hard, and leave aside any feelings of jealousy or insecurity! *What to do if you feel you can't get out of this: Limit your intake of other artists' work to only specific days each week. Consider periods in which you aren't actively searching for external influences as periods of "incubation". These phases are incredibly important, as they allow you to truly digest the information you've taken in, think about how you can make it your own, and really bring forth your OWN ideas! I cannot tell you how important these periods are, especially when you're already working on finding your own artistic voice and style! 
Check out my FREE Patreon-exclusive tutorial and class samples here.
3. Downright copying other artists work and not giving any thought (or importance) to your own ideas/voice There's nothing wrong with getting inspired by other artists, especially when we're just starting out and searching for our own artistic style/voice. We're all influenced by external factors, whether we want to admit it or not. Personally, I started drawing by copying Sailor Moon cards when I was a little girl! I think most of us start by copying and we can definitely learn a lot from studying a particular artist's style/technique. However, these are studies and, more often than not, we should keep these to ourselves. It's important to recognize that constantly copying other artists' work and not giving any thought to what you personally want to put out into the world, isn't going to help you progress past a certain technical point. Isn't this the whole point of creating art getting your own thoughts and ideas out into the world, anyway? This is something we should all be striving for at the end, I think. *What to do if you feel you can't get out of this: A while back, I wrote a very thorough blog post explaining the method I personally use to get inspired by other artists while still creating original artwork. In this post, I take you step-by-step through this process and share my end-product with you! Find this post here: How to Effectively Use Other Artists' Work as Inspiration and a Great Method to Start Developing Your Own Artistic Style. The idea is quite simple. Instead of focusing on copying one artist's work, study several different pieces by three of your favorite artists simultaneously. This will challenge you to arrive at those characteristics that call out to you, personally, about their works and to combine them all into one new artwork! 
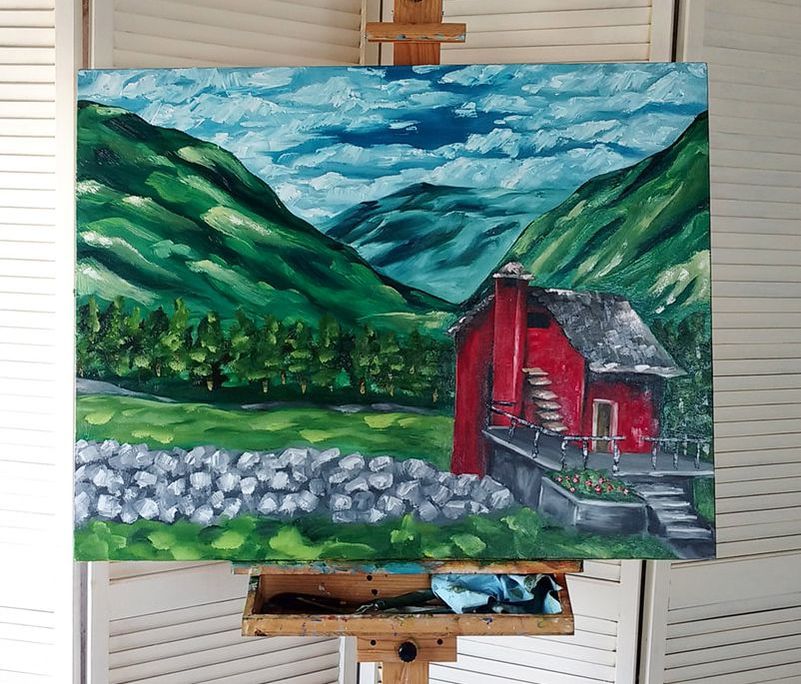
4. Being inconsistent in your practice I know that life gets crazy busy. We have jobs, families and life is unpredictable. However, if your art is important to you and you really want to make something out of it one day, it's imperative to make it a priority. If you don't practice consistently, your skills are going to stay stagnant at best (if you're lucky). This said, smaller explorations and sketches are definitely ways of progressing! As I mentioned before, sketchbook work and smaller pieces are just as important as larger artworks. The trick here is to stay consistent and keep moving forward in any way you can. Use your creative muscles and get your ideas down on paper as frequently as possible, otherwise, it's going to be hard for you to get to the point you want to be at. *What to do if you feel you can't get out of this: Only have 15-20 minutes today? No problem! Get that sketchbook out and create a quick pencil sketch! Not enough energy to concentrate after a tough day at work? Do at least a loose, abstract exploration of color, line and shape! Invest a few minutes of your day into planning a new project and schedule some time in this weekend, when life isn't as crazy. The point is to keep moving forward and keep your end-goal in mind, always! 5. Not making time for exploration I've already mentioned that exploration and art go hand in hand. It's through exploration that we get to know ourselves as artists and bring new life to our work. Exploration isn't only incredibly important in the beginning of our journeys! Any artist, no matter how talented or established, should continue making time for new challenges because this will help prevent stagnation and take his/her artwork to new levels. Exploring new mediums and techniques helps expand our knowledge and enhances our work. By making time for exploration, we arrive at ideas that we would have otherwise never thought of. *What to do if you feel you can't get out of this: Set aside time, each month, to explore something you don't usually explore. It doesn't necessarily mean you should go out and buy expensive art supplies that you may end up never using again! It can simply mean trying your hand at creating a landscape when you usually focus on abstract work, or finally trying out that gouache paint set you've had buried in your closet for months. You can also collect a few old magazines and create a few collages! Have fun with it! Here's a video in which I share my favorite method for overcoming Art Block, as well as a time-lapse of an exploratory oil painting I worked on a few weeks ago.
If you enjoyed this video and found it helpful, make sure to subscribe to my YouTube channel. I share a brand new video every week with art tips, drawing and painting tutorials and mindset/productivity tips for artists. *Subscribe HERE*
Which of the five habits or attitudes mentioned here has caused YOU the most trouble as you try to progress artistically? I'd love to hear from you in the comments section below! 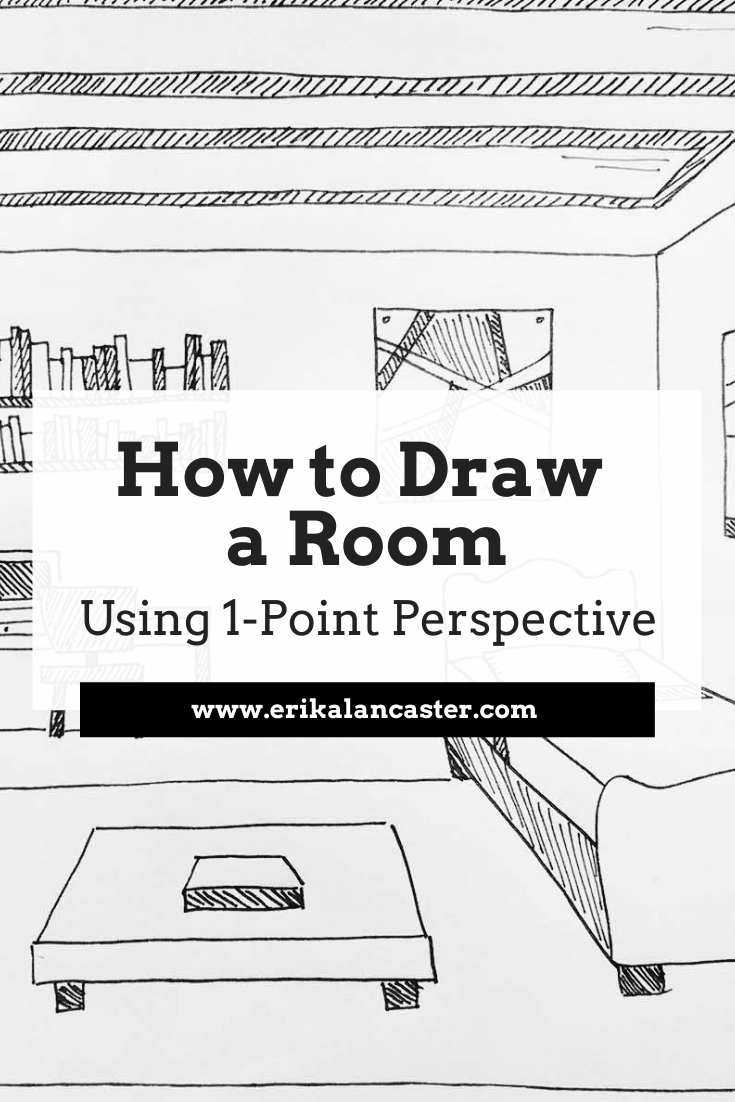
*This post contains affiliate links. I receive small commissions for purchases made through these links at no extra cost to you. These commissions help me keep this site up and running, in order for me to keep providing helpful and inspiring art content. :)
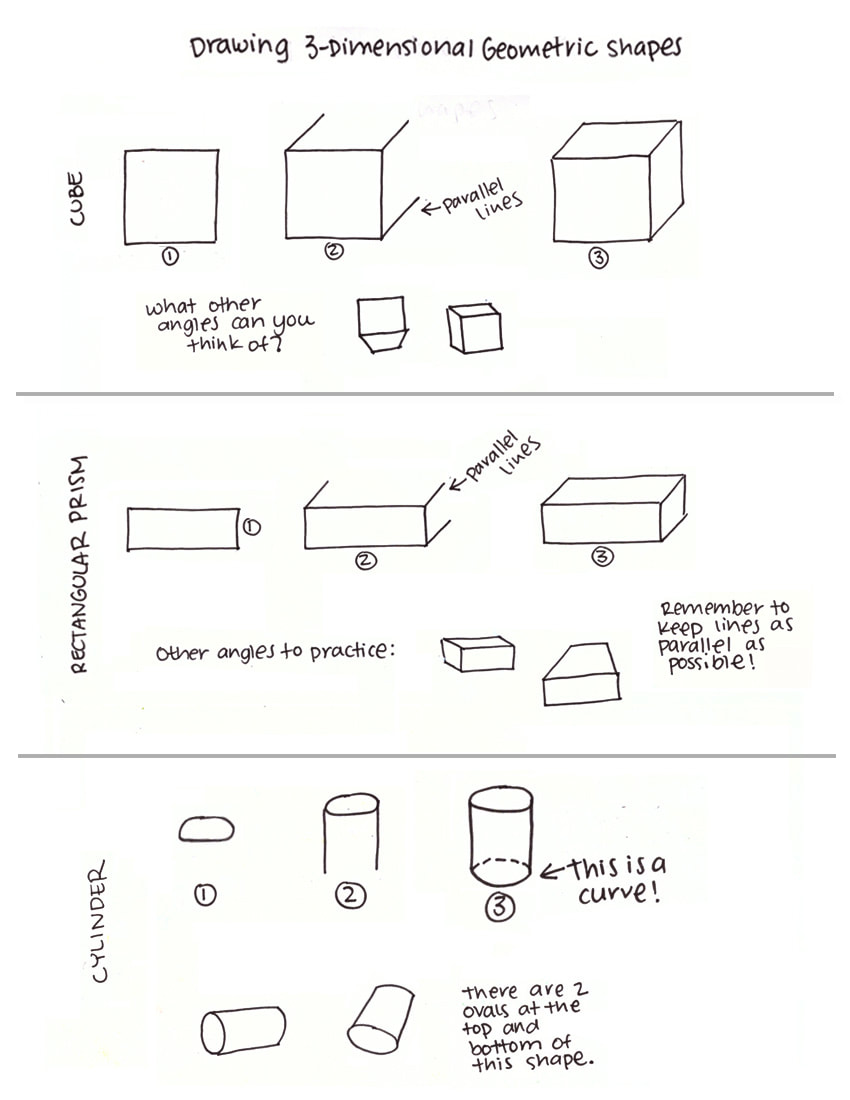
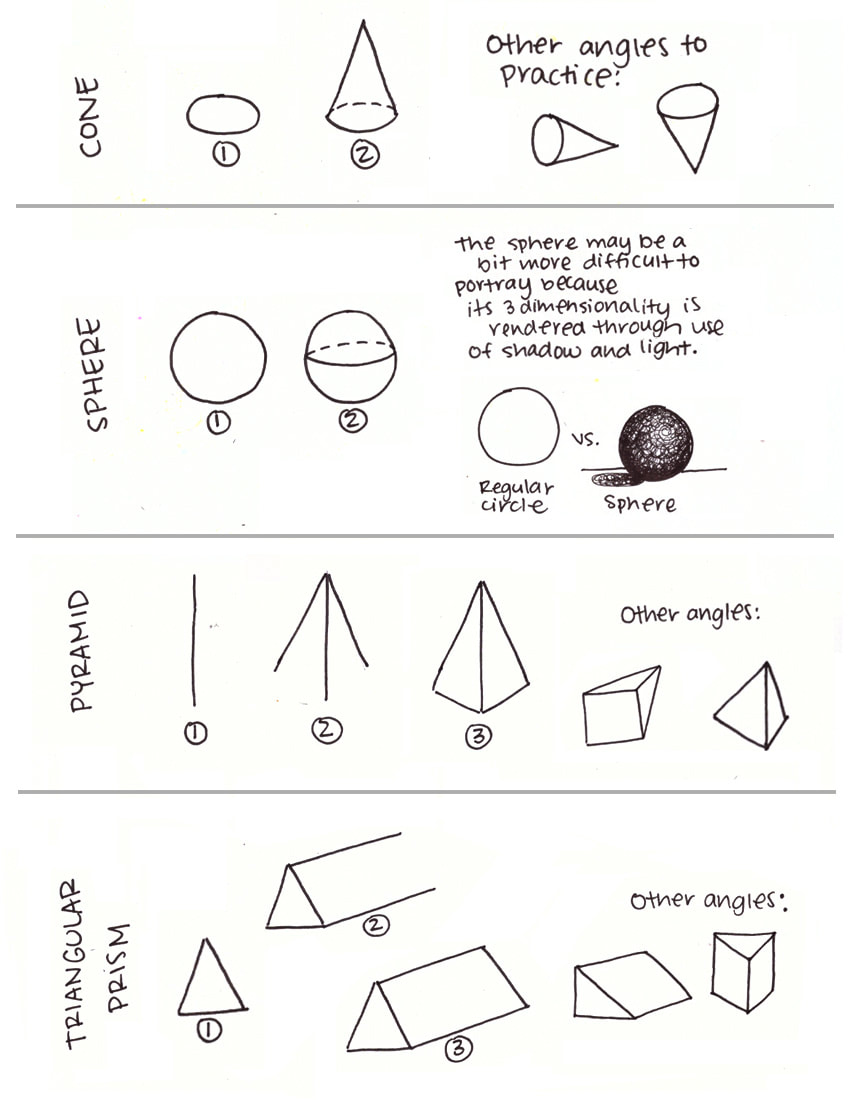
Does the word 'perspective' scare you off from creating more complex artworks? Do you feel like being too precise and using grids takes away from the fun of creating art? Would you love to be able to create drawings or paintings that effectively transmit a sense of depth and space, but don't know where to start? The term 'perspective' basically refers to our point of view when we're in a specific, fixed location. Depending on where you're sitting or standing right now, you're going to have a different perspective of your surroundings when compared to a person sitting on the opposite side of the room, or even from someone sitting/standing next to you at a different height or slightly different angle! To create believable three-dimensionality and depth on flat surfaces like paper or canvas, artists make use of grids and/or lines that assist them in creating optical illusions. Though perspective may be more evident in artworks featuring indoor or outdoor scenery, it's actually present in all types of art, whether it's a portrait, a still-life, or anything in between. Make no mistake, perspective is a fundamental topic to understand in order to achieve believable and compositionally-sound drawings or paintings. In today's post (and YouTube video!), we're focusing on 1-Point Perspective, which is the perfect place to start for the beginner artist. I'll be walking you through an initial exercise using simple three-dimensional geometric shapes that will allow you a proper warm-up, and then we'll be applying our knowledge to draw the inside of a room! *A quick caveat before moving on: If you feel you don't have enough practice drawing simple, three-dimensional geometric shapes, you may want to practice drawing these a few times before continuing with the first drawing exercise. Feel free to grab and print these two PDF's with steps for drawing cubes, rectangular prisms, etc.
A while back I wrote a very thorough guide to both One-Point and Two-Point Perspectives, which includes several more free downloadable worksheets/templates. In that post, I explain a lot of key terms related to perspective that you should definitely know about and also provide numerous examples of perspective in both famous artworks and modern photography. Check it out here: Perspective for Beginners: How to Use 1 and 2 Point Perspectives to Create Great Artwork The 1-Point Perspective Grid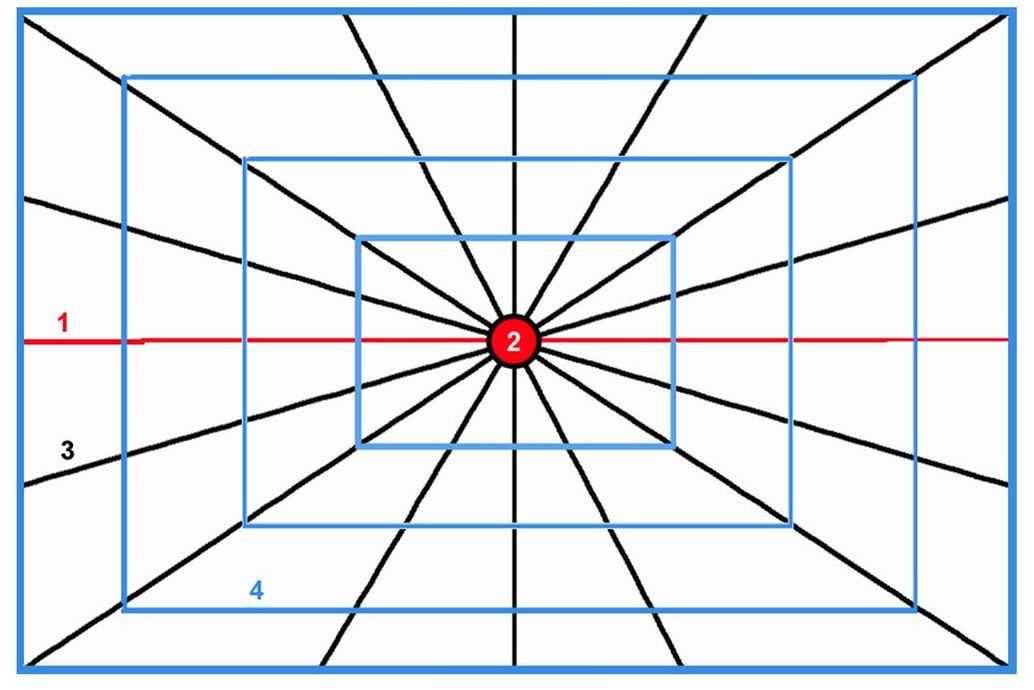
The 1-Point Perspective grid
One, Two and Three-Point Perspectives are all categorized as ¨Linear Perspectives¨. This means that they rely on the use of straight lines to depict three-dimensional space and the forms within it. In other words, to apply these techniques we will need to prepare for our drawings by creating grids which will be erased later on. What these grids do, is allow us to create the illusion that objects get smaller and smaller as they get further away from us, while objects closer to us will appear larger. These grids also allow us to establish our vanishing point(s), which represents the furthest point from us in the distance. The 1-Point Perspective grid contains one vanishing point, while the 2-Point Perspective grid contains two, and so on. The 1-Point Perspective grid, is very useful when we're trying to draw a subject front-on. Surfaces of objects facing the viewer are drawn in their flat, undistorted shapes. However, sides of shapes that are not facing the viewer are created by diagonal lines that converge at our single vanishing point in the distance. The following are included in a One-Point Perspective grid: 1. Horizon Line This is the line that separates sky from land (in landscapes) or sky from water (in seascapes). It is also referred to as the "eye-level" of the viewer. The Horizon Line doesn't necessarily have to be right in the middle of your picture. In fact, it is a lot better, compositionally speaking, if it is somewhere below or even above the halfway point of your drawing area. Objects above the horizon line are drawn as if you're looking up at them, while objects below it are drawn as if you're looking down at them. 2. Vanishing Point The Vanishing Point is placed somewhere on the Horizon Line and it represents the farthest point in your picture. When creating a grid, this point is were the Orthogonal Lines all meet. 3. Orthogonal Lines Orthogonal Lines (also known as Convergence or Vanishing Lines) are key when drawing perspective. They are diagonal and recede back into the vanishing point. A perspective grid can have many Orthogonal Lines or very few of them, depending on the complexity of the picture. The more elements in the picture, the more lines you will probably have to include in your grid. 4. Transversal Lines These are completely horizontal or vertical lines that are either parallel or perpendicular to the horizon line. They form rectangles or right angles along the grid and are especially useful when drawing interiors (which we'll be doing today!). 5. Vantage Point The Vantage Point refers to the specific place from which a scene is viewed. This point can actually be very high (referred to as bird's-eye) or very low (referred to as worm's-eye). It is crucial to decide where the Vantage Point is going to be in the very beginning because this will affect the placement and size of all elements within the composition.
If you enjoyed this video and found it helpful, make sure to subscribe to my YouTube channel. I share a brand new video every week with art tips, drawing and painting tutorials and mindset/productivity tips for artists. *Subscribe HERE*

Let's get started!
Supplies You'll Need:
-1 pencil with harder lead (4H, 2H or H) -1 pencil with softer lead (B, 2B or 4B) -Ruler -Sharpener -Soft eraser -A few sheets of regular printing paper *Optional: Black drawing pen
Drawing Exercise #1: 3D Shapes Using the 1-Point Perspective Grid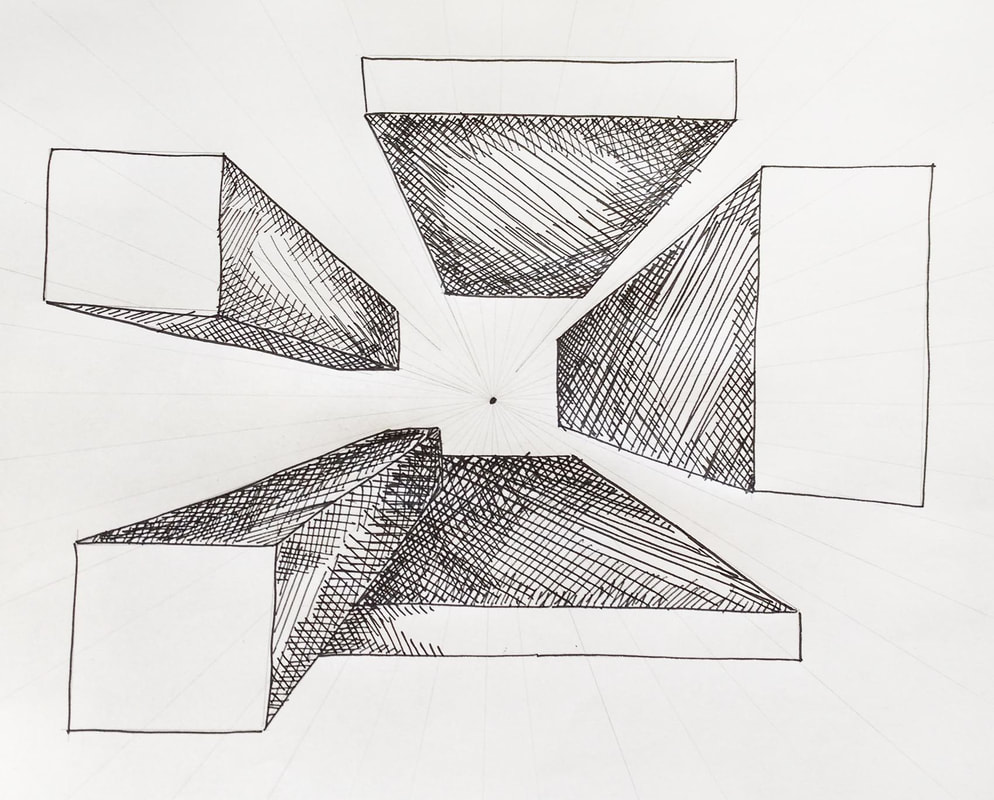
3-Dimensional shapes drawn on a 1-Point Perspective grid.
Check out my FREE Patreon-exclusive tutorial and class samples here.
Steps: 1. Using a ruler and your hard-lead pencil, draw a simple 1-Point Perspective grid. Pick a point within your drawing space (it doesn't necessarily have to be right smack in the center of it). With your ruler, draw lines intersecting at this point. Draw enough lines to fill the majority of your drawing space, but keep them as light as possible! 2. Using a softer-lead pencil, start drawing flat, two dimensional squares or rectangles anywhere within your grid. Do your best to keep your lines as straight as possible and help yourself with your ruler if needed. These flat shapes will be the 'planes' or sides of objects facing you. 3. Pin-point the innermost corners of your shapes (the ones closest to the vanishing point) and, using a ruler, draw lines from these corners to your vanishing point. Make sure your ruler is perfectly aligned with the corners of your shapes and your vanishing point. *Notice that some shapes are going to have two planes (or sides) showing and others will have three, depending on their location within your grid. 4. Close these shapes anywhere you'd like using horizontal or vertical lines. Make sure to protect those right angles and keep your lines as parallel as possible! 5. Extra step: Shade some of your shape's sides, just make sure to keep it consistent throughout (if you start shading the innermost planes of your shapes, keep the front planes unshaded). Read my blog post titled Guide to Shading Techniques: Hatching, Cross-Hatching, Scribbling and Others to learn some fast shading methods! Drawing Exercise #2: Drawing a Room Using the 1-Point Perspective Grid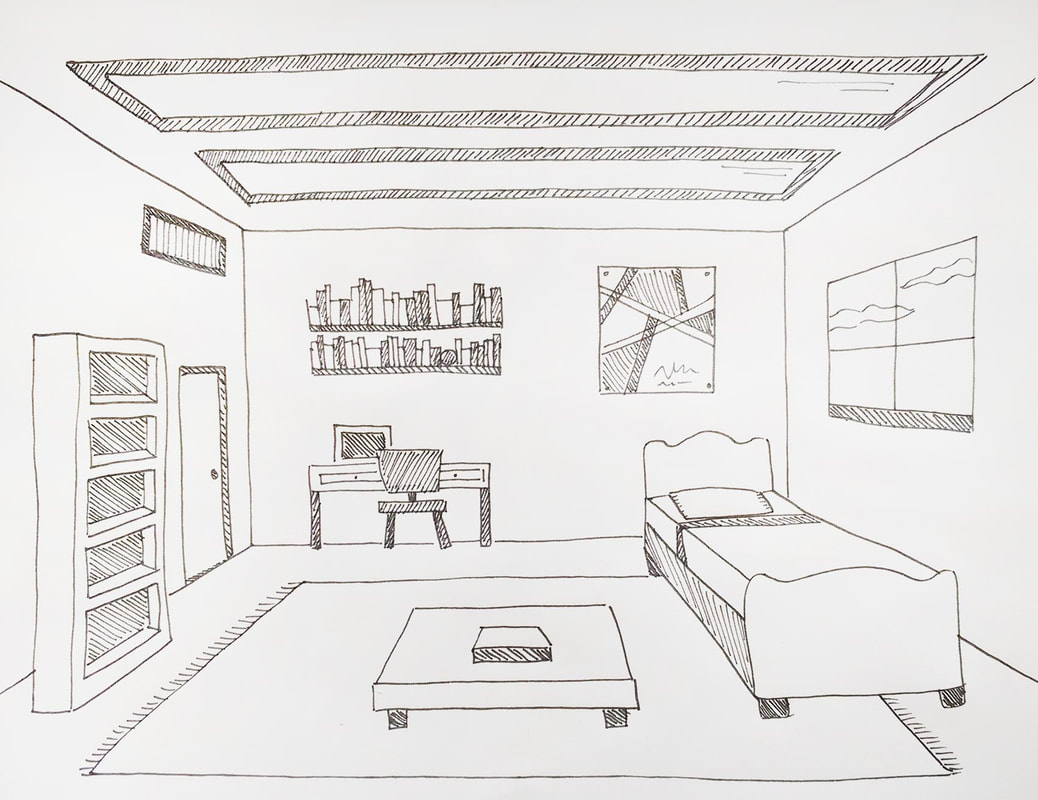
Room interior drawing showing One-Point Perspective.
Process: 1. Using a ruler and your hard-lead pencil, draw a flat rectangle in good size somewhere near the center of your drawing space (this will represent the back wall of your room). This rectangle doesn't necessarily have to be perfectly centered by any means, but make sure that you're leaving enough space around it so you have enough area to add things into your room! *Don't make this rectangle to small or narrow, as it will make your room look more like a long hallway. And don't make your rectangle to big, as this will make it seem like your standing too close to your back wall! 2. Create a very light cross in the center of your rectangle/back wall by aligning your ruler to opposite corners of your rectangle (top-left to bottom-right and top-right to bottom-left). Make a dot right where these diagonal lines intersect. This will represent your vanishing point. 3. Next, you're drawing the four corners of your room! To do this, align your ruler with your vanishing point and each of the corners of your back wall to draw four lines outward. Fill up the rest of the area on your floor, ceiling and walls with light lines like we did in the first exercise. Avoid filling in your back wall with lines, as you won't be needing them there. 4. Switch to your softer-lead pencil and re-trace the corners of your room to make them a bit darker. This will allow you to better visualize your floor, walls and ceiling. 5. Start adding in windows, doors, rugs or whatever you'd like to include in your room using your diagonal grid lines. Start by adding in flat decorative items (posters, doors, windows) and once you've got that down, begin experimenting with using 3-dimensional shapes as foundations for more complex pieces of furniture! Remember, rectangular prisms and cubes can basically be used to start off drawings of tables, shelves, beds and even sofas! *Check out the embedded video and pause as many times as you need to to see how I do it, step-by-step. Vincent Van Gogh's famous Bedroom in Arles is an excellent example of a famous artwork showing the interior of a room. Where would you say the Vanishing Point in this work is located? 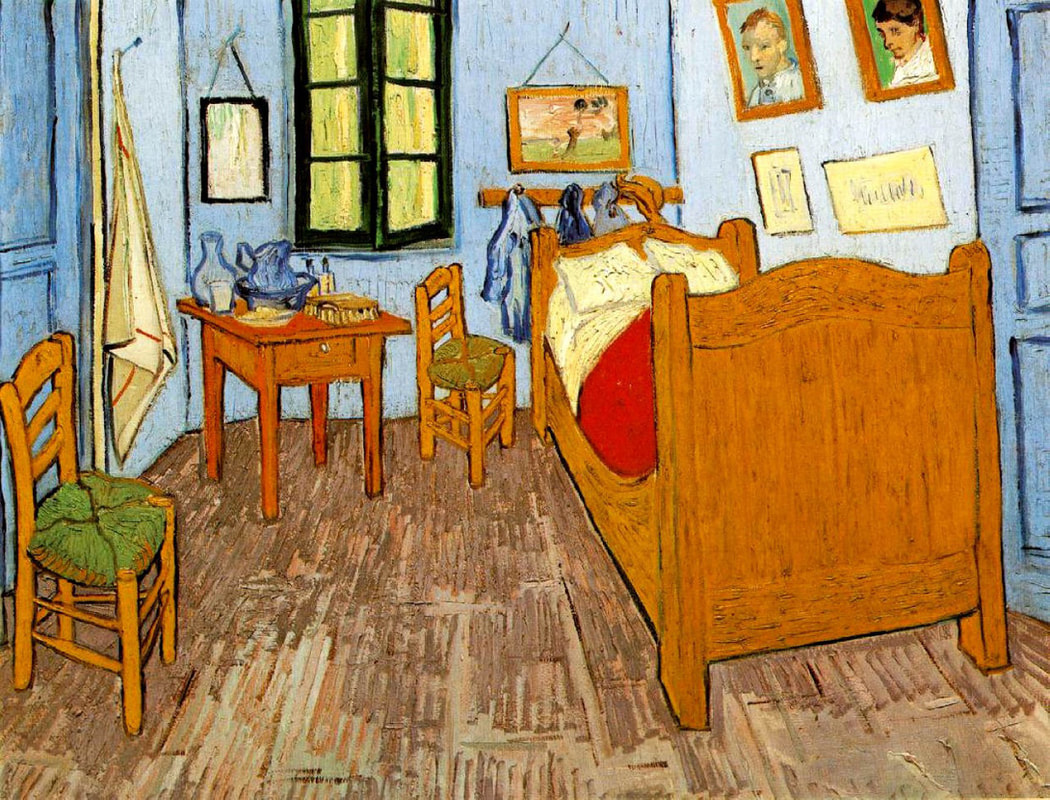
Bedroom in Arles painting by Vincent Van Gogh (1888) showing 1-Point Perspective.
Notice how the Vanishing Point in this room is off-center! In many cases, placing this point off-center actually makes a work more interesting!
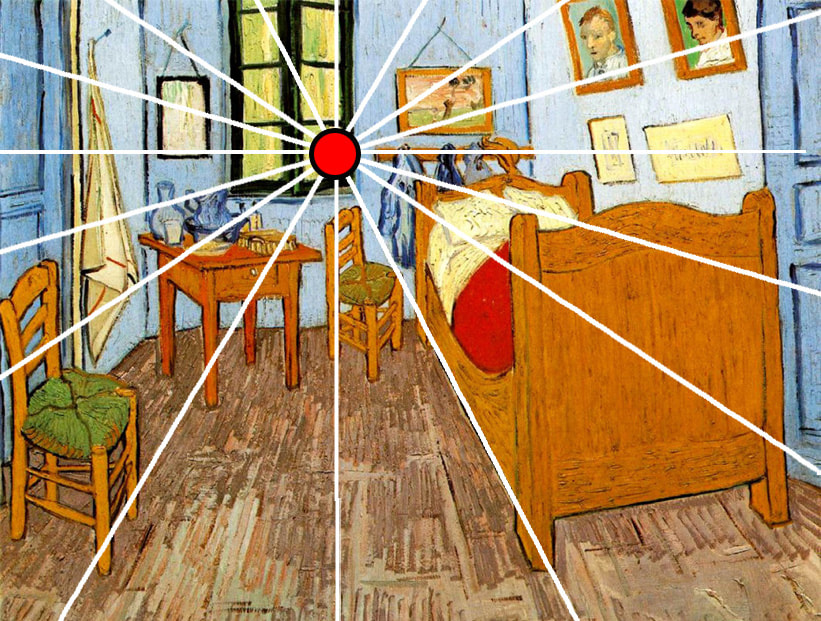
Bedroom in Arles painting by Vincent Van Gogh (1888) with 1-Point Perspective grid.
Even though creating perspective may sound complicated and like an intricate process when we're just starting out, I promise you that it's not as hard as it seems and it will come naturally to you after some practice! Not to mention, these types of drawings usually lead to very satisfying results and provide us with much needed visualization practice that will improve our artistic skills tremendously! Take your time with this, have fun, and move on to creating 2-Point Perspective drawings once you've grasped the concept! :) What's your favorite masterpiece or famous artwork that demonstrates 1-Point Perspective? I'd LOVE to know in the comments section below!
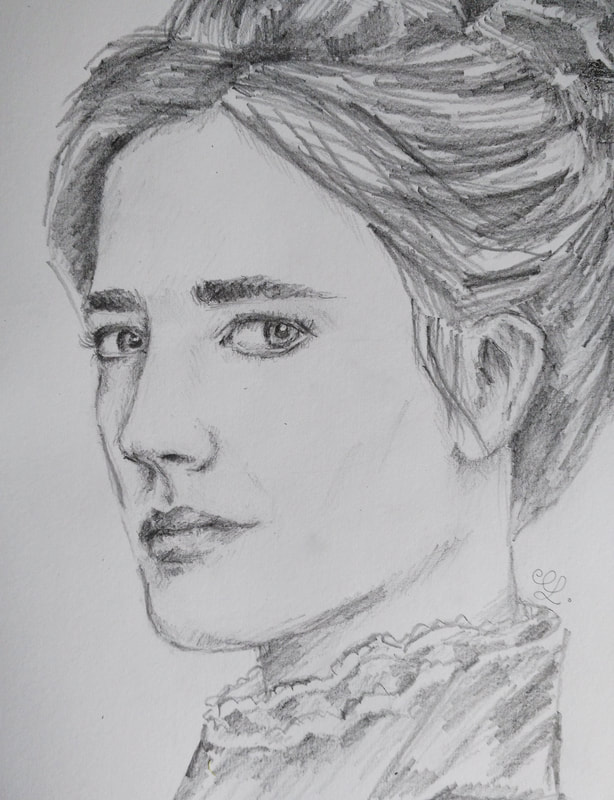
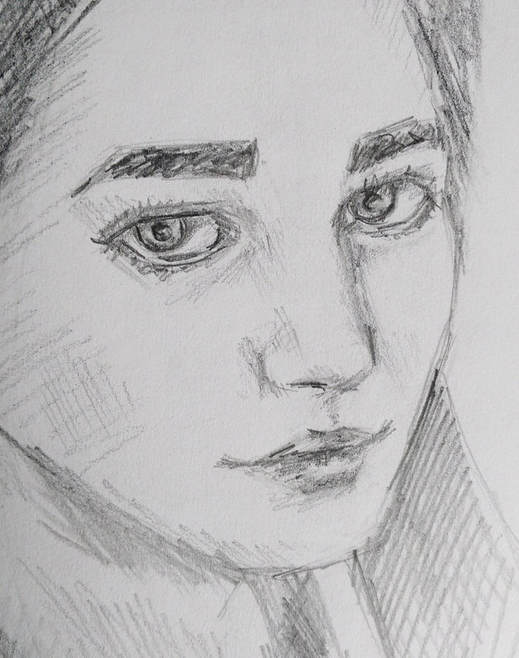
Eva Green pencil portrait.
Hey there, art friends! The past couple of weeks, I've been sketching a lot of female figure studies, as well as portraits. 
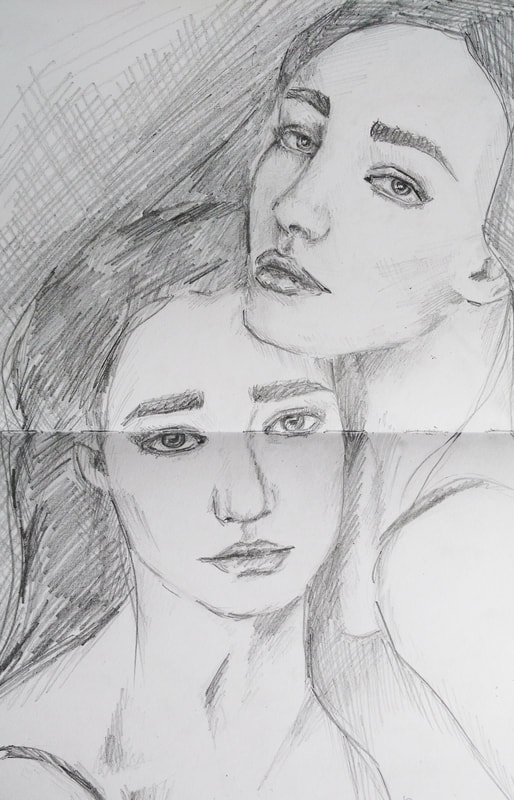
Sketchbook pencil portrait studies
Sketchbook pencil portrait study.
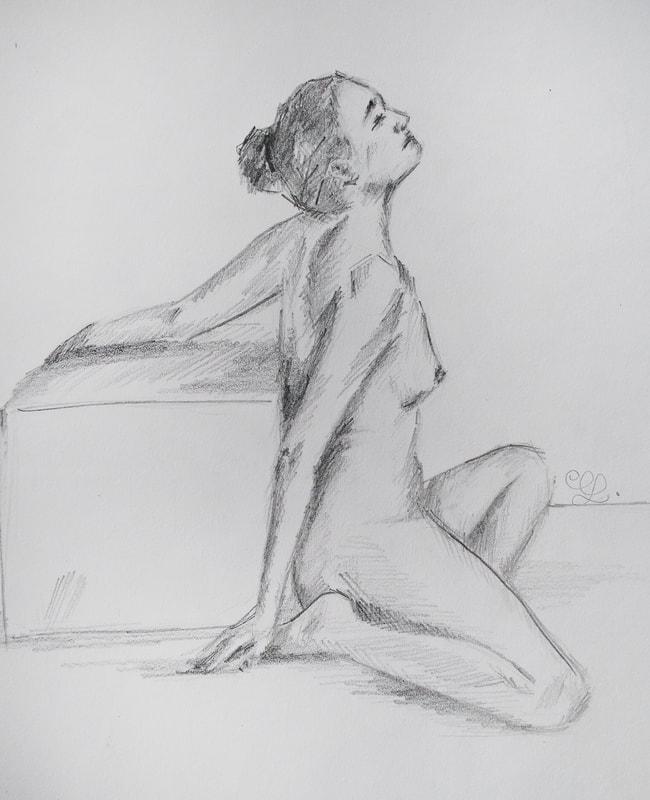
Sketchbook female figure pose study.
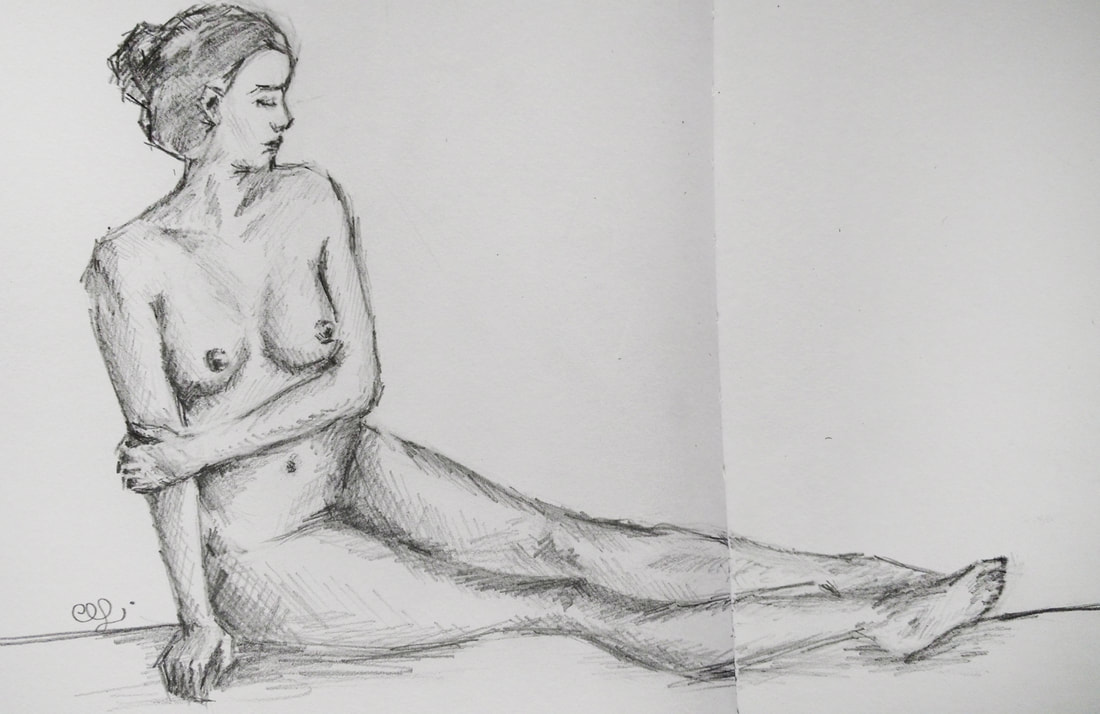
Sketchbook female figure pose study.
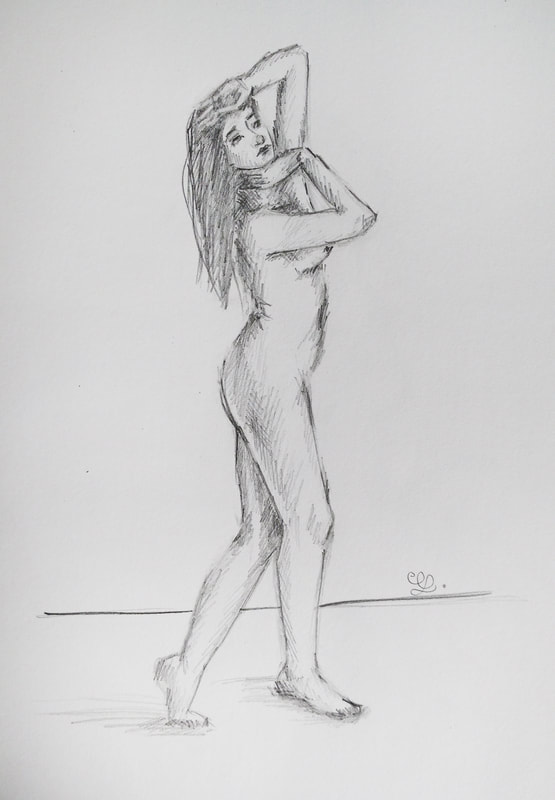
Sketchbook female figure pose study.
In case you're not following me on Instagram, you should! Over there, I share what I'm up to on a daily basis. If you've already been following me, then you're probably aware that a couple of weeks ago I challenged myself to produce a total of five landscape paintings using oils. I've nearly completed the second, which I will be sharing soon! I'm including the first in this mini-collection of my latest artwork! 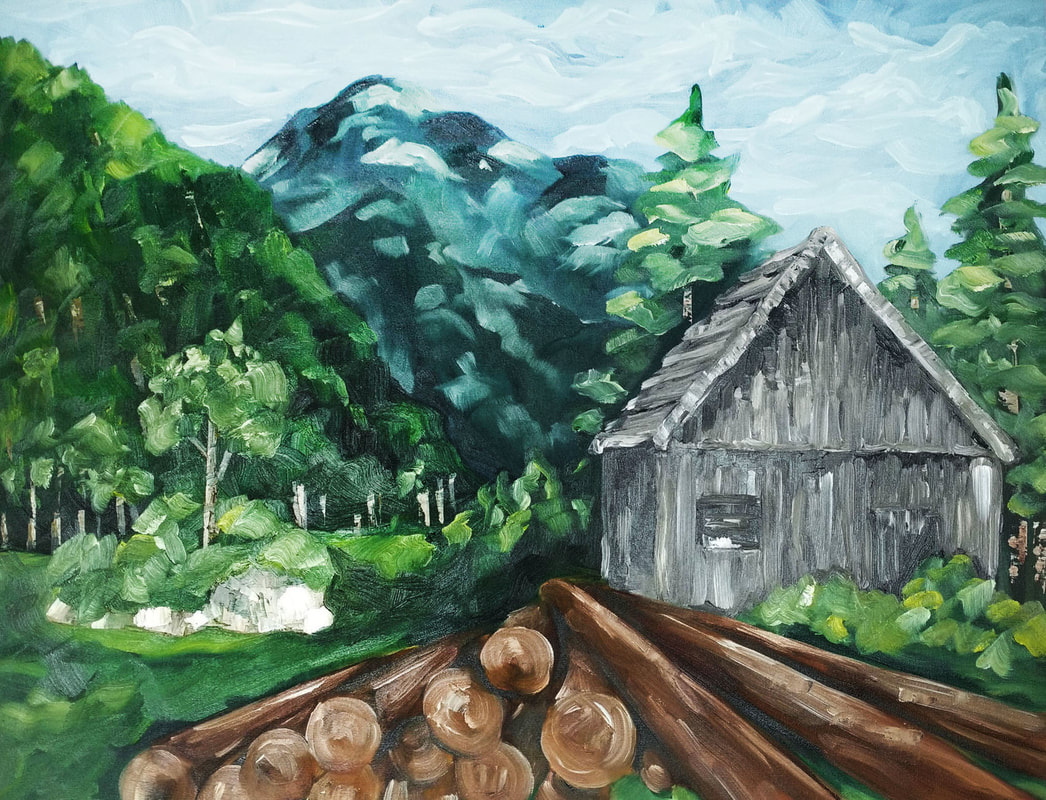
Cabin and mountain landscape. Oils on 90 x 70 cms. stretched canvas.
That's it for now, but stay tuned for much more to come! I hope you're having a wonderful day and that you've been able to set aside at least a bit of time to work on your art. Cheers! 
Have you reached a point in your art journey at which you feel relatively confident about your skills but are anxious to find your own style and voice? Are you stuck with your art and feel that your own perfectionism and/or fear of failure is keeping you from moving forward? "Create your own visual style... let it be unique for yourself and yet identifiable for others." -Orson Welles There is a point in every artist's journey at which a substantial amount of time and effort has been dedicated to developing artistic skills, but the artist has yet to decide what ideas he/she wants to share with the world and what mediums, techniques and style will set him/her apart from others. It takes an immense amount of work, exploration and introspection to push through this point, but it's important to keep on until the breakthrough happens. In my opinion, it's exactly this desire to push through the initial phase that differentiates a hobbyist from a pro. It's a point at which perfect rendering and technique becomes just as important as (or may even take back seat to) having an artwork transmit the ideas or feelings we are striving to transmit. In this blog post, I will be sharing five very useful tips that will help you loosen up and express more of yourself through your art. It's this exploration that will help you discover yourself as an artist. If you're at this point, it's time to experiment fearlessly and push your limits! I wrote a blog post several months ago in which I share an excellent method that you can apply to start discovering your own art style using other artists' work as inspiration. This strategy will be very useful for you in this stage, so make sure to check it out after this post. How to Effectively Use Other Artists' Work as Inspiration and a Great Method to Start Developing Your Own Artistic Style. Currently, I'm doing a lot of exploratory work with oils on canvas. If you've been following my work for any amount of time, you probably already know that I love working on smaller-scale watercolor illustrations. However, I've had the pleasure of creating larger decorative fine art for local clients and have really enjoyed it! I'm making time for oil painting as much as I can and am planning on selling my artwork internationally in the near future. I'm working on a series of five large landscape oil paintings. I will be sharing these with you throughout the upcoming weeks so stay tuned! 
Landscape oil painting by Erika Lancaster (90 x 70 cms.).
If you enjoyed this video and found it helpful, make sure to subscribe to my YouTube channel. I share a brand new video every week with art tips, drawing and painting tutorials and mindset/productivity tips for artists. *Subscribe HERE*
5 Tips That Will Help You Become More Loose and Expressive When Creating Art "Regularity, order, desire for perfection destroy art. Irregularity is the basis of all art." -Pierre-Auguste Renoir 1. Gain confidence in your skills by learning and practicing Art Fundamentals In order to draw or paint freely, you need to have a certain level of confidence in your skills and artistic knowledge. And the only way to truly gain confidence in anything, is by practicing first-handedly and delving deep into the fundamentals. Knowing Art Fundamentals inside and out is going to help you immensely, and is the basis for everything else. Topics like composition, harmony, proportion, color, perspective, texture, value, etc., have to be engrained in your head so that you can apply this knowledge naturally and organically as you are creating your artwork. Over at my Patreon site, I have a library of classes that cover all the basic Art Fundamentals I learned about in school, in sequential order! All of my most helpful, exclusive content such as real-time drawing and watercolor painting tutorials with downloadables, weekly sketchbook prompts, feedback from me on your work, and much more can be accessed immediately upon joining. Check out my Patreon site here! Aside from knowing Art Fundamentals, it's also imperative for you to have some experience working with whatever medium and supplies you're thinking of using. How are you going to paint or draw freely if you feel like you're constantly fighting with the medium, or have no idea how the substrate/medium/etc. is going to react throughout the process? The saying "Learn the rules before you can break them" applies here! In my blog post titled Why Sketchbooks Are Essential Tools for Artists and A Few Usage Tips I share how I personally use my sketchbooks on a daily basis to make sure I'm progressing continuously. 2. Prepare yourself mentally before you begin It's absolutely essential to start a challenging piece in the right headspace. Once you have arrived at the idea of what you'll be creating, start with positivity and confidence. I've mentioned this before, but our minds are extremely powerful. Remember, if you think you're going to fail, you most likely will. Now is the time to embrace experimentation and throw perfectionism out the window. Allow the magic to happen as you work with your medium and tools. Do your best to give up some of your control and allow your medium to do some of the speaking for itself. 3. Paint with larger brushes and, if possible, on a larger substrate Painting/drawing at a larger scale will not only encourage more arm movement (which in turn leads to more dynamic work), but allows you to focus on larger shapes. Using a larger brush, or drawing tools like chalk or charcoal, also make it more difficult to obsess over tiny little details. This, in turn, challenges you to think about what is actually needed in your composition and what can be left out. Not to mention, larger pieces are also (usually) meant to be viewed from farther away. At the moment of drawing or painting, step back and continuously remind yourself that the piece is meant to be appreciated from a distance. If you're creating a painting, remember that your paintbrush is not meant to be held as a writing pencil or pen! Try holding it with your thumb and index finger, and keep the rest of your hand relaxed. Beginners have a tendency to hold brushes very close to the bristles to feel more in control. Try holding your brush farther up the handle, anywhere from halfway up to the tip. Explore the different types of brush strokes your brushes are able to create, and the shapes and textures their bristles naturally leave behind. Load your paintbrushes with a good amount of paint so that there's more of a chance for interesting "natural" occurrences to happen. 
Check out my FREE Patreon-exclusive tutorial and class samples here.
4. Use music Music can have such a deep impact on our mood and inspiration levels! I love creating a good, long playlist for myself prior to starting with a painting. Music helps keep my creativity flowing and my energy high for hours. Our taste in music will vary from person to person, of course. Perhaps an artist looking to create an extremely dynamic abstract painting would be inspired by music with a faster/upbeat tempo. Whereas, another artist might find more relaxing, classical music more helpful. Regardless of your taste in music, create a playlist that will help you stay positive, inspired and motivated to continue. 5. Practice leaving your brushstrokes alone Do your best to place your brushstrokes (or lines if your drawing) with intention and then leave them alone! Allow the organic occurrences to happen and think of how you can use these effects to your advantage instead of trying to correct them or blend them out. Stop yourself from pushing forward with actions that are really not really necessary. Try to do more with less and don't obsess over every tiny little accident or irregularity. Let go of the need to control everything! I hope that you found this post helpful and that it encouraged you to keep exploring and moving forward with your art. I wish you all the best and remember to enjoy the process!
|


 www.erikalancaster.com
is a participant in the Amazon Services LLC Associates Program, an affiliate advertising program designed to provide a means for sites to earn advertising fees by advertising and linking to amazon.com. www.erikalancaster.com is a participant in the Shareasale.com Affiliate Program, an affiliate advertising program designed to provide a means for sites to earn advertising fees by advertising and linking to Shareasale.com partner companies. |
|||||||||||||


 RSS Feed
