*This post contains affiliate links. I receive small commissions for purchases made through these links at no extra cost to you. These commissions help me keep this site up and running, in order for me to keep providing helpful and inspiring art content. :) Confused as to how other artists manage to stay in a productive creative flow and can't help but feel jealous when seeing incredible new artworks others are constantly sharing? Want to make a living from your art someday, but doubt whether you'll have the courage, character and determination required to succeed? Does criticism and/or lack of support make you feel so low, that you want to stop creating altogether? If you're set on becoming an artist, and you're constantly feeling any (or all) of these things, it's imperative that you start working on yourself, alongside your artistic skills. This is going to be absolutely essential for you if you ever want to achieve lasting success. Being an artist is tough. Not only are we entrepreneurs (which means we work a lot, wear a ton of different hats and have to be willing to push ourselves out of our comfort zones every-single-day), but we also have to consistently create quality work that people will want to buy. Work that, in most cases, is created by us and us alone. Work that is pretty much a piece, or extension, of ourselves. All of this makes it necessary to stay strong if we're intending to make a living from our passion. In today's blog post/YouTube video, I'll be sharing the top five things that I make sure to do on a weekly basis in order to stay healthy both mentally and physically as an artist. Since I started doing these things consistently a few years ago, not only have I been able to make much faster progress, but I'm also able to enjoy what I do much more and have been able to improve my self-confidence to a degree that I'm able to myself out there in ways I never thought possible. It wasn't always like this though, and I'm getting very personal about my past today, which is something I very rarely do online. I do this with the hope that some of you out there will resonate with my story and really grasp how important prioritizing self-care is if you want to reach your goals. I want to keep creating art until I'm a little old lady, and I hope that you also intend to keep inspiring and awakening others through your art for as long as possible. It is my objective with this blog (and my YouTube channel) to help aspiring artists improve their skills and pursue their passions. However, we cannot give our all at any task if we're unwell mentally and/or physically. Not to mention, many of us artists are inherently sensitive, which is even more of a reason to stay aware of our wellbeing and set systems in place to ensure that we're not exhausting ourselves. Artists have had a bad rap throughout history for living in excess and having erratic personalities. I'll have none of that! Whenever tragedies that artists (from all fields) have partaken in come into my mind, I also remind myself of all the others who have led happy and fulfilling lives. “An empty lantern provides no light. Self-care is the fuel that allows your light to shine brightly.”
|


Quiet: The Power of Introverts in a World That Can't Stop Talking by Susan Cain
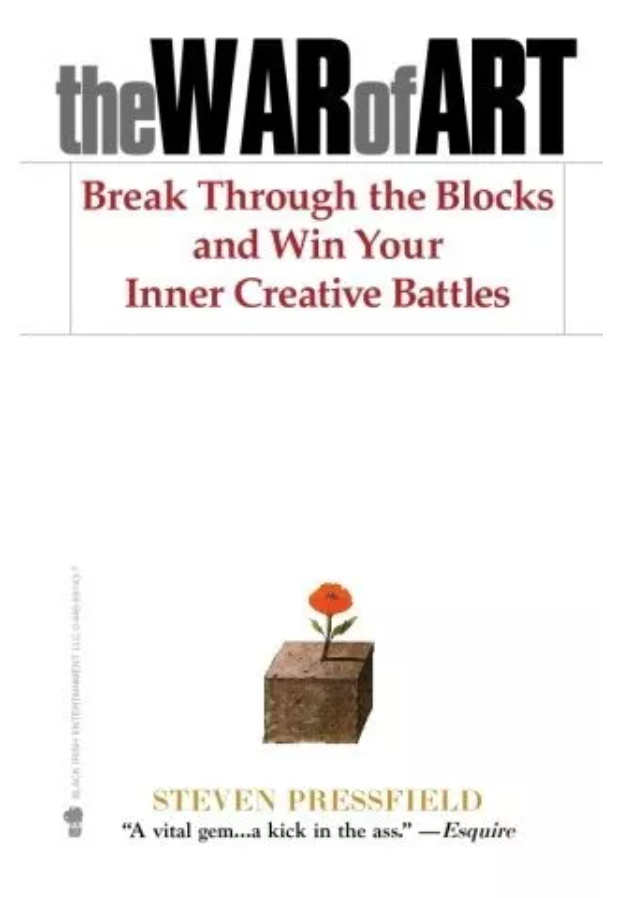
The War of Art by Steven Pressfield

The Artist's Way by Julia Cameron
|
3. Review short term/long term goals (personal, work and interpersonal). All of them are important!
Most people go through life without really giving thought to what they truly want. They settle for what's expected and let life happen to them instead of fighting for their dreams to come true. This is a surefire way of feeling unfulfilled and unhappy.
With introspection comes getting to know yourself, and with getting to know yourself comes discovering what you truly want in life. This alone will bring you a ton of clarity.
Once you're there, it's important to give thought to your specific short-term and long-term goals in order to set the necessary steps to get there. No matter where you're currently at, prioritize those goals.
A while back I wrote a blog post titled Time Management for Artists: My Secrets for Staying Consistently Productive, which I highly recommend you check out if you feel like you're wandering aimlessly through life.
I provide a free workbook to help you set your personal, work and interpersonal goals, as well as ideas for scheduling your week to ensure you're making progress each and every week.
For me, it was imperative to learn to say no to the things that didn't align with my goals once I had set them. I realized time is the most valuable resource I have and I don't want to waste it on activities or people that aren't going to help me get closer to them.
It may sound harsh, but we absorb the negativity and positivity from those around us. As creatives, we should strive to be around people that are positive, have big ideas like we do, and lift us up.
As you work towards your dreams to come true, please don't forget to celebrate each and every small victory that comes your way!
4. Schedule time for organization and adulting. Keep your working area as safe and inspiring as you can.
Unless you're a clean freak, have people that help you with homely chores, or don't have very much going on in life, I'm willing to bet that your home and/or working area tends to get cluttered and messy pretty fast.
Most of us are directly or indirectly affected by the environment we're in, which leads to being more stressed and less productive.
It also leads to more accidents, wasting time when we're unable to find things we need, and it can also lead to more serious health problems depending on the type of artwork we create. So make sure you're staying as organized as you can, and always follow safety instructions when using materials that are toxic.
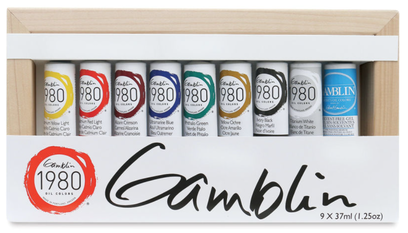
If you paint like I do, always work in well-ventilated areas and use gloves so that potentially harmful substances don't come into contact with your skin. If you can, check out brands of art products that are doing their best to provide non-toxic paints and mediums like Gamblin!
I like scheduling in at least a bit of time each week to take care of cleaning, organizing and other administrative tasks so that things don't pile up (literally and in my head). It may initially seem like a waste of precious time but I assure you you'll be saving time in the long run.
As artists, we do what we love for a living, and keeping our studio organized and inspiring to work in really helps keep things as enjoyable as possible.
|
|
5. Schedule time to disconnect from your work. Make time to socialize and set aside time for activities that relax you.
As artists, we spend a lot of time alone. It's important to make sure we're nurturing the relationships we have with people that are important to us. We can't let the connections we have with amazing people fizzle out OR keep ourselves locked up to the point that we miss opportunities to meet other great humans.
No matter how introverted we may be, we need some degree of connection with others in order to feel happy and fulfilled. Treasure the relationships you have with those amazing people in your life.
Finally, make sure you're doing things that relax you and bring you joy. As an artist, I'm sure creating art was initially something that brought you a great amount of pleasure.
However, if it is now work for you, I would suggest looking for activities that allow you to disconnect for a while. I enjoy going to the movies, planning a dinner with friends or reading a good book.
Remember that the best ideas come when we're actually living our lives and not stuck in our studios!

That's it for today, everyone!
I hope you found this blog post helpful and that you start making your mental and physical health a top priority. I promise you that your work, as well as every other aspect of your life will greatly improve if you stick with it.
16 Comments

*This post contains affiliate links. I receive small commissions for purchases made through these links at no extra cost to you. These commissions help me keep this site up and running, in order for me to keep providing helpful and inspiring art content. :)
Frustrated with having to spend so many hours a day at a 9-5 job when all you want to do is work on your art? Confused about how to make the jump from working a full-time job into creative entrepreneurship? Wondering if making a living from your creative gifts is even possible to begin with?
Becoming a full-time artist or artistpreneur is definitely possible, provided you establish clear goals for yourself, set up a realistic plan of action depending on your current life situation, and keep working towards your objective, no matter what.
It's possible, and there are lots of amazing artists out there doing what they love for a living.
Is it easy? Not at all.
Will the first few years be tough? Absolutely.
But as long as you stay motivated and focused on your end-goal you will get there.
In today's blog post and YouTube video, I'll be answering three of the most recurrent questions that I was asked during my recent Ask Me Anything event over at www.amafeed.com, which was much more focused on the business side of becoming an artist and how I transitioned from being a full-time employee into creative entrepreneurship.
This blog post and YouTube video are probably the most personal ones to-date and I will be sharing lots of tips and secrets that have allowed me to set the foundations for a successful art business.
It's hard for me to believe that it's been a year since I left my last full-time job! I had been working as an employee for almost ten years after having graduated from university, and it wasn't until around three years ago that the idea of becoming a solopreneur started looking like something I could pursue.
Even though the idea made me extremely nervous and I was very uncertain about what would happen, I decided to take the leap and have been working extra-hard on my art business ever since.
Though I am not making an income I can live off from yet, I have learned a ton throughout this year and I have confidence that I'm slowly (but surely) building a business that will allow me to live life on my own terms.
Aside from finally having time to devote to my personal artistic growth, this year has been full of new and interesting experiences, including meeting people from all over the world whom I share my passion for art with and would have otherwise never met!
If you enjoyed this video and found it helpful, make sure to subscribe to my YouTube channel. I share a brand new video every week with art tips, drawing and painting tutorials and mindset/productivity tips for artists. *Subscribe HERE*

Transitioning into Creative Entrepreneurship Questions
1. What arrangements and preparations did you go through before leaving your full-time job? How did you know you were ready?
Firstly, I saved up as much money as I possibly could, especially during that last year. I've never been a very big spender, so I already had quite a bit of money saved up.
This was hugely important because I knew I wanted to treat this as a business right away and that I was going to have initial business investments to make on top of my regular living expenses!
Investments I would have to make right away included: Hiring an accountant, paying for a website/domain name, social media schedulers, business courses, quality art supplies so I could start producing work I could sell with confidence, etc.
Also, well before leaving my job, I was doing my absolute best to invest as much of my time out of work as possible into continuing to develop my artistic skills so that, as soon as I was able to, I would have quality products/services to offer.
It didn't matter if I had worked overtime (which I did several days a week) or if I had to give up being social on weekends, I made sure to schedule in time to work on my art.
Here are some of the supplies I had by my side as I was working hard on building those initial skills. I even took these to work with me to draw or paint whenever I had a few extra minutes!
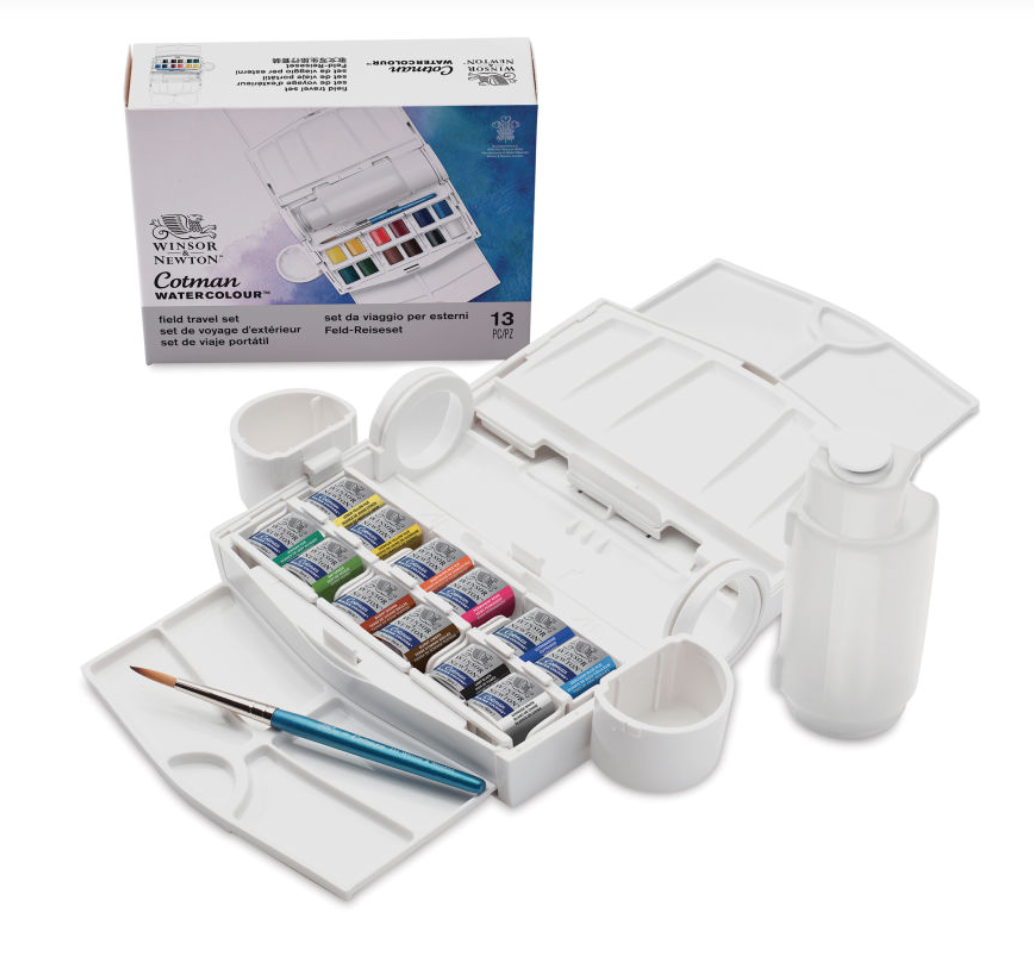
Winsor and Newton 12 Color Cotman Watercolor Set
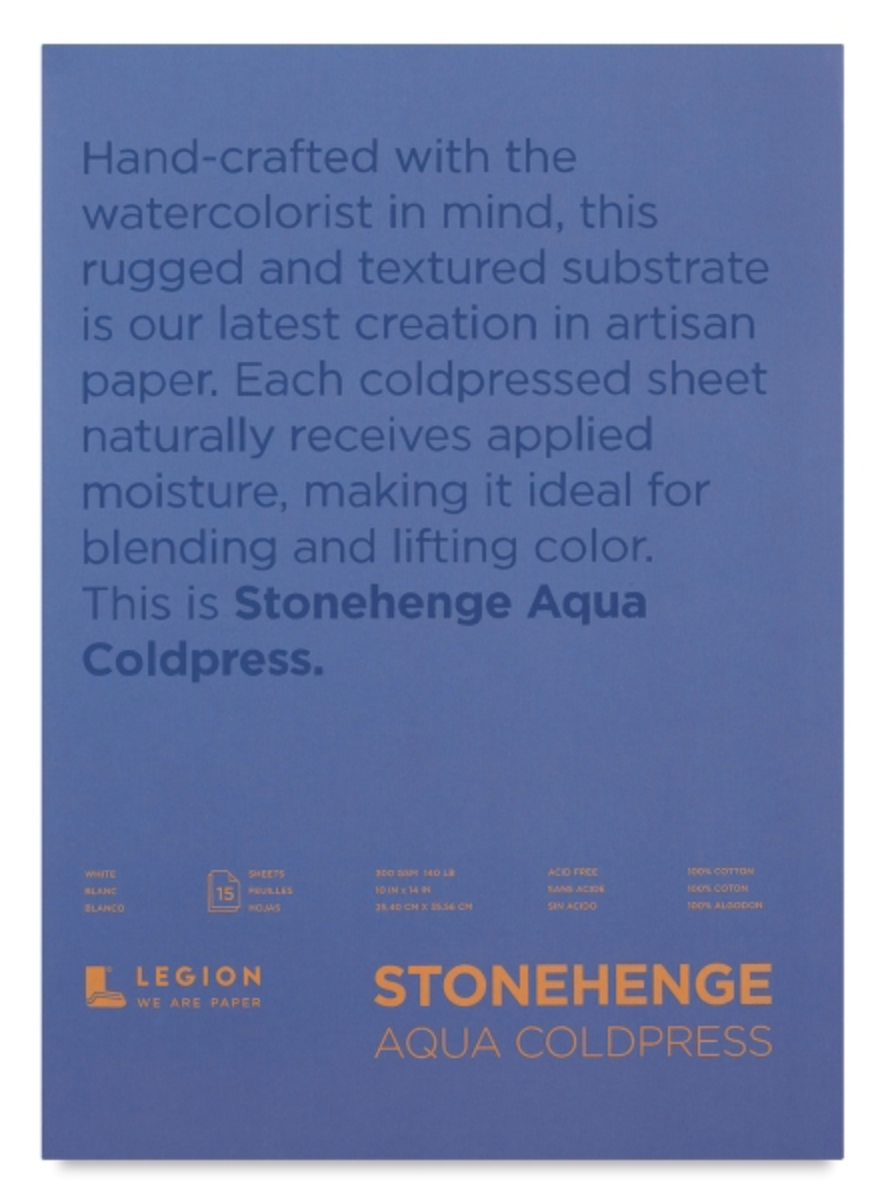
Stonehenge 100% Cotton Cold Press Watercolor Paper
|
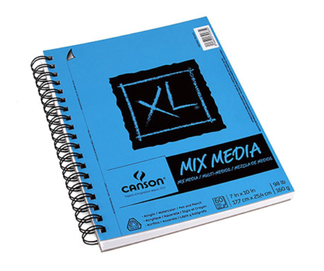
Canson Mixed Media Sketchbook

Royal and Langnickel Zen Watercolor Brushes
|
Every free minute I had (even during work hours at this point!-woops!), I continued reading articles and watching videos to learn as much as possible from artists that were already successful.
I took mental notes of everything they had to do and how long it actually took them to make a living from their art, as well as many other things.
In regards to the second part of this question, I would say (as cliché as this sounds) I just felt it. I don't think the time is ever going to be 100% perfect, and you're always going to be nervous and feel uncertain when it comes to any big decision in life.
However, I knew I had prepared as much as I possibly could and felt that my time to take action was running out. If I didn't do it then, I would probably be stuck teaching art in a school environment for the rest of my life.
I spent the majority of that last year before leaving my job thinking about all of these ideas I wanted to make happen and anxiously waiting to get home to draw and paint and continue to develop myself artistically.
Even whilst at my job, my mind was already elsewhere!
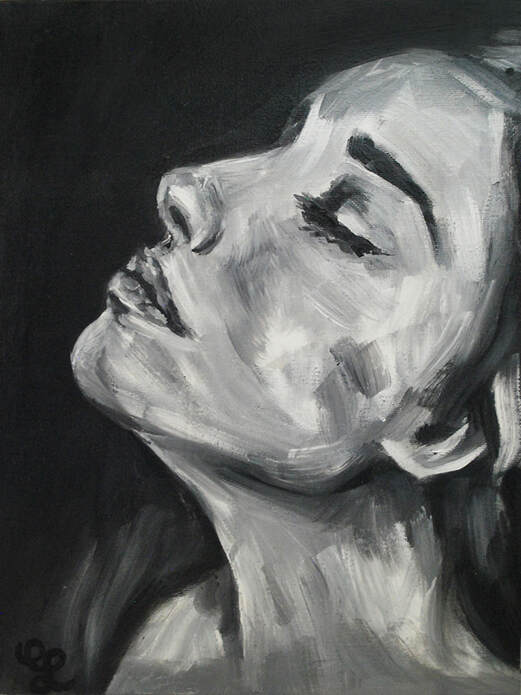
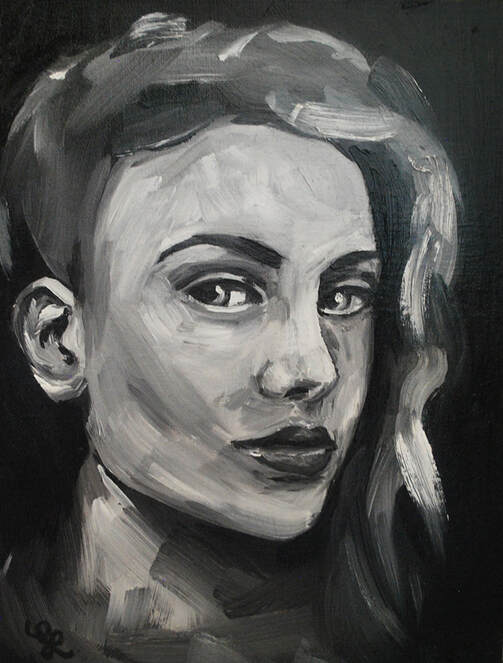
Grayscale oil portrait study by Erika Lancaster
2. What were the most challenging aspects of transitioning from a 9 to 5 job to a full-time artist? What were the first steps you took when you became your own boss?
I would say that, aside from all the financial preparations I had to make sure to make, it was difficult for me to accept in the beginning that artists ARE business owners.
As a business owner, I would only be actually creating art a certain amount of time and I would have to spend time doing activities that are tedious, boring and downright scary. For an introvert like me, this meant accepting that I would have to constantly push myself out of my comfort zone.
Another thing that was challenging was to create, and stick to, a weekly work schedule. As a solopreneur, there is nobody setting a schedule for me and I don't have to abide by anyone's timeframes (unless I'm working on a specific client project or commission-but even in these cases I have a say in the matter).
This may sound like a dream, but anyone that has been doing it for a while can tell you that it requires a HUGE amount of discipline and commitment. If you don't get up and check off those things you have to get done that day to move your business forward, you're backpedalling (at least this is the case in the beginning).
Throughout the months, my daily schedules have shifted around a bit as my priorities change and I discover at what points in the day I'm most creative. Nonetheless, I make sure to set my alarm to get up early, and stay as focused as possible throughout the working hours I have set for myself, every-single-day.
Another essential thing I did once I left my job was give serious thought to what I wanted my life to look like in five years and what kind of business I wanted to work towards.
There are SO many directions that an art business can go in, and it's very important to think about what YOU want, so that you can then set those strategies and commit to them. If we don't know what we want, we're never going to get anywhere.
And yes, goals shift and new ideas pop up, but you have to MOVE in order for things to happen!
Check out my blog post titled Time Management for Artists: My Secrets for Staying Consistently Productive to learn more about my short-term and long-term goal setting method, as well as how I schedule my days to keep my business moving forward consistently.
This blog post has a free goal planner and time-blocking worksheets so you can make sure you're moving forward yourself!
Lastly, but just as important as the previous points, I made sure to make self-care a priority. As a solopreneur, if I'm not well, my business is going to suffer. Especially in the beginning, it's essential to show up and be ready and able to put in the work.
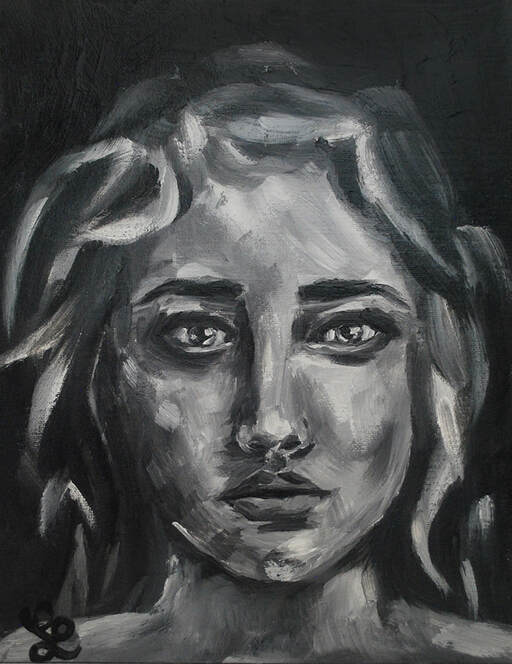
Grayscale oil portrait study by Erika Lancaster
3. Do you have any regrets? Do you wish you had left your full-time earlier?
In the beginning I kind of did. Especially because I was already over thirty and I felt drowned in a sea of amazingly talented artists that were a lot younger than I was. I felt that I would have to push myself to the max on top of everything I already had to do to start building a business just to catch up.
However, over time, I have come to accept and enjoy the phase I'm in. I also came to the realization that everything happens for a reason and I was exactly where I had to be.
Also, I think I had to go through those job experiences and the growth they provided so I would be able to do what I'm doing now.
I don't see those years as wasted time, by any means, and am incredibly thankful for those experiences that allowed me to grow at both personal and professional levels. They allowed me to prepare financially and mentally to be able to do what I'm doing now, building up my dream career.
Grayscale oil portrait study by Erika Lancaster
5 Tips to Achieve Success as an Artist
1. Set up multiple streams of income for yourself.
Do not put all of your eggs in one basket. Stay open and think of different products and services you can offer using your talents and skills. As a creative being, there is a ton that you can do to bring light to people's lives.
Stay generous and never underestimate the connections you can make with people that are either directly or indirectly related to your end goal.
Stay generous and never underestimate the connections you can make with people that are either directly or indirectly related to your end goal.
2. Continuously learn from other artists that are already successful.
Research who's currently successful at doing what you want to be doing, and learn all you can from them so that you can do that as well, in your own way. Remember they started from zero, too and that, if they could make it, you could too. Learn from what's already working and keep paying attention.
3. Stay adaptable and flexible.
As an entrepreneur, there are a lot of learning to be done along the way before finding true success. As time goes by you're going to start finding out what works and what doesn't.
Try to find a middle ground between what you like doing and what your audience actually wants. Adapt to do more of what's working.
Try to find a middle ground between what you like doing and what your audience actually wants. Adapt to do more of what's working.
4. Accept (and embrace) that you are a business owner.
A lot of artists (perhaps even most of us) are introverts.
However, if we want to achieve sustainable success, we need to be open and willing to step out of our comfort zones.
Learn about marketing, accounting, inventory, sales and do not be afraid to put yourself and your work out there. Remember that it's as much about your artwork as it is about yourself.
Always stay professional and courteous, both online and off. Build up a solid and reliable reputation.
5. Stay inspired and motivated, no matter what.
This can totally happen for you but you have to remain patient and keep going, but it's going to take effort and it's going to take time.
It's highly likely that you're going to have to work a full-time job, but stay thankful and take these experiences as learning opportunities to grow at both personal and professional levels so that you can use these skills to set up a successful art business later on.
It's highly likely that you're going to have to work a full-time job, but stay thankful and take these experiences as learning opportunities to grow at both personal and professional levels so that you can use these skills to set up a successful art business later on.

*This post contains affiliate links. I receive small commissions for purchases made through these links at no extra cost to you. These commissions help me keep this site up and running, in order for me to keep providing helpful and inspiring art content. :)
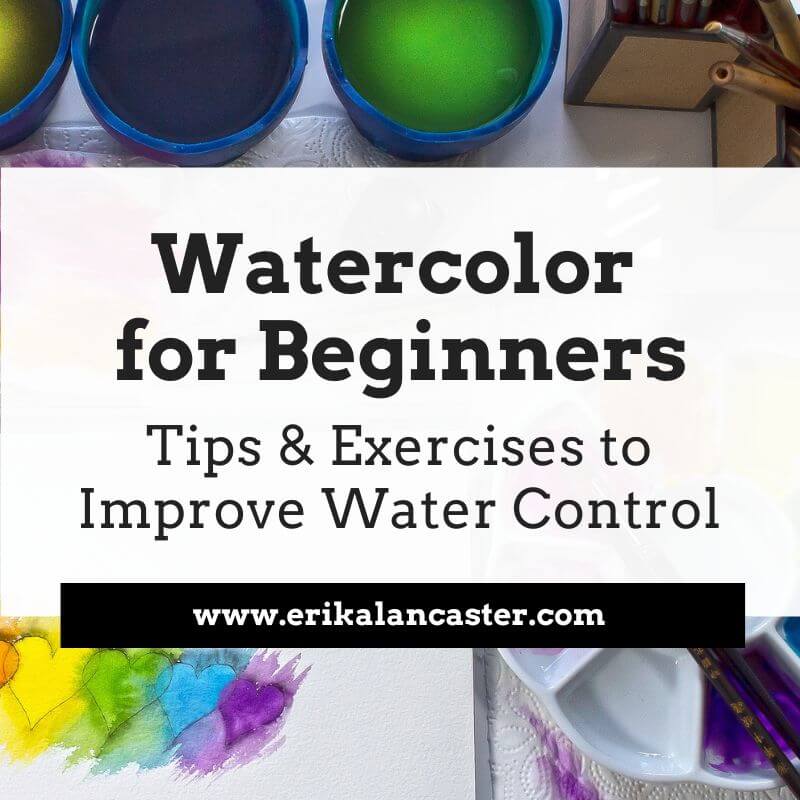
Do you feel like you're constantly fighting against your supplies when painting with watercolors? Feel like a failure after every single little mistake you make throughout your painting process? Do you frequently end up frustrated with yourself and throw away more paintings than you actually keep?
In today's post, I'll be sharing five common watercolor painting mistakes and what I personally do to fix them or avoid them altogether. By making use of these tips and tricks, you'll end up with a painting that is going to have way more positives than negatives.
When using watercolors, we cannot just simply cover up our mistakes with a new layer of paint. This artistic medium requires us to be much more mindful and delicate, even, right from the start of the painting process.
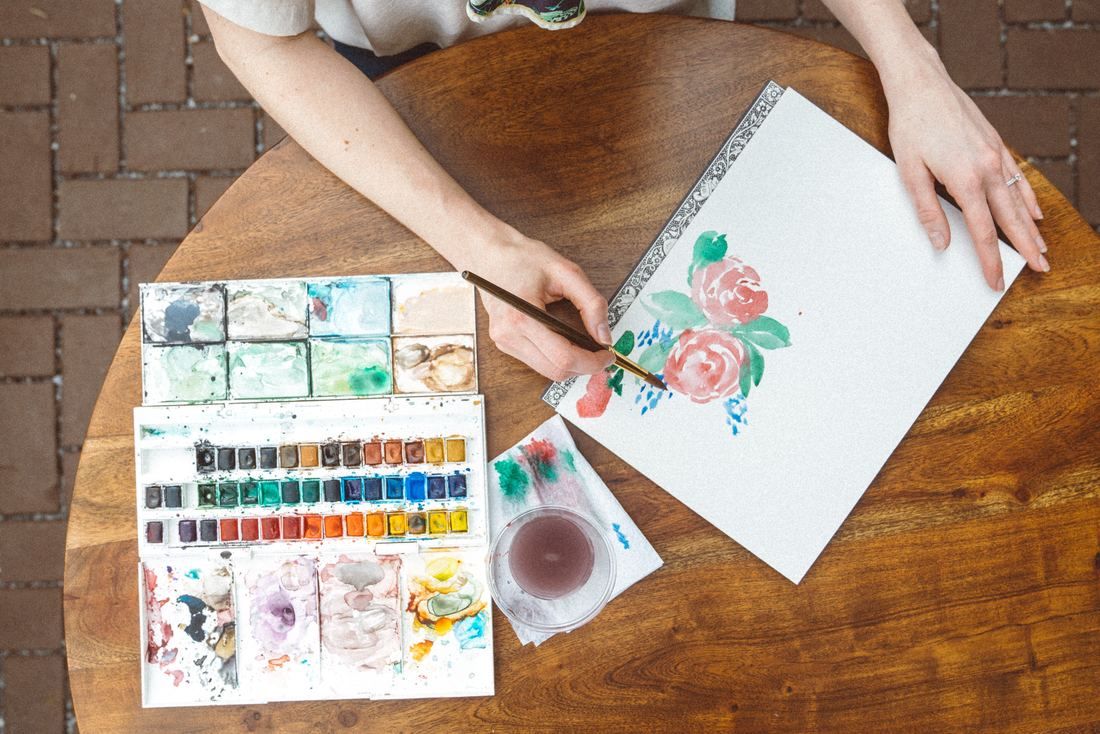
As an artist who uses different painting mediums, it's helpful to remember that I'm using this medium's transparency in combination with the whiteness of my paper, to produce a wide range of values.
I am not covering up my substrate and layering paint, as I would with oils or acrylics, but using my paper in itself as my lightest value. This is what's going to help create watercolors' distinctive "glowing" effect.
There's way more of a chance that you'll produce a great watercolor painting if you do, at least, a bit of planning before starting, and are able to remain patient throughout the process.
It's also essential that you are aware of this medium's characteristics and have practiced basic exercises before jumping into a more complex subject.
I highly recommend reading my blog post titled 10 Things I Wish I Knew Before Starting With Watercolors if you're just getting started.
All this said, it's important to know that you don't have to get frustrated with yourself and throw away a painting every-single-time you've made a mistake.
If you're mistake is small (which it should be if you're staying focused throughout the process), there most likely will be a way to make it less noticeable.
There are also specific things you can do to avoid these mistakes in the first place.
Do you feel like you're constantly fighting against your supplies when painting with watercolors? Feel like a failure after every single little mistake you make throughout your painting process? Do you frequently end up frustrated with yourself and throw away more paintings than you actually keep?
In today's post, I'll be sharing five common watercolor painting mistakes and what I personally do to fix them or avoid them altogether. By making use of these tips and tricks, you'll end up with a painting that is going to have way more positives than negatives.
When using watercolors, we cannot just simply cover up our mistakes with a new layer of paint. This artistic medium requires us to be much more mindful and delicate, even, right from the start of the painting process.
As an artist who uses different painting mediums, it's helpful to remember that I'm using this medium's transparency in combination with the whiteness of my paper, to produce a wide range of values.
I am not covering up my substrate and layering paint, as I would with oils or acrylics, but using my paper in itself as my lightest value. This is what's going to help create watercolors' distinctive "glowing" effect.
There's way more of a chance that you'll produce a great watercolor painting if you do, at least, a bit of planning before starting, and are able to remain patient throughout the process.
It's also essential that you are aware of this medium's characteristics and have practiced basic exercises before jumping into a more complex subject.
I highly recommend reading my blog post titled 10 Things I Wish I Knew Before Starting With Watercolors if you're just getting started.
All this said, it's important to know that you don't have to get frustrated with yourself and throw away a painting every-single-time you've made a mistake.
If you're mistake is small (which it should be if you're staying focused throughout the process), there most likely will be a way to make it less noticeable.
There are also specific things you can do to avoid these mistakes in the first place.
Five Ways to Avoid or Fix Watercolor Mistakes
It's important to understand that no mistake will be completely erased with any of these techniques. What you're trying to do is make them less noticeable, so that they don't distract from the great areas of your painting.
Mistake #1: Accidentally covering up your lightest areas (highlights)
How to avoid this:
Make sure that you take time to plan and decide how you'll be protecting your lightest areas before starting with the painting process. You can do this by either creating a "map" for yourself (drawing small shapes around these areas using a pencil) and very carefully working around them as you're painting.
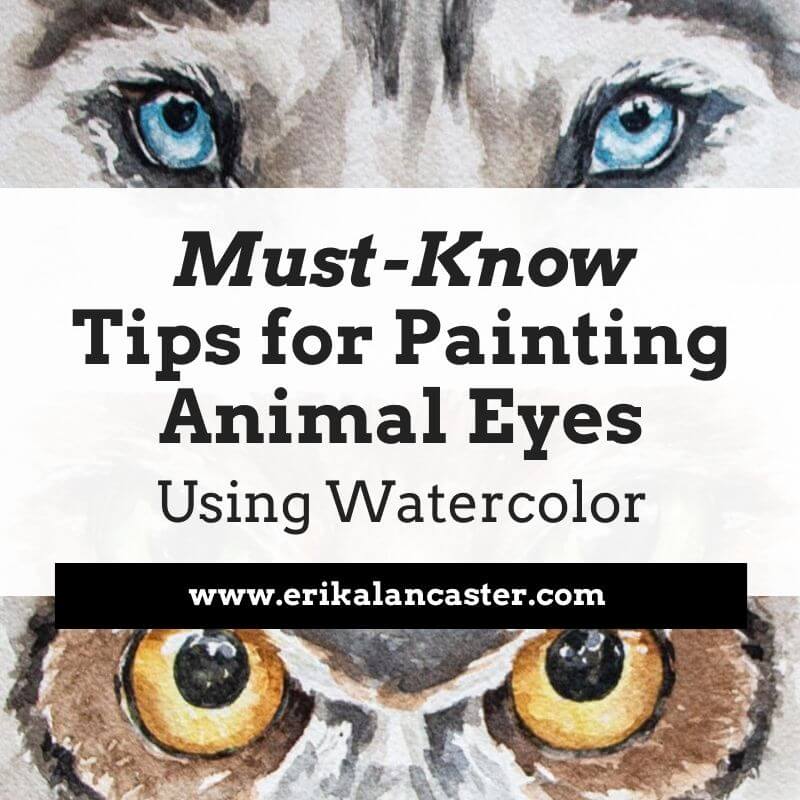
If you're painting a very complex subject with very small areas you want to protect, I recommend using masking fluid, as I did to protect the whiskers of this cougar.
To learn everything you need to know about using masking fluid with watercolors, visit my blog post titled Using Masking Fluid with Watercolors: Everything You Need to Know.
How to fix it:
Use the lifting technique to remove some of the pigment from your paper. If your paint is still wet, simply take your rag or paper towel and gently blot your paper with up and down motions (not sideways as this will damage the paper).
If your paint is already dry, no problem! As long as you're using decent quality watercolor paint, they can be reactivated by re-wetting them. All you have to do is rinse your brush well, remove excess water from its bristles and do gentle circular scrubbing motions in the area.
Don't go back in with too much water, though, and stay mindful about not damaging your paper.
Remember that the more wet your paper is, the more fragile it is. So once you've removed all you can, just let it go and allow the area to dry.
*It's important to know that different colors are going to have different staining qualities on your paper, and that the quality/type of paper you're using will affect the outcome of this technique.
*Also, the thicker the paper you're working on, the more scrubbing and lifting it will allow without you damaging it. These techniques won't work well if you're using lightweight paper. I love working on paper that's 140 lbs. and thicker.
On this page, you'll find a list of my favorite current art supplies.
Make sure that you take time to plan and decide how you'll be protecting your lightest areas before starting with the painting process. You can do this by either creating a "map" for yourself (drawing small shapes around these areas using a pencil) and very carefully working around them as you're painting.
If you're painting a very complex subject with very small areas you want to protect, I recommend using masking fluid, as I did to protect the whiskers of this cougar.
To learn everything you need to know about using masking fluid with watercolors, visit my blog post titled Using Masking Fluid with Watercolors: Everything You Need to Know.
How to fix it:
Use the lifting technique to remove some of the pigment from your paper. If your paint is still wet, simply take your rag or paper towel and gently blot your paper with up and down motions (not sideways as this will damage the paper).
If your paint is already dry, no problem! As long as you're using decent quality watercolor paint, they can be reactivated by re-wetting them. All you have to do is rinse your brush well, remove excess water from its bristles and do gentle circular scrubbing motions in the area.
Don't go back in with too much water, though, and stay mindful about not damaging your paper.
Remember that the more wet your paper is, the more fragile it is. So once you've removed all you can, just let it go and allow the area to dry.
*It's important to know that different colors are going to have different staining qualities on your paper, and that the quality/type of paper you're using will affect the outcome of this technique.
*Also, the thicker the paper you're working on, the more scrubbing and lifting it will allow without you damaging it. These techniques won't work well if you're using lightweight paper. I love working on paper that's 140 lbs. and thicker.
On this page, you'll find a list of my favorite current art supplies.

Mistake #2: Laying down too much dark paint in the beginning stages or creating flat/stark looking shapes or lines
How to avoid this:
Remember that a good watercolor piece requires patience. Take your painting one-step-at-a-time and always start with light, translucent values and work your way towards darker darks incrementally.
Look at your reference and add your darkest values only where you actually see them (usually even these areas have somewhat of a variation in color and translucency in them in order to avoid flatness).
Generally speaking, you want to keep very dark/saturated colors only in the areas that really require them and make use of the medium's translucent qualities.
How to fix it:
Went a bit crazy laying down way too heavily pigmented paint mixture in a larger area (or sooner) than intended? Don't fret! Use the lifting technique described in the previous point using your rag to gently blot the area while it's still wet or use your clean, damp brush to do some scrubbing.
Be gentle while you remove as much pigment as possible and allow to dry before attempting to do anything else in that area.
You can also use the pulling/spreading technique in order to dissipate the concentrated pigment into a larger area. Of course, you don't want to spread that pigment into areas that are meant to be white or affect other colors you've already placed, so be careful.
I've found, dissipating that stark line or edge into a gradient really helps remove that flatness that we've mistakenly created. Do what you can and leave it. Move on to work on other areas of your painting.
Later on, when the area is completely dry, you can go back in and make any overworked areas less noticeable by adding more paint carefully and playing around with values/washes.

Mistake #3: Bleeding colors (when you didn't plan for them)
How to avoid this:
It's really essential for you to know the different effects that watercolors allow and when to use different techniques. I wouldn't recommend moving onto a complex piece if you haven't practiced simple exercises that will allow you to know your medium's characteristics.
Essentially, when you place a paint mixture on a previously wetted paper, it will expand/bleed/intermix. This is referred to as the wet-on-wet technique and will lead to a blurred-out effect that you, most likely, do not want in some areas of your painting.
Before starting with your painting process, give thought to what areas you want blurred out, and which you want more definition in. The more defined you want an area, the more important it is for you to wait for the previous layer of paint to dry before applying more paint on top.
How to fix this:
Gently blot your paper with your paper towel immediately when this intermixing starts happening in order to prevent it from expanding more. Allow it to dry completely.
If the mistake is small and the color left behind is faint, chances are you will be able to add more definition to the area with subsequent layers once it's dry.
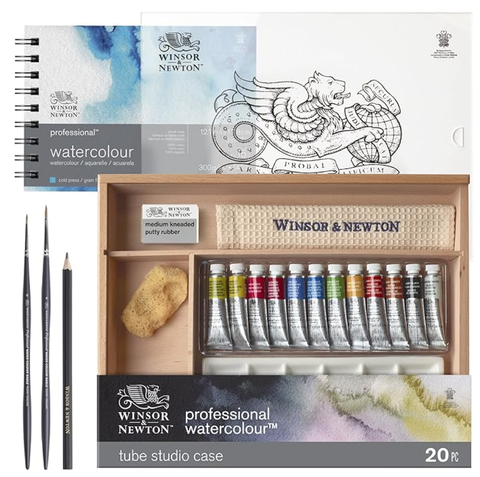
Winsor & Newton Professional Watercolour Travel Case Set -12 Colors
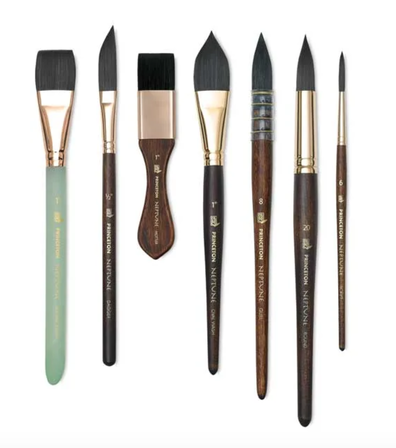
Princeton Neptune Watercolor Brushes
Mistake #4: Creating muddy colors
*In this video I explain how to avoid muddy colors when working with watercolor.
How to avoid this:
The very best thing you can do in order to avoid muddy colors to begin with, is to take time to test and experiment how the pigments you're planning to use mix together. Before starting to paint, give thought to the color palette needed for your composition. Plan the exact colors you'll be using, and keep your palette limited (5-6 colors usually works for me).
I cannot paint without my scrap piece of watercolor paper beside me that allows me to constantly test out color mixtures and transparencies throughout the process.
Know and understand the Color Wheel and the relationships between colors. Explore Analogous and Complementary colors, and decide how you want to approach deepening color values and creating shadow effects.
Take time to do exercises before even attempting to paint a complex subject or else you'll end up frustrating yourself more than you need to.
*Don't mix more than 3 different colors together, unless you know what you're doing.
How to fix this:
If you've mistakenly laid down a muddy color on your paper, try to absorb what you can while it's still wet and allow the area to dry. There are some cases in which adding a light wash of a brighter color on top, will make the mistake less noticeable.
Mistake #5: Overworking or damaging your watercolor paper
How to avoid this:
If you're anything like me and you enjoy using techniques like scrubbing, lifting and layering, buy decent quality paper that's at least medium weight or thicker (140 lbs. and heavier). I personally cannot work on thin, flimsy paper.
However, even when using thick, quality paper, it's essential to learn when to stop and allow your paper to dry. The more experience you gain, the faster you'll be able to recognize when your paper needs time to recoup!
In the video included here, you'll notice I jump around a lot. If I do something I don't like, I absorb/lift what I can, and leave it. I work somewhere else and come back to that area to fix it later. I do not obsess over imperfections and move on with the process.
How to fix this:
Damaged paper simply cannot be fixed (unless you want to cut that part off). Of all the mistakes mentioned in this post, this is probably the deadliest, so stay mindful throughout the process so it never gets to this point.
Try not to get to obsessive over your mistakes, take a learning experience for what it is, and move on with the work you can do.
To finish up this post, I want to encourage you to not get frustrated over small mistakes. There is a certain beauty behind imperfection, and what you should be striving for with each piece is progress.
Trying to chase perfection with every single drawing or painting you create is probably going to end up hindering you and not allowing you to move forward as fast as you could.
Thanks so much for reading!

*This post contains affiliate links. I receive small commissions for purchases made through these links at no extra cost to you. These commissions help me keep this site up and running, in order for me to keep providing helpful and inspiring art content. :)
Looking to start sketching consistently? Do you have a sketchbook or two (or three) laying around, but find that you rarely use them either because you can't find the time or are scared of "ruining" them? Would you like to get past the initial stage of "awkwardness" as quickly as possible, so that you can actually start enjoying your sketching process?
In past blog posts and YouTube videos, I've talked about how I consider drawing to be the basis for all kinds of art. It doesn't really matter what kind of visual artist someone is setting out to become, or what level of skill has already been attained, artists must make sketching a habit and continue with this practice throughout their journeys.
In today's post, I will be sharing the top five tips I wish I knew when I first started sketching. By understanding and practicing these points, you'll be able to progress a lot faster, start enjoying your studies and explorations a lot more, and start filling out entire sketchbooks in no time.
Before moving forward, I want to get a very important message across. I believe that smaller sketches and studies are just as important as larger, more polished pieces that may take days (or even weeks) to complete.
Learning how to get ideas down on paper in a quicker, rougher way, is extremely valuable as an artist.
It was precisely these kinds of smaller, quicker studies that allowed me to progress artistically while holding on to demanding full-time jobs and going through major life changes.
Few of us are fortunate to know, since a very young age, that we want to dedicate our lives to art and become professional artists some day. And an even less percentage of those people who do know, are lucky enough to have the funds necessary to live, while solely working on developing their artistic skills.
If you're one of those lucky people and you have the money/time to explore both smaller and larger pieces simultaneously, by all means go for it!
However, if you have kids, full-time jobs, a house to keep clean, and many other responsibilities, rest assured that these smaller studies are moving you forward, as long as you're making it a point to stay consistent.
Five to six smaller sketches and/or studies a week are going to get you way farther than setting out to create one large masterpiece every five to six months, with no activity in between.
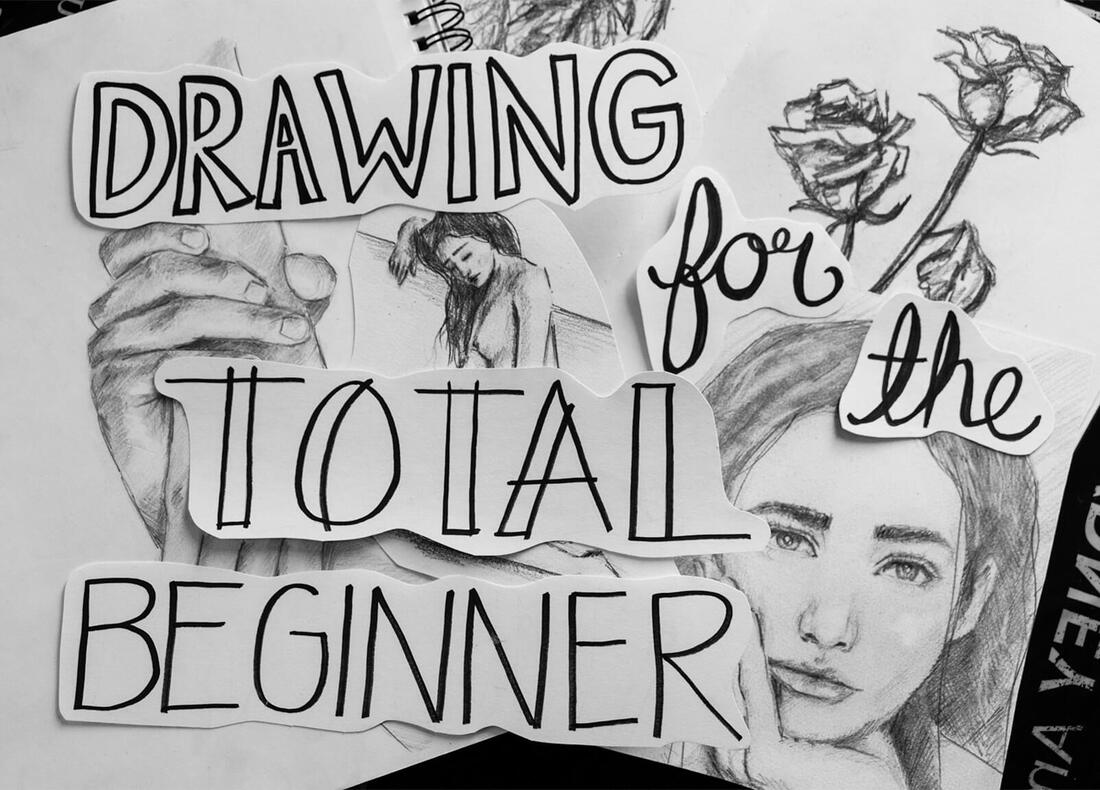
I highly recommend checking out my Drawing for the Total Beginner Mini-Course which you can get access to immediately after joining my art email insider group.
This mini-course is made up of three classes that are jam-packed with all of the information I wish I knew when I was getting started on my own drawing journey. It's contains must-know information about basic drawing supplies, specific exercises and lots more that will provide you direction as to how to move forward. Check it out here.
Looking to start sketching consistently? Do you have a sketchbook or two (or three) laying around, but find that you rarely use them either because you can't find the time or are scared of "ruining" them? Would you like to get past the initial stage of "awkwardness" as quickly as possible, so that you can actually start enjoying your sketching process?
In past blog posts and YouTube videos, I've talked about how I consider drawing to be the basis for all kinds of art. It doesn't really matter what kind of visual artist someone is setting out to become, or what level of skill has already been attained, artists must make sketching a habit and continue with this practice throughout their journeys.
In today's post, I will be sharing the top five tips I wish I knew when I first started sketching. By understanding and practicing these points, you'll be able to progress a lot faster, start enjoying your studies and explorations a lot more, and start filling out entire sketchbooks in no time.
Before moving forward, I want to get a very important message across. I believe that smaller sketches and studies are just as important as larger, more polished pieces that may take days (or even weeks) to complete.
Learning how to get ideas down on paper in a quicker, rougher way, is extremely valuable as an artist.
It was precisely these kinds of smaller, quicker studies that allowed me to progress artistically while holding on to demanding full-time jobs and going through major life changes.
Few of us are fortunate to know, since a very young age, that we want to dedicate our lives to art and become professional artists some day. And an even less percentage of those people who do know, are lucky enough to have the funds necessary to live, while solely working on developing their artistic skills.
If you're one of those lucky people and you have the money/time to explore both smaller and larger pieces simultaneously, by all means go for it!
However, if you have kids, full-time jobs, a house to keep clean, and many other responsibilities, rest assured that these smaller studies are moving you forward, as long as you're making it a point to stay consistent.
Five to six smaller sketches and/or studies a week are going to get you way farther than setting out to create one large masterpiece every five to six months, with no activity in between.
I highly recommend checking out my Drawing for the Total Beginner Mini-Course which you can get access to immediately after joining my art email insider group.
This mini-course is made up of three classes that are jam-packed with all of the information I wish I knew when I was getting started on my own drawing journey. It's contains must-know information about basic drawing supplies, specific exercises and lots more that will provide you direction as to how to move forward. Check it out here.
If you enjoyed this video and found it helpful, make sure to subscribe to my YouTube channel. I share a brand new video every week with art tips, drawing and painting tutorials and mindset/productivity tips for artists. *Subscribe HERE*
5 Must-Know Sketching Tips
1. Know your tools
As with any other art-related practices, it's ultimately going to be up to you to explore different supplies/techniques so you can arrive at your personal favorites.
However, what you should know is that you can go far with limited and inexpensive supplies. So don't get overwhelmed with the large variety of papers, pencils, erasers, etc. out there, and go for the basics.
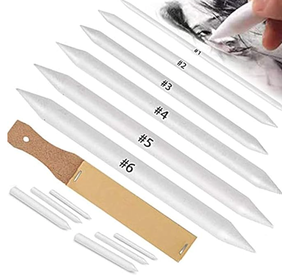
For my quicker sketches, I usually like to prepare the following:
a) Three different pencil grades (usually HB, 2B, and 6-8B) *I rarely use the H variety at all!
b) Drawing/sketching paper or sketchbook
c) Soft rubber graphite eraser
d) Basic metallic sharpener
e) Tombow Mono Zero eraser *This has been my favorite eraser to be able to get into smaller areas
These are optional, but useful if you want to start drawing more realistically:
f) Blending stumps or tortillions
g) Kneaded eraser
In terms of paper, it's useful to start noticing how different thicknesses and textures affect your process, as well as the outcome of your drawings.
As with any other art-related practices, it's ultimately going to be up to you to explore different supplies/techniques so you can arrive at your personal favorites.
However, what you should know is that you can go far with limited and inexpensive supplies. So don't get overwhelmed with the large variety of papers, pencils, erasers, etc. out there, and go for the basics.
For my quicker sketches, I usually like to prepare the following:
a) Three different pencil grades (usually HB, 2B, and 6-8B) *I rarely use the H variety at all!
b) Drawing/sketching paper or sketchbook
c) Soft rubber graphite eraser
d) Basic metallic sharpener
e) Tombow Mono Zero eraser *This has been my favorite eraser to be able to get into smaller areas
These are optional, but useful if you want to start drawing more realistically:
f) Blending stumps or tortillions
g) Kneaded eraser
In terms of paper, it's useful to start noticing how different thicknesses and textures affect your process, as well as the outcome of your drawings.
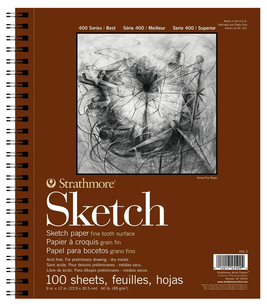
Strathmore 9x12" Sketchbook
|
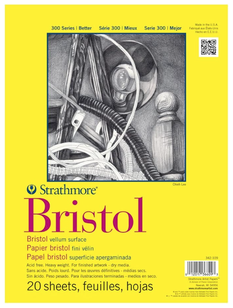
Strathmore Bristol Paper Vellum Surface
|
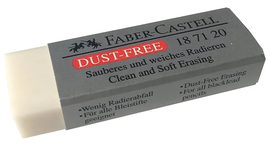
Faber-Castell Dust Free Graphite Erasers
|
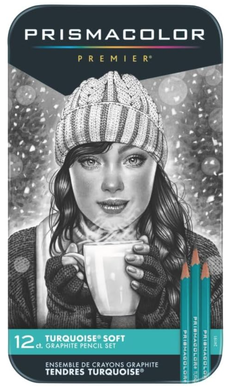
Prismacolor Turquoise Drawing Pencils
|
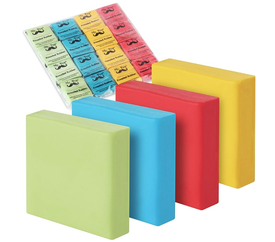
Mr. Pen Kneaded Erasers
|
12 Piece Set of Blending Stumps and Tortillions
|
2. Start with simplified large shapes and forget about details until later
This is huge! When we're just starting out drawing, we want to get into the details right away and spend hours working on a drawing just to find out that it looks off at the end.
It's absolutely imperative to learn to visualize your subjects (whether your drawing still life, the human figure, a landscape or anything else), as combinations of simple shapes like cubes, cylinders, rectangular prisms, cones, etc.
Learn to tune out all the smaller shapes and intricacies until after effective proportion and placement of individual elements in regards to each other, has been achieved.
I'm serious! Don't even start adding details, textures, shading, or anything of the sort, until your base outline sketch is solid.
I go a lot more in depth about this topic and provide you with several different exercises in my Drawing for the Total Beginner Mini-Course. To get immediate access to it, click on the image below to join my art insider group.
*Free Drawing for the Total Beginner Mini-Course
Once you've gained enough practice creating basic outline drawings, I highly recommend looking into shading techniques that will allow you to start creating a believable sense of three-dimensional form.
I have a very thorough blog post (complete with downloadable exercises) in which I explain hatching, crosshatching, scribbling, and other quick shading techniques that you can read here: Guide to Shading Techniques: Hatching, Crosshatching, Scribbling and Others.
This said, being able to create that preliminary outline sketch that shows effective proportion is first and foremost, in my opinion.
3. Learn how to hold your pencil for drawing purposes
It can take a bit of time for the beginner artist to get comfortable holding a pencil for drawing purposes. This is only natural, as we've been trained to hold pencils and pens a certain way since we started writing.
When we're writing, we need to be able to create neat, legible letters right-off-the bat. On the other hand, when we're drawing, we start by laying down imperfect lines and we refine them along the way (that's what our erasers are for!).
These are two very different activities and we have to make that mental switch necessary to change our approach depending on what it is we're doing.
There are many different ways of holding a pencil for sketching purposes and there isn't one that is necessarily "better" than the next. It's going to depend on what you find most comfortable at each point of the sketching process once you have a bit more drawing practice.
Have in mind you'll usually switch between different hand positions and grips throughout your drawing process. However, generally speaking, you want to position your hand further away from the tip of your pencil.
You also want to move your entire arm as you draw and not only your wrist (as you do when you're writing).
Try to relax and draw loosely! If you're too tense, warm up by drawing different types of lines and shapes. There's absolutely nothing to be nervous about, especially if you start out with light lines that you can easily erase (as you always should).
Always start lightly, and move on to darker values as you refine your sketch.
Have fun with it and throw perfection out the window! Fearing you'll make mistakes and striving for perfection will keep you from creating art, which will keep you from making progress.
Don't ever fear the blank page and, remember, with every sketch you make you'll get better and better.
Here are two different ways that I usually hold my pencil when I'm sketching:
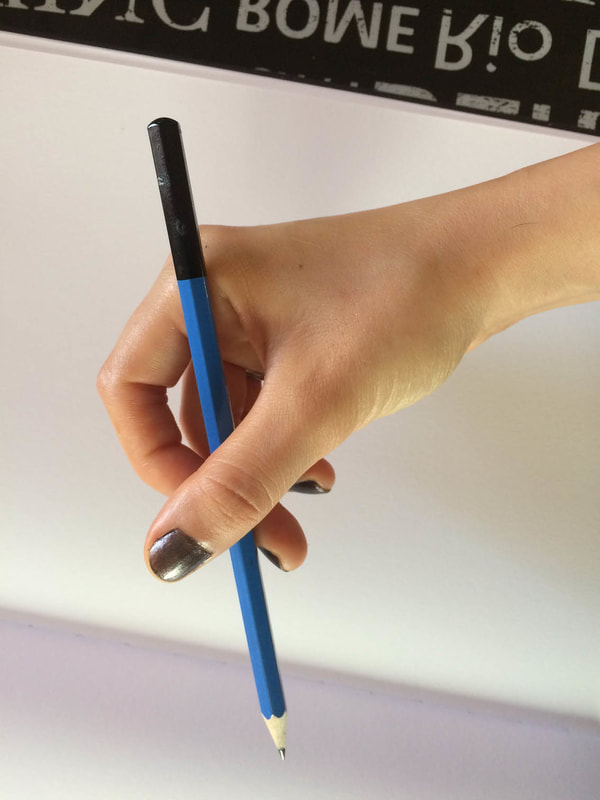
Underhand pencil grip for sketching.
|
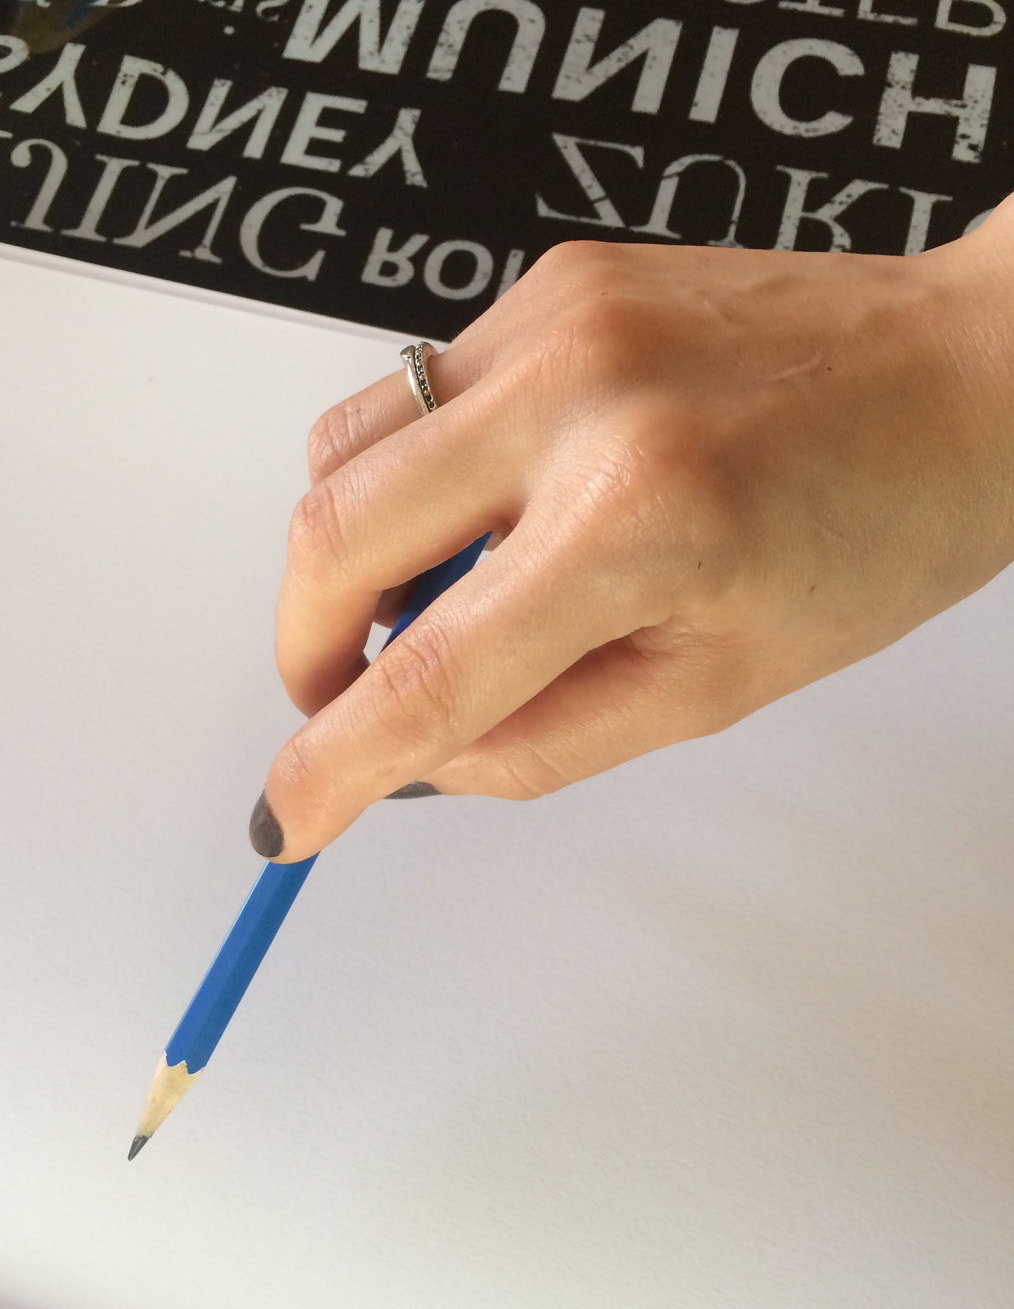
Overhand pencil grip for sketching.
|
4. Develop your observational skills and hand-eye coordination through using references
Drawing from both photographic references, as well as from life, is absolutely essential for progress to occur. Especially when we're looking to develop high levels of realism.
I've written about the use of references when creating art in blog posts before and I think it's absolutely hilarious when people think artists aren't supposed to use references and are supposed to draw or paint everything from imagination.
These types of comments show ignorance on the part of the commenter in terms of how art and creative processes work.
*Note: With "references" I mean either using photographs or drawing from life, not copying a previously made illustration or painting by another artist. Though there is a lot to gain from creating studies of other artists' work, I firmly believe that after having gained basic skills, we'll be making much more progress by creating original artwork from the ground up.
By this, I mean creating our own still life arrangements (or preparing compositions featuring whatever subjects we're interested in) to draw from direct observation, or taking our own photos to work from. We can also use other people's photos, if we have permission to use them of course!
Using references allows us to develop our observational skills and our hand-eye coordination. It's also impossible for the human brain to hold on to all the visual information that a photograph (or seeing something directly) can present to us.
Even if you're intending on developing a cartoonish style in the future, studying how things actually look like in real life, will help enhance your work and make it more effective.
I highly recommend all beginners out there to start working from photographs as soon as possible. We must learn to see.
There are many awesome free image sources online, so there's really no excuse. You can find a list of my favorite free image sites HERE.
Begin forming your own art reference library! Learn what makes a good photograph in terms of lighting and composition, and remind yourself to take photos whenever an opportunity presents itself. Soon enough, you'll have plenty of your own original photos to work from.
Once you've gained some confidence using photographs as references, start incorporating sketching from life into your weekly routines.
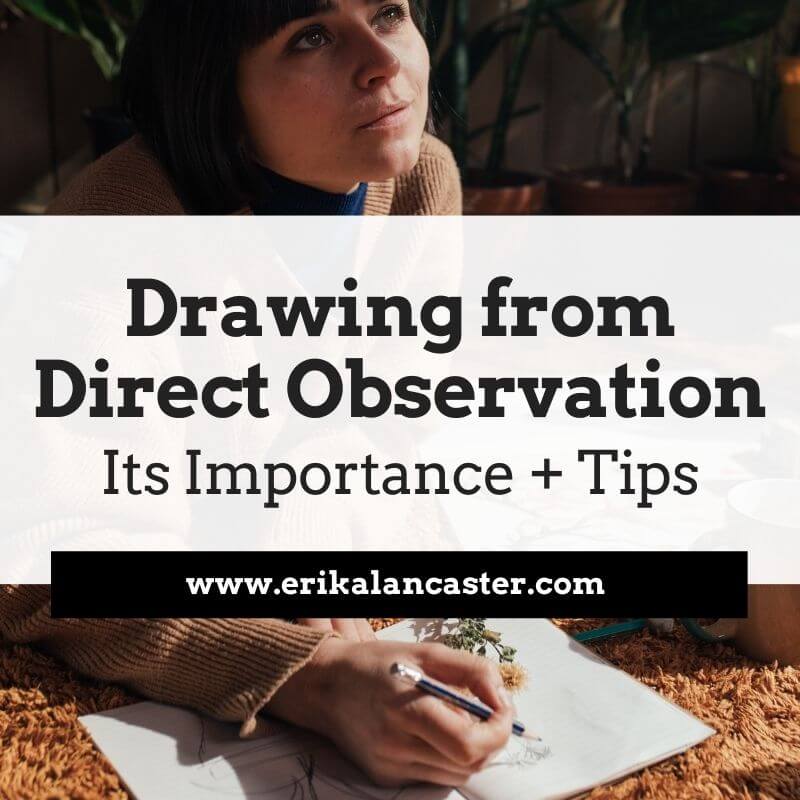
I explain why drawing/painting from life is an incredibly important part of an artist's journey and provide ten useful tips to make these exercises less intimidating in this blog post: Why Drawing From Direct Observation is Essential and 10 Tips to Improve
I've written about the use of references when creating art in blog posts before and I think it's absolutely hilarious when people think artists aren't supposed to use references and are supposed to draw or paint everything from imagination.
These types of comments show ignorance on the part of the commenter in terms of how art and creative processes work.
*Note: With "references" I mean either using photographs or drawing from life, not copying a previously made illustration or painting by another artist. Though there is a lot to gain from creating studies of other artists' work, I firmly believe that after having gained basic skills, we'll be making much more progress by creating original artwork from the ground up.
By this, I mean creating our own still life arrangements (or preparing compositions featuring whatever subjects we're interested in) to draw from direct observation, or taking our own photos to work from. We can also use other people's photos, if we have permission to use them of course!
Using references allows us to develop our observational skills and our hand-eye coordination. It's also impossible for the human brain to hold on to all the visual information that a photograph (or seeing something directly) can present to us.
Even if you're intending on developing a cartoonish style in the future, studying how things actually look like in real life, will help enhance your work and make it more effective.
I highly recommend all beginners out there to start working from photographs as soon as possible. We must learn to see.
There are many awesome free image sources online, so there's really no excuse. You can find a list of my favorite free image sites HERE.
Begin forming your own art reference library! Learn what makes a good photograph in terms of lighting and composition, and remind yourself to take photos whenever an opportunity presents itself. Soon enough, you'll have plenty of your own original photos to work from.
Once you've gained some confidence using photographs as references, start incorporating sketching from life into your weekly routines.
I explain why drawing/painting from life is an incredibly important part of an artist's journey and provide ten useful tips to make these exercises less intimidating in this blog post: Why Drawing From Direct Observation is Essential and 10 Tips to Improve
5. Make sketching a habit
Out of the five tips I'm mentioning in this post, getting into the habit of sketching regularly, is probably the most important of all. Oftentimes we make excuses, telling ourselves we don't have enough time to draw.
However, it's a matter of reminding ourselves what's important to us, getting our priorities straight, and setting aside the time.
If you want to get better at anything in life, you have to do it consistently.
As I was mentioning in the introduction of this post, taking even 15-20 minutes a day to sketch will get you far, as long as you make sure to continue.
I highly recommend buying a sketchbook that feels right for you and getting into the habit of taking it along with you throughout your day so that you can use any free pockets of time you may have available.
I hope these tips were useful for you and wish you much progress in your artistic journey!

*This post contains affiliate links. I receive small commissions for purchases made through these links at no extra cost to you. These commissions help me keep this site up and running, in order for me to keep providing helpful and inspiring art content. :)
Do you struggle with keeping your art studio as clean and organized as you'd like? Do you wonder how so many artists/creatives manage to keep their working spaces so neat and tidy? Have you ever found the mess around you demotivating to the point that it affects your productivity levels?
Though the act of creating art can (and sometimes downright should) imply making some sort of mess, this doesn't mean we should be okay with our studios being in a constant state of chaos.
Of course, people's tolerance levels towards disorganization vary immensely, but our studios are an extension of ourselves and our work, and should be treated as such.
Personally, I like to work in an environment that inspires me to create and helps me be as productive as possible every-single-day. My artwork is important to me (and I hope that your artwork is important to you as well), and staying as organized as possible ensures that it is going to be protected and accessible.
In their article How to Design the Ultimate Craft Room (for Beginners) the pros from porch.com explain the benefits of having a craft room at home, and provide lots of tips to consider if you're just about to get started with creating your own!
I really enjoy learning tips and tricks from other creatives, and Ali from Cut, Cut, Craft ( www.cutcutcraft.com ) was super helpful to share some ideas with us in the following post!
Enjoy!
8 Ways to get (and stay) organized
by Ali Fields
Hey guys and gals! It’s Ali here from Cut, Cut, Craft! (www.cutcutcraft.com) with some practical and creative ideas on how you can keep your studio organized in order to make the best art you can.
In Erika’s own words, "the environment that surrounds us impacts our mood and creativity". Read her blog post titled How I Find Inspiration as an Artist and Some Ideas to Keep You Going.
This is true for the people you surround yourself with, as well as the sorts of art and entertainment you consume. But it is especially valid in your own art studio, the very place you want to be free to act on your creativity to produce wonderful creations.
If your space is cluttered and disorganized, your mind will spend precious resources distracted by the mess. It will take you extra time to find materials to get started on a new project. Your aim should be to lower the activation energy needed to create art.
Spend some effort on organizing your space, so it’s easy for you to dive in when inspiration strikes!
I’ll go through some general tips on how to get your art studio in working order, and give you specific ideas on how to implement each of them.
Let's get into the tips!
1. Purge your supplies (and donate them)
The first step in organizing your art space should actually be getting rid of all the stuff you don’t need or won’t ever use. You probably know if you have some hoarding tendencies, in which case you’ll have to spend some extra effort to actually acknowledge that you don’t need all those styrofoam spheres.
But don’t just toss any good markers and paints that aren’t getting use! Donate them! There are so many places that are happy to receive donated arts and crafts supplies: elementary and preschools, YMCAs, community centers, women’s shelters, churches, art centers, etc.
It’s best to donate locally.
So just do a quick Google search, “where to donate art supplies [your city/town/county name]” to find locations nearby.
Make sure that the supplies you donate can actually be used! Dried up paint and crusty paint brushes aren’t useful for anyone. So when you are purging your art supplies, you’ll need at least two piles: one for trash and one to donate.
2. Use containers for writing, drawing, and painting instruments
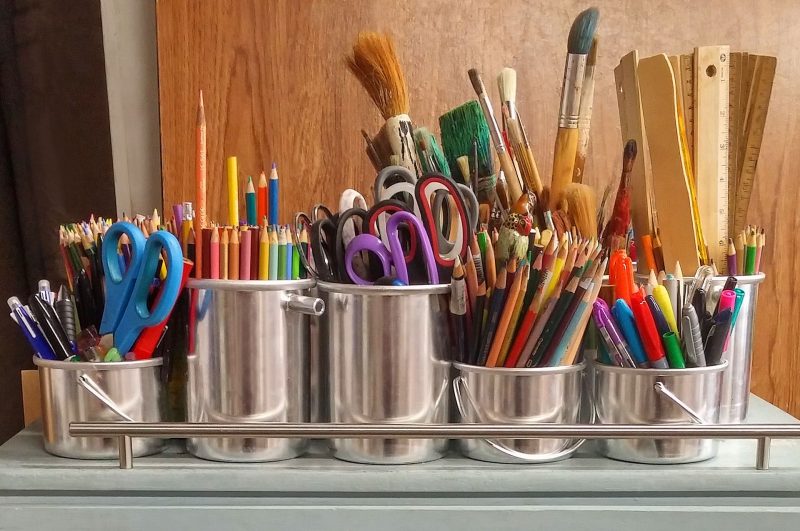
There’s no need to spend loads of cash on fancy decorative bins.
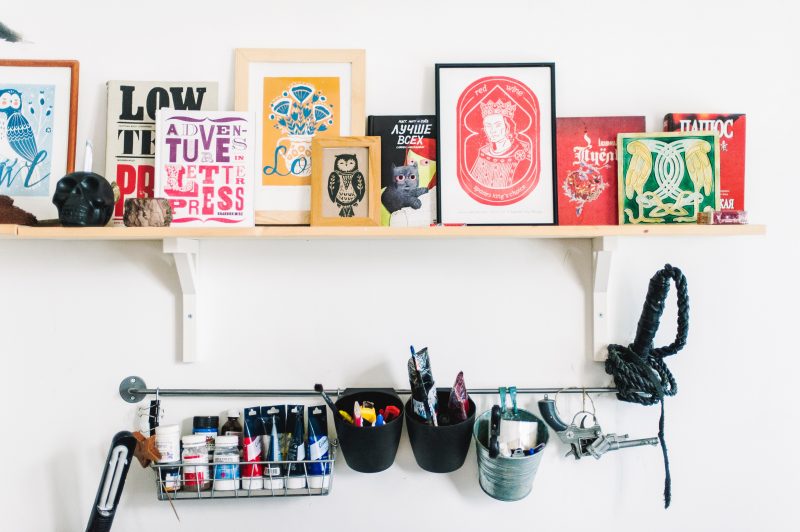
You can use tin cans and mason jars to store pens, pencils, markers, and paintbrushes (and decorate them yourself if you want). I personally like to use the $1 metal buckets from Target, but they aren’t always in stock.
You can also find all sorts of neat containers at dollar stores and thrift shops. These sorts of open containers make sure your tools are always visible and easily accessible.
Make sure to have enough containers that you can actually sort all your creative instruments with plenty of space. This way you don’t have to work to cram pens into overstuffed mugs or spend time trying to find just the right marker.
3. Have a designated place to store your works in progress
Some people are only working on one project at a time. Others have six or twelve different things that are waiting to be completed.
Regardless, you should always be able to clear off your work surface, and also protect your work from accidental damage, which means you need to have a place to put your WIP.
This is easiest for 2D art. If you have any adjustable shelving, make a short shelf or two, just a couple inches high, that are always kept clear so you can place your work there. There are also flat plastic ArtBins that are useful for keeping dust, lint, and hair off your work.
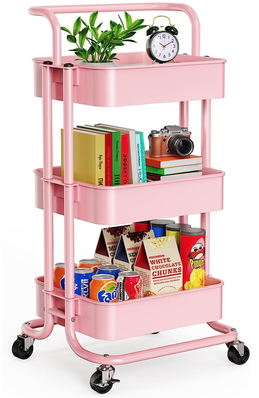
For 3D projects, a container on a larger shelf will work. I actually like to use the top bucket-shelf of the rolling Ikea trolley. (It’s called Raskog if you want to check it out.) For larger pieces, I’ll usually place projects up high on top of shelves so my kids don’t wander past and touch something delicate that needs a day or two to set.
Regardless, you should always be able to clear off your work surface, and also protect your work from accidental damage, which means you need to have a place to put your WIP.
This is easiest for 2D art. If you have any adjustable shelving, make a short shelf or two, just a couple inches high, that are always kept clear so you can place your work there. There are also flat plastic ArtBins that are useful for keeping dust, lint, and hair off your work.
For 3D projects, a container on a larger shelf will work. I actually like to use the top bucket-shelf of the rolling Ikea trolley. (It’s called Raskog if you want to check it out.) For larger pieces, I’ll usually place projects up high on top of shelves so my kids don’t wander past and touch something delicate that needs a day or two to set.
4. Take advantage of vertical storage
I know a lot of us are cramped for space. Maybe you only have a corner, instead of an entire room to use for creative purposes. In that case, vertical storage will absolutely be your new best friend. Use all the height you can!
Install shelves, cubbies, or racks that go all the way up to the ceiling. (But make sure to have a sturdy step stool so you can actually reach things at the top.)
I’m also a really big fan of pegboards for taking advantage of walls as storage, without protruding as far as shelves do. Yeah, the sort you’ll see at discount stores or maybe covering a wall of your pop’s garage.
They are super useful for hanging tools and buckets, but you’ll need the right accessories: straight and curved pegboard hooks. You can also get pegboard kit, with a great variety of hanging devices.
It’s all super affordable and available at any big hardware store.
5. Use bins and boxes for larger items
Okay, so you have shelves, cubbies, or racks and finally have all these spaces to put your supplies away.
Don’t just make sloppy piles of materials! Those shelves will quickly become a black hole of lost utility.
Create separate containers for different sorts of materials and tools. Or group together all the supplies for a type of project, so your watercolor paints, brushes, and paper are all in a single box for easy use.
Plastic shoe boxes are an affordable option, and they only cost a couple bucks each.
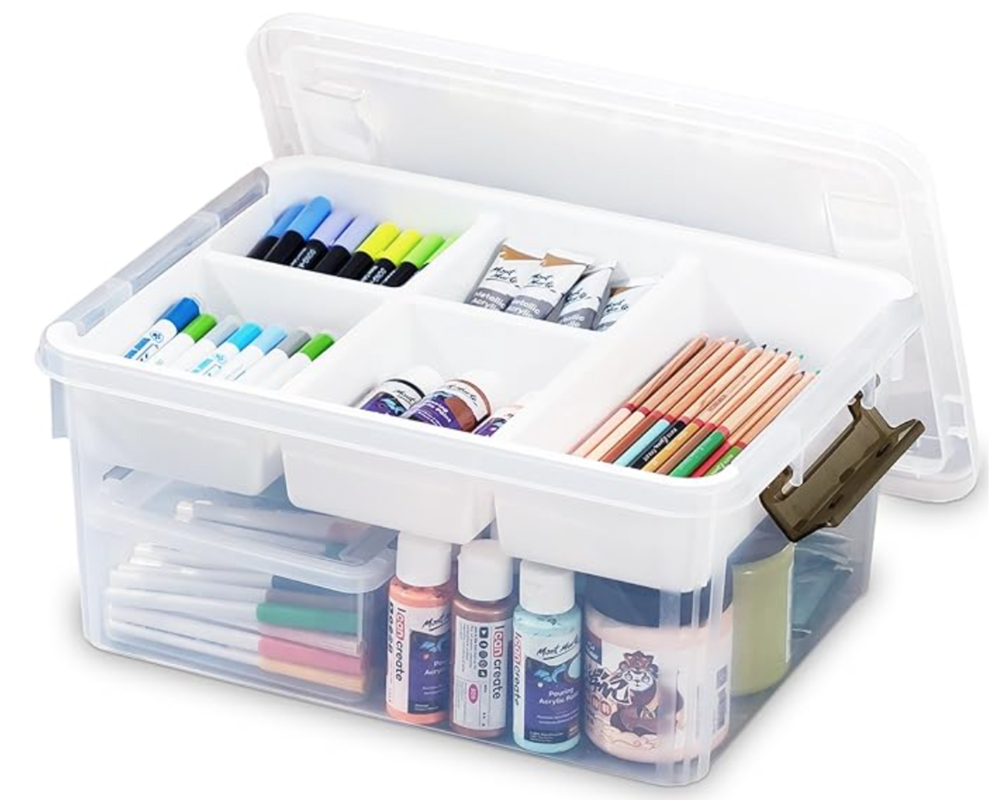
Plastic Storage Box with Removable Tray
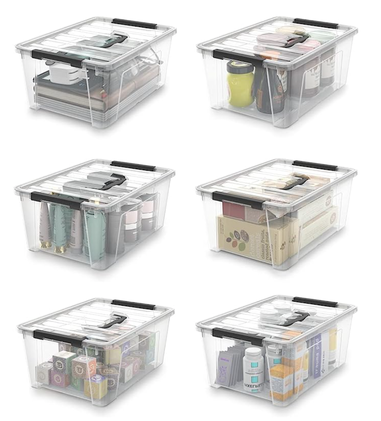
Storage Containers
|
Storage Caddy
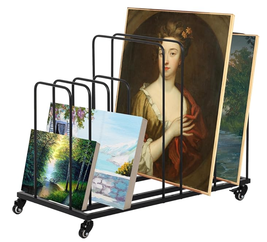
Adjustable Canvas Storage Rack
|
|
|

6. Hang your storage
Yes, I love to hang things!
It’s incredibly flexible storage you can rearrange as you see fit, which is great if you’re like me and maybe switch to a different art mode every few months.
So past pegboards, which I mentioned above, another of my favorites is using towel rods or curtain rods. You can find affordable ones at Ikea, or pick some up at a hardware store. I use S-hooks to hang buckets with supplies.
You can also hang string or wire across a wall, and use clothespins to display some of your work! It’s easy to rotate out what you are looking at, as the mood strikes.
Another option for hanging storage would be over-the-door storage. No shame in repurposing a hanging shoe rack to hold things like cans of spray paint or skeins of yarn.
Smaller over-the-door organizers are great for pens, markers, glues, and paint as well.
7. Label your containers
This one is big and was a total game-changer for me.
Before I started meticulously labeling my containers, my organization system would quickly decay the first time I was in a hurry to put everything away and just shoved supplies into whatever bin looked like it had enough space. “I can always reorganize it again later,” I thought.
Which I would have to do. Over and over again.
By labeling all your storage containers, you not only know where to find everything, you can also easily tell where to put everything away. Miraculously, all my pens and papers and ribbons and tapes now actually stay separated and useful.
And hey, labels can also be super fun to make! So take some time and make a pretty project out of it.
8. Once it's clean, keep it clean
Once you have a system in place for storing all the art supplies and projects you have decided you want to keep, you need to put in a little effort to maintain it.
At the end of the day, or when you are finished working on a project, spend a few minutes to put everything back in its proper spot. Clear off your work surface and put all your pencils or paints back in their spots.
This is time well-spent, and will absolutely save time for your future self (hey future self, have some time!).
Tomorrow, when you sit down to create something, you’ll have space to work and will be able to easily find all the things you want to you.
Best of all, you’ll be more likely to actually make more things, because your creative space will be so much easier to use.
And since it’s so sensible, I’m going to go ahead and crib Erika’s Ben Franklin quote here as well:
“For every minute spent organizing, an hour is earned.”
For more ways to save time and be productive, check out Erika's blog post
Time Management for Artists: My Secrets for Staying Consistently Productive.
Alright, that’s all the organizational advice I have for you today!
Thanks so much to Erika for letting me share my ideas here. I hope you all find some of these tips helpful for keeping your art space organized and functional.
I’m sure you guys have all sorts of things you use to organize your own space, so please share them below so we can all benefit!

|
Ali Fields is a crafting geek who writes DIY tutorials and reviews over at Cut, Cut, Craft! Her latest obsession? The Cricut Maker Follow her on social media: Pinterest: https://www.pinterest.com/cutcutcraft Facebook: https://www.facebook.com/cutcutcrafting Twitter: https://twitter.com/cutcutcraft |
Sending out a huge thank you to Ali for sharing all of these useful ideas with us today! Hope you found it helpful.
Cheers!


www.erikalancaster.com
is a participant in the Amazon Services LLC Associates Program, an affiliate advertising program designed to provide a means for sites
to earn advertising fees by advertising and linking to amazon.com.
www.erikalancaster.com
is a participant in the Shareasale.com Affiliate Program, an affiliate advertising program designed to provide a means for sites to earn advertising fees by advertising and linking to Shareasale.com partner companies.
 RSS Feed
