Love #Inktober? Looking for new art supplies to make this popular drawing challenge different and perhaps, more special, this year? Do you enjoy trying out unique art supplies to share with your creative friends? If so, you'll definitely want to check out Viviva Colors' new sketchbook line that's been launched especially in time for Inktober 2020, but will continue being sold worldwide even after this popular yearly drawing challenge concludes at the end of October. That's right! Viviva's crowdfunding campaign for these sketchbooks has gone so well, that the company will continue making them available for artists (without the Inktober logo) for an undefined amount of time. Inktober is one of the most popular drawing challenges going on in the online space since 2009. Each year, Inktober creator and renowned illustrator Jack Parker, publishes a new daily prompt list for artists to use as inspiration to create a new drawing/painting/mixed-media piece each day throughout the month of October. Every October, thousands of artists and creatives all around the world participate in this challenge, pushing themselves to work on a new piece, every day, for 31 days. It's no secret that Jake Parker has been involved in a couple of different controversial incidents as of late, which have caused a good amount of people to look for alternative art challenges to work on this October. However, lots of die-hard followers of this challenge are still eager to participate and are excited to begin, many of whom aren't necessarily fans of Jake Parker himself, but have found the experience of Inktober a valuable part of their art journeys. Many artists believe that the challenge has grown to become more than the person who initially created it. Inktober has become a way for artists to push their skills, creativity and build the discipline to stay consistent with their art practice. It has become an event that allows lesser-known emerging artists, to gain traction online and start growing their name known amongst a larger audience. It's also become an event that brings artists from all over the world together, helping us create meaningful connections that'll last a lifetime. Inktober, in my opinion, is about artistic growth, about community, and about sharing the importance of art with the world. 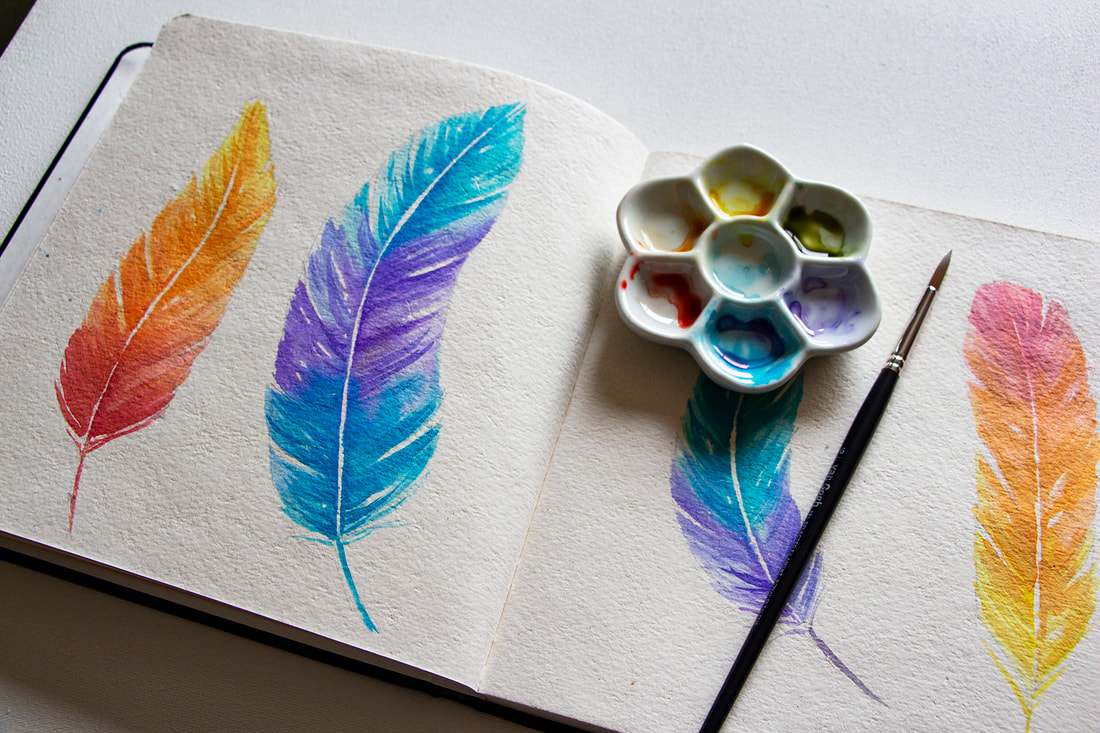
Image 1. Colorful feathers painted on 7.5 x 7.5 in / Rough / Off-white sketchbook using special edition colorsheets.
In this past blog post I talk about Viviva Colors' history and also share my swatching process, as well as my review, for their original colorsheets. Make sure to check it out to read more about their compact and insanely vibrant watercolors. Viviva Colors' mission has always been to inspire artists to continue on their creative journeys and to never set their art aside, no matter how busy or how stressful life becomes. The company is not only constantly improving their products and offerings, but is always looking for new ways to encourage and motivate artists to stay on their paths. Viviva knows that, through art, people are able to cope with anxiety and depression, which are rampant this year due to the current pandemic, its economic repercussions, and all of the uncertainty its creating worldwide. And knowing how challenging 2020 has been, Viviva teamed up with Jake Parker to release an officially licensed set of supplies that'll make this year's Inktober even more special. These items were designed to make Inktober 2020 #AnInktoberToRemember. Just like Viviva's original colorsheets, which were officially launched in 2017, these new supplies were crowdfunded via Indiegogo. With the huge success of the first campaign, Viviva Colorsheets was able to start mass manufacturing their original product and have shipped them out to more than 30,000 artists in over than 100 countries. They are currently working on doing the same for the backers of these Inktober sketchbooks and colorsheets! 
Viviva's Inktober sketchbook line.
You can find out more about the products they have available at their website. Let's talk about the new items! For Inktober 2020, Viviva launched 4 sketchbook variants, as well as a special edition of their colorsheets. Sketchbooks All of these sketchbooks are hardbound with a quality faux-leather cover and (during the Inktober season) also include a silver foil stamp with the Inktober 2020 and Viviva Colors logos on the front cover. a) A5 format (5.8 x 8.3 in) / 240 gsm / Ivory white / Smooth Lessebo paper / 64 pages b) A5 format (5.8 x 8.3 in) / 300 gsm / Off-white color / Rough watercolor paper / 40 pages / 100% Cotton c) Square format (7.5 x 7.5 in) / 300 gsm / Off-white color / Rough watercolor paper / 40 pages / 100% Cotton d) *The Easy Sketchbook* A5 format (5.8 x 8.3 in) / 240 gsm / Ivory white / Smooth Lessebo paper / 64 pages *The Easy Sketchbook was created especially for beginner artists who have trouble with their preliminary sketching process. It includes a sketching mirror and an aluminum slot stand to hold it as you're drawing, which helps you transfer the reference's outlines onto paper in an easier and faster way. See the Easy Sketchbook in action here! Colorsheets Aside from the four sketchbooks, Viviva also released a special edition of their colorsheets set which contains an extra 4 colors (their original sets have 16 and this one has 20). The 20 colors offered in this edition have been curated by Viviva and Jake Parker especially for Inktober. Check out my color swatching process for their original colorsheets in this blog post. You'll be able to see the colors' vibrancy and learn about my thoughts as to how they compare with regular watercolors in that post. Just like their original colorsheets, the Inktober edition also has the portable booklet format with protective paper in between each page. 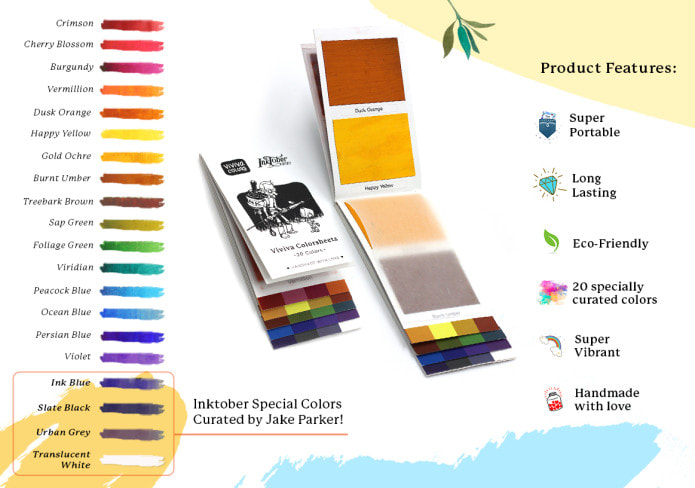
Viviva Colors' special edition Inktober colorsheets.
Here are a couple of pieces I've created in my Viviva/Inktober sketchbook, which is the square format with rough watercolor paper. 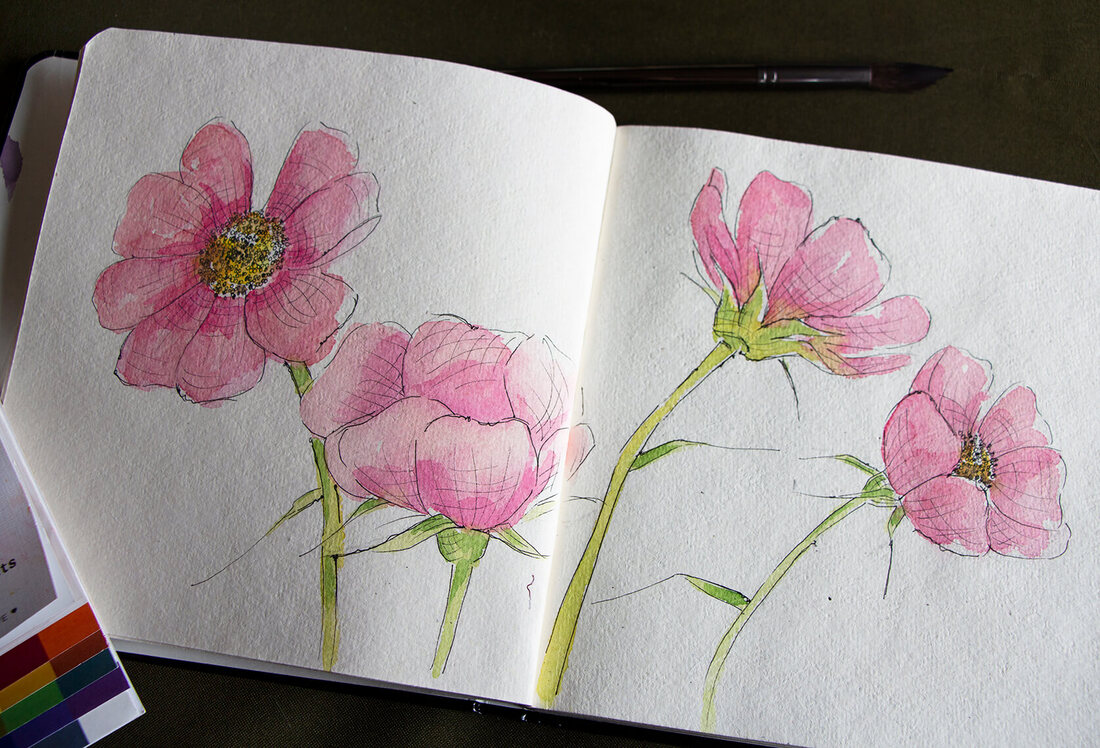
Image 2. Pen and watercolor wash pink flowers painted on 7.5 x 7.5 in / Rough / Off-white sketchbook using Micron drawing pens and Viviva's original colorsheets.

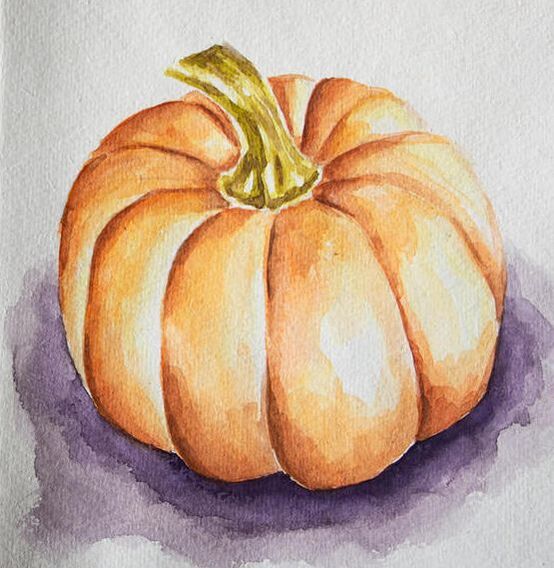
Image 3. Fall pumpkin painted on 7.5 x 7.5 in / Rough / Off-white sketchbook using professional quality Van Gogh watercolors.
A few interesting characteristics I noticed about the sketchbooks:
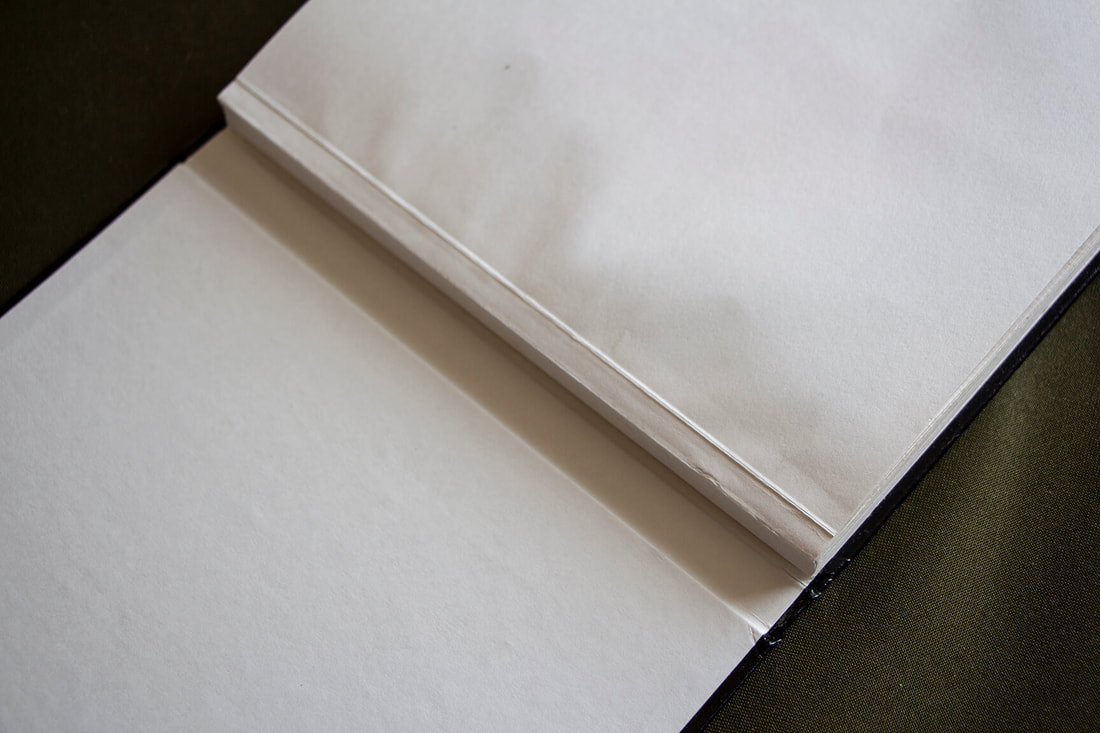
Viviva Inktober Sketchbook spine (made to allow the pages to open flat).
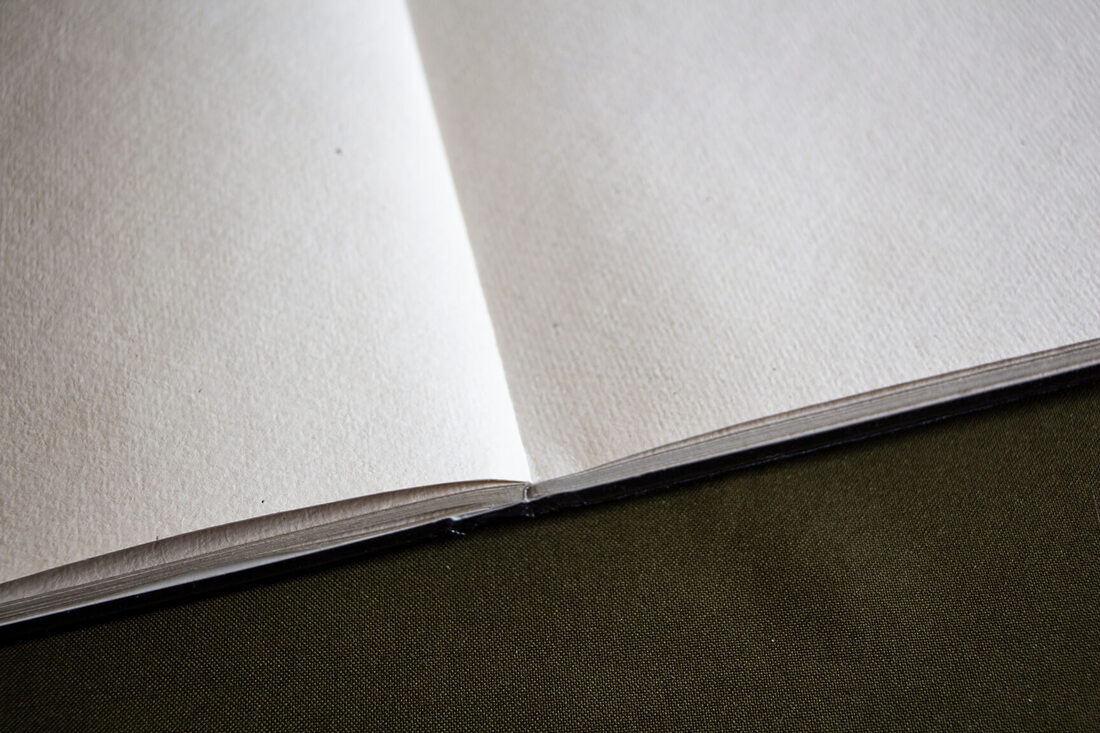
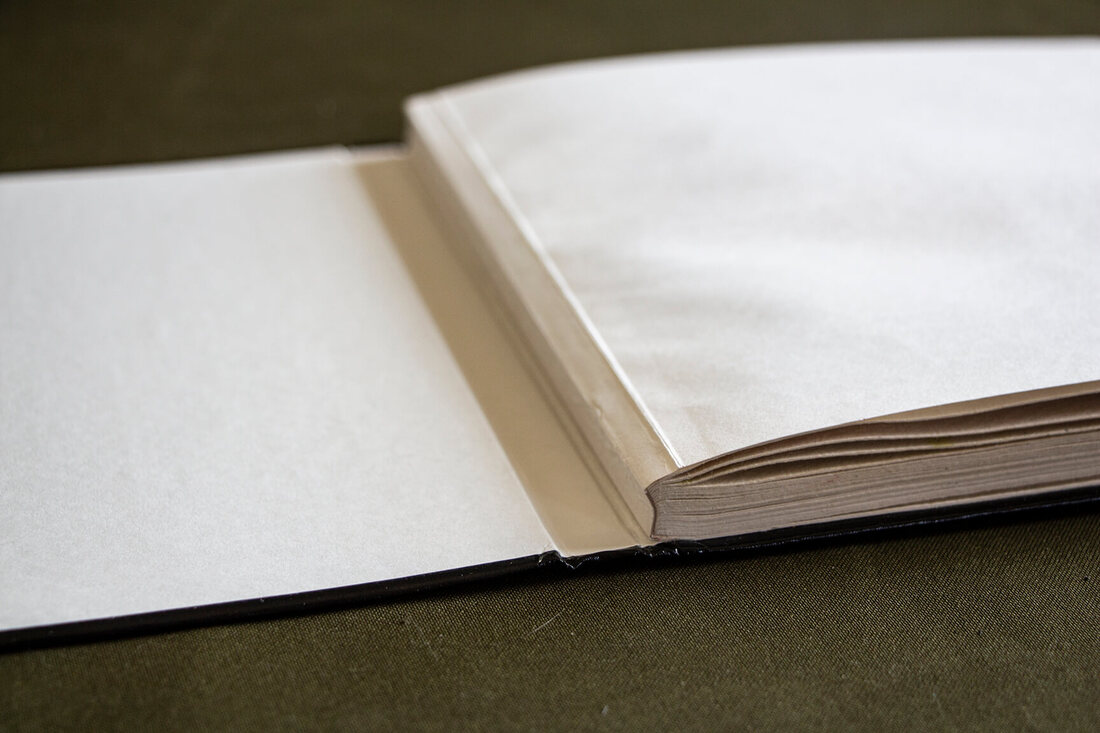
Viviva Inktober Sketchbook open flat.
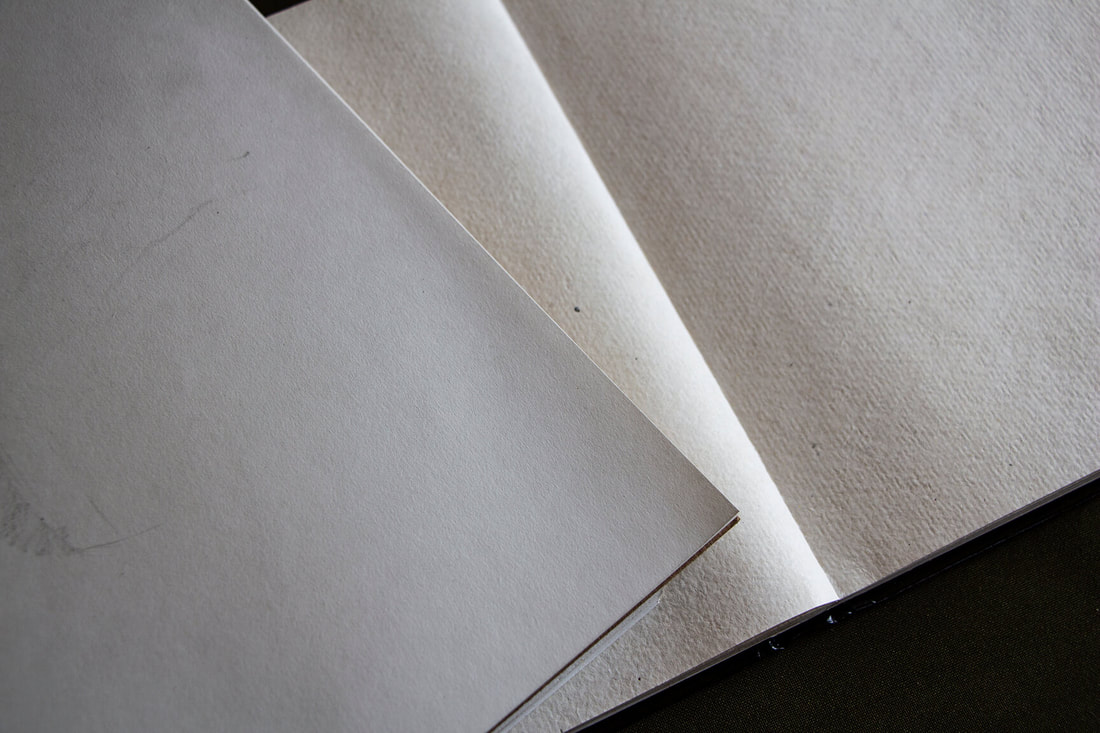
Viviva Inktober watercolor paper sketchbook next to smooth, white drawing paper sketchbook. Notice differences in texture, as well as color.

Viviva Inktober watercolor paper sketchbook next to a sheet of Arches, cold-press watercolor paper. Notice differences in texture and color. Viviva's paper is a lot more textured and is cream-colored.
Finally, here are a few pros and cons I've found in relation to the items I've had the opportunity to try out, in bullet form. Pros and Cons of Viviva Colors'
|
Pros
*For more pros and cons about Viviva's color sheets, go here.
|
Cons
|
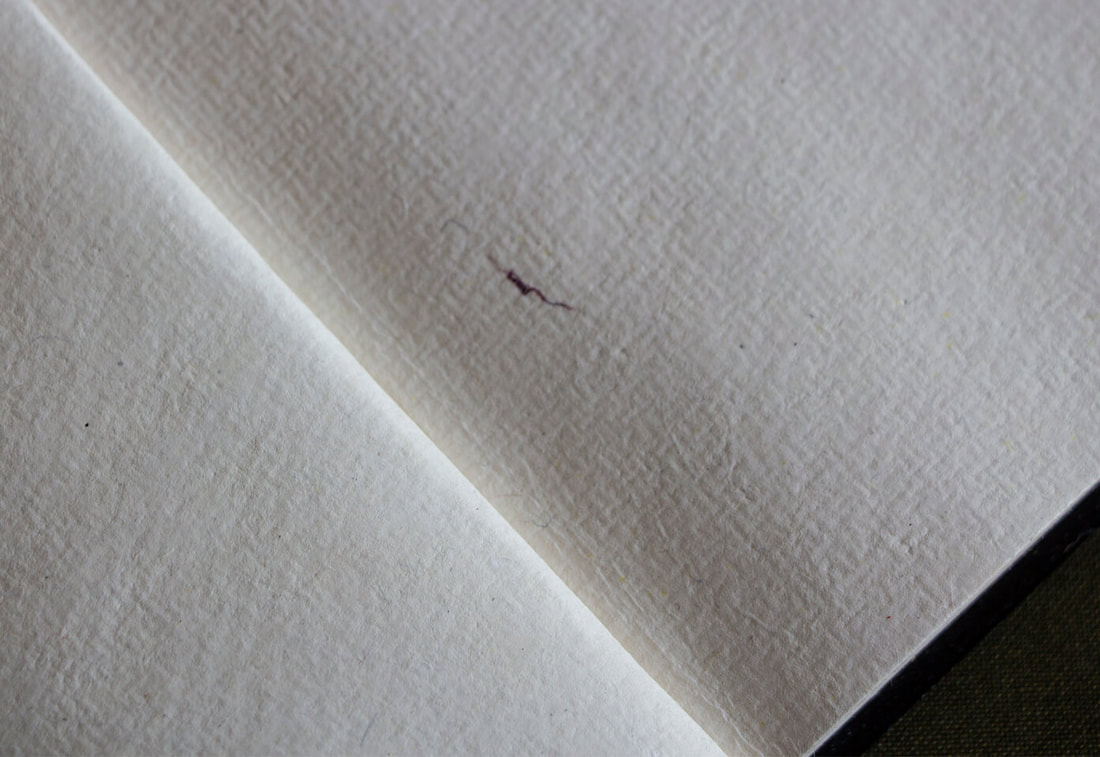
Close-up of Viviva's Inktober Sketchbook (watercolor paper). Blemishes can be found here and there because this is hand-made paper. I personally liked these little blemishes, but am not so convinced with the color of the paper.
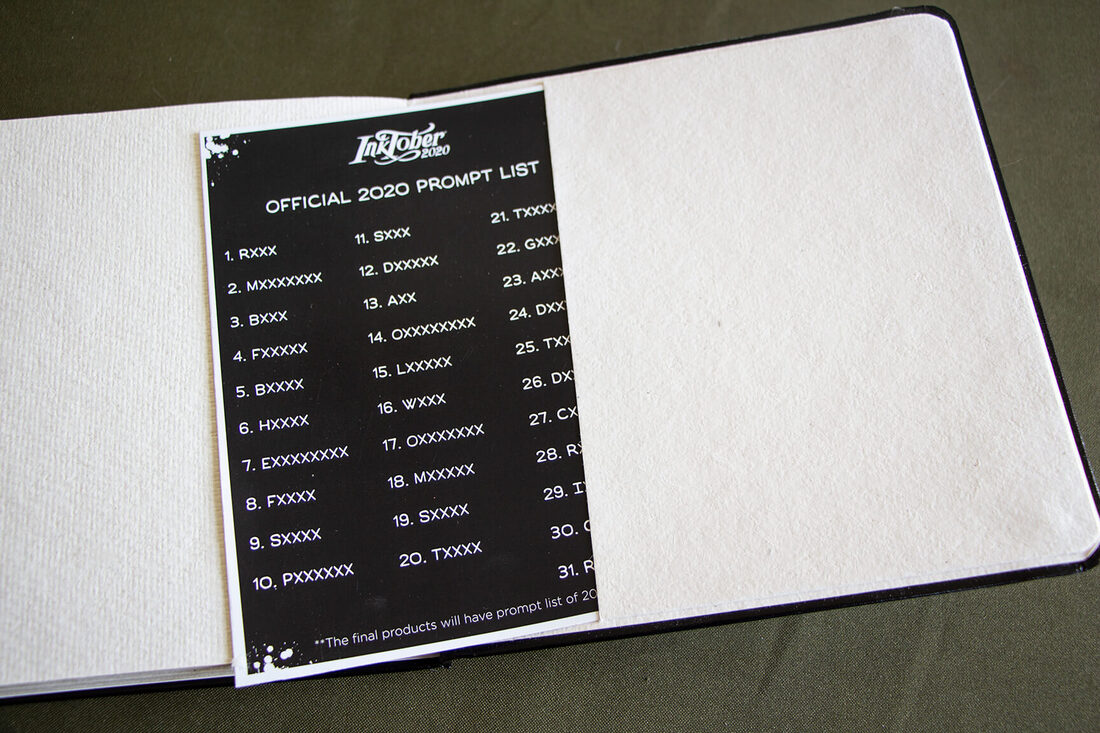
Viviva Inktober Sketchbook back folder with prompt list (because my sketchbook was a prototype created prior to mass production, the words appear with "X").
Viviva Inktober Sketchbook spine (made to allow the pages to open flat).
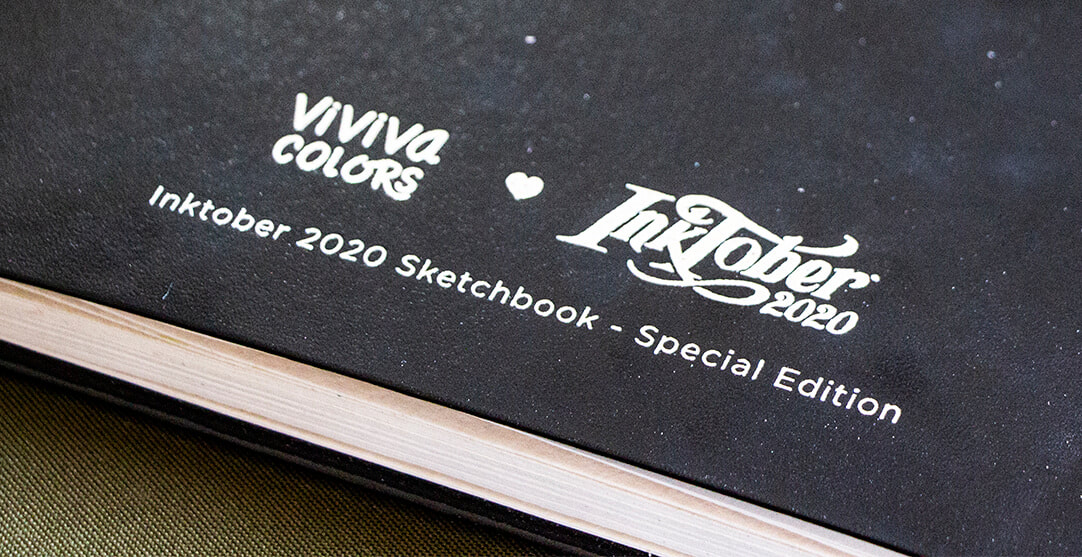
Beautiful silver foil logos on the faux leather cover.
These items are all beautiful and high-quality, and I want to send a huge thank you to Viviva Colors for providing me these items to explore and review!
Personally, I won't be participating in Inktober this year due to a lack of time and more important projects I'm working for my online art communities, but I look forward to creating more pieces in this great sketchbook.
*Visit Viviva Colors' website and follow them on social media to see inspiring artwork created with their colorsheets, as well as the latest news from them:
Viviva Colors Website
Viviva Colors on Instagram
Viviva Colors on Facebook
0 Comments
What benefits does buying original art have over buying prints or reproductions? How do you go about finding an original art piece to bring into your home? What are the main things to have in mind when selecting a painting? How does one care for original wall art?
If you're a visual/creative person like I am, you're probably well aware of how your surroundings can affect your mood and even your daily productivity levels. At the same time, it's likely important to you that your home (being an extension of yourself) is able to transmit your personality and individuality.
You probably like to live your days in an inspired state of mind and simultaneously enjoy bringing inspiration to others with your distinct style and ideas.
You know that your home is a big part of your life. It's your place of relaxation, where you entertain loved ones, and where you make important memories.
It may even be your place of work (high-five!) or the space where you bring up your family and keep them protected.
In their article titled 9 Benefits of Art in the Home and How to Curate a Collection, thezebra.com shares how having artwork up on our walls has benefits such as: lowering our stress levels, promoting critical thinking, supporting local artists, amongst many others.
Because of all of these reasons, it's important to take the time to make our space our own.
Many of us can fall into thinking that collecting original fine art is only for people who have lots of money to spend. However, with the Internet, it's easier than ever to find amazing decorative artwork at all price points.
Moreover, the options are vast ranging from cheaper pieces that add a touch of life to a room, to vintage pieces that could add even more diversity to your investment portfolio. Furthermore, we're also able to connect with galleries and artists directly!
We can easily start our own art collections composed of a mix of pieces that speak to us and transmit who we are to the world.
We can find affordable art prints that we can hang up nearly immediately, as well as original paintings that no one else has and will last for generations to come.
Lots of people are ready to invest in an original piece but feel it's easier to decorate with cheaper, mass-produced art, or are overwhelmed because they don't have experience visiting galleries or simple are too shy to build relationships with artists directly.
In today's guest post, Madeline Dudziak, who writes for macfineart.com, is going to share some valuable tips on decorating with original fine art, as well as information that will help demystify the art-buying process.
Let's get into her article!
How to Choose Artwork for Interior Decorating (5 Valuable Tips)
by Madeline Dudziak
Once you’ve had a chance to settle into your home, you may begin to tire of the box store’s mass produced “Live, Laugh, Love” decor and may be longing for some proper art.
It can be so hard to choose though and there are so many options when it comes to finding the right art pieces for a room, that it can get a bit overwhelming.
When you’re first setting out down the road of fine art, you may feel out of place scoping out galleries to find a painting that speaks to you or that will suit a room in a way that will both let your personality shine and showcase the piece simultaneously.
If you’re struggling to figure out how to choose the right painting for your space, the next five tips will make the process easier!
1. Be Inspired
The first rule of thumb when selecting an artwork is to not stress about the decision. Unless you have a strict timeline, it’s unrealistic to think you'll just walk into a gallery, immediately find something you love, and hang it on your wall that evening.
There are many things to consider when looking to decorate and taking them all into consideration is important.
For example:
- What emotion do you want your art to evoke?
- Are you leaning towards a specific art style?
- Is there are color palette you are trying to work within?
- What feel/style do the furniture and other elements in the room already have?
Starting an art collection is easier than ever. You can seek new artists in local art events and social media, as well as browsing galleries both in person and online until you come across pieces that speak to you.
Follow these artists and galleries so that you can stay up-to-date with new work being shared.
If you're reading this article, chances are you're a visual, creative being. You're probably already aware that your surroundings can have a strong impact on how you think and feel.
Being surrounded by art that speaks to you is incredibly inspiring and can improve your own creativity. Paintings can be expressive of your personality and feeling, but they can also prompt you to work harder and feel better in your day-to-day life.
While art can be considered an investment, if you start buying paintings just to make money in the future, you’re rather missing the point and the opportunity to cultivate a higher appreciation for art.
Sometimes art can be used as a social status but don’t let keeping up with Jones’ stop you from buying pieces that you adore. While you hope your guests will feel similarly inspired by your home’s artistic style, ultimately you want to surround yourself with art that speaks to you.
Your home is an extension of yourself and should represent who you are.
Check out more tips on finding art that's right for you in this article over at thezebra.com
Click on image to visit original source at Unsplash.com.
2. Seek Unique
While it can be practical (and cheap) to buy mass-produced art reproductions, there's nothing like being the sole owner of an original art piece that can be handed down for generations to come.
Nothing compares to the feeling of owning an original painting that an artist spent hours upon hours creating and has a piece of them in it. Not to mention, you'll be hard-pressed to find a reproduction that can outlast a well-made painting.
This said, you certainly don’t want to spend your time, effort and money on a piece that was sold to you as an original and really isn't. This is why it's important to visit reputable art galleries or go straight to an artist.
Whether you hope to become a collector or you just want to have one great piece of art in your home, buying original paintings from artists you love is easier than ever before.
The Internet gives us the ability to personally reach out to galleries and artists all around the world with whom you can establish connections and build relationships with over time.

3. Size Matters
Acquiring smaller pieces or quality reproductions may be a great way to start your collection and developing a relationship with an artist or gallery, but it's important to acknowledge that they have a tendency to get lost in a room.
You don’t want your art to look like a tiny island in a sea of a wall, light fixtures and book shelves. Most likely, if you're going to invest in an original artwork, you want it to be a focal point in your room. So go ahead and look at larger pieces! Showcase your favorite art and bring a new life to your space.
Of course, there are areas and rooms in any home that can accommodate smaller paintings, too. Think of entryways, bedrooms, kitchen, bathroom, etc.
A good rule of thumb is you want your wall art to cover ⅔-¾ of your wall. Measure the height and width of your wall and multiply those numbers by .57. That will give you the smallest dimensions you should be looking for.
If that is much too large for you, you can always opt to create a gallery wall or group art together to cover the necessary space. Some artists even have groupings of paintings that are sold as a set, so keep an eye out for art like that, especially if you have a lot of space to fill.
Click on image to visit original source at Unsplash.com.
4. Hanging Your Art Properly
Don’t just eyeball it and pound a nail. If you’re going to put in the time and effort to buy an amazing art piece that you love, make sure you're giving it the respect it deserves and hang it up properly.
While certainly a room’s architectural design (wall height/width, location of windows, etc.) may dictate where the frame should rest, you will want to carefully consider what wall and specific location the piece should be installed in.
Consider the furniture and accessories you already have in the room. Does it make sense to leave them where they are, or will the room work better as a whole if things are moved around now that you have an important focal point in your decor?
Another huge element to consider is lighting!
I highly recommend installing the art piece on a wall that receives little to no direct sunlight. Sun rays can drain a picture of its vibrant color, which is the last thing you want. If you have a room with a lot of windows and sunlight that needs art, make sure to frame it using specialized UV acrylic plexiglass which will protect the paint from fading.
While there are exceptions to any rule, you should aim for your artwork’s center to be at eye level or 57 to 60 inches from the floor.
The next formula will help guide you through this process:
First, divide the height of the frame in two. Take the resulting number and subtract the distance from the top of the frame to the hanging hardware the frame has. Add this number to 57, 58, 59 or 60. Take your sum, measure upwards from floor level to that many inches on the wall, and mount your hardware there. This should give you the proper place for hanging art at eye level.
5. Tender Care
Aside from direct sunlight, another factor that can affect the painting is humidity. Make sure you choose a room and area with low humidity and no direct contact with water. Excessive moisture can damage a painting over time.
If your art requires cleaning, simply dust it with a feather duster and leave it alone. Never use water or cleaning products, and inform yourself on cleaning instructions when you buy the piece. The gallery or artist will be happy to provide tips and recommendations.
If at any point you notice that the art is becoming damaged, immediately reach out to the gallery or artist for suggestions. If you're unable to do so, another option is reaching out to a restoration expert. Cover your art with cardboard and bubble wrap for transporting to avoid further damage.
Click on image to visit original source at Unsplash.com.
Conclusion
Artistic expression and individuality are beautiful, powerful things. We're all unique and deserve to have inspiring spaces to live in that reflect who we are to our guests.
Don't hesitate reaching out to galleries or artists today and, just ask! I assure you, they'll be incredibly happy to help you, and you'll never regret starting this relationship.
Allow yourself the chance to fall in love with art and to truly appreciate the pieces you bring into your home. Anyone can become an art collector! The magic starts with only one piece.
I'd like to send out a huge thank you to Madeline for so generously providing all of this helpful information for us.
Visit macfineart.com to find amazing fine art and read more helpful art-related posts such as one titled How Color Is Used in the World of Art and Why Local Artists Are So Important (and How You Can Support Your Local Art Community).
Also, follow them on social media to find out news and when new resources are released:
Twitter : https://twitter.com/mac_fine_art
Facebook: https://www.facebook.com/MACArtGalleries/
Youtube: https://www.youtube.com/channel/UCv3Q8KUNmtB6Er9p97vLAVw
Thanks so much for reading!
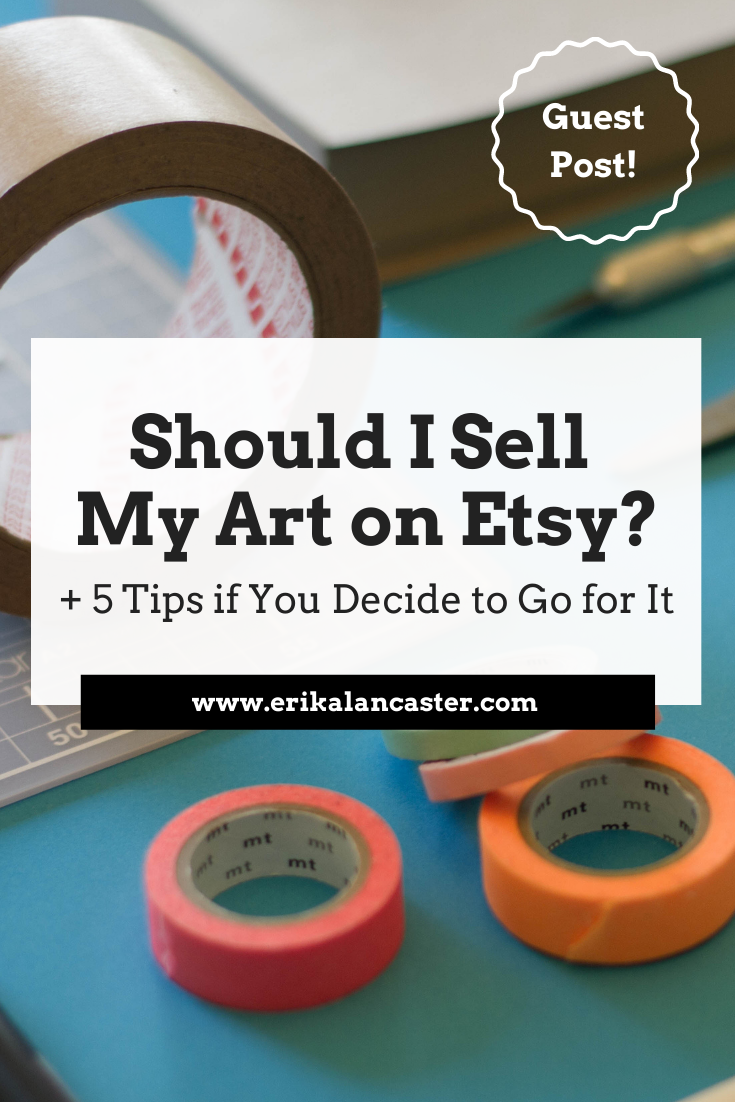
Is Etsy a good online marketplace to start selling your art? What are the essential things to know about as a newbie just starting out on this popular platform? Selling art online is as easy as just uploading your work and waiting for the sale, right?
As an artist just starting to make the transition from selling my paintings locally to selling online, I know how confusing and overwhelming it can be to try to make sense of all the information available to us about selling art via the Internet. Even picking a platform to start on can seem like an impossible task.
What if we start on one and it turns out to be a huge waste of money, time and effort?
And there's so much to wrap our heads around, even beyond selecting a platform or marketplace.
We need to learn about online marketing, which is a monster topic in itself that consists (among many other things) of creating a personal brand, building up an audience, learning what works on different social media channels and selecting the one(s) that works best for us, as well as consistently sharing our work/message with the world.
We need to learn about taxes and accounting because, make no mistake, as artists we are creative entrepreneurs. If we want to get to a point at which we're creating a consistent income from our work, we need to start seeing what we're doing as a business and not be afraid of stepping into our entrepreneurial shoes.
As business owners, we must be willing to consistently step out of our comfort zones, accept that we need to pivot or try something new when things are not working, and not be afraid to invest in different parts of our businesses. For some of us, this may even include looking for specialized courses and/or coaching.
Finally, and most importantly, we need to consistently work on our mental and physical well-being because our brands/businesses are an extension of ourselves.
The more time I spend working on building up my own business (which consists of many things aside from selling art online), the more I find this to be true.
It takes a lot of mental strength and deep-rooted determination to stay persistent with learning and implementing. To show up everyday, even when things aren't growing as fast as you'd like them to. To keep believing in oneself and consistently providing value, even when negativity is thrown your way.
I find caring for our mental and physical health is even more important as artists because, not only is what we do so personal, but most of us are working on both our art and all of the aforementioned things alone. We don't have assistants or a team to share our worries (or even wins) with.
I share the specific things I do on a weekly basis to stay happy and productive as an artist in my blog post/YouTube video titled 5 Essential Self-Care Tips for Artists and Creatives.
Because of all this, I'm incredibly thankful that we have the opportunity now-a-days to connect with other creatives around the world and learn from people who are willing to share their experiences/knowledge.
Today, we have writer and seamstress Annabelle Carter Short, who's had her own handmade business for many years, sharing a lot of useful information about selling on Etsy with us.
Let's get into her article!
The Pros and Cons of Selling on Etsy + 5 Key Tips
Many independent artists struggle to start selling their work. Not because they're not inspiring or creative, but because they lack an understanding on how to actually sell their art. If you're looking to make money off your art, consider trying Etsy marketplace for a start.
According to Etsy 2018 numbers, the platform has approximately 35.8 million active users, 1.98 million sellers, and over 50 million products listed for sale. With sellers all around the world, Etsy is a marketplace that is well-known for facilitating sales of arts and handmade products.
But, what are the advantages and disadvantages of selling your art through Etsy? And, is it right for you?
Advantages
• It is convenient and has a more accessible set up than building your own website or physical shop.
• Through the years, Etsy has worked hard on its branding. It is already trusted and respected by customers looking for handmade goods. This is a huge help for starting businesses that haven't yet built up an audience or fanbase.
• Etsy has a blog, forums and a lot of resources for users on everything from product photography, customer care, packaging, taxes, branding your shop and much more.
• This platform has a targeted customer base. The audience here is not looking for mass products, and not necessarily for the cheapest ones either. Uniqueness (and quality) is what will sell.
• You can open up your shop for free in a matter of minutes and the fees taken by Etsy when a seller uploads a new product, as well as what it takes when a sale gets made, are very low compared to other selling platforms (like Amazon and eBay) or setting up your own e-commerce website.
• When you get a sale, the money is transferred to you immediately, as opposed to other markets like eBay.
Disadvantages
• Etsy has frequent updates and you will need to always keep learning and adapting to change.
• Competition is fierce (especially for certain niches like jewelry, hair accessories, printables, etc.) and you cannot rely on the platform's search field to be your one and only traffic source. This means that you have to be very hands-on about sharing your work and growing an audience that you can promote it to.
• Though Etsy's fees are a lot lower than other marketplaces like eBay and Amazon, you will have to take them into account, as well as your shipping costs, when you are setting your prices.
• Having a shop on Etsy, means you have your shop on someone else's property. According to their Terms of Service, they can choose to suspend or close your store at any point in time if they feel you aren't playing by their rules. This means, you have to take time reading these documents carefully.
*Verdict
If you're looking to start selling your art online, Etsy is a great option. Through this experience, you'll be able to gain knowledge on the basics you need to succeed online like pricing, customer service, shipping, taxes, and marketing products effectively.
A lot of handmade businesses start on Etsy and move on to creating their own website/e-commerce store after gaining such experience and traction. Many of them keep selling on Etsy even after setting up their own independent shops, because they know the unique opportunities this presence can bring them.
To start on the right foot, you'll need to put some effort into understanding the platform, and how to maximize your business potential. As mentioned above, the competition is high, but that doesn’t mean there is no space for you. You just need to learn how to make people notice your shop.
Here are five essential tips for you.
1. Build your brand
To run a successful Etsy shop, you'll need to work on your branding. Branding is much more that just a logo.
Create and build a brand based on your target market and your unique offer. Besides the aesthetic aspects such your logo, color palette and the look and feel of your photos, you should also study which kinds of words and ideas you'll be using to communicate and connect with your audience.
What messaging can you use to transmit your mission and values? What sets you apart from your competitors?
Good branding is what will make people remember your business.
With your brand in mind, set up your shop for success by creating a cover photo, adding your bio, and even creating a welcoming video for your customers. Make sure to also include polices and not leave any fields blank.
2. Make your product stand out
Do your research and understand your market and competitors. Understand what is trendy, but don’t fall into the trap of doing what everyone is doing.
Differentiate your work by understanding what makes you unique. Maybe you use an interesting combination of art mediums, have a special process or an unusual source of inspiration.
Find what differentiates your products and place them in front of the right niche.
Think of ways in which you can share your process and thoughts with your potential customers so that they can connect with you and understand the hard work that goes behind the creation of your art.
Remember that you are just as important as the art you create and, most of the time, people will buy art because they connect with its creator.
3. Visuals are everything
When people are shopping online, they cannot reach out and touch a product, which is why high-quality images that show the product clearly and in different perspectives is essential.
You'll need to invest time in producing high-quality photos to display your work. Having a good camera and lighting is essential. If you're taking pictures of paintings, don’t forget to also use a tripod, since it will help to maintain stability, alignment, and focus.
Erika offers some great tips on taking quality photos in this blog post.
When creating visuals to upload, think of whether your artwork should be scanned or photographed. Smaller illustrations or even paintings that don't have texture can be scanned, while larger/textured paintings should be photographed.
Also, creating mock ups of your paintings or illustrations showing what they would look like hanging on a wall can really help a customer visualize what it would look like hanging in their home. If you don't have an area to set this up at home, you can buy mock up generator files through www.creativemarket.com that will help your work shine to its full potential.
Finally, consider looking into photo-editing softwares that will help you with color correction, as you always want your visuals to represent the product as truthfully as possible.
4. Get found
Like with any search engine, you should make time to learn about SEO and use keywords that will help you get found. Strong keywords will help your products show up in the shopper’s queries listing.
Make sure you're using them in your title, description and filling up all available tags. Brainstorm these keywords first, try to make similar searches and check results.
- Title –Be specific and detailed in your title and use words that shoppers are actually typing into the search field (oftentimes these are very different from words we would use). Focus on using the strongest keywords here and stick to the 140 characters limit.
- Description – Describe everything you can about your product. Think about possible questions shoppers would have and reply to them into this section. Don’t forget to mention your artwork size, medium, supplies used, care instructions, and any other relevant information.
- Tags – Tags are a word or combination of words used to describe your product briefly. You can add up to 13 tags per item listing (use all of them!). Etsy suggests a few keywords to your tags, which you shouldn’t ignore! They are based on the audience’s searches to related products and are extremely useful. Without these tags, chances are your work will be hidden from potential customers.
If you need some extra help into deciding which keywords are best, you could try EtsyRank and/or Marmalead.
5. Get noticed
Every time you publish a new product, it will be displayed on the top of its category for some time. Use this in your favor and don’t upload all your products at once. Choose the best time, when most of your target audience will probably be scrolling on Etsy, and upload your products then.
Another way to get noticed is by driving traffic to your store through social media. Make good use of Facebook, Instagram, Pinterest, Twitter, and so on. Learn about what works best with each platform and select the ones that are right for you. These tools are the best solution to create awareness and engage with your potential customers.
Remember, social media is all about engagement, not only posting. Use them to create connections with potential customers and stay away from only promoting work you want to sell. Reply to questions, ask your own, and always think of what your possible clients would like to see.
Finally, start to learn about paid promotion to amplify your reach. Think of investing a small amount in targeted campaigns via Facebook and Etsy's own promoted listings and testing out different strategies.
Final Thoughts
Etsy might not be the perfect platform, but it's probably the easiest for beginners. You will have to learn about technicalities and selling strategies, but this is applicable to any other e-commerce platform.
Put some effort into understanding the algorithms, using keywords appropriately, having great photos, managing finances, and driving traffic through your social media. When you feel more confident, you could even open your own website and sell your products directly.
Annabelle Carter Short is a freelance writer and seamstress of more than 7 years. She’s passionate about selling on Etsy and starting a handmade business. In her free time, she likes to make DIY projects with her two kids. Annabelle also works with few organizations to provide the best resources for raising and educating a special needs child.
Follow Annabelle on Facebook here.
I'd like to send out a huge thanks to Annabelle for sharing her expert advice with us.
And I want to encourage you, fellow artist, to make time to establish your own artistic goals. Set a plan for yourself and get to it. Do whatever research you feel you need to do, but don't allow yourself to get stuck or overwhelmed with contradicting or confusing advice.
Take action and implement what you learn because otherwise, you'll never really know if that path will work for your specific situation.
Inform yourself, make a decision based on your gut feeling, and get to it.
As one of my business coaches always says:
"Clarity comes through engagement, not thought."
And even if a platform doesn't turn out to be the best for your own goals, you'll have learned a whole ton from taking action.
Finally, if you're passionate about your art and it's your dream to one day make a living from selling, step one is to get your skills up to a level at which you're able to offer original, quality work with confidence.
Helping aspiring artists progress their skills and find their voice is one of my passions, and I'm here to help you.
Become a member of the Becoming Artists community on Patreon to gain immediate access to a library of classes on Art Fundamentals, exclusive drawing and watercolor painting tutorials that I don't share anywhere else, as well as live Q&A's in which I answer all your questions.

How does one go about making a living as an artist? How do working artists manage to juggle their art production, marketing, all of the administrative tasks that come with running a business and their own personal life? What does it really take to be able to sell art online? How can we deal with artistic burnout/creative block in order to keep producing consistently?
Podcasts and YouTube videos created by working artists and art-business experts have been invaluable for me ever since I first started planning on leaving my last "normal" full-time position, up until today, as I navigate the challenges of online creative entrepreneurship (while still teaching and selling locally).
Today, I'll be sharing my top five.
Honestly, if it weren't for all of these amazing people sharing their own experiences and advice so generously, I don't think I'd be here today. I simply wouldn't of had the courage to leave my many years of working as an employee and starting my own art business.
Check out my past blog post/YouTube video titled How I Became an Artistpreneur to learn everything I did to prepare to leave my last full-time job.
I absolutely love listening to these podcasts as I draw or paint and I highly recommend all of them to anyone who's just getting started with selling their art or wants to make any amount of income through their artistic skills.
All of these are both inspiring and incredibly useful as they provide practical, actionable tips to help get your art career up-and-running.
I talk more about each of the podcasts in this video and you'll be able to find direct links to all of them below.
If you enjoyed this video and found it helpful, make sure to subscribe to my YouTube channel. I share a brand new video every week with art tips, drawing and painting tutorials and mindset/productivity tips for artists. *Subscribe HERE*
Best Podcasts for Artists
1. Creative Pep Talk
http://www.creativepeptalk.com/episodes/
2. Art Biz Coach Podcast
https://artbizsuccess.com/podcasts/
3. The Jealous Curator (Art for Your Ear)
http://www.thejealouscurator.com/blog/art-for-your-ear-podcast/
4. The Thriving Artist
https://clarkhulingsfund.org/chfpodcast/
5. Beyond the Studio
https://www.beyondthe.studio/
Hope you enjoy them and find them inspiring and helpful!


*This post contains affiliate links. I receive small commissions for purchases made through these links at no extra cost to you. These commissions help me keep this site up and running, in order for me to keep providing helpful and inspiring art content. :)
Do you struggle with keeping your art studio as clean and organized as you'd like? Do you wonder how so many artists/creatives manage to keep their working spaces so neat and tidy? Have you ever found the mess around you demotivating to the point that it affects your productivity levels?
Though the act of creating art can (and sometimes downright should) imply making some sort of mess, this doesn't mean we should be okay with our studios being in a constant state of chaos.
Of course, people's tolerance levels towards disorganization vary immensely, but our studios are an extension of ourselves and our work, and should be treated as such.
Personally, I like to work in an environment that inspires me to create and helps me be as productive as possible every-single-day. My artwork is important to me (and I hope that your artwork is important to you as well), and staying as organized as possible ensures that it is going to be protected and accessible.
In their article How to Design the Ultimate Craft Room (for Beginners) the pros from porch.com explain the benefits of having a craft room at home, and provide lots of tips to consider if you're just about to get started with creating your own!
I really enjoy learning tips and tricks from other creatives, and Ali from Cut, Cut, Craft ( www.cutcutcraft.com ) was super helpful to share some ideas with us in the following post!
Enjoy!
8 Ways to get (and stay) organized
by Ali Fields
Hey guys and gals! It’s Ali here from Cut, Cut, Craft! (www.cutcutcraft.com) with some practical and creative ideas on how you can keep your studio organized in order to make the best art you can.
In Erika’s own words, "the environment that surrounds us impacts our mood and creativity". Read her blog post titled How I Find Inspiration as an Artist and Some Ideas to Keep You Going.
This is true for the people you surround yourself with, as well as the sorts of art and entertainment you consume. But it is especially valid in your own art studio, the very place you want to be free to act on your creativity to produce wonderful creations.
If your space is cluttered and disorganized, your mind will spend precious resources distracted by the mess. It will take you extra time to find materials to get started on a new project. Your aim should be to lower the activation energy needed to create art.
Spend some effort on organizing your space, so it’s easy for you to dive in when inspiration strikes!
I’ll go through some general tips on how to get your art studio in working order, and give you specific ideas on how to implement each of them.
Let's get into the tips!
1. Purge your supplies (and donate them)
The first step in organizing your art space should actually be getting rid of all the stuff you don’t need or won’t ever use. You probably know if you have some hoarding tendencies, in which case you’ll have to spend some extra effort to actually acknowledge that you don’t need all those styrofoam spheres.
But don’t just toss any good markers and paints that aren’t getting use! Donate them! There are so many places that are happy to receive donated arts and crafts supplies: elementary and preschools, YMCAs, community centers, women’s shelters, churches, art centers, etc.
It’s best to donate locally.
So just do a quick Google search, “where to donate art supplies [your city/town/county name]” to find locations nearby.
Make sure that the supplies you donate can actually be used! Dried up paint and crusty paint brushes aren’t useful for anyone. So when you are purging your art supplies, you’ll need at least two piles: one for trash and one to donate.
2. Use containers for writing, drawing, and painting instruments
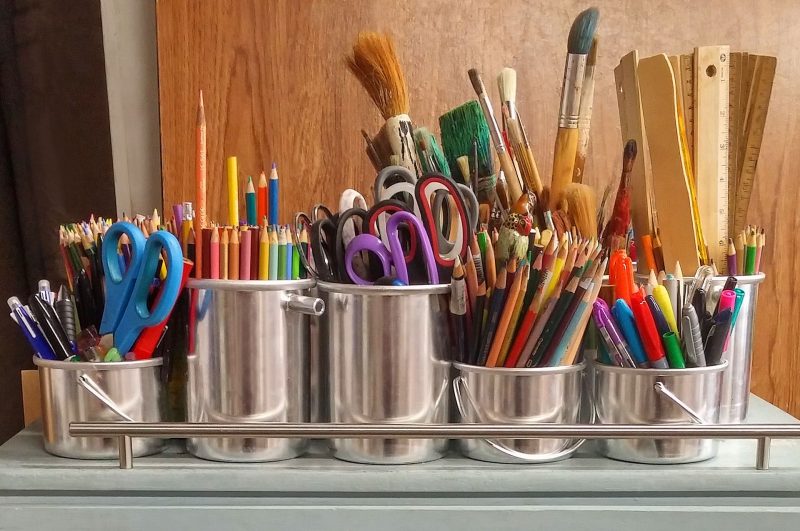
There’s no need to spend loads of cash on fancy decorative bins.
You can use tin cans and mason jars to store pens, pencils, markers, and paintbrushes (and decorate them yourself if you want). I personally like to use the $1 metal buckets from Target, but they aren’t always in stock.
You can also find all sorts of neat containers at dollar stores and thrift shops. These sorts of open containers make sure your tools are always visible and easily accessible.
Make sure to have enough containers that you can actually sort all your creative instruments with plenty of space. This way you don’t have to work to cram pens into overstuffed mugs or spend time trying to find just the right marker.
3. Have a designated place to store your works in progress
Some people are only working on one project at a time. Others have six or twelve different things that are waiting to be completed.
Regardless, you should always be able to clear off your work surface, and also protect your work from accidental damage, which means you need to have a place to put your WIP.
This is easiest for 2D art. If you have any adjustable shelving, make a short shelf or two, just a couple inches high, that are always kept clear so you can place your work there. There are also flat plastic ArtBins that are useful for keeping dust, lint, and hair off your work.
For 3D projects, a container on a larger shelf will work. I actually like to use the top bucket-shelf of the rolling Ikea trolley. (It’s called Raskog if you want to check it out.) For larger pieces, I’ll usually place projects up high on top of shelves so my kids don’t wander past and touch something delicate that needs a day or two to set.
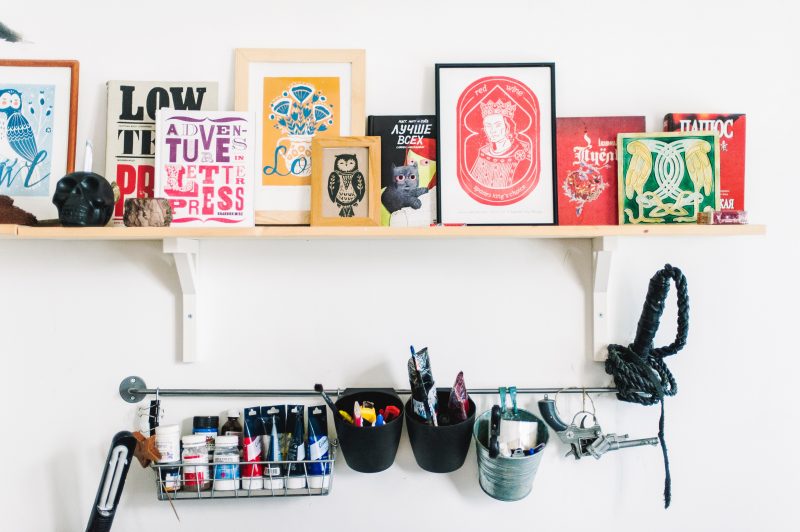
4. Take advantage of vertical storage
I know a lot of us are cramped for space. Maybe you only have a corner, instead of an entire room to use for creative purposes. In that case, vertical storage will absolutely be your new best friend. Use all the height you can!
Install shelves, cubbies, or racks that go all the way up to the ceiling. (But make sure to have a sturdy step stool so you can actually reach things at the top.)
I’m also a really big fan of pegboards for taking advantage of walls as storage, without protruding as far as shelves do. Yeah, the sort you’ll see at discount stores or maybe covering a wall of your pop’s garage.
They are super useful for hanging tools and buckets, but you’ll need the right accessories: straight and curved pegboard hooks. You can also get pegboard kit, with a great variety of hanging devices.
It’s all super affordable and available at any big hardware store.
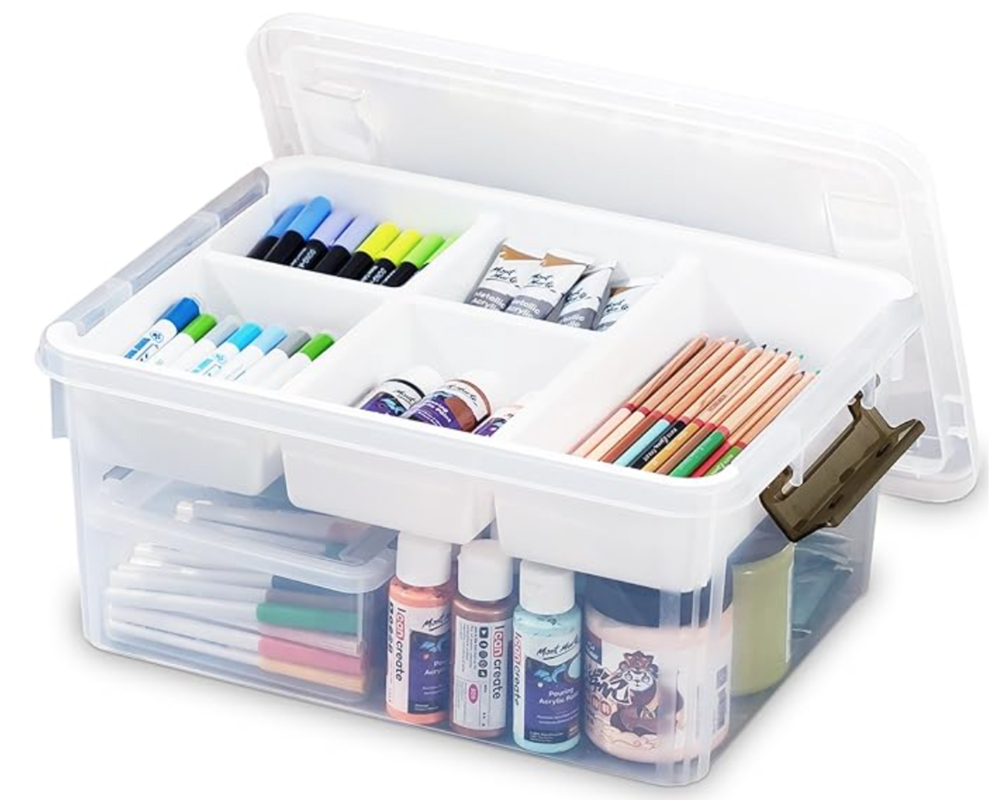
5. Use bins and boxes for larger items
Okay, so you have shelves, cubbies, or racks and finally have all these spaces to put your supplies away.
Don’t just make sloppy piles of materials! Those shelves will quickly become a black hole of lost utility.
Create separate containers for different sorts of materials and tools. Or group together all the supplies for a type of project, so your watercolor paints, brushes, and paper are all in a single box for easy use.
Plastic shoe boxes are an affordable option, and they only cost a couple bucks each.
Plastic Storage Box with Removable Tray
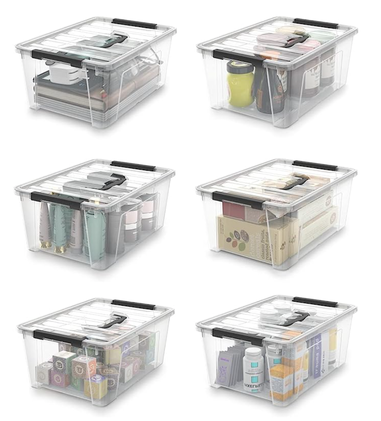
Storage Containers
|
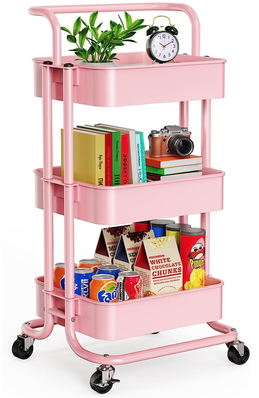
Storage Caddy
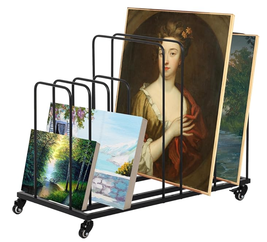
Adjustable Canvas Storage Rack
|
|
|
6. Hang your storage
Yes, I love to hang things!
It’s incredibly flexible storage you can rearrange as you see fit, which is great if you’re like me and maybe switch to a different art mode every few months.
So past pegboards, which I mentioned above, another of my favorites is using towel rods or curtain rods. You can find affordable ones at Ikea, or pick some up at a hardware store. I use S-hooks to hang buckets with supplies.
You can also hang string or wire across a wall, and use clothespins to display some of your work! It’s easy to rotate out what you are looking at, as the mood strikes.
Another option for hanging storage would be over-the-door storage. No shame in repurposing a hanging shoe rack to hold things like cans of spray paint or skeins of yarn.
Smaller over-the-door organizers are great for pens, markers, glues, and paint as well.
7. Label your containers
This one is big and was a total game-changer for me.
Before I started meticulously labeling my containers, my organization system would quickly decay the first time I was in a hurry to put everything away and just shoved supplies into whatever bin looked like it had enough space. “I can always reorganize it again later,” I thought.
Which I would have to do. Over and over again.
By labeling all your storage containers, you not only know where to find everything, you can also easily tell where to put everything away. Miraculously, all my pens and papers and ribbons and tapes now actually stay separated and useful.
And hey, labels can also be super fun to make! So take some time and make a pretty project out of it.
8. Once it's clean, keep it clean
Once you have a system in place for storing all the art supplies and projects you have decided you want to keep, you need to put in a little effort to maintain it.
At the end of the day, or when you are finished working on a project, spend a few minutes to put everything back in its proper spot. Clear off your work surface and put all your pencils or paints back in their spots.
This is time well-spent, and will absolutely save time for your future self (hey future self, have some time!).
Tomorrow, when you sit down to create something, you’ll have space to work and will be able to easily find all the things you want to you.
Best of all, you’ll be more likely to actually make more things, because your creative space will be so much easier to use.
And since it’s so sensible, I’m going to go ahead and crib Erika’s Ben Franklin quote here as well:
“For every minute spent organizing, an hour is earned.”
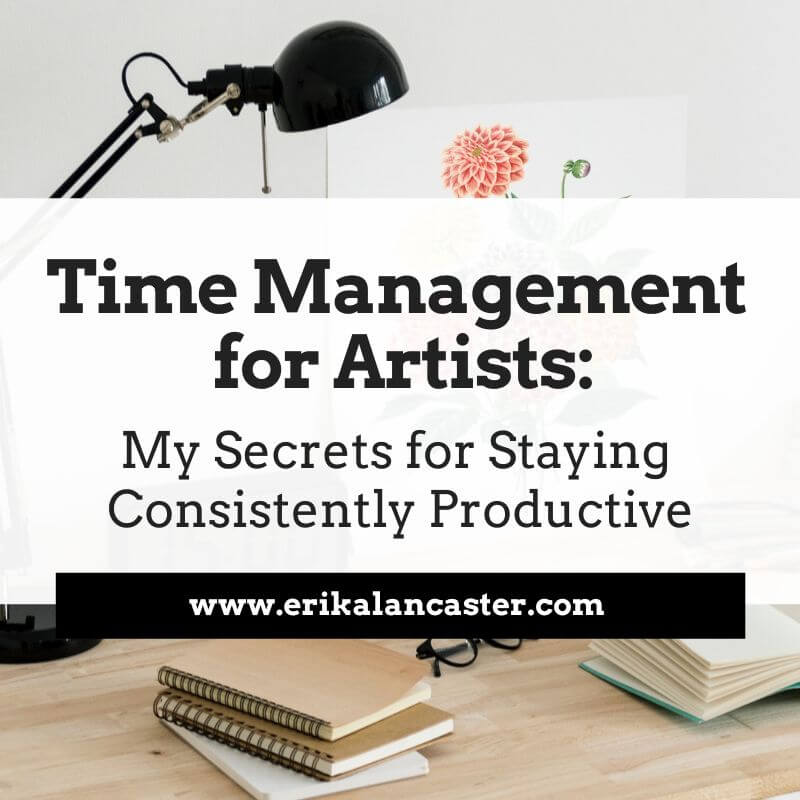
For more ways to save time and be productive, check out Erika's blog post
Time Management for Artists: My Secrets for Staying Consistently Productive.
Alright, that’s all the organizational advice I have for you today!
Thanks so much to Erika for letting me share my ideas here. I hope you all find some of these tips helpful for keeping your art space organized and functional.
I’m sure you guys have all sorts of things you use to organize your own space, so please share them below so we can all benefit!

|
Ali Fields is a crafting geek who writes DIY tutorials and reviews over at Cut, Cut, Craft! Her latest obsession? The Cricut Maker Follow her on social media: Pinterest: https://www.pinterest.com/cutcutcraft Facebook: https://www.facebook.com/cutcutcrafting Twitter: https://twitter.com/cutcutcraft |
Sending out a huge thank you to Ali for sharing all of these useful ideas with us today! Hope you found it helpful.
Cheers!


www.erikalancaster.com
is a participant in the Amazon Services LLC Associates Program, an affiliate advertising program designed to provide a means for sites
to earn advertising fees by advertising and linking to amazon.com.
www.erikalancaster.com
is a participant in the Shareasale.com Affiliate Program, an affiliate advertising program designed to provide a means for sites to earn advertising fees by advertising and linking to Shareasale.com partner companies.
 RSS Feed
