*This post contains affiliate links. I receive small commissions for purchases made through these links at no extra cost to you. These commissions help me keep this site up and running, in order for me to keep providing helpful and inspiring art content. :)
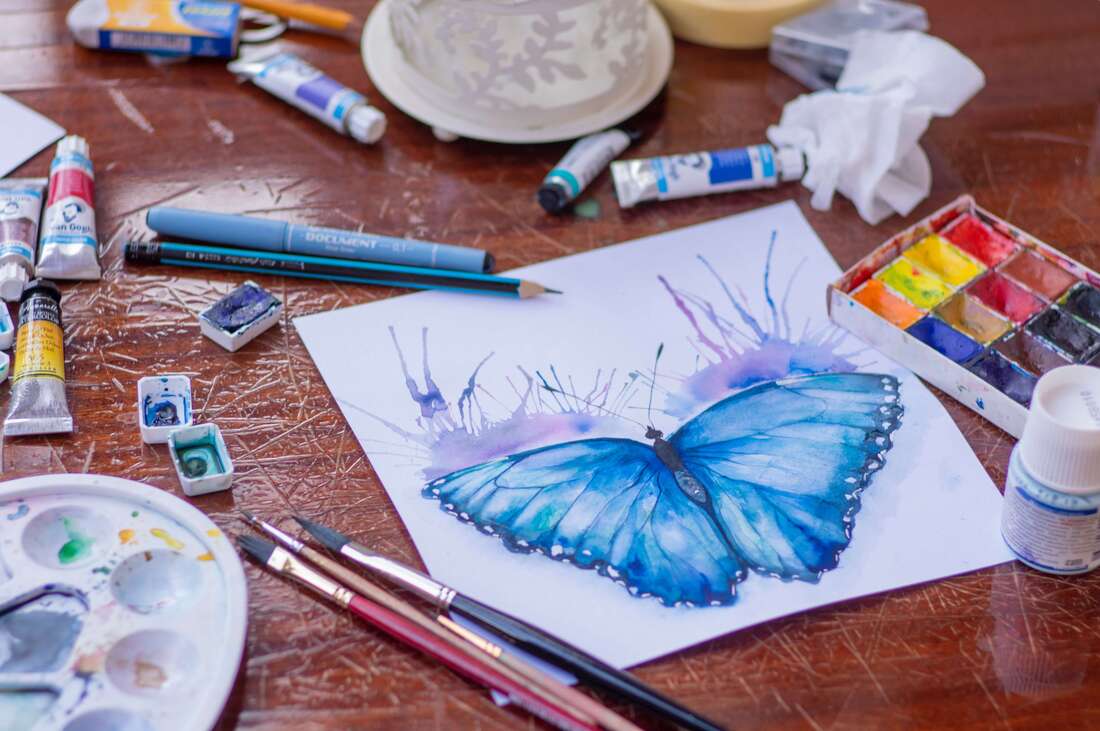
Looking for new techniques to make your watercolor paintings more unique and interesting? What are watercolor blooms and how are they created? Watercolor is a challenging, but extremely rewarding painting medium. As opposed to mediums like acrylics or oils, watercolor encourages us to be light-handed, to embrace surprises, and to not overly describe our subjects. Because plenty of water is brought in throughout the painting process, there's only so much that we can actually control. In order to arrive at great watercolor paintings, we must learn to balance between strategizing and letting go. Yes, it's important to think critically and go in with a plan in order to arrive at the results that we're after, but it's also important to allow the water/paint to do their own thing and to embrace surprises that happen along the way. By learning new techniques, we develop a deeper knowledge of the medium and discover new ways to make more intentional use of the unique effects that watercolor allows. Blooms are one of the effects that this medium is known for. They are a great technique to know about, as they can help us add great visual textures, as well as deliberate points of interest to our artwork. 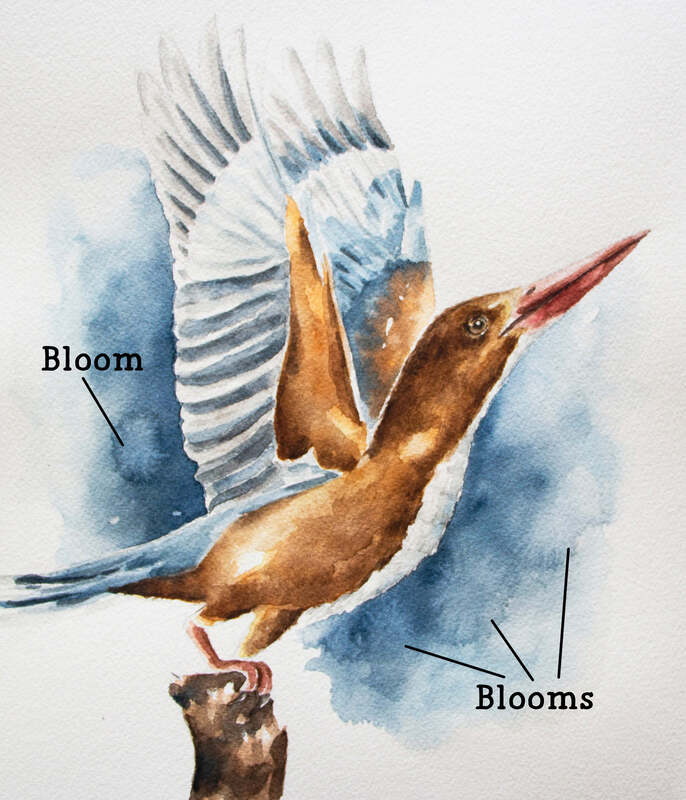
Kingfisher watercolor painting by Erika Lancaster.
Today, I'm excited to share another very helpful guest blog post that shares lots of information about watercolor blooms, and 5 different ways they can be created. Dee Maene is a London-based artist and art teacher. She has a deep love for watercolor and enjoys exploring different artistic mediums, including digital drawing and painting. Dee enjoys bringing in experimentation and play into her creative practice, and has a passion to encourage others to do the same. She likes pushing herself artistically, and strives to produce artwork that's not only beautiful, but meaningful. Without much further ado, let's jump into her article! 5 Ways To Create Beautiful Watercolor Blooms
By Dee Maene
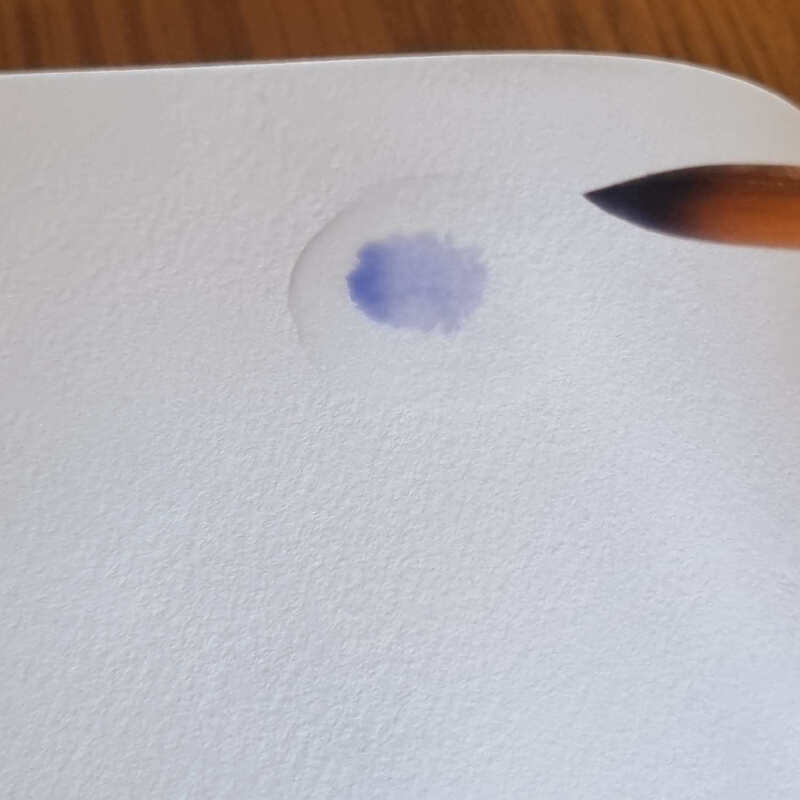
Watercolor blooms are a great way to add life to your paintings. They are also not only incredibly satisfying to create, but relatively easy to do once you get the hang of water control. Blooms happen when a drop of water falls on wet paint and spreads, pushing the paint that's on the paper outwards. They can be created by dropping in clean water into paint, or by dropping in more paint into paint, as long as that initial layer of water/paint is still wet. Watercolor blooms are one of the most magical things that can happen when painting with this medium. They are unique to watercolor and definitely add an element of surprise to the painting process. Another reason why it's important to know different ways to create blooms, is because they enable us to create softer effects that have a more ethereal quality than regular brushstrokes, which can add variety and a touch of elegance to your paintings. So, if you're looking to add a little bit of magic to your watercolor paintings, definitely try experimenting with blooms! There's a variety of different ways blooms can be created and, in this blog post, I'll be sharing 5 techniques that you can start using today. Technique 1: Dropping a Single Color On Water (Basic Watercolor Bloom Technique) One of the simplest and most effective ways to create a watercolor bloom is to drop a single color into water that's been applied on your painting surface. The bloom will happen naturally as the paint spreads out into the water. This technique is especially effective with darker colors, such as blues and greens. Step-by-step process: 1. Pre-wet a section of your paper with clean water using a larger brush and going over the area at least 3-4 times to arrive at an even sheen. 2. Swivel your paintbrush in your container of water to pre-wet it, and load it with nice, juicy color you've prepared on your mixing palette. 3. Touch the tip of your brush to the surface of the water. 4. Allow the color to drop from the brush onto the water. 5. Repeat steps 3-4 until you have achieved the desired effect. 6. Allow the bloom to dry before adding additional colors or details. This basic technique can be used to create a wide variety of effects, from delicate flowers in landscapes and scenes, to textures and points of interest in abstract pieces. With a little practice, you'll be able to produce beautiful blooms that are truly one-of-a-kind.
Dropping paint into wet paper.
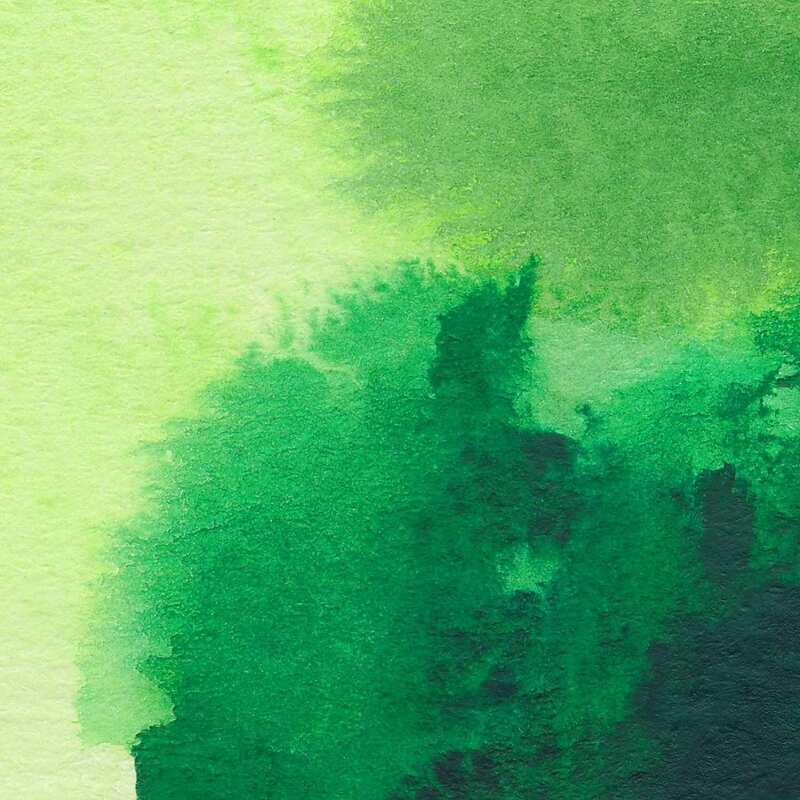
Technique 2: Dropping In Two Colors The graded watercolor blooms technique is achieved by dropping two colors side-by-side on wet paper. The colors will mix together where they meet and create a bloom effect. This technique is best achieved with two colors that have high levels of pigment, such as Magenta and Cobalt Blue. It's important to work quickly when dropping the colors onto the paper, as you want them to mix together before they start to dry. Also, make sure that you completely remove the previous color from your paintbrush bristles before loading your paintbrush with the next color. To create a more pronounced bloom effect, you can drop the colors from a higher height, farther away from the surface. This technique can be used to create beautiful and atmospheric paintings with a soft and ethereal quality. I often use this technique when creating galaxy watercolor paintings.
Dropping in a different color on or beside a previous color.
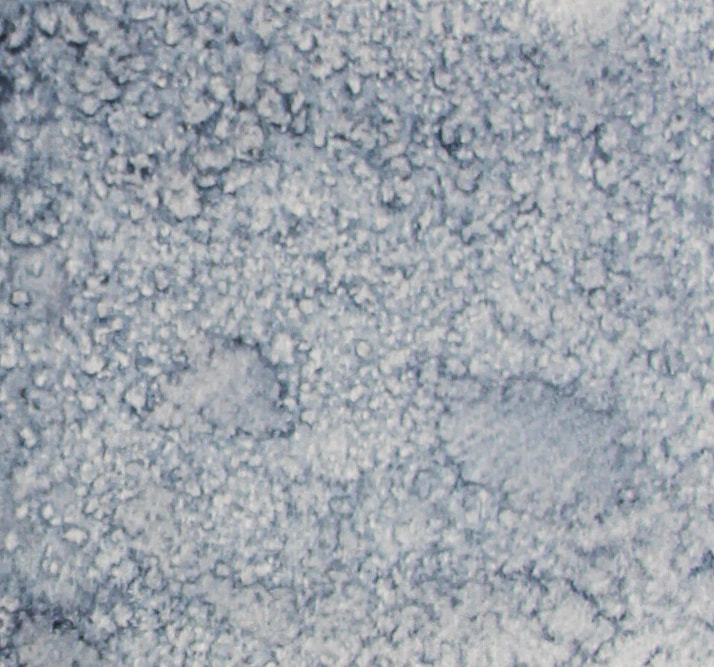
Technique 3: Using Salt The salt technique is another great way to create blooms, though this one is more so used to create visual texture in larger areas. By sprinkling salt on wet paint, you can achieve a variety of effects depending on the amount and type of salt used. For example, coarse salt will create larger blooms, while fine salt will create smaller blooms. You can also experiment with different types of salt, such as Epsom salt and Kosher salt, to see what effects they produce. In addition, you can control the intensity of the blooms by adjusting the amount of salt you use. A little salt will create subtle blooms and less visual texture, while a lot of salt will create more dramatic blooms and a higher visual texture. Whether you're looking for delicate flowers in landscapes, or to add snow into snow scenes, using salt is a great way to add interest to your watercolor paintings. Step-by-step process: 1. Paint a wash of color on your paper (I'd recommend using a darker color). 2. Sprinkle in salt, while the paint is still wet. 3. Allow paint to dry completely. 4. Dust off salt to reveal the beautiful visual texture.
Dropping in salt into wet paint. *Left image shows salt granules just dropped into wet paint. Right image shows the texture created once the paint has dried and salt hast been removed.
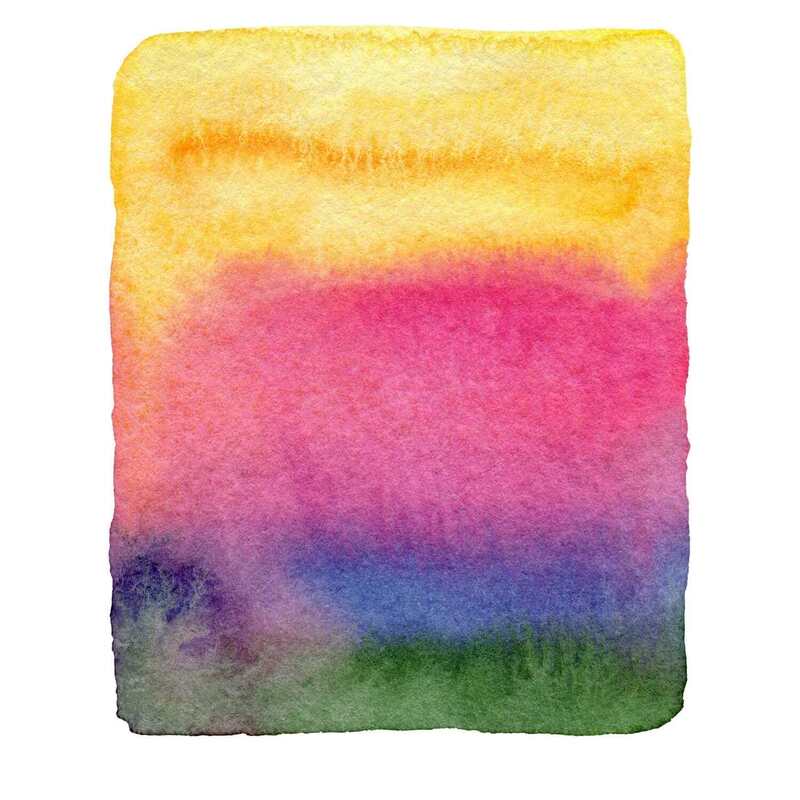
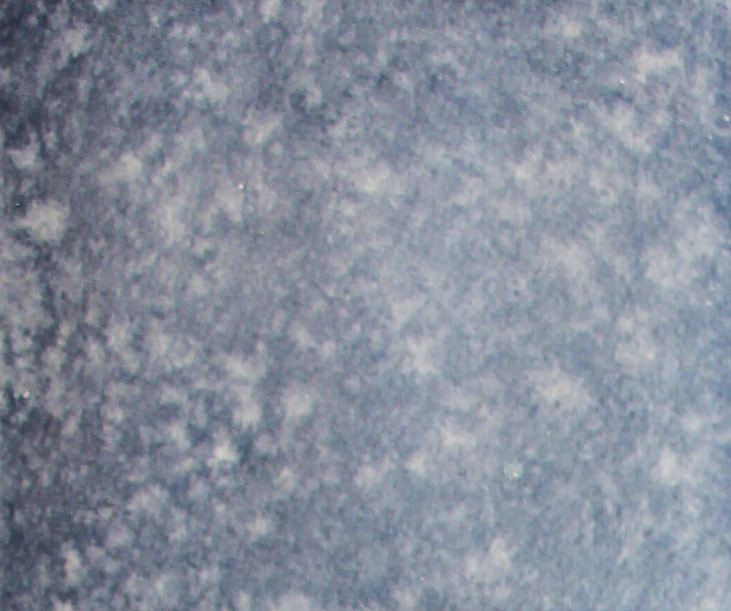
Technique 4: Dropping Clean Water Into Color We can also create watercolor blooms by dripping clean water on wet paint. The drop of water spreads and pushes the paint outwards, revealing more of the white paper underneath and creating a whitish bloom. Step-by-step process: 1. Start by painting a shape on your paper with any color. You can drop in another color if you'd like. 2. While the paint is still wet, use a dropper, a pipette, or a paintbrush loaded with only a small amount of water, to slowly drip water onto the center of the shape. 3. Allow to dry. You can control the size and shape of the bloom by adjusting the amount of clean water you drop in. Experiment with different colors and techniques to create unique blooms. By splattering clean water on wet paint, a mottled texture can be achieved via tiny blooms!
Dropping in water into wet paint. *Image on the left shows water that has been dropped into wet paint. Image on the right shows visual texture created when paint has been splattered onto wet paint.
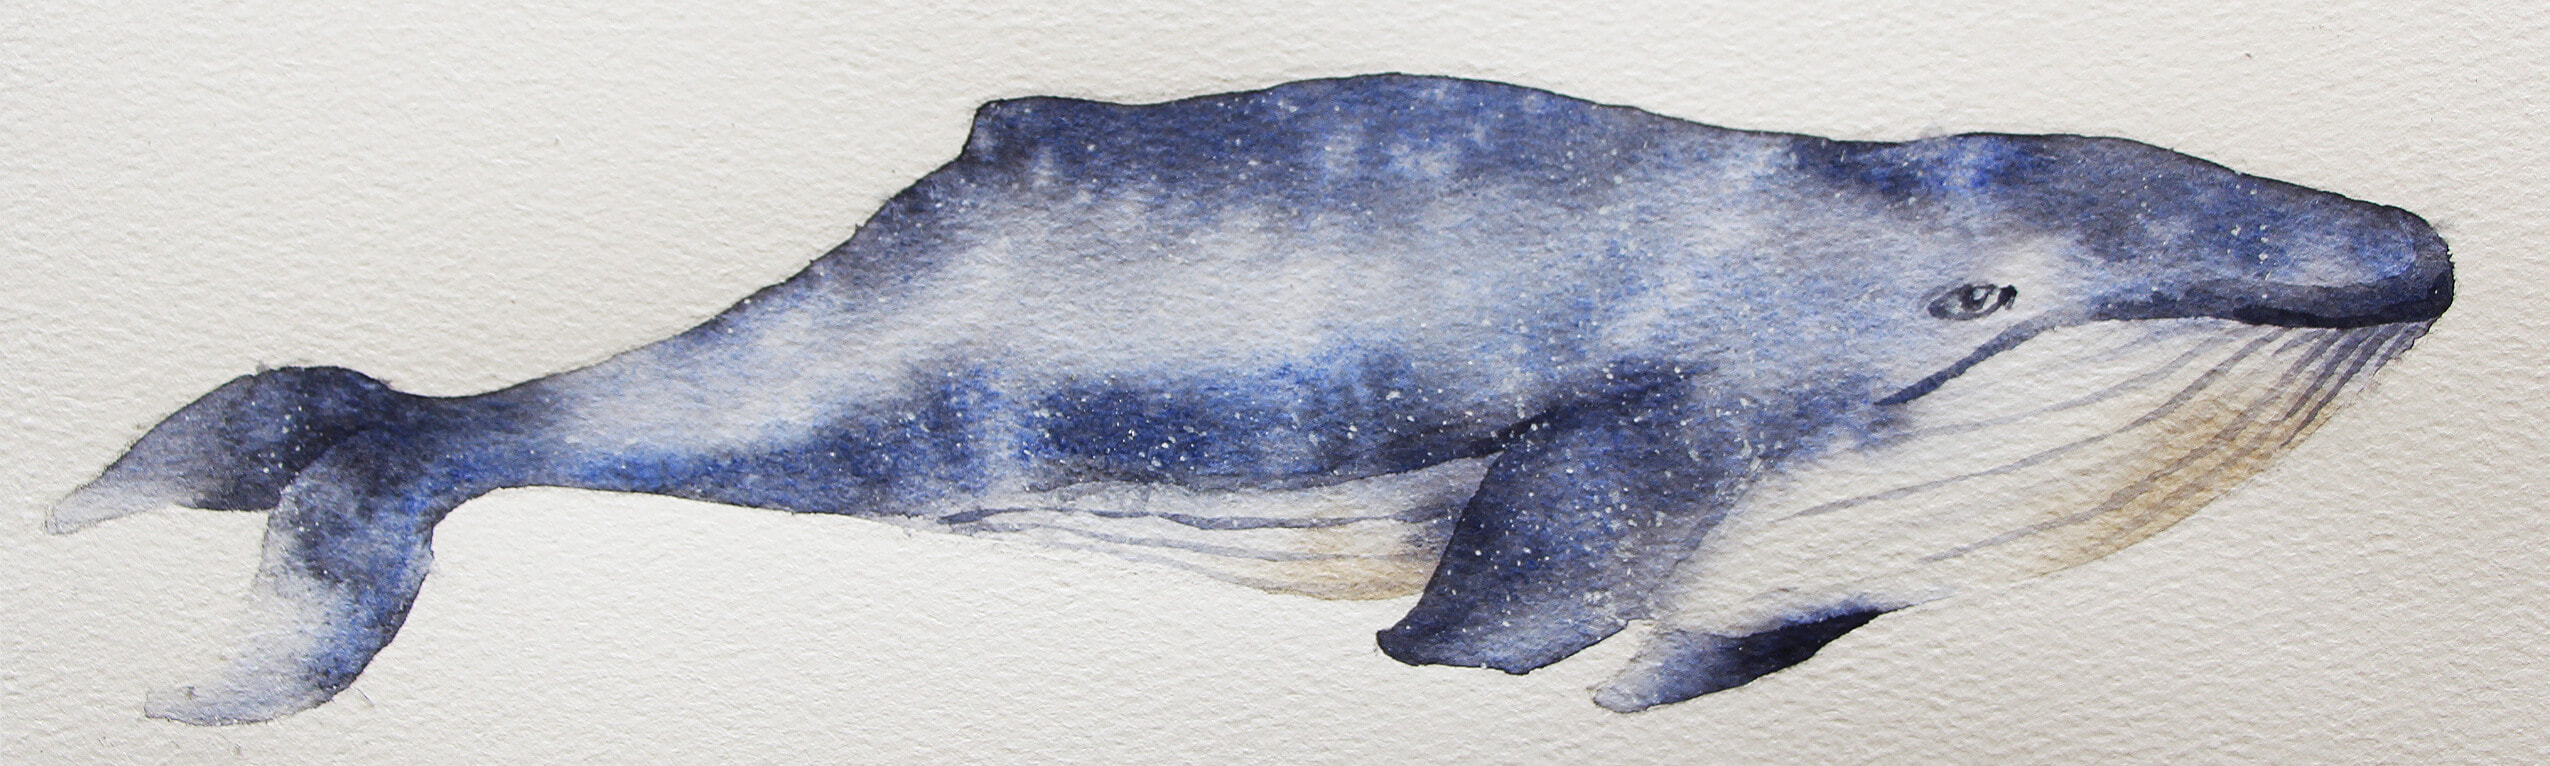
Watercolor Blue Whale by Erika Lancaster. Mottled texture was created by splattering clean water on the blue-gray color while it was still wet.
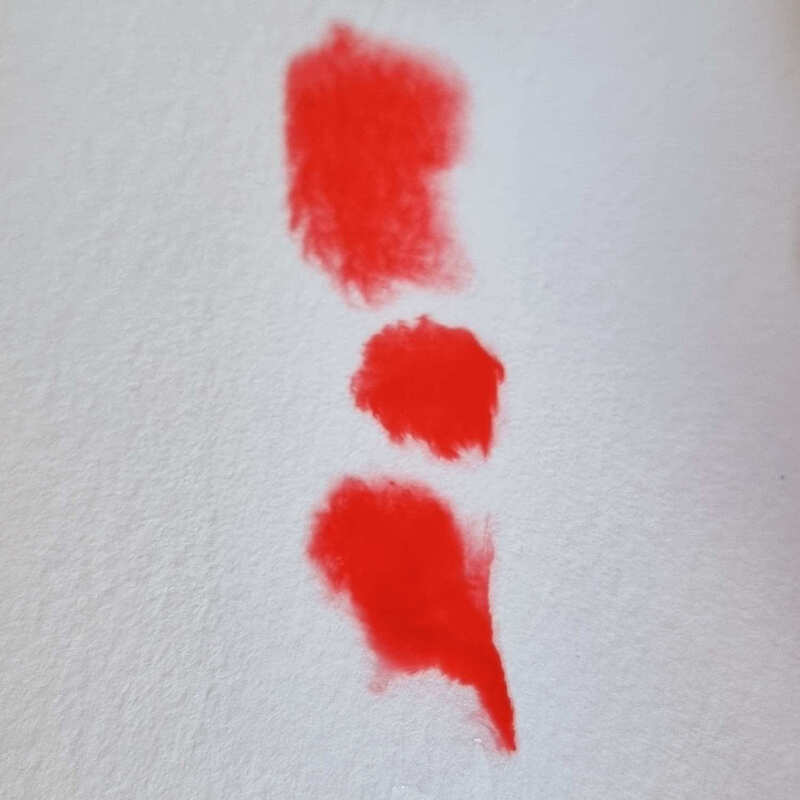
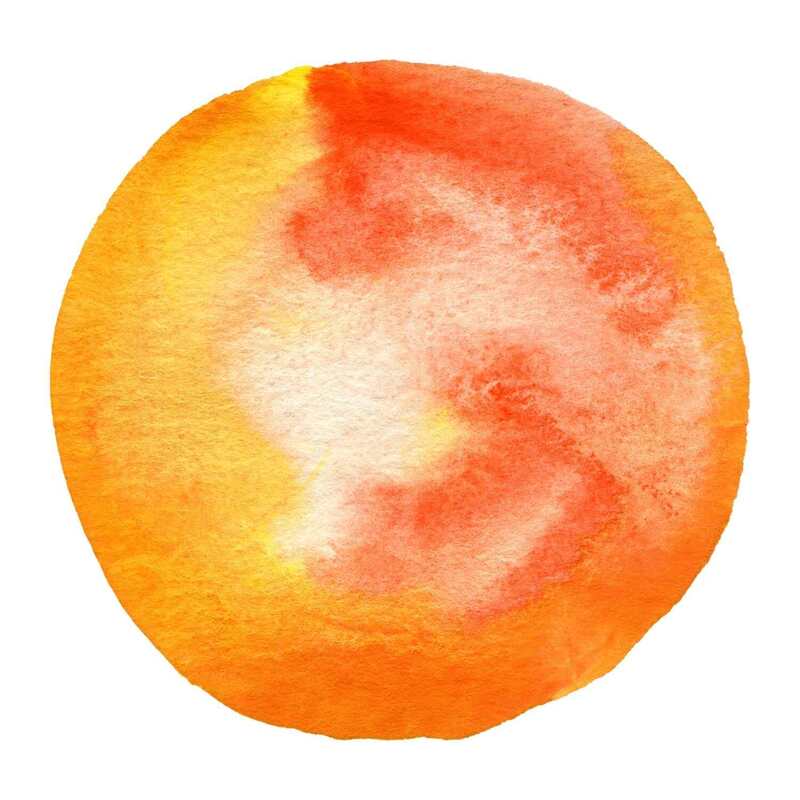
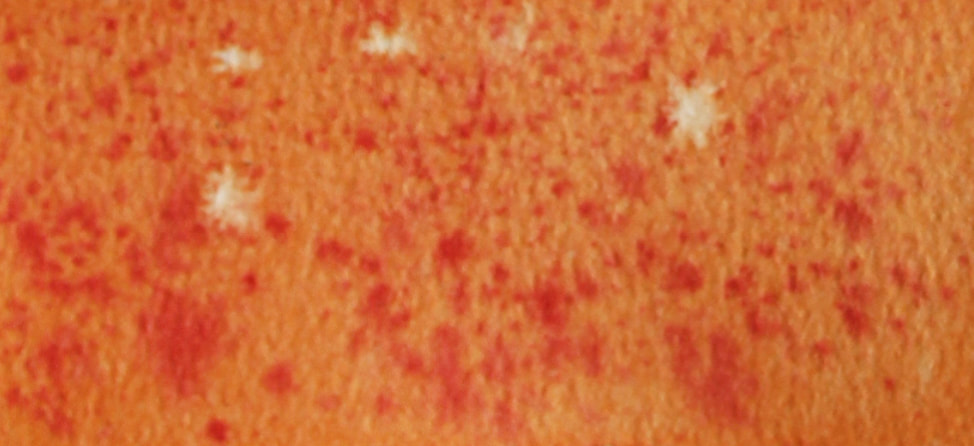
Technique 5: Splattering Color Into Water Flicking wet paint on wet paper, whether it's been pre-wetted with clean water or a colored wash has been applied, is an easy and fun way to create a speckled texture. You can use any color paint you like, but I find that using two or three colors works best. The consistency of your color mixture has to contain a good amount of paint in it, and some amount of water. Make sure your mixture doesn't have so much water that you start dripping water all over your painting and too much water runs down your paintbrush as you're doing your flicking. Hold the brush close to the paper and then quickly flick your wrist so that the bristles hit the paper with a light tap. Another way you can do this by loading up your paintbrush with paint, and use your Index finger to flick your paintbrush bristles. This second option works great when you're using synthetic brushes that have spring-y bristles that "snap" back. You can experiment with varying the amount of paint on the brush, the type and size of paintbrush used, and the distance from the paper, to get different effects. Once you've made a few dots, take a clean brush and blend them together lightly. Add more dots if you want a fuller effect. Allow the paint to dry completely before framing or displaying your work.
Flicking/splattering paint on wet paper. *Image on left shows two different colors splattered on paper. Image on right shows red paint splattered on orange paint that was still wet. The wetter the paper is, the more "blurred" and soft the edges of those shapes will be.
Must-Know Tips For Better Watercolor Blooms 1. Choose the right type of paper Different types of paper absorb water differently, and this can impact your painting. Choose a good-quality watercolor paper that is thick enough to hold the water without buckling or warping. I recommend using cold-pressed paper that is at least 140 lb/300 gsm. This type of paper is thick enough to hold the water without warping, and it will also give your painting a nice textured finish. If you're looking for a smooth finish, you can use hot press watercolor paper. This type of paper has a smooth surface that is ideal for painting detailed blooms. Just keep in mind that hot press paper is a bit more delicate and can warp more easily. 2. Use a light touch When painting watercolor blooms, it's important to use a light touch. This will help prevent the paint from spreading too much and ruining your painting. If you want more control over the way your watercolor paint flows, use a smaller brush and add the paint slowly, building up the color gradually. I use a size 3 or 4 round brush for most of my watercolor blooms. And remember, you can always add more paint if you need to, but it's much harder to remove paint once it's on the paper. So start with a light touch and then build up the color gradually until you get the effect you're looking for. 3. Add water sparingly Too much water can cause the paint to run and make your blooms look muddy. Add water sparingly, and only when necessary, to avoid this problem. I like to use a small spray bottle to mist my paper before I start painting. This gives the paint something to cling to so that it doesn't run too much when I add water. If you do accidentally add too much water, simply blot the excess moisture with a paper towel. Be careful not to rub the paint too hard, or you'll end up with a blurry bloom. 4. Use different colors for variation One of the best things about watercolor blooms is that you can use any color you want. To add interest and variation, try using two or three colors instead of just one. I like to use a light color for the base of the bloom and then add a darker color around the edge. This creates a nice contrast that makes the blooms pop. You can also experiment with different color combinations to see what you like best. Just remember to stay within a similar color family so that you don't accidentally create a color you don't want when they start intermixing. 5. Experiment and have fun The best way to learn how to paint watercolor blooms is to allow yourself to explore, simply for the fun of it. Try different techniques, colors, and papers until you find a look that you love. And don't be afraid to make mistakes. Watercolor is a forgiving medium, and even the most experienced painters make mistakes. Just relax and enjoy the process. With a little practice, you'll be able to create beautiful watercolor blooms! Frequently Asked Questions What is a bloom in watercolor? A bloom is a type of watercolor painting technique where paint is spread outwards from a central point, creating a flower or cauliflower-like effect. How to avoid watercolor blooms? There are a few things you can do to avoid watercolor blooms: use the right type of paper, use a light touch, and develop great water control. It's all about making sure that the amount of water in your paint mixtures, in your paintbrush bristles, and on your paper is what you need for what you're trying to do. If there's too much water in any of these, or not enough, it'll be hard to arrive at the effects you're after. This is why we have to constantly check on these three things during the painting process. What causes watercolor blooms? Watercolor blooms are caused by adding water to wet paint. The water disturbs the paint, pushing it outwards and creating a bloom effect. How do you control watercolor blooms? You can control the size and shape of watercolor blooms by adjusting the amount of water you add. Experiment with different techniques to get the results you want. What causes back-runs watercolor painting? Back-runs are created when we drop in way too much water (or watery paint) on paint that is still wet. If our paper is still wet, and we're going to be dropping in paint or clean water to create blooms, we have to be in control of the amount that we're dropping in. If too much drips down, it can flow into areas we don't want and we can create splotches. It's all about water control! The more you practice, the more easily you'll be able to tell when there's way too much water in the three key areas mentioned before (paint mixtures-paintbrush-paper). You'll intuitively change the paint-to-water ratios in your mixtures, load up your paintbrush more or less, and add more water to your paper (or allow it to dry), depending on what you're intending to do in that point in time in the painting process. Practice these five key techniques to create beautiful blooms in your watercolor paintings. Remember to experiment and have fun with this medium – the possibilities are endless! 
I hope this post was helpful and inspiring for all of you getting started with watercolors! Thanks so much to Dee Maene for so generously sharing all of this useful information with us. Thank you for reading and I wish you tons of progress and enjoyment in your art journey.
2 Comments
*This post contains affiliate links. I receive small commissions for purchases made through these links at no extra cost to you. These commissions help me keep this site up and running, in order for me to keep providing helpful and inspiring art content. :)
Struggling with an art block or creative rut? Looking for ideas to get the most out of Inktober this year? Eager to take your art further, whether in terms of skill development or expanding your audience? Participating in online art challenges can be an amazing way to get back into creating art consistently after a break, as well as to improve your drawing/painting skills in a short period of time. Not to mention, because so many people will be participating and sharing consistently, it's also a great way to get your art out there and start growing your name as an artist. I've personally participated in Inktober a few times in the past and have gotten a lot from pushing myself to complete them. You can check out video timelapses I've shared of past sketching processes, things I learned from the challenge and more in past posts. I also recently shared a video over at my YouTube channel in which I explain the main reasons why participating in daily art challenges like Inktober can be so powerful for artists, as well as my main tips to help you reach the finish line while enjoying every step of the way. You can check it out here. To add to the Inktober/Fall art challenge goodness and helpful tips, I'd love to share an article today which was kindly contributed by Debbie Woodliffe. Debbie's not only been working in the creative industry for nine years, but has always had a deep love for art and it's been her hobby her entire life. As a creative, Debbie knows what it's like to struggle with blocks. Inktober and similar challenges have helped her move past them and get back into the flow of consistent art creation. Below, she'll be sharing her top tips that'll help reignite your creativity and take your art to a new level with Inktober 2021. Without further ado, let's get into her article!
|


I hope this post was helpful and inspiring!
Thanks so much to Debbie Woodliffe for so generously sharing all of this useful information with us. It has certainly gotten me excited for Inktober and all the amazing work I'm sure I'll get to see next month.
Thank you for reading and I wish you tons of progress and enjoyment in your art journey.
For a list of my favorite art supplies, go here.
*This post contains affiliate links. I receive small commissions for purchases made through these links at no extra cost to you. These commissions help me keep this site up and running, in order for me to keep providing helpful and inspiring art content. :)
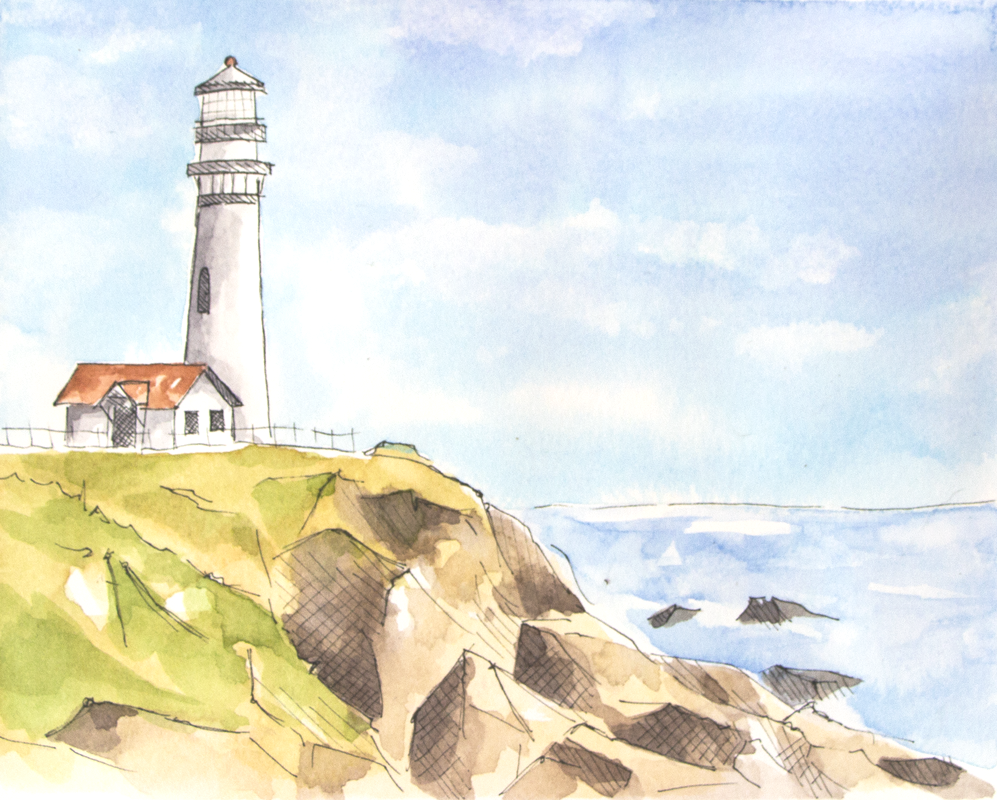
Love the look of pen and watercolor artwork and want some tips to get started on the right foot? What are the must-know things to have in mind when combining ink and watercolor in order to avoid undesired accidents? What are some good options for supplies when it comes to ink pens and bottled inks?
Watercolor and ink go together like bread and butter.
As an artist with experience working with a vast array of traditional drawing and painting mediums, I've found very few combos that can so easily create such striking and professional-looking results.
I'm a huge fan of both painting with watercolor as well as of pen and ink sketching, and have released helpful blog posts and videos to help beginners improve their skills with both.
In today's blog post, we're covering the must-know basics to know about when looking to use these two mediums in combination, which brings up a whole new set of questions in terms of process and supplies.
A variety of step-by-step pen and watercolor wash tutorials for beginners can be found over at my membership site on Patreon.
As with all mixed-media art creation, it's incredibly important to consider how the mediums we're going to be using will be interacting and affecting each other throughout the art-making process, but also how the piece will hold up over time after the artwork has been completed.
By doing a bit of research, choosing the right art supplies, visualizing what results we're after, and planning the techniques/general strategy we'll be using before getting started with a new piece, we can ensure a smoother process and it'll be much more likely that we'll arrive at results we'll love.
Today, I'm incredibly pleased to share an article written for us by pen and ink expert K.T. Mehra. She is the founder of Goldspot Pens, a store based in New Jersey that is dedicated to selling not only beautiful, high-quality fountain pens, but also incredible inks, writing instruments and paper.
Alongside the hard work she does in her company, she's incredibly passionate about literature, history and, you guessed it...art!
Without much further ado, let's get into her helpful tips and recommendations for supplies.
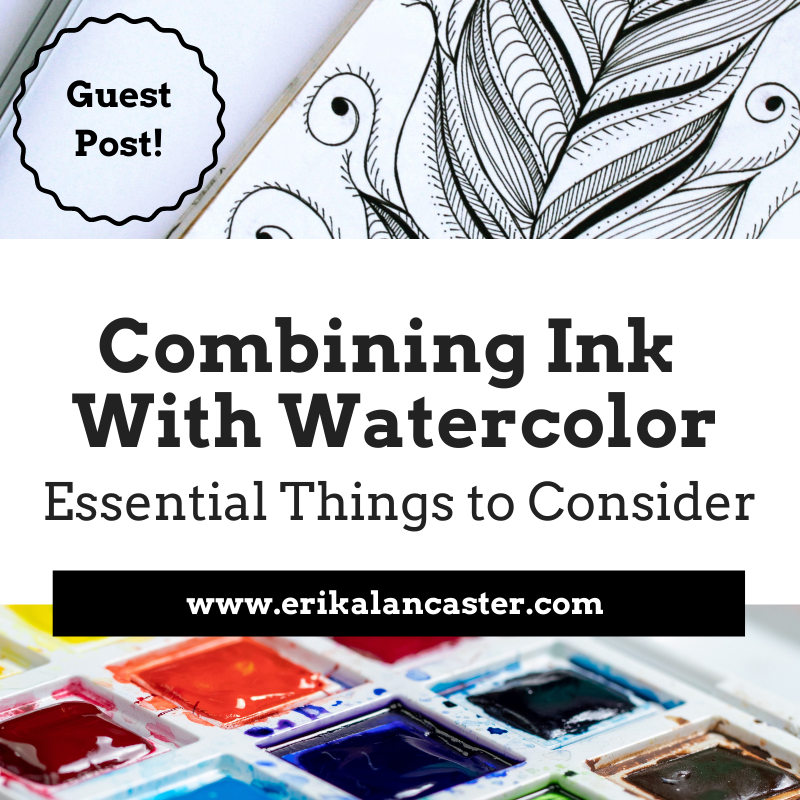
Combining Ink With Watercolor:
Essential Things to Consider
by K.T. Mehra
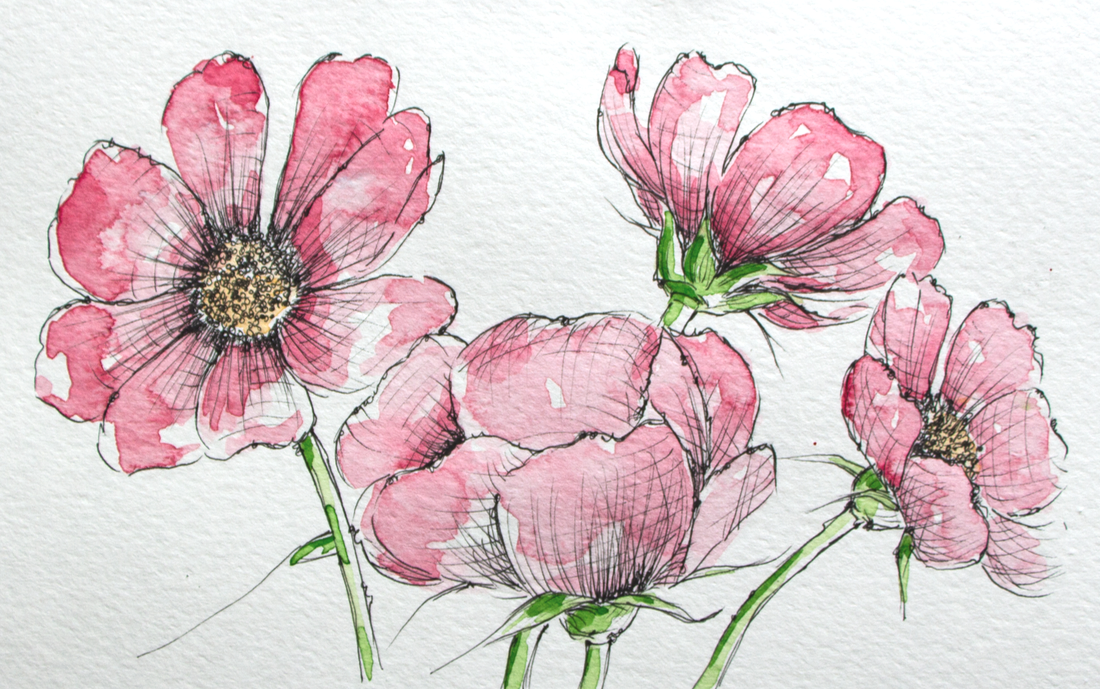
Watercolor and ink work together beautifully, and this combination of mediums can certainly lead to a variety of amazing effects and styles.
Line work created with dark inks can be colored in with bright watercolor washes for very impactful, modern-looking pieces, but there's also so much room for exploration, creativity, and for artists to bring in their own personalities into the process.
To make it easier for artists just getting started with ink and watercolor, I’ve written a short list of must-know aspects to consider when choosing pens and inks to combine with watercolor. Afterwards, I'll be sharing my favorite options for both ink pens and bottled inks.
Before getting into anything else, when buying inks to combine with watercolor (whether in pen or bottled format), it's important always ask yourself the following four questions:
1. Is it waterproof?
The first and most important factor you want to consider is whether your ink is waterproof. This will determine whether it'll bleed or smudge when water is applied on top of the ink.
When working with watercolor, you'll need quality waterproof ink. This will allow your line work to stay clean and sharp as you apply paint over it. Most pens and inks will be labelled as 'waterproof', whether in pen form or bottled format.
2. Is it water-soluble?
You may come across inks and pens that state they are 'water-soluble'. You want to avoid these inks, as they are made with water and will run when combined with watercolor.
These can be used to create particular styles, but are not ideal for most cases when you're looking for a good ink or pen to use in combination with watercolor, as the ink will run and smudge, and very possible affect the vibrancy of your washes of color.
It's best to assume that any ink pen contains water-soluble ink and will not be ideal for use with watercolor unless its specifically states that it is waterproof. You also usually want to avoid any pen or ink that says it’s 'water-based'.
3. Is the ink pigmented?
Oftentimes it's not 100% clear whether the pen contains waterproof ink or not. One sign that the pen is most likely waterproof and usable with watercolor is if it includes the words 'pigment' or 'pigmented ink' on the pen or bottle.
Pigments are tiny particles of colored material that do not dissolve in water. In other words, they are rarely water-soluble or water-based, which makes them good for use with watercolor.
4. How long does it take to dry?
Another factor you want to consider is the ink’s drying time. If you apply watercolor too soon after drawing with ink, it's likely that some smudging will occur.
Most inks will dry after an hour or two, but to avoid this completely, you’ll want to wait 12 to 24 hours for the ink to fully dry and set into the paper.
If you don't want to wait this long for the ink to dry, make sure that to purchase a fast-drying ink. I'll recommend my favorite below, so keep on reading!
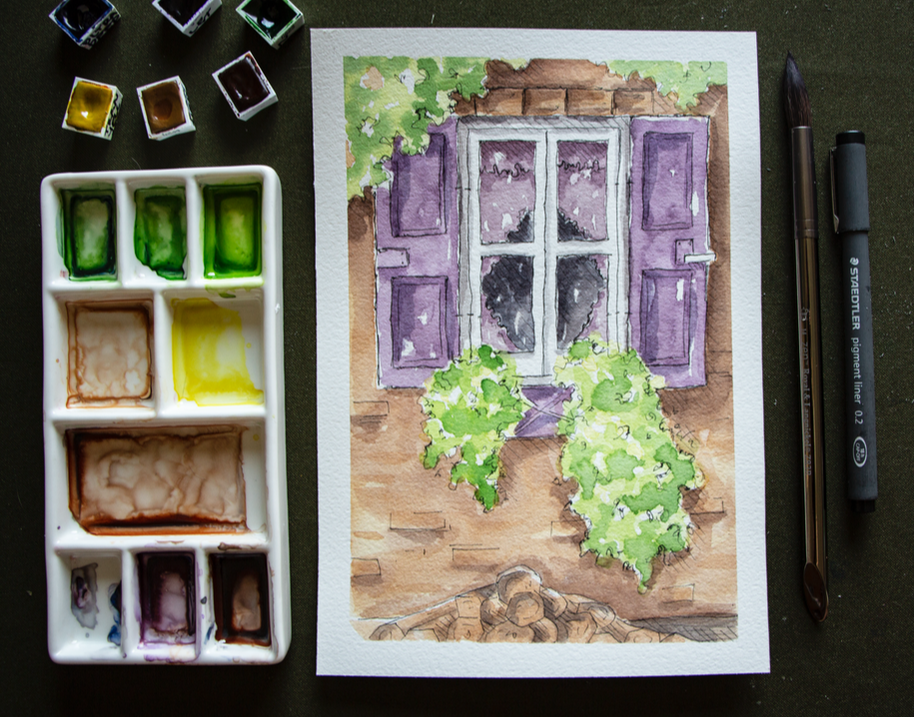
Are you supposed to do your ink line work before or after your watercolor washes?
This is a great question, and the answer is even better.
The truth is... either way works!
There are pros and cons to both methods, but it's ultimately up to you to experiment and determine what'll work best for you, making sure, of course, that you're taking precautions and allowing layers the necessary time to dry in between.
It depends on the artist's personal way of working and the outcome that he/she is going for.
A reason you might want to do your ink work before watercolor is that it allows you to focus on your line work and/or outlines first, establishing a type of preliminary sketch to work with. You're then able to begin applying watercolor washes and it's easier to stay inside the lines and have more control over where the color is applied.
Also, you'll likely find that the pen glides across your paper more smoothly when there's no paint on your paper yet, which can be a pro for many artists.
A reason you might want to do your ink work after your watercolor painting process is if you're looking for your line work to be very clear and visible.
Doing your line work after your washes also allows you to first freely paint with watercolor, creating abstract shapes and organic effects which can then serve as a guide or a type of underpainting for the line work that'll come later.
This technique is great for artists who love the looseness and interesting effects watercolor allows, and want the paint to be the primary creative force structuring the artwork.
It's also important to note that, when doing your ink work after your watercolor painting, you're also able to use water-soluble inks, as long as you've allowed your painting to dry for 24 hours.
Have fun, explore and get creative with your process!
Ink and watercolor can and should be used in new ways that give your pieces a unique personality and character. I'd recommend exploring both sequences and analyzing which results you like best.
A variety of step-by-step pen and watercolor wash tutorials for beginners can be found over at my membership site on Patreon.
Best Waterproof Pens For Use With Watercolor
Now that we’ve covered the basic things to consider when searching for an ink pen or bottled ink to use in combination with watercolor paint, let’s look at the best waterproof pens available (in no particular order).
Uni-Ball Signo Gelstick Pen
The Uni-Ball Signo is a great beginner-friendly option. It's affordable and one of the best ink pens for use with watercolor. It's waterproof, fade-proof, and is able to create smooth, thin lines. It also doesn’t leave stop and start marks at the end of long lines and marks like most gel pens do.
*Most Affordable *Best Gel Pen
Sakura Pigma Micron Series
If you’re looking for a slightly more professional fineliner pen, the Sakura Pigma Micron is a great option, and it's one our favorite fineliner pens for use with watercolor. The Sakura Pigma Micron draws smooth, thin, and very consistent lines that can really help bring together watercolor pieces.
Artists around the world swear by the Pigma Micron for its precise and professional line work.
*Best Fineliner Pen
Lamy Safari Fountain Pen
Using disposable pens can definitely become expensive because they have to be replaced after a relatively short period of time, especially when using them for drawing/sketching purposes.
We recommend, as an alternative, using a fountain pen and filling it with your own ink. This allow us to use our own choice of ink at an affordable price and we can continue filling up the pen when the ink runs out. As long as we take care of the pen, it'll last for years.
If you are looking to invest in a fountain pen, Lamy Safari is the best option for beginners and is relatively affordable for a quality, reusable fountain pen.
*Best Beginner-Friendly Fountain Pen *Most Affordable
Uni-Ball Impact Gel Pen
The Impact Uni-ball pen is a slightly more expensive gel pen option that works wonderfully with watercolors. Go with this waterproof pen if you're looking to incorporate thicker, bolder outlines or marks into your watercolor paintings.
This pen draws fairly wide lines. So if you are looking to do very detailed work, you will need a large canvas or paper, which may be a drawback of the impact gel pen for some artists.
Fudenosuke Brush Pen
Another interesting option is using a brush pen alongside watercolors! The Fudenosuke pen by Tombow is perfect for use with watercolor, as it is waterproof, and produces beautiful drawings with a lot of line-weight variation.
Brush pens allow for varying thicknesses of lines/marks via changing the pressure and angle we're using. If you aren’t looking for a this kind of variation in your line work, as well as organic transitions between thin and thick lines, a brush pen may not be for you.
This pen also requires practice and a certain level of control, which may be a drawback for some artists.
*Best Brush Pen
Kaweco Pen
If the thought of a fountain pen caught your attention, the Kaweco brand is famous for their superior quality fountain pens.
Winsor and Newton Fineliner
This is another beautiful and unique option for a high-quality fineliner that works great with watercolor. Winsor and Newton provide a great lineup of fineliners that are waterproof and come in many sizes and colors. I can’t recommend them enough!
The Unipin Fine Line
The Unipin Fine Line is a great and fun-to-use waterproof pen, but it does have some drawbacks. I love this pen and it’s definitely worth a buy. Unfortunately, when using an eraser on the Unipin Fine Line, the ink fades and blurs a bit.
This is a fantastic option if you do not plan on using any pencil markings that you’re thinking of erasing later in the process.
Pentel Pocket Brush Pen
If you are looking for something a little different, the Pentel Pocket Pen is a really neat option. This pen was created for writing expressive Japanese calligraphy. It has a very sensitive felt-tip that's able to create plenty of variation when it comes to line width.
This may be a negative for new artists, but it does allow more control for experienced artists that are used to brush pens.
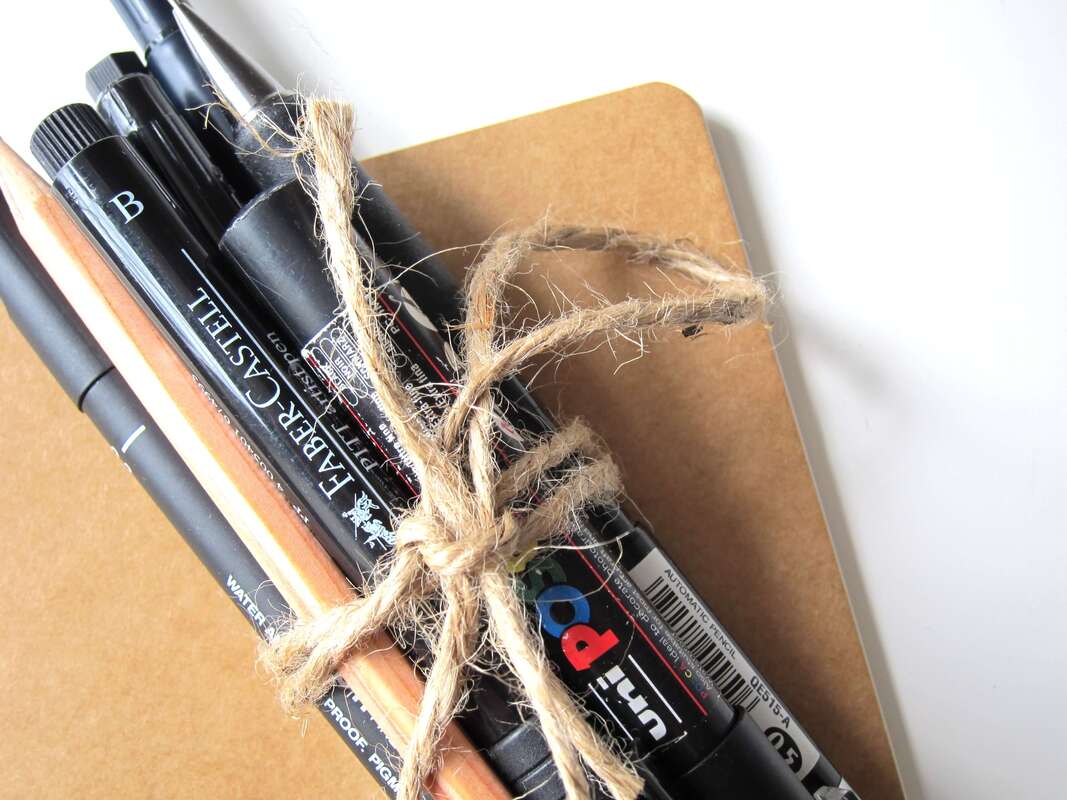
Faber-Castell Assorted Pens
Faber-Castell has an awesome pack of eight waterproof pens which offers and assortment of different types and sizes. They call these their Pitt Artist Pens, and the cool thing about this pack is that you get four fineliners and four brush pens in almost every size.
There are better ink pens to use with watercolor on this list, but the Faber-Castell Artist Pens are waterproof and do work well with watercolor. The main benefit of buying this pen set is primarily the variety offered, which allows the artist to explore amongst them.
*Most Variety
The Unipin Fine Line is a great and fun-to-use waterproof pen, but it does have some drawbacks. I love this pen and it’s definitely worth a buy. Unfortunately, when using an eraser on the Unipin Fine Line, the ink fades and blurs a bit.
This is a fantastic option if you do not plan on using any pencil markings that you’re thinking of erasing later in the process.
Pentel Pocket Brush Pen
If you are looking for something a little different, the Pentel Pocket Pen is a really neat option. This pen was created for writing expressive Japanese calligraphy. It has a very sensitive felt-tip that's able to create plenty of variation when it comes to line width.
This may be a negative for new artists, but it does allow more control for experienced artists that are used to brush pens.
Faber-Castell Assorted Pens
Faber-Castell has an awesome pack of eight waterproof pens which offers and assortment of different types and sizes. They call these their Pitt Artist Pens, and the cool thing about this pack is that you get four fineliners and four brush pens in almost every size.
There are better ink pens to use with watercolor on this list, but the Faber-Castell Artist Pens are waterproof and do work well with watercolor. The main benefit of buying this pen set is primarily the variety offered, which allows the artist to explore amongst them.
*Most Variety
A variety of step-by-step pen and watercolor wash tutorials for beginners can be found over at my membership site on Patreon.
Best Bottled Ink For Use With Watercolor
If you’re looking for the absolute best supplies to use for your ink and watercolor pieces, buying your own ink bottle along with a fountain pen or dip pen is going to provide you a custom experience and might just be the way to go.
Next, I’ll reveal my top ten picks in terms of the best bottled inks out there.
Platinum Carbon Ink
Probably my favorite ink to use with watercolor is the Platinum Carbon ink. It's a beautiful natural black textured ink that comes in a lovely little glass bottle. This permanent, waterproof ink is great for use with watercolors.
This ink takes about an hour to dry. Once dried, it’s resistant to water, erasing, smudging and anything else.
This Japanese ink is highly sought-after, which makes it slightly pricey, but it's worth every penny!
*Best Overall Ink
De Atramentis Archive Ink
This is an incredible waterproof ink. The color is less textured and not as pretty than the Platinum Carbon Ink and less of a 'true black' than the Speedball India Ink, but the De Atramentis Archive Ink may just be the most waterproof ink on this list.
I've experienced absolutely no smearing or even a drop of ink smudged after working on my watercolor washes. The ink was also dry after only a few minutes! This is a great and really safe option for use for your watercolor projects.
*Most Waterproof Ink *Best Fast-Drying Ink
Speedball Super Black India Ink
India ink is the best, deepest, truest black ink you can get. Speedball's India Ink is an amazing waterproof option. Some artists mention occasional smearing, but I've personally never had this happen.
The Speedball Super Black India Ink is the best ink bottle you can purchase for a pure, true black outline with your fountain pen and dip pen. If you use this with your Lamy Safari fountain pen or the Kaweco, you’ll want to clean out the pen often, as this ink is thick and can clog the pen if not cleaned routinely.
*Best Pure Black Ink
Winsor and Newton Ink
Winsor and Newton’s ink is also great for watercolor projects. It offers a matte black finish that would be perfect for more modern or cartoony styles and line work. This ink does take a while to dry, but if you're looking for this kind of color and style, it’s definitely worth it.
Sailor Kiwa-Guro
Sailor is a company that's known for their fountain pens, but they're also one of the top ink manufacturers in the world. This is another high-end Japanese ink that performs beautifully for both writing and drawing. You cannot go wrong with the Sailor Kiwa-Guro.
The ink is a solid matte black and dries very quickly. The big negative is that there have been reports of it losing its waterproof properties after several months of being left in the bottle.
So far, this hasn’t happened in my personal experience, but it would make this option riskier if our aim is to combine it with watercolor.
|
|
How To Find The Right Pen And Ink For You
Like with all art supplies, it’s important to explore for yourself in order to find the right pen (and ink) for you. Art is such a personal experience, and we all have different styles, quirks, and processes.
Try different pens and inks to find the ones that work best for you, starting at accessible options if you have a limited budget. Finding your personal favorites will make all the difference when working on a new art piece.
Whether you decide on a gel pen, a fountain pen and ink, or a professional fineliner, we are excited to see what you come up with!
A variety of step-by-step pen and watercolor wash tutorials for beginners can be found over at my membership site on Patreon.
Sending out a huge thank you to K.T. Mehra for her enlightening tips and recommendations!
To find out more about Goldspot Pens and the products they have available, visit their website here.
Also be sure to follow their Facebook page and Instagram account for the latest news.
Thanks for reading!
Find a list of my favorite art supplies here.

How, exactly, can creating art help someone deal with negative emotions such as anxiety and stress? What happens in an art therapy session? Why are holistic, comprehensive approaches for managing inner turmoil more effective than treatments that only revolve around talking or taking medication?
As an artist sharing content online, I've made it a priority to not only share helpful tips and tutorials that help others progress their technical skills, but also articles and videos providing insights and habits I've set in place that have allowed me to improve my mindset and wellbeing.
Our physical and mental health permeate, quite literally, into all areas of our lives (personal, professional, interpersonal).
Plus, being an artist can not only be incredibly challenging in a variety of ways, but lonely too.
In the past, I've shared how I've struggled with Generalized Anxiety Disorder since my teenage years and how, since making my mental/physical wellbeing a priority and started embracing more positive practices and routines, I've become way happier, as well as more focused and energized.
This, of course, has helped me be a lot more productive, which has led to much greater success with my art creation and business overall.
Alongside my art creation and everything I do revolving around my business, I'm constantly reading, researching and putting to use new information that I feel could help me improve my life, as a working artist and educator, even more.
And I'll keep sharing with you guys, in hopes that some of you may find it helpful too.
Because of the current worldwide pandemic, its negative effects on our economies and the social injustices/inequalities that are becoming more and more evident, a lot of us are struggling with negative emotions such as worry and overwhelm at a deeper level than we normally would.
This is why I'm incredibly happy to be sharing an article written for us by professional writer, Patrick Bailey, who has studied the fields of mental health and addiction for years.
Patrick's article helps clarify what happens during an art therapy session and why creative activities are such a great way to cope with negative emotions.
This information is enlightening even for those of us who don't struggle with severe mental illnesses.
Without much further ado, let's get into his article!
How Creating Art Can Reduce Conditions Such as Anxiety, Stress, and Addiction
by Patrick Bailey
Chronic stress and anxiety are leading underlying causes of substance use disorders (SUDs) or addiction. These conditions can make it more difficult for you or your loved one to quit.
In the context of addiction treatment, creating art can help you relax and be more willing to address drug or alcohol use disorder. Art therapy provides a healthy, alternative way to cope with stress, anxiety, and other conditions that often co-occur with substance abuse.
What is Creative Art Therapy?
Art therapy is a form of experiential therapy that has been used to treat substance abuse since the 1950's. There is scientific evidence that backs up the efficacy of using creative expression to confront past trauma that triggers stress or anxiety, or leads to self-destructive behaviors.
Substance abuse is often caused or exacerbated by co-occurring conditions such as depression and post-traumatic stress disorder. Alcohol and drug rehab centers are still using art therapy as part of a multidisciplinary and holistic approach to substance abuse treatment.
Treatment specialists initially focused on using evidence-based treatments such as medication therapy, behavioral therapy, and contingency management as recovery tools.
Today, holistic therapies such as art, poetry, music, and dance help individuals in rehab to connect with their emotions and express them in various ways.
Other forms of creative expressions are:
These and other creative activities also provide a way for people to process
negative emotions and anxieties that may show up during their treatment.
Chronic stress and anxiety are leading underlying causes of substance use disorders (SUDs) or addiction. These conditions can make it more difficult for you or your loved one to quit.
In the context of addiction treatment, creating art can help you relax and be more willing to address drug or alcohol use disorder. Art therapy provides a healthy, alternative way to cope with stress, anxiety, and other conditions that often co-occur with substance abuse.
What is Creative Art Therapy?
Art therapy is a form of experiential therapy that has been used to treat substance abuse since the 1950's. There is scientific evidence that backs up the efficacy of using creative expression to confront past trauma that triggers stress or anxiety, or leads to self-destructive behaviors.
Substance abuse is often caused or exacerbated by co-occurring conditions such as depression and post-traumatic stress disorder. Alcohol and drug rehab centers are still using art therapy as part of a multidisciplinary and holistic approach to substance abuse treatment.
Treatment specialists initially focused on using evidence-based treatments such as medication therapy, behavioral therapy, and contingency management as recovery tools.
Today, holistic therapies such as art, poetry, music, and dance help individuals in rehab to connect with their emotions and express them in various ways.
Other forms of creative expressions are:
- Crafting
- Art journaling
- Creating collages or mosaics
- Drawing, painting, or sculpting emotions
These and other creative activities also provide a way for people to process
negative emotions and anxieties that may show up during their treatment.
The Role of Art Therapy in Substance Abuse Treatment
Psychotherapy is also known as talk therapy, but talking is not always the most effective way to express the emotions that emerge in the recovery process.
Artistic creations give you a less stressful way to describe your emotions and help your therapist better understand your recovery needs. Your therapist may also encourage you to discuss them during individual talk therapy and group therapy.
The ultimate goal of using arts-based methods for rehabilitation is to improve the mental, physical, and emotional well-being of the person.
The creative processes also are a good addiction management technique that can make recovery easier by:
- Providing a safe, non-addictive way of emotional release
- Helping the client admit the addiction
- Motivating change in behaviors
- Stimulating a desire to sober up
- Reducing the shame and guilt of addiction
Artistic activities help by acting as a door that opens up to a place or part of themselves from which patients are running.
There is a type of art therapy called incident drawing that lets you illustrate your feelings and experiences of feeling out of control or self-destructive via drawing.
Seeing the images on paper is a powerful way to help you connect the dots and see the role stress and anxiety play in substance abuse.
Finally recognizing that addiction is a problem makes you more willing to stay in treatment and commit to long-term sobriety.
What Happens During Art Therapy Sessions?
Art therapy is facilitated by a professional art therapist, someone who is trained in using art as a medium for healing and recovery. Therapy takes place at an inpatient or outpatient treatment center in a structured and supportive environment.
Interestingly, you don't need to have a special talent or a background in the arts to get involved. The purpose of art therapy isn’t to produce quality artwork but to help clients become healthy.
You only need to be open to the idea of speaking your truth using art-based methods when words alone cannot explain it all. The art therapist needs to be ready for all the mixed emotions that may emerge from the process.
Expect your therapist to provide a variety of art supplies such as paper, canvas, cloth, paint, crayons, and clay. Don't worry. There is no need to create anything that looks perfect; the focus will be on the creative process rather than the finished product.
Some programs allow you to create your art pieces independently or work on a group project with others. The program structure and your schedule will help determine the approach.
After you're finished, your therapist may interpret your creation or encourage you to focus on the healing the process brings. You may be asked to explain how you feel the art—painting, drawing, or crafting, for example—helps you.
Enrolling in an Art Therapy Program
Art therapy helps clients in rehab overcome addiction and live a healthy life.
It allows you to release stress, anger, and frustration, regain confidence, build self-acceptance, and improve self-esteem.
Many addiction treatment centers offer a creative arts program as a part of a comprehensive treatment program that addresses the "whole person."
Other modalities include individual therapy, group therapy, 12-Step meetings, family counseling, fitness, nutritional counseling, and recreational outings.
When looking for a treatment facility, it's important to consider one that uses an integrative approach to recovery.
Sources:
- https://www.tandfonline.com/doi/full/10.1080/07421656.2016.1166832?journalCode=uart20 - Reduction of Cortisol Levels and Participants' Responses Following Art Making
- https://www.drugabuse.gov/publications/principles-drug-addiction-treatment-research-based-guide-third-edition/evidence-based-approaches-to-drug-addiction-treatment - Evidence-Based Approaches to Drug Addiction Treatment
- https://www.ncbi.nlm.nih.gov/pmc/articles/PMC4268880/#R2 - The Use of Art and Music Therapy in Substance Abuse Treatment Programs
Sending out a huge thank you to Patrick for this enlightening article.
To find more of his helpful wellness articles, visit his website here.
Cheers!

Is going to art school a waste of time and money? Can a person even make a stable living with an art degree? What paths can an art major open up for us?
No to the first (depending on the school you go to). Yes to the second (I'm living proof of it!). Whichever path you desire would be my answer to the third, as long as art is truly your passion, and you're willing to step out of your comfort zone consistently and work really hard.
*Most of the time while holding a regular job that will enable you to pay your bills and put food on the table while investing in art supplies, developing your skills and building your name/audience.
In today's guest post, emerging freelance writer Ruby Clarkson who's written for Jackson's Art and is absolutely obsessed with writing, theatre and visual arts, will help shed some light on the many paths an art degree can help open up.
But, before getting into her article, I'd like to share a few things with you.
The myth of the 'starving artist' totally irks me.
So does the myth of the crazy/depressed artist and the myth that artists create their best work from a place of pain and misery.
I create my best work when I'm in a calm, positive state of mind. And, like I shared in this blog post, I believe in taking care of myself mentally and physically because this enables me to consistently make forward progress.
But I digress.
If you want to make a living as an artist in the future, know that it's possible, whether you decide to go to art school or not.
Today more than ever. There are lots of people doing it all around the world.
This said, even artists who do spend years building up those solid bases in art school know that they have to keep learning and improving their skills/knowledge continuously throughout their journeys.
Not only when it comes to cold artistic skills, but also in terms of business, marketing and personal development.
We're incredibly lucky that, with the Internet, we're able to connect with artists who're further ahead in their journeys, join communities of like-minded people looking to share and encourage each other, and get access to valuable courses created by skilled artists that will boost our knowledge at very low costs.
My advice?
Take advantage of these tools and opportunities! Because, the reality is, you're only going to get so far holed up in your studio and following free tutorials.
Though the Internet is full of information, it's a vast place full of contradicting advice and lots of people just getting started skip over fundamentals or simply don't know where to start based on their current skill level.
To grow at a professional level, we need to invest in ourselves, connect with others, get feedback from people who are knowledgable in art, step out of our comfort zones, talk about our work, etc.
In past blog posts, I've shared how I was lucky to have had the opportunity to attend art school on scholarship and graduated with a BA in Graphic Design.
I'm thankful to have had that chance, as there's nothing like being surrounded by other artists and creatives consistently, learning about Art Fundamentals through-and-through, getting comfortable talking about art, obtaining useful feedback from professors who have been in the field for years, and getting used to meeting deadlines.
All of these are things that helped me tremendously in all the 9-5 jobs I held after having graduated and have made starting my own business a lot easier. I still had to invest in business courses and complementary creative classes, though.
Let's get into Ruby's article!
What Can You Do With an Art Degree?
by Ruby Clarkson
One of the most persistent myths about a fine arts or design degree is that it’s difficult to find lucrative employment once you graduate. In fact, there are countless opportunities for talented creatives out there, it just takes, funnily enough, a little creativity in exploiting those possibilities!
If you’re considering enrolling for an art degree but are worried about your future prospects, read on for seven career paths you might not have considered before.
Interior Design
If you have a natural eye for color, harmony and proportion, and can work with the latest home décor trends, you might enjoy being an interior designer.
But it’s not all just picking out scatter cushions – several exciting niches exist, including office or educational space design, textile, furniture and product design, and even styling and planning bespoke kitchens for luxury homes.
Illustration and Multimedia Art
Whether it’s children’s cartoons, TV and film animations for advertising, special effects or fashion drawings, a career as an illustrator is bound to be rewarding. You can work independently or as part of an in-house creative team for corporate.
Creating compelling and original images for merchandising like t-shirts, calendars and product packaging is also a field with plenty of potential.
Gallery Management
If you possess the right balance of artistic expertise and business savvy, you might do well in the art gallery world. Working with artists, art dealers and the general public, you’ll need to wear many hats to make sure that exhibitions are properly organized and profitable.
You’ll need to know your industry inside and out, but sales, marketing and networking will also be a big part of your daily life.
Graphic Design
Graphic design is an exciting and competitive area, but one in which it’s more than possible to distinguish yourself. You’ll work with a range of clients to bring their design briefs to life, using classic fine art media, a host of design software and plenty of marketing acumen.
This line of work offers the possibility of freelancing or remote work, as well as the option to design in-house for big brands – a more niche but likely more profitable line of work.
Lecturing or Teaching
Of course, you could teach art and design as a subject at any level, which is a great option for those who enjoy working with people and might appreciate the more predictable schedule. Bring your love for the arts to secondary schools or sixth form colleges, or consider applying to teach a course at university.
Another option is to offer more informal painting, drawing, decorating or design courses at your local community college or privately.
Art Therapy
You don’t necessarily have to use your art skills directly.
Art therapists use visual arts media to help people communicate or work through their issues non-verbally. Artistic expression can be incredibly healing – if you’re artistic but also have a lot of empathy, patience and a desire to use art for good, this role could prove extremely gratifying.
After further training, you can specialize more in psychotherapy, work with children, social work or even nursing contexts.
Fine Artist, Sculpting or Mixed-Media Art
If you have a knack for creating beautiful items that people want to own, consider doing it independently via local art fairs, galleries or online stores, and selling your hand-crafted wares directly to art collectors.
Many people are happy to buy and gift art objects that are unique, custom made, locally produced or simply beautiful to look at.

But what if I can’t get into art school?
For many, earning a degree in art and design is a far-off dream they can’t imagine actually achieving for themselves. But even if you think that certain options may not be open to you, bear in mind that art education is more accessible now than ever.
Consider an apprenticeship, or a bridging or foundation course to prepare you for higher education. Thankfully, there are many options for those who want to work up to a higher degree in art and design, and plenty of ways to finance your choice.
Chat to your chosen university to discuss funding options and possible scholarships, or directly contact funding bodies who seek out and reward upcoming talent.
While it’s true that careers in art and design are not as “cut-and-paste” as other more conventional occupations, there is still enormous scope for a talented creative to make a rewarding living doing what they love.
It might take a little planning and thinking ahead, but the world always needs people with strong aesthetics, no matter how they apply their talents.
I'd like to thank Ruby for sharing all of this helpful information with us and inspiring us to work towards building a fulfilling life around our passions.
To get in touch with her, you can email her here.
I hope you found this post helpful and thanks so much for reading!


www.erikalancaster.com
is a participant in the Amazon Services LLC Associates Program, an affiliate advertising program designed to provide a means for sites
to earn advertising fees by advertising and linking to amazon.com.
www.erikalancaster.com
is a participant in the Shareasale.com Affiliate Program, an affiliate advertising program designed to provide a means for sites to earn advertising fees by advertising and linking to Shareasale.com partner companies.
 RSS Feed
