|
As an Art teacher, I am constantly looking for new projects that could be engaging for my students. This means creating my own and searching not only in books, but in other blogs for inspiration. I have come across quite a few awesome sites created by fellow Art teachers which I have found extremely helpful. The idea for the following project was taken from: www.artforsmallhands.com
My students were extremely interested in my lesson about the Hopi Indians and their Kachina Dolls. They were very excited to begin with the process and are currently working on them. I look forward to sharing pictures of their work later. Supplies: Medium-sized plastic bottle (max. 10 inches tall) Plastic bottle lid (doesn't have to be from the same bottle) *I recommend one with an interesting shape White liquid glue Water Container for mixing glue and water Regular copy paper cut into small squares Tempera paint Thick Kraft paper or cardboard that can be bent Feathers, twigs, leaves, pieces of fabric (optional) Silicone gun Paintbrushes
Process:
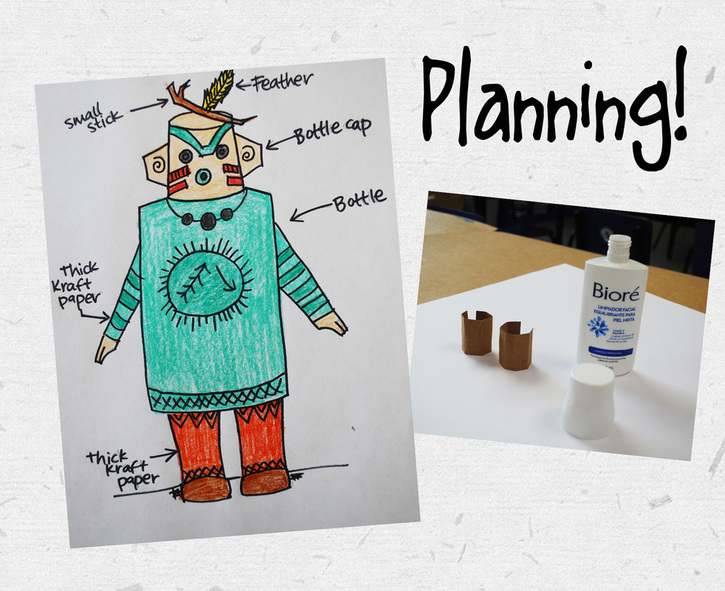
1. Planning: I do my best to teach my students that planning an Art project is just as important as planning anything else. We ALWAYS start with a rough draft/experimentation/brainstorm in sketchbooks before actually starting.
After finishing with the lesson, I projected many different Kachina Doll designs in order for my students to be inspired to do something different and unique. I also made sure to show them Native American symbols in case they wanted to include one or two on their dolls. In this first session, I also helped them choose the plastic bottles they will be using. 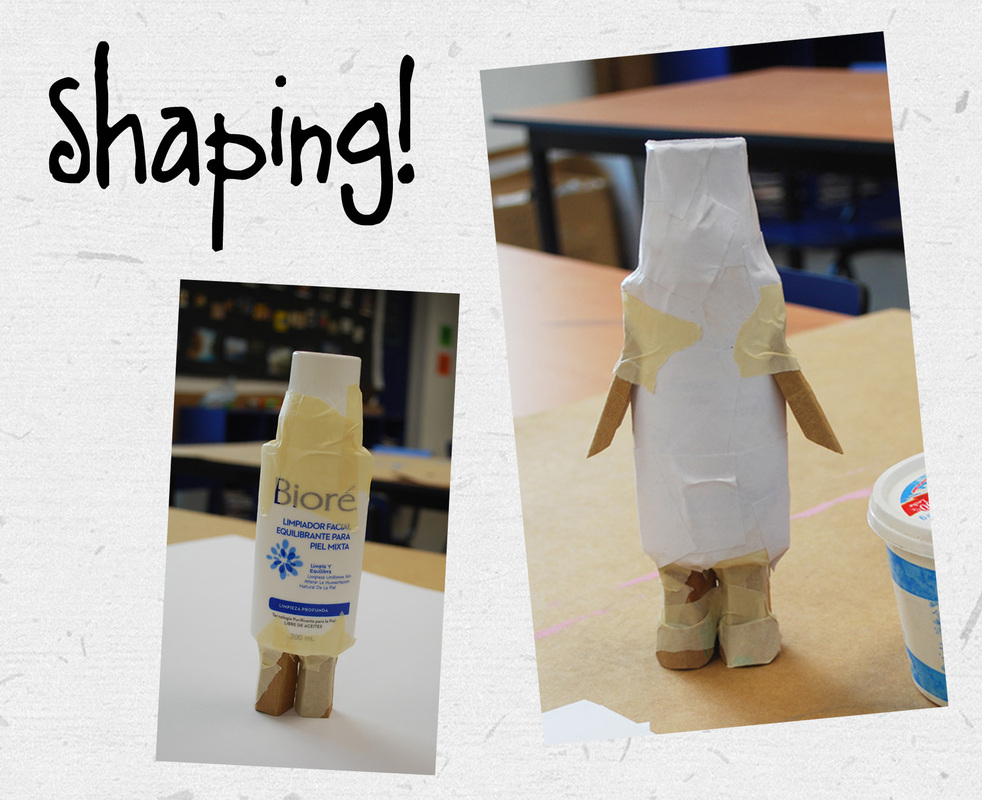
2. Shaping: I encouraged my students to use bottles and lids that they thought would create an interesting overall shape. At this point the different pieces are taped together and the appendages of the doll are created using thick cardboard. I used thick Kraft paper and experimented until I came up with folded pieces I thought would look nice for arms and legs. I ended up putting some ears on mine as well because I liked how some Kachina Dolls have huge ears. :)
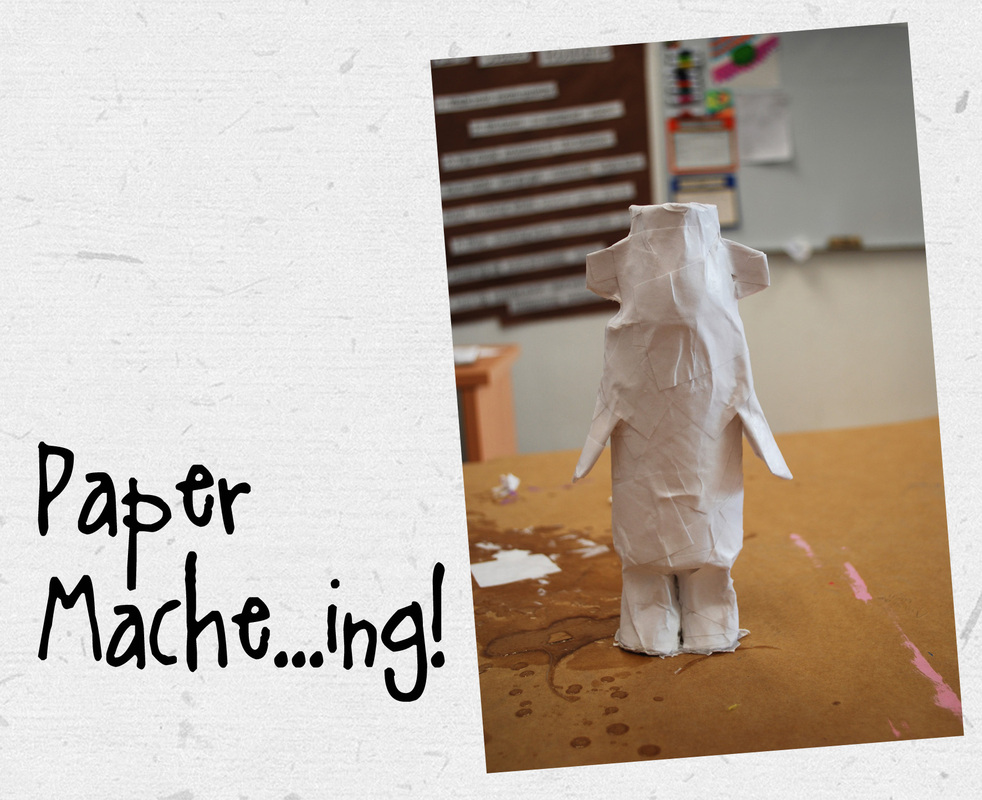
3. Paper Mache...ing: At this point everything is covered with 2-3 coats of paper mache. I mixed 50% white liquid glue and 50% water in a small plastic container and simply dunked my pieces of paper in there before placing them on my doll. I recommend being as neat and careful as possible when using this technique because whatever you are making can get stuck to the surface you are using since it'll be covered in glue. I usually try to do a side at a time. Allow to dry completely (I let at least a day pass before painting). If things DO get stuck, be gentle!
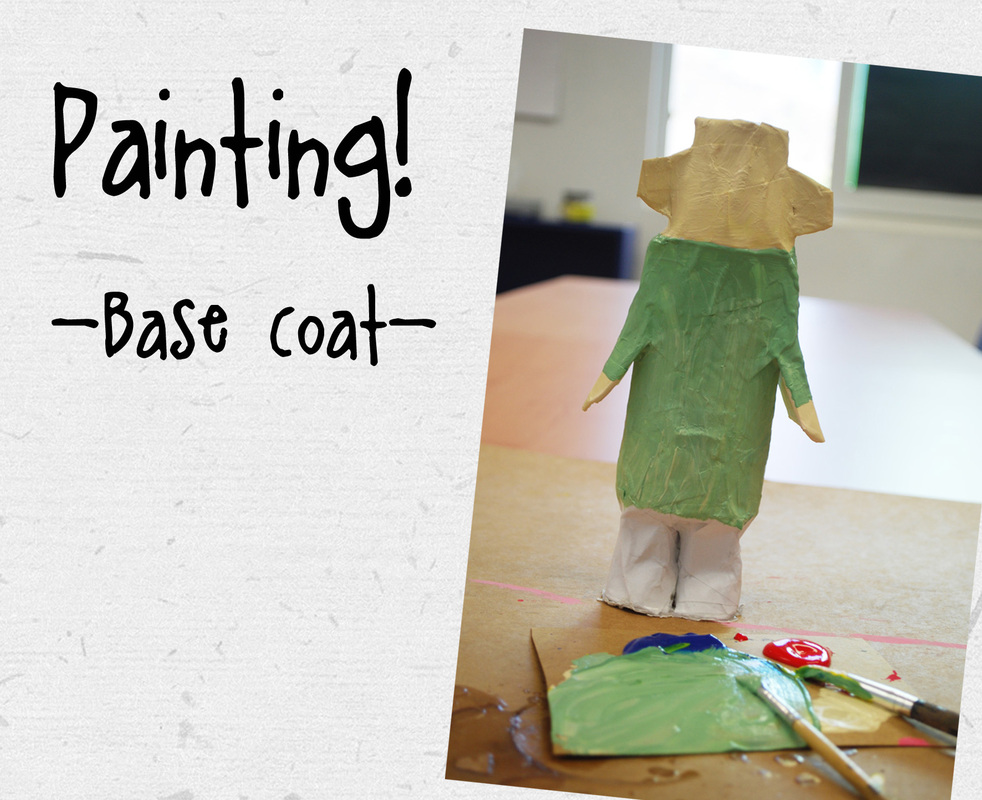
4. Painting (base coat): Once everything is dry, use tempera to give the doll its base coat of paint. Some areas might need a second coat. Allow to dry completely.
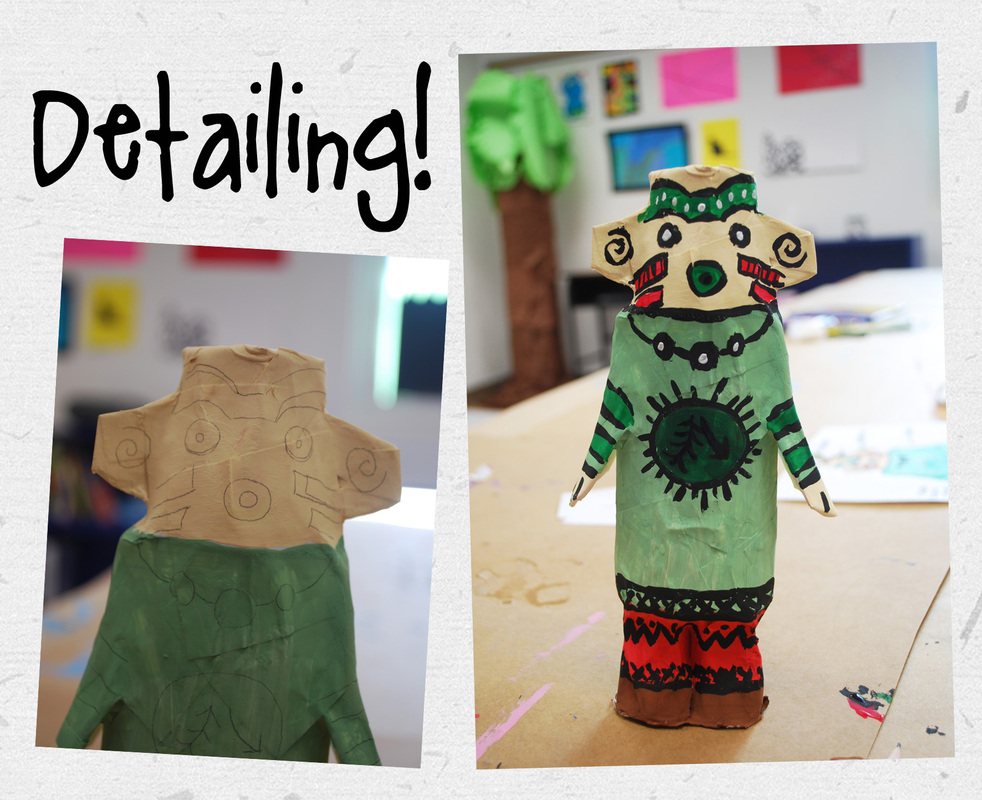
5. Detailing: I used my initial sketch to transfer my designs onto my doll and used thin paintbrushes to carefully paint them in with the planned colors. I then traced everything with black paint to make my designs pop.
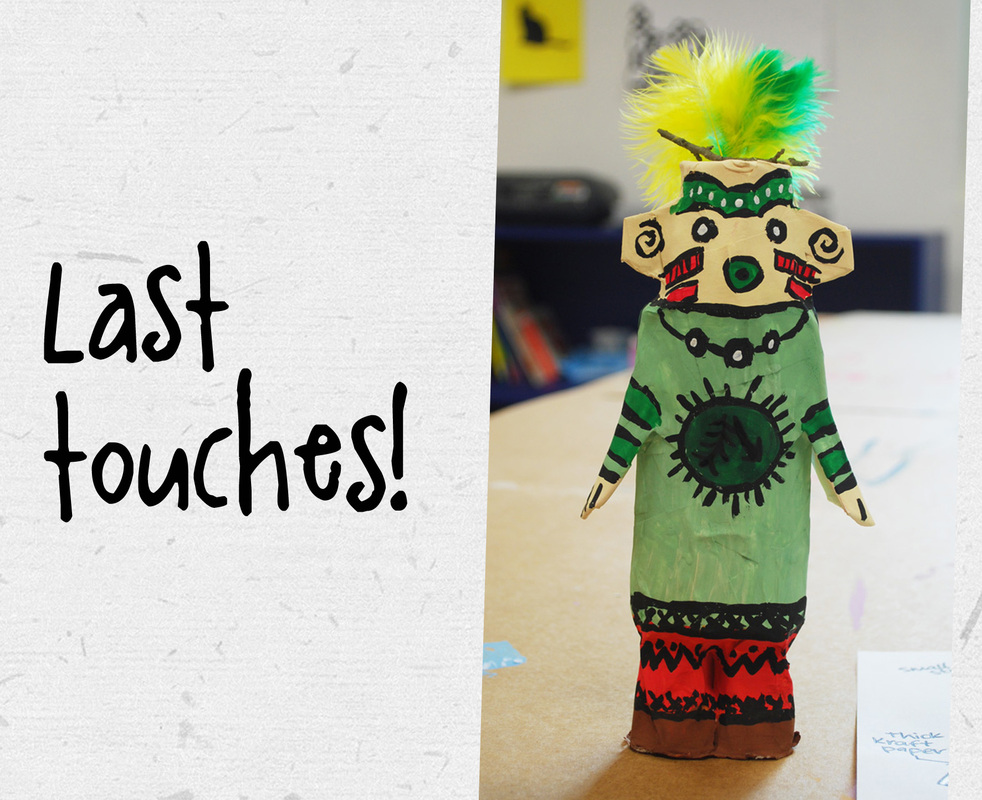
6. Finishing touches: I wanted to add some final details to my doll to make it look even better. I went with some colored feathers and I also went outside in order to find a small twig that could look nice on its head. I played around with them until I found the position I wanted to paste them in. Julie Voigt (LINK TO HER SITE) also suggests small seashells or beads as final details.
https://platform.sharethis.com/inline-share-buttons
7 Comments
2/2/2021 10:52:45 am
Hi, Lillian!
Carolyn
2/1/2021 10:25:42 am
Thank you for this fabulous idea! We used it to create a Kachina doll for my daughter's 3rd grade Native American Artifact project! I wish I could attach a pic lol. I used wine corks to create the legs/feet but otherwise I pretty much followed this to the "T". 2/2/2021 10:54:38 am
Hi, Carolyn! Leave a Reply. |


 www.erikalancaster.com
is a participant in the Amazon Services LLC Associates Program, an affiliate advertising program designed to provide a means for sites to earn advertising fees by advertising and linking to amazon.com. www.erikalancaster.com is a participant in the Shareasale.com Affiliate Program, an affiliate advertising program designed to provide a means for sites to earn advertising fees by advertising and linking to Shareasale.com partner companies. |
 RSS Feed
