*This post contains affiliate links. I receive small commissions for purchases made through these links at no extra cost to you. These commissions help me keep this site up and running, in order for me to keep providing helpful and inspiring art content. :)
Do you let other peoples' comments about watercolors (how they are temperamental, unforgiving, etc.) dissuade you from using them to create art? Have you ever binge-watched YouTube videos from amazing watercolor artists who make the process seem extremely easy, just to get frustrated when you try a painting out yourself? It's hard for me to believe, but it's already been a year since I made the decision to get serious about advancing my drawing/painting skills and made my first investment in (actual) watercolor painting supplies. By then, I had already tried acrylics and oils, but I wanted to keep experiencing different mediums in order to see which I liked best and which complemented my art style most (this is an ongoing process btw). I became increasingly interested in watercolor illustration and was very inspired by artists I found online. I made it my objective to paint and learn as much as possible in the afternoons after getting home from work and whenever else I could. 
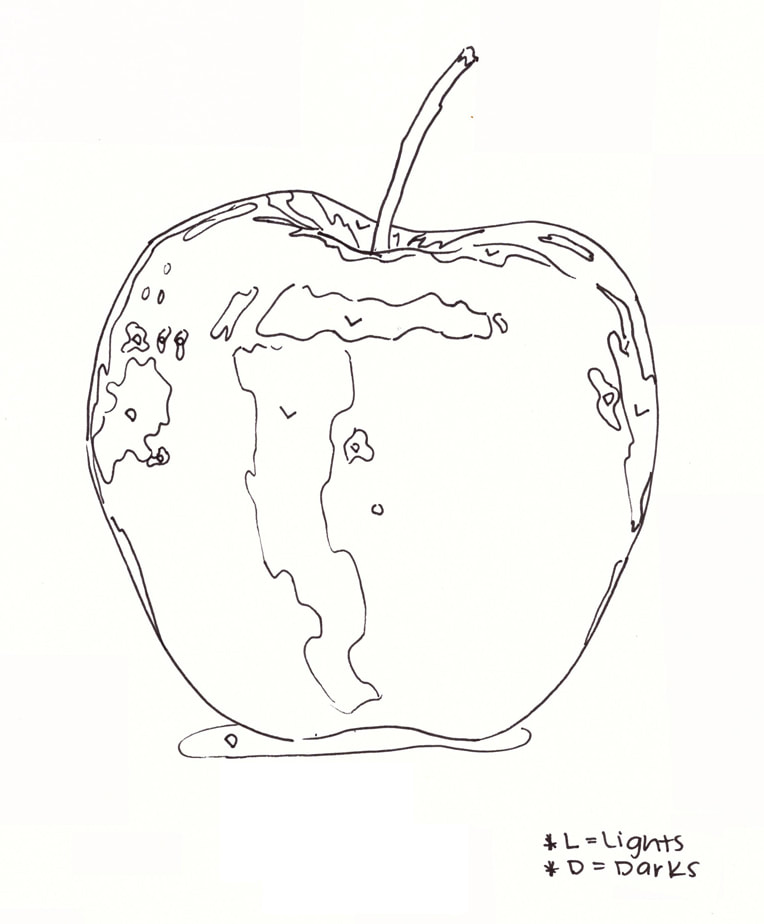
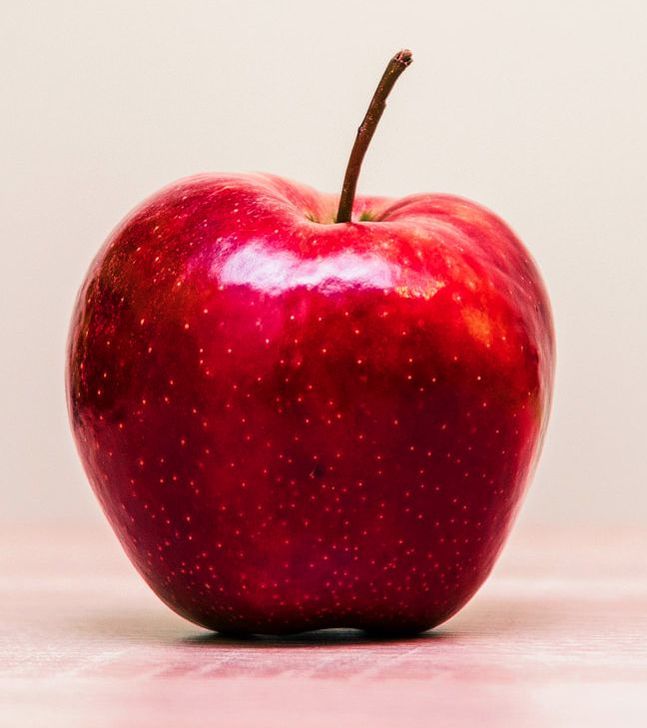
Though I still have a long way to go before I reach the skill level I want to be at, I have managed to advance my skills and want to share what I have learned with you. Make sure to check out the free downloadable PDF at the end of the post that you can use for practicing! I created what I call a watercolor painting "map" for you using a reference picture of an apple. Remember that practice is what's going to make you move forward and, above all, you need to be patient with yourself. Read my blog post titled Self-Doubt as an Artist: How to Stay Confident and Keep Going. Here are the ten things that I wish somebody had explained to me before starting with watercolors! I really believe that if you understand these ten things and consciously apply them throughout your work, you will be able to improve your watercolor painting skills a lot faster and not waste as much money and supplies. Watch the video, read the blog post, or better yet, do both! : )
If you enjoyed this video and found it helpful, make sure to subscribe to my YouTube channel. I share a brand new video every week with art tips, drawing and painting tutorials and mindset/productivity tips for artists. *Subscribe HERE*
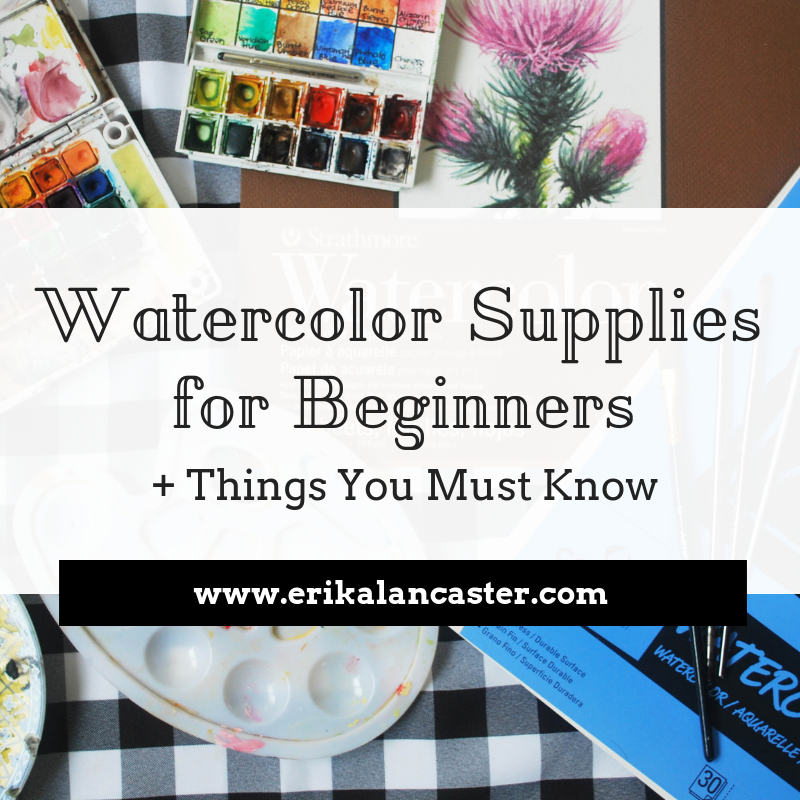
1. Buy paper that's intended for watercolor It can be extremely frustrating to feel like you're constantly fighting against your supplies when your trying to create artwork. Make things easier for yourself by actually buying paper intended for water-soluble mediums. If you're serious about improving, do not attempt to paint on regular paper or cardboard. Mixed-media sketchbooks may or may not work depending on the amount of paint and/or water you use, so I don't recommend them either until you gain a bit more of experience and control over this medium. I suggest doing some quick research in order to find a brand of watercolor paper that is relatively good quality and price for you to start off with. With experience, you'll start seeing whether you prefer thicker, thinner, cold press, hot press, etc. As my watercolor journey has progressed, I've discovered that I love thicker varieties (preferably 140 lbs. and up) because I can be pretty heavy handed with my paints and I'm pretty rough with my paintbrushes and paper! I also like that I don't have to necessarily tape down my paper every single time I feel like painting. Canson and Strathmore are brands that offer quality watercolor paper at accessible prices. 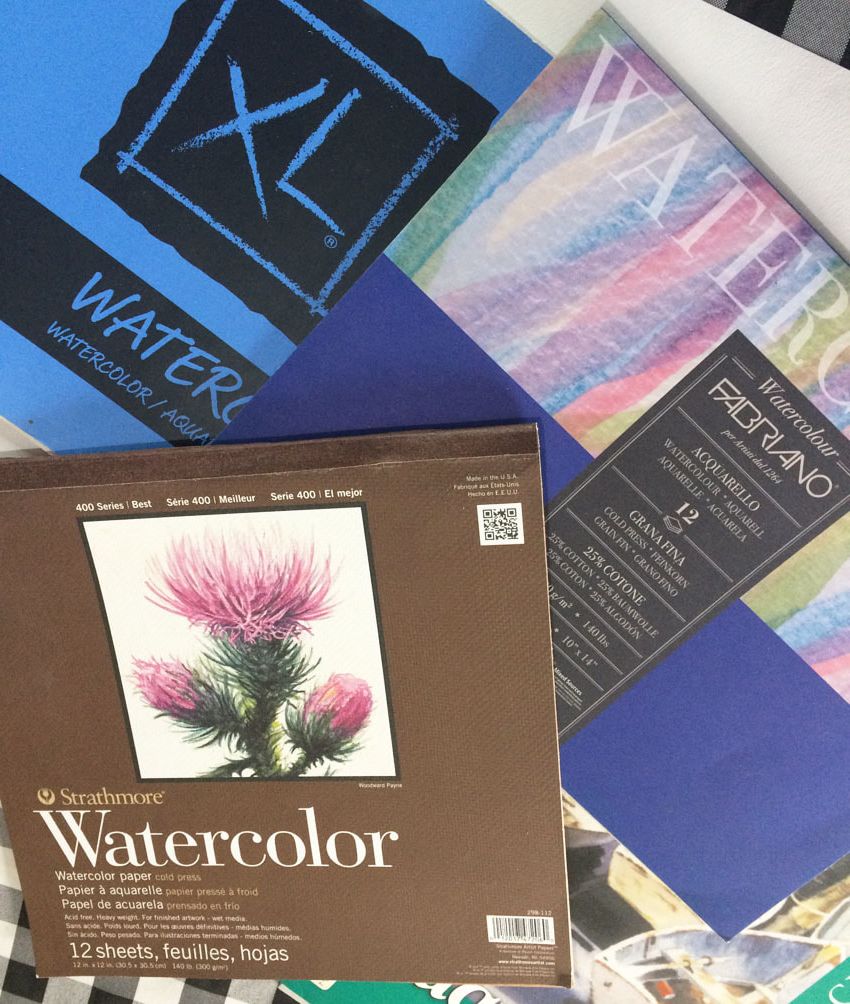
Watercolor paper brands I am currently working with.
2. Plan colors before starting to paint I know this may feel like a pain, especially when you just want to get to painting. However, I ruined SO many good drawings because I was too anxious to get started and ignored the planning aspect that goes behind creating an artwork using watercolors. Remember that truly effective artworks show harmony, unity and coherence. For this to happen, the artist must give thought to how the elements included within a composition (no matter how simple or complex) relate with and complement each other. This applies directly to the colors you use. There's a lot of value to starting with a limited color palette. I suggest you plan and limit not only the colors you'll be using in your painting, but also decide how you'll be creating your darkest mixtures and shadows. You can use mixtures of complementary colors, analogous colors, earth tones, etc. Planning and keeping colors in control will help ensure a more professional outcome. 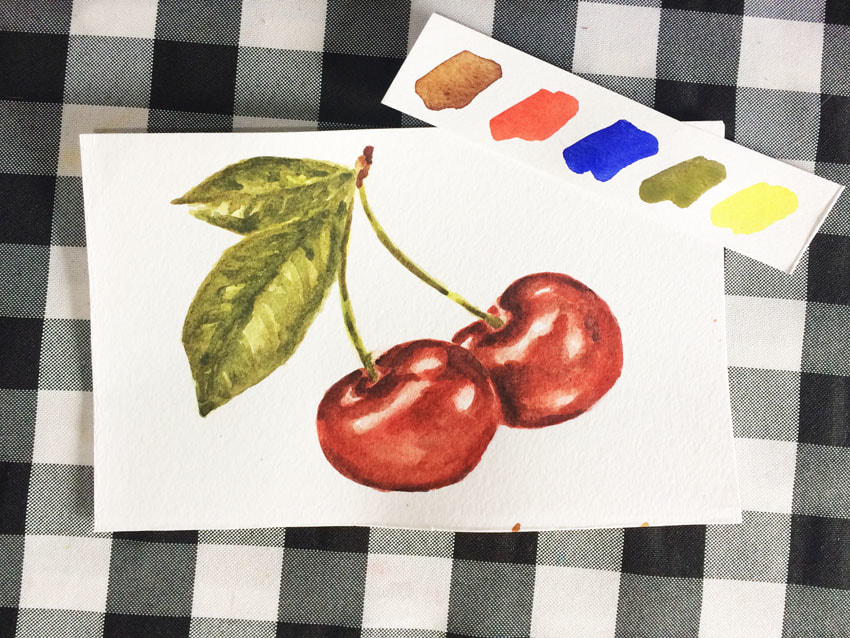
Watercolor cherry illustration with colors used.

3. Keep pencil sketches as light as possible Because watercolor layers are transparent and thin, any hard pencil marks will most likely be visible through the paint at the end. I recommend using your pencil lightly when you are creating your initial sketch/map and erase at least partially afterward, if possible. Remove any extra graphite you may have accidentally smudged on your paper while drawing using a soft and clean eraser. This will ensure a cleaner outcome at the end. Something I have found useful is creating my initial sketch with a water-soluble gray colored pencil. That way, these lines will disappear completely as I paint. I highly recommend this method if your drawing and observation skills are already good (some lines that you weren't intending to erase could be erased). Read more about the watercolor paper, pencils, erasers and other useful tools in my My Favorite Art Supplies (So Far) blog post. I include Amazon links to the products I've bought in case you want to give them a try. 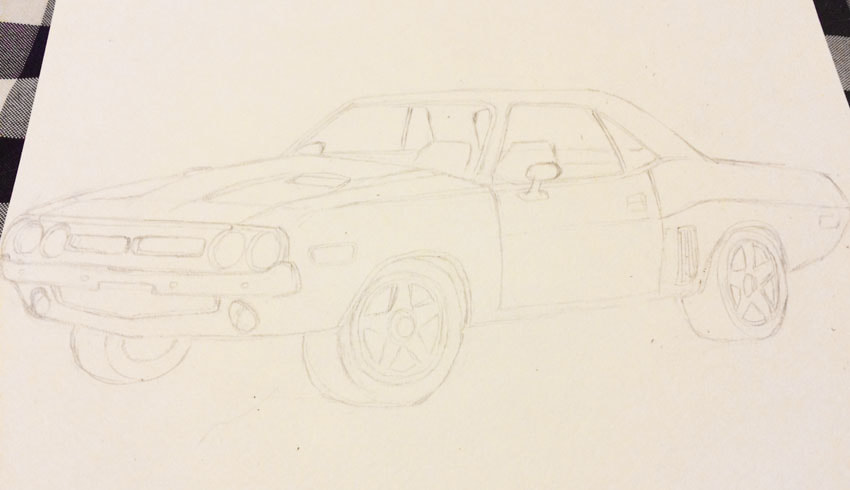
Vintage Dodge Challenger pencil sketch on watercolor paper.
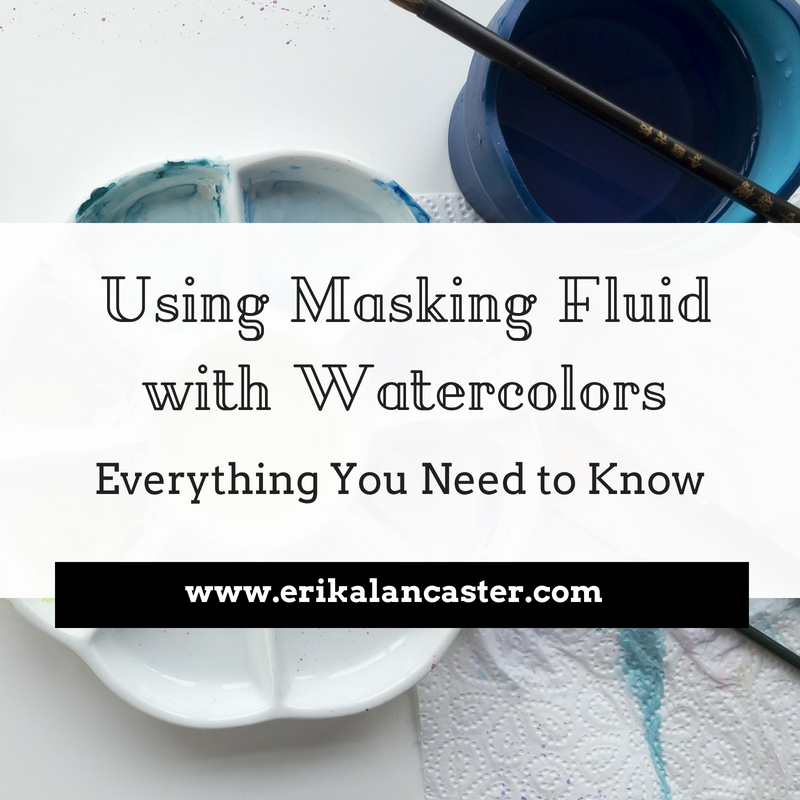
4. Protect the whites This was so hard for me in the beginning and is still something I have to make a conscious effort to do! As previously mentioned, watercolor painting definitely requires some plan work. When creating your initial sketch, make sure to map out/indicate where the lightest and darkest areas of your painting will be. You can see how I did this in the PDF included at the end of this post. Once your sketch/map is complete, make sure you do your best to protect the lightest areas throughout your painting process. I have three specific tips related to this: a) Pick a good reference photo to work from. Artists have to develop an eye for picking out photographs that will lead to good paintings. If you'd like to read more about the characteristics that make a good reference photo and how I take my own in my studio, read my blog post titled How to Take Great Reference Photos to Use in Art and Why They Are Important. A good reference photo demonstrates a balance of darks, midtones and lights. b) Work large. If you're creating a painting that will have a good amount of detail in it, make it easier for yourself by working larger. Water gives watercolors a mind of their own and you have to learn to work with it and not against it. Give the paint space to do its thing! With practice, you'll naturally start learning how much water should be used in any given point and you'll be able to gain control. Later on, you can move on to smaller paintings or illustrations. c) Use masking fluid. A lot of people abstain from using masking fluid because it adds a couple of extra steps to the process and can be time consuming. However, depending on the complexity and subject you are painting, this may be the best way to go. Masking fluid ensures that the whites will be protected throughout the painting process and you don't have to be as careful when you're painting! 
Watercolor egg and veggie subway sandwich in process showing whites.
5. When starting to apply paint, start as light and transparent as possible As previously mentioned, I personally tend to be quite heavy handed and have to make a conscious effort to control the amount of pigment in my paint mixtures, especially as I start a painting. Always begin with a transparent paint mixture that's nice and watery. Work your way up towards the darker values by adding layer upon layer as needed, and allowing layers to dry in between. This method allows the beginner more control as he/she gets to know the medium. Also, make sure to place the darkest values (paint mixtures with large amounts of pigment in them) only in the very darkest areas you see in your reference photo. Be careful when you start placing your darkest values/highly-saturated paint mixtures or you'll risk creating a flat painting! Remember you're trying to create a large variety in values, from very light and translucent to dark and saturated, as this is what will give your painting dimension and depth. 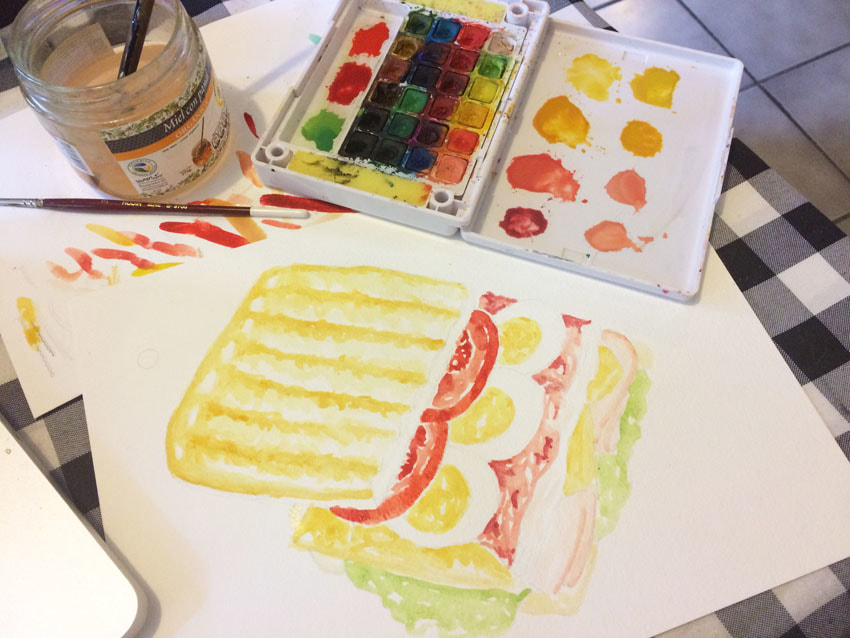
Watercolor panini in beginning stages.
6. Allow layers to dry Once again, approach watercolor painting with patience! I honestly think that's half the battle. When I first started, I didn't understand the need to allow each layer to dry before applying the next (unless you're painting specific areas in which you want to create wet-on-wet effects). I went way beyond over-working, messing up my colors and my paper, over and over again! It took me a bit to learn that the effects I was looking for are created with subsequent washes and by reactivating colors that are already dry. If you're impatient like I am, I recommend working on compositions in which you can jump around from one side to the other or simply working on two separate pieces at a time, switching between them to allow them to dry whenever needed. The more realistic you want to get with your paintings, the more layers it will require. One final recommendation, but a very important one, is to resist the urge to keep painting when you make a mistake. Let it dry and, most likely, you'll be able to fix it later or at least make it less noticeable when adding more layers. Do not stress out when you make a mistake. 7. Don't use more than three colors in the same mixture (unless you know what you're doing) I'm totally behind creating new paint colors and think color-mixing experiments provide us with invaluable knowledge. However, when you are attempting to create a painting, it's important that you have good understanding of the color wheel and what happens when different colors are mixed together. I mix analogous colors together all the time when painting my middle values, but am very careful when creating my darkest hues because they usually require me to mix very different colors together. When creating these mixtures, I make sure to prepare them and test them out before actually applying them in my paintings to make sure they are what I'm looking for! You do not want to ruin your work by applying a color that looks like mud. Something I always do is keep a scrap piece of watercolor paper next to me as I paint in order to test colors before actually applying them. By doing this, you can ensure that both your color and level of transparency are what you actually want at that given point. 8. Clean brushes between colors In the beginning I took for granted that watercolor pigments were easily removed from paintbrushes and didn't take the time to make sure I had removed the previous color completely before going in with the next. If you're using the same paintbrush with very different colors, doing some gentle blotting on a rag after having rinsed it can usually help you notice if its clean. You don't want to create muddiness in your paintings that will be impossible to remove. Also, swivel your brushes in your water gently. 9. Replace your water frequently It's important not to be lazy and replace your water when it starts to get murky because this can affect your colors and/or muddy up your work. Some artists work with several different water cups at the same time, but you'll find whatever works for you personally in time. I'm guilty of waiting way too long before changing my water and there's nothing worse than ruining a great painting with something that could be avoided so easily. 10. Invest in quality over quantity when it comes to paint colors I recommend doing some research and finding watercolor sets that are good in terms of quality and price. Depending on the subjects you like to paint (landscapes, interior scenery, portraits, food, etc.), you can go for sets that contain colors you will actually be using. It's preferable to buy smaller sets that offer better quality, than larger ones with poor quality. Look for paint that has a strong color payoff and blends well when mixing. Two brands that I recommend are Winsor & Newton (their Cotman line is great for beginners) and Sakura Koi Watercolors (good for beginners in terms of both quality and price-this one actually comes with 24 different colors). Here are the Amazon links for both: Sakura Koi Watercolors Pocket Field Sketch Box Winsor & Newton Cotman Watercolors Sketchers' Pocket Box 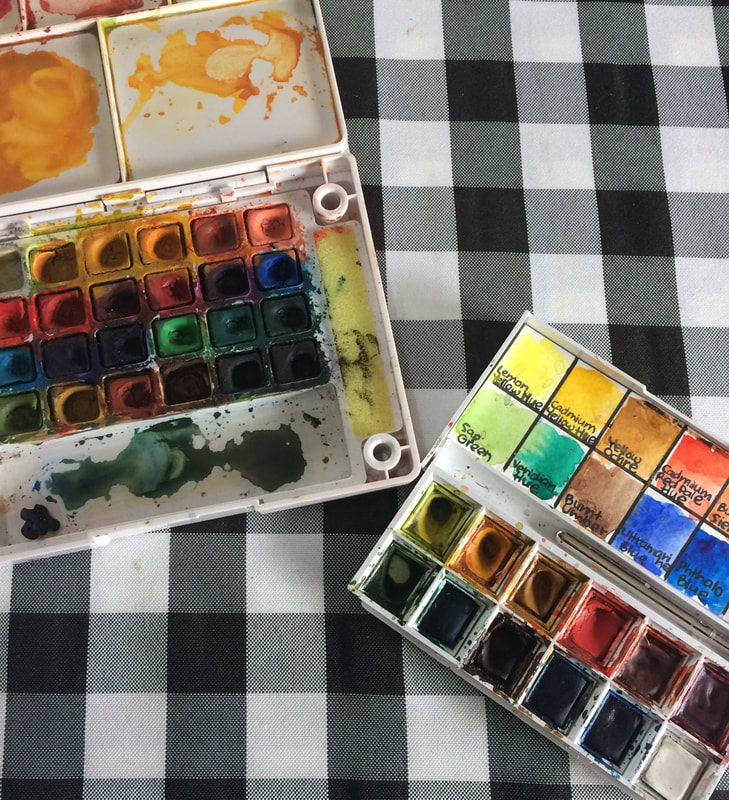
Sakura Koi Pocket Field Sketch Box and Winsor and Newton Cotman Sketchers' Pocket Box watercolor sets.
Feel free to download both the outline drawing, as well as the reference picture to practice below:
Which of these ten things gives you the most trouble? Is there any other aspect of watercolor painting that you find particularly frustrating that didn't make in on the list? I'd love to know! Let's have a discussion in the comments section below!
163 Comments
|


 www.erikalancaster.com
is a participant in the Amazon Services LLC Associates Program, an affiliate advertising program designed to provide a means for sites to earn advertising fees by advertising and linking to amazon.com. www.erikalancaster.com is a participant in the Shareasale.com Affiliate Program, an affiliate advertising program designed to provide a means for sites to earn advertising fees by advertising and linking to Shareasale.com partner companies. |
|||||||||||||||
 RSS Feed
